SSO with OIDC
IOMETE offers an interface to configure your SSO with OpenID Connect (OIDC) for authentication.
Accessing the SSO configuration page
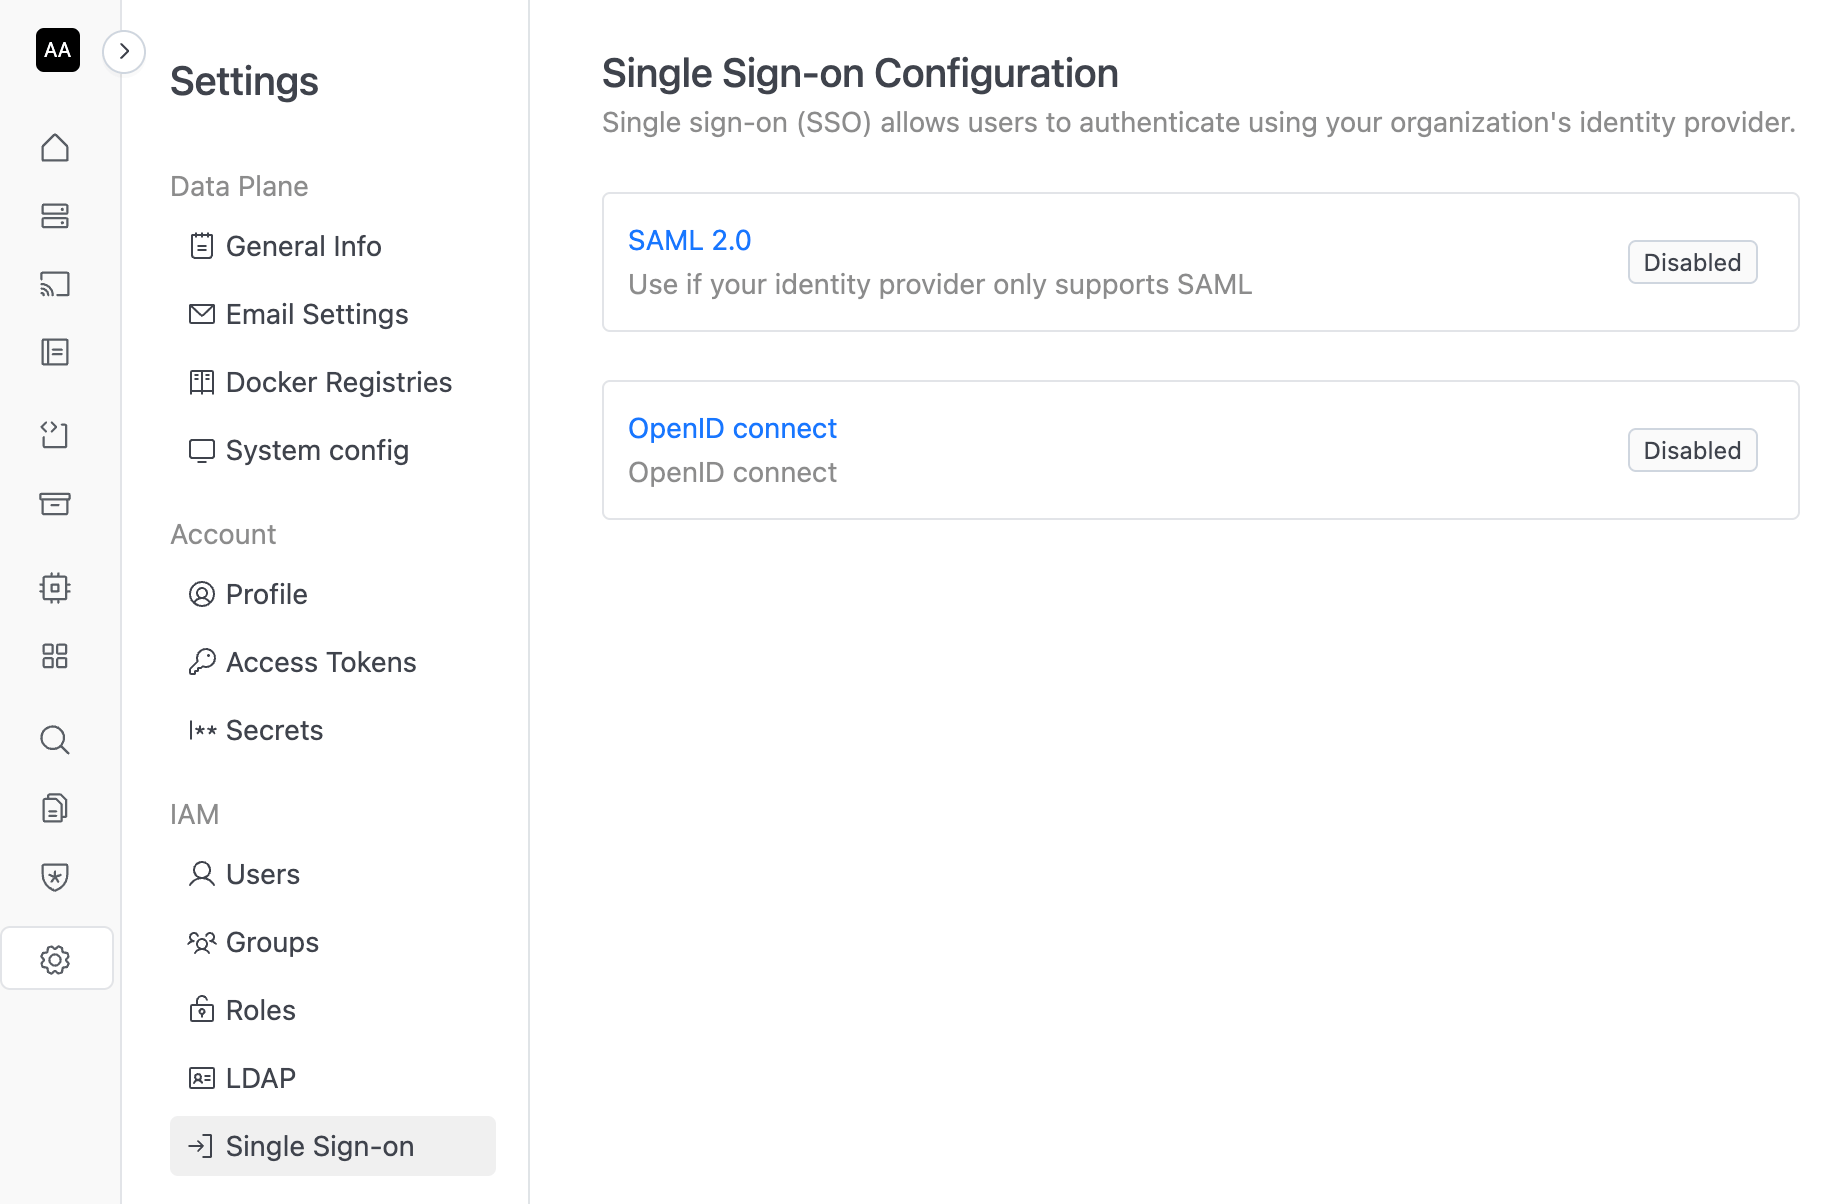
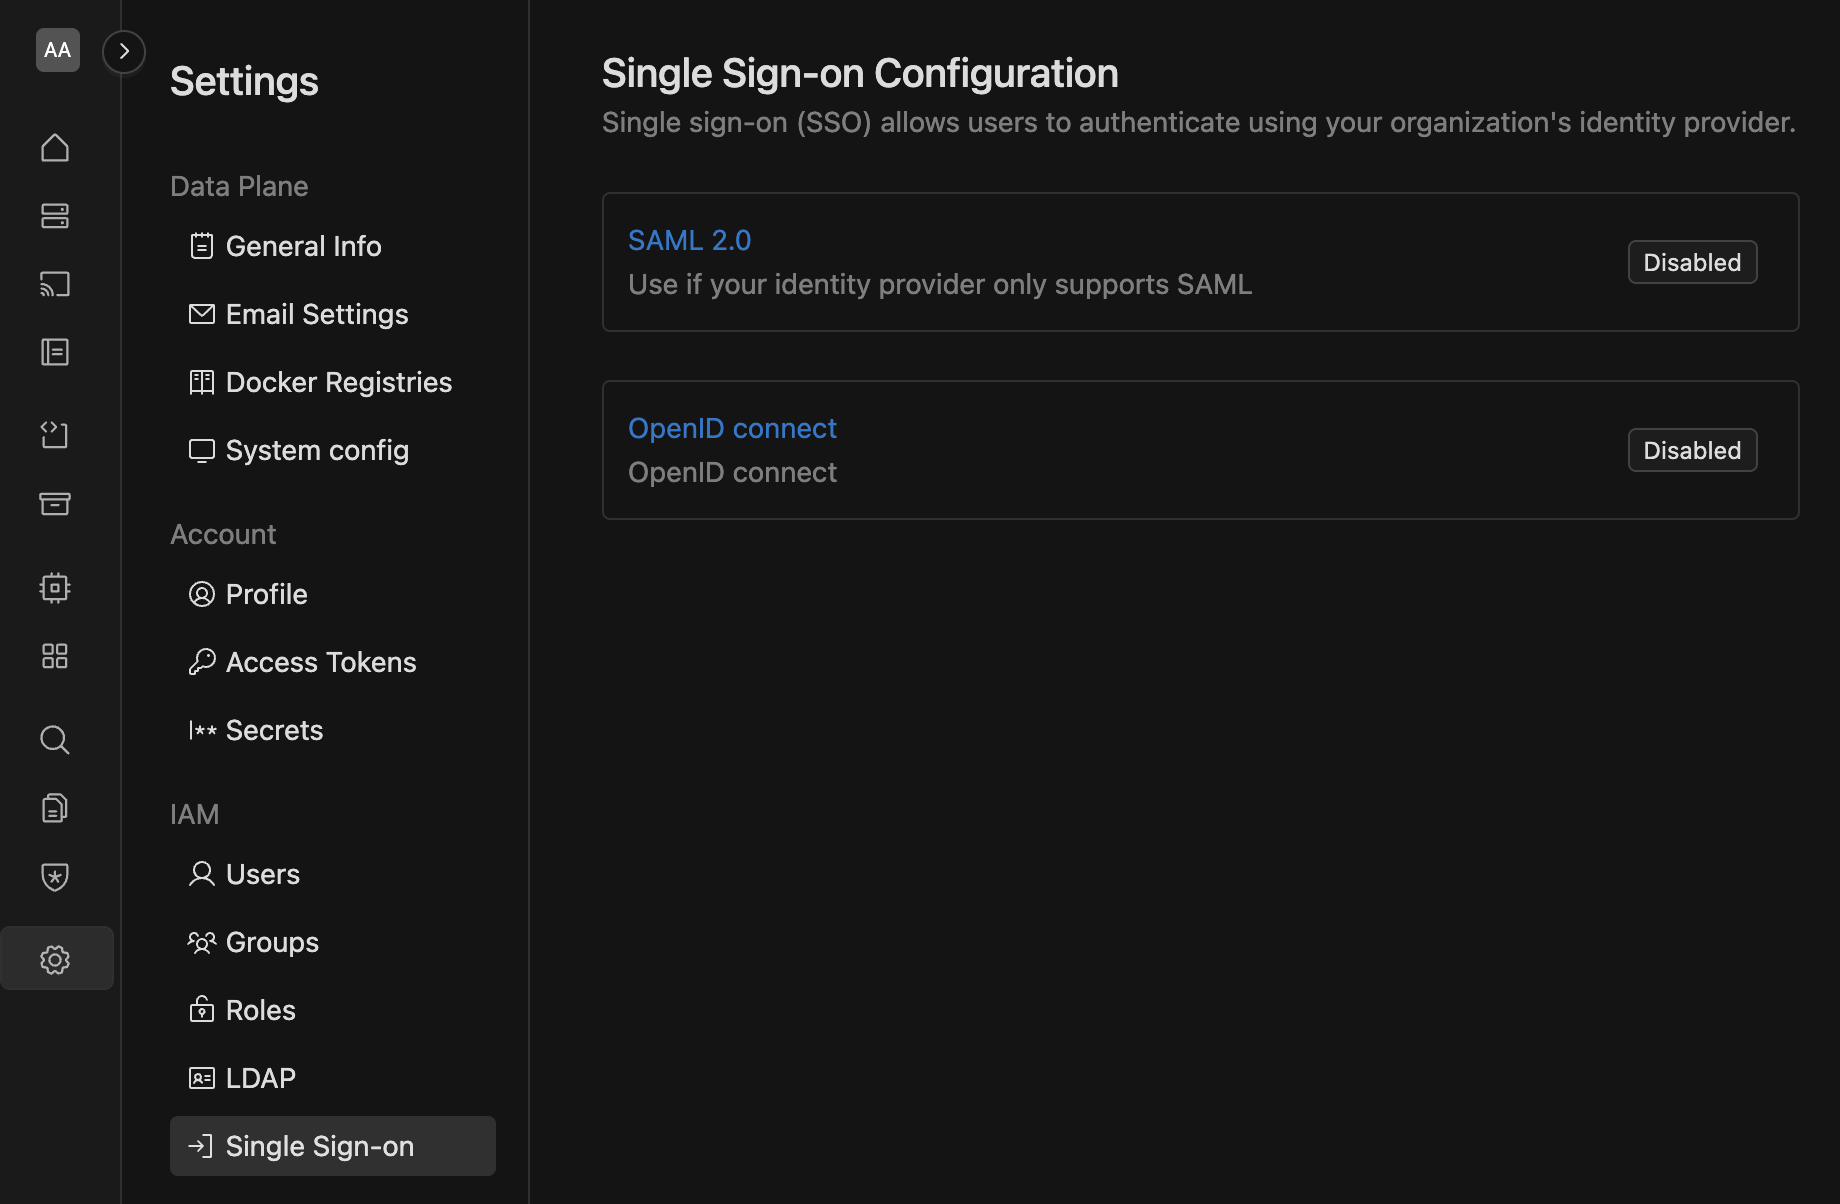
To begin, log in to the IOMETE Console as an account admin. Click the Settings menu in the sidebar and navigate to the Single Sign-On tab under IAM. From there, choose OpenID connect to begin the configuration process.
OIDC configuration steps
Once on the OIDC configuration page, follow these steps to integrate OIDC with your identity provider (IdP):
1. Retrieve the IOMETE Redirect URI
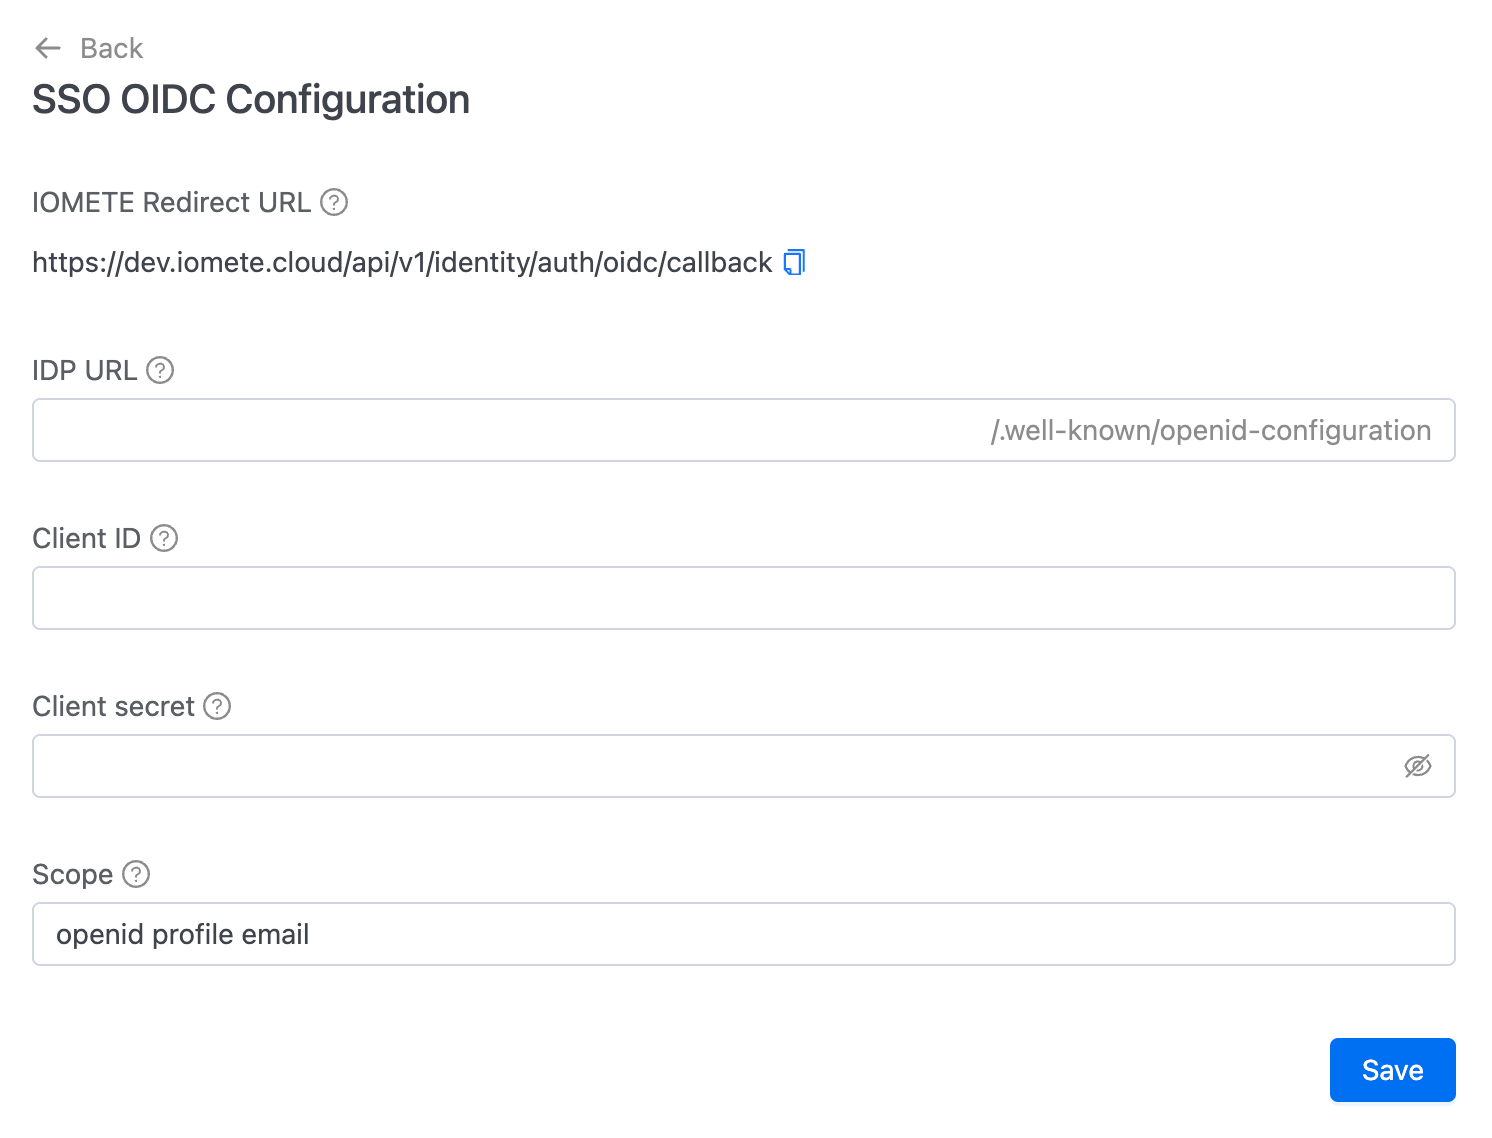
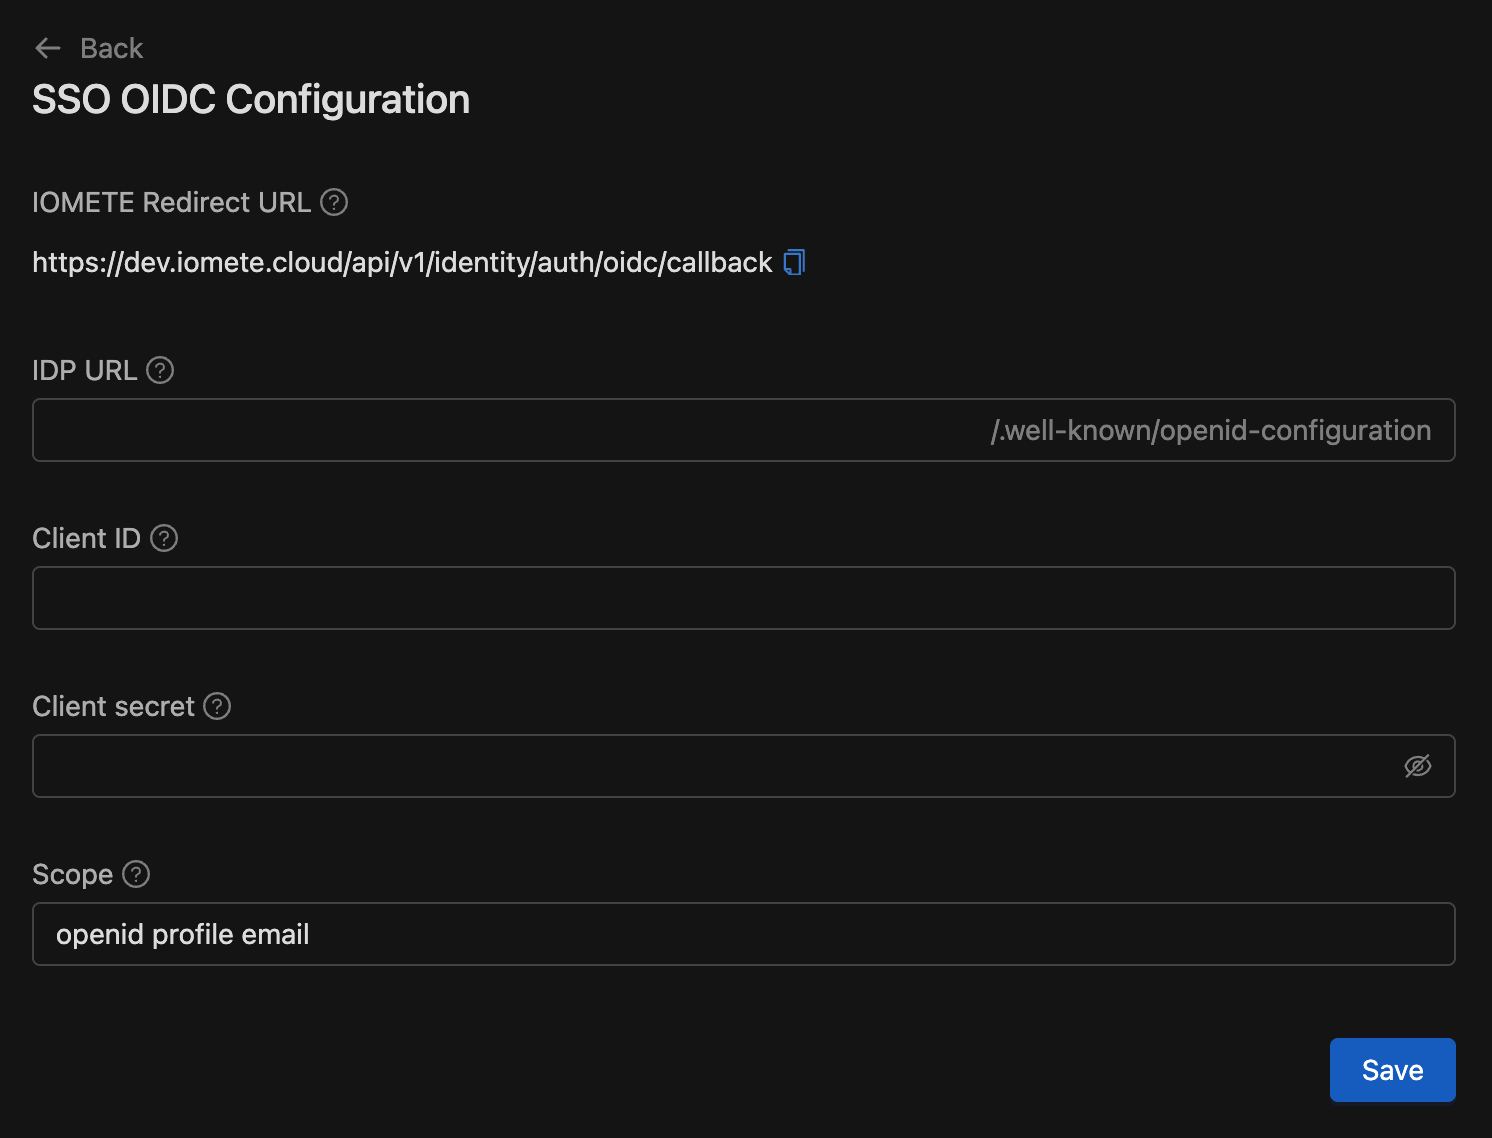
On the OIDC configuration page, you’ll find the IOMETE Redirect URI. Copy this URL, as you will need it when setting up your application in the identity provider.
2. Set up IOMETE in your identity provider
In a new browser window or tab, proceed to your identity provider and create a new client application for IOMETE. Follow these steps:
- Go to your identity provider (IdP): Open your IdP’s admin console. This could be services like Okta, OneLogin, Microsoft Entra ID, or others.
- Create a new client application: Choose to create a new web client application. Use your provider's documentation for guidance.
- Input the IOMETE Redirect URI: In the appropriate field (typically labeled as the
Redirect URI), paste the IOMETE Redirect URI you copied earlier. - Configure attribute mappings: Ensure that the following fields are mapped in your IdP:
preferred_usernameemailgiven_namefamily_namename
- Copy necessary information from your identity provider: You will need to copy and save the following from your IdP:
- OpenID Issuer URL: This is the URL where your identity provider’s OpenID Configuration Document can be found. It’s typically located at
{issuer-url}/.well-known/openid-configuration.- IOMETE uses
Authorization Codeas the Grant Type andCodeas the Response Type. - IOMETE retrieves the relevant endpoints from the OpenID Configuration Document to successfully authenticate and authorize users.
- IOMETE uses
- Client ID: This is the unique identifier for the IOMETE application in your IdP, sometimes referred to as the Application ID.
- Client Secret: This is a secret or password generated by your IdP for the IOMETE application, used to authorize IOMETE with your IdP.
- OpenID Issuer URL: This is the URL where your identity provider’s OpenID Configuration Document can be found. It’s typically located at
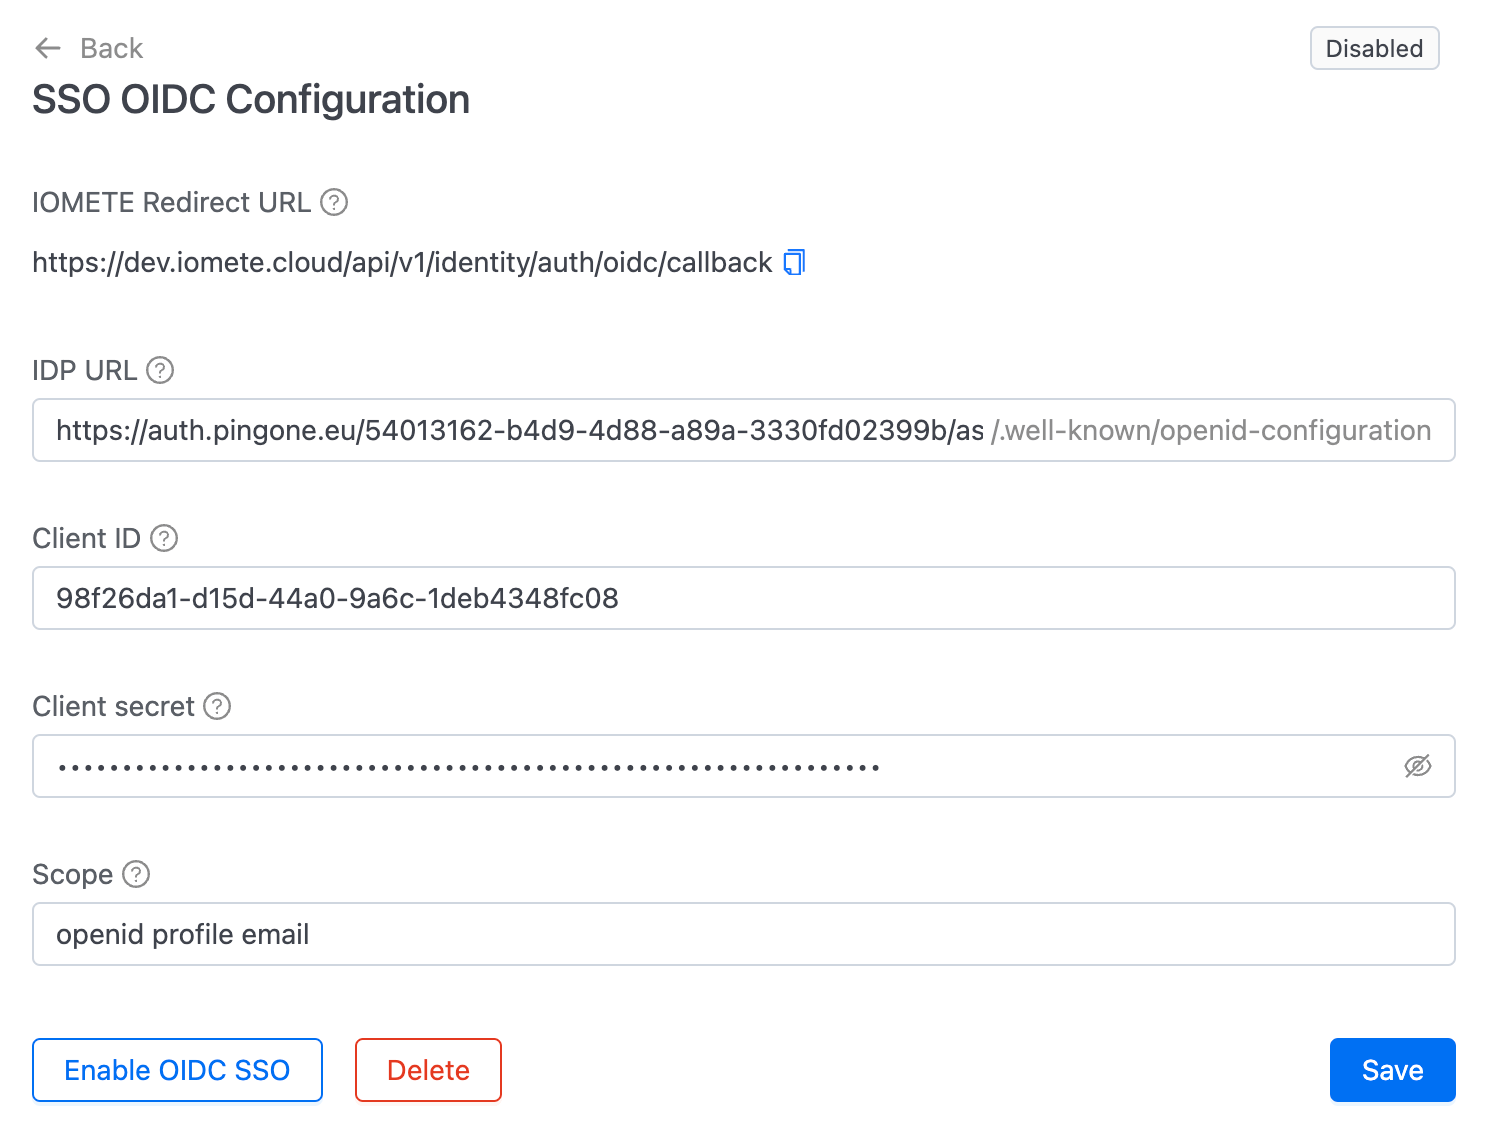
3. Configure OIDC in IOMETE
Return to the IOMETE SSO configuration page and input the following details from your IdP:
OpenID Issuer URLClient IDClient Secret
You will also see the default values for Scope. Keep these values as they are unless you need to make changes. Ensure that the necessary scopes are enabled for the IOMETE application in your IdP.
Once you’ve entered the required information, follow these steps:
- Click
Saveto store your settings. - Click
Enable OIDC SSOto activate Single Sign-On for your account. - Test logging into the IOMETE console using OIDC to ensure everything is working as expected.
4. Grant user access in the identity provider
After configuring OIDC, ensure that users are granted access to the IOMETE application in your IdP. You may need to adjust the access permissions for users to log into the IOMETE application.
During the SSO testing phase, it's recommended to keep the IOMETE account console open in a separate browser window. This will prevent you from being locked out while making changes.