Getting Started with DBT
If your team already runs analytics with version control, tests, and CI, dbt fits the same workflow for SQL transformations. dbt is an open-source tool for writing SQL models, testing them, and deploying them like any other software project.
The dbt-iomete adapter wires dbt into your IOMETE lakehouse with full Iceberg support, so you get versioned transformations on top of open table formats.
This guide walks you through your first dbt project on IOMETE.
Prerequisites
Before you start, make sure you have:
- A running IOMETE compute cluster (see Compute Clusters for setup details).
- Python 3.9 or later.
Setting Up Sample Data
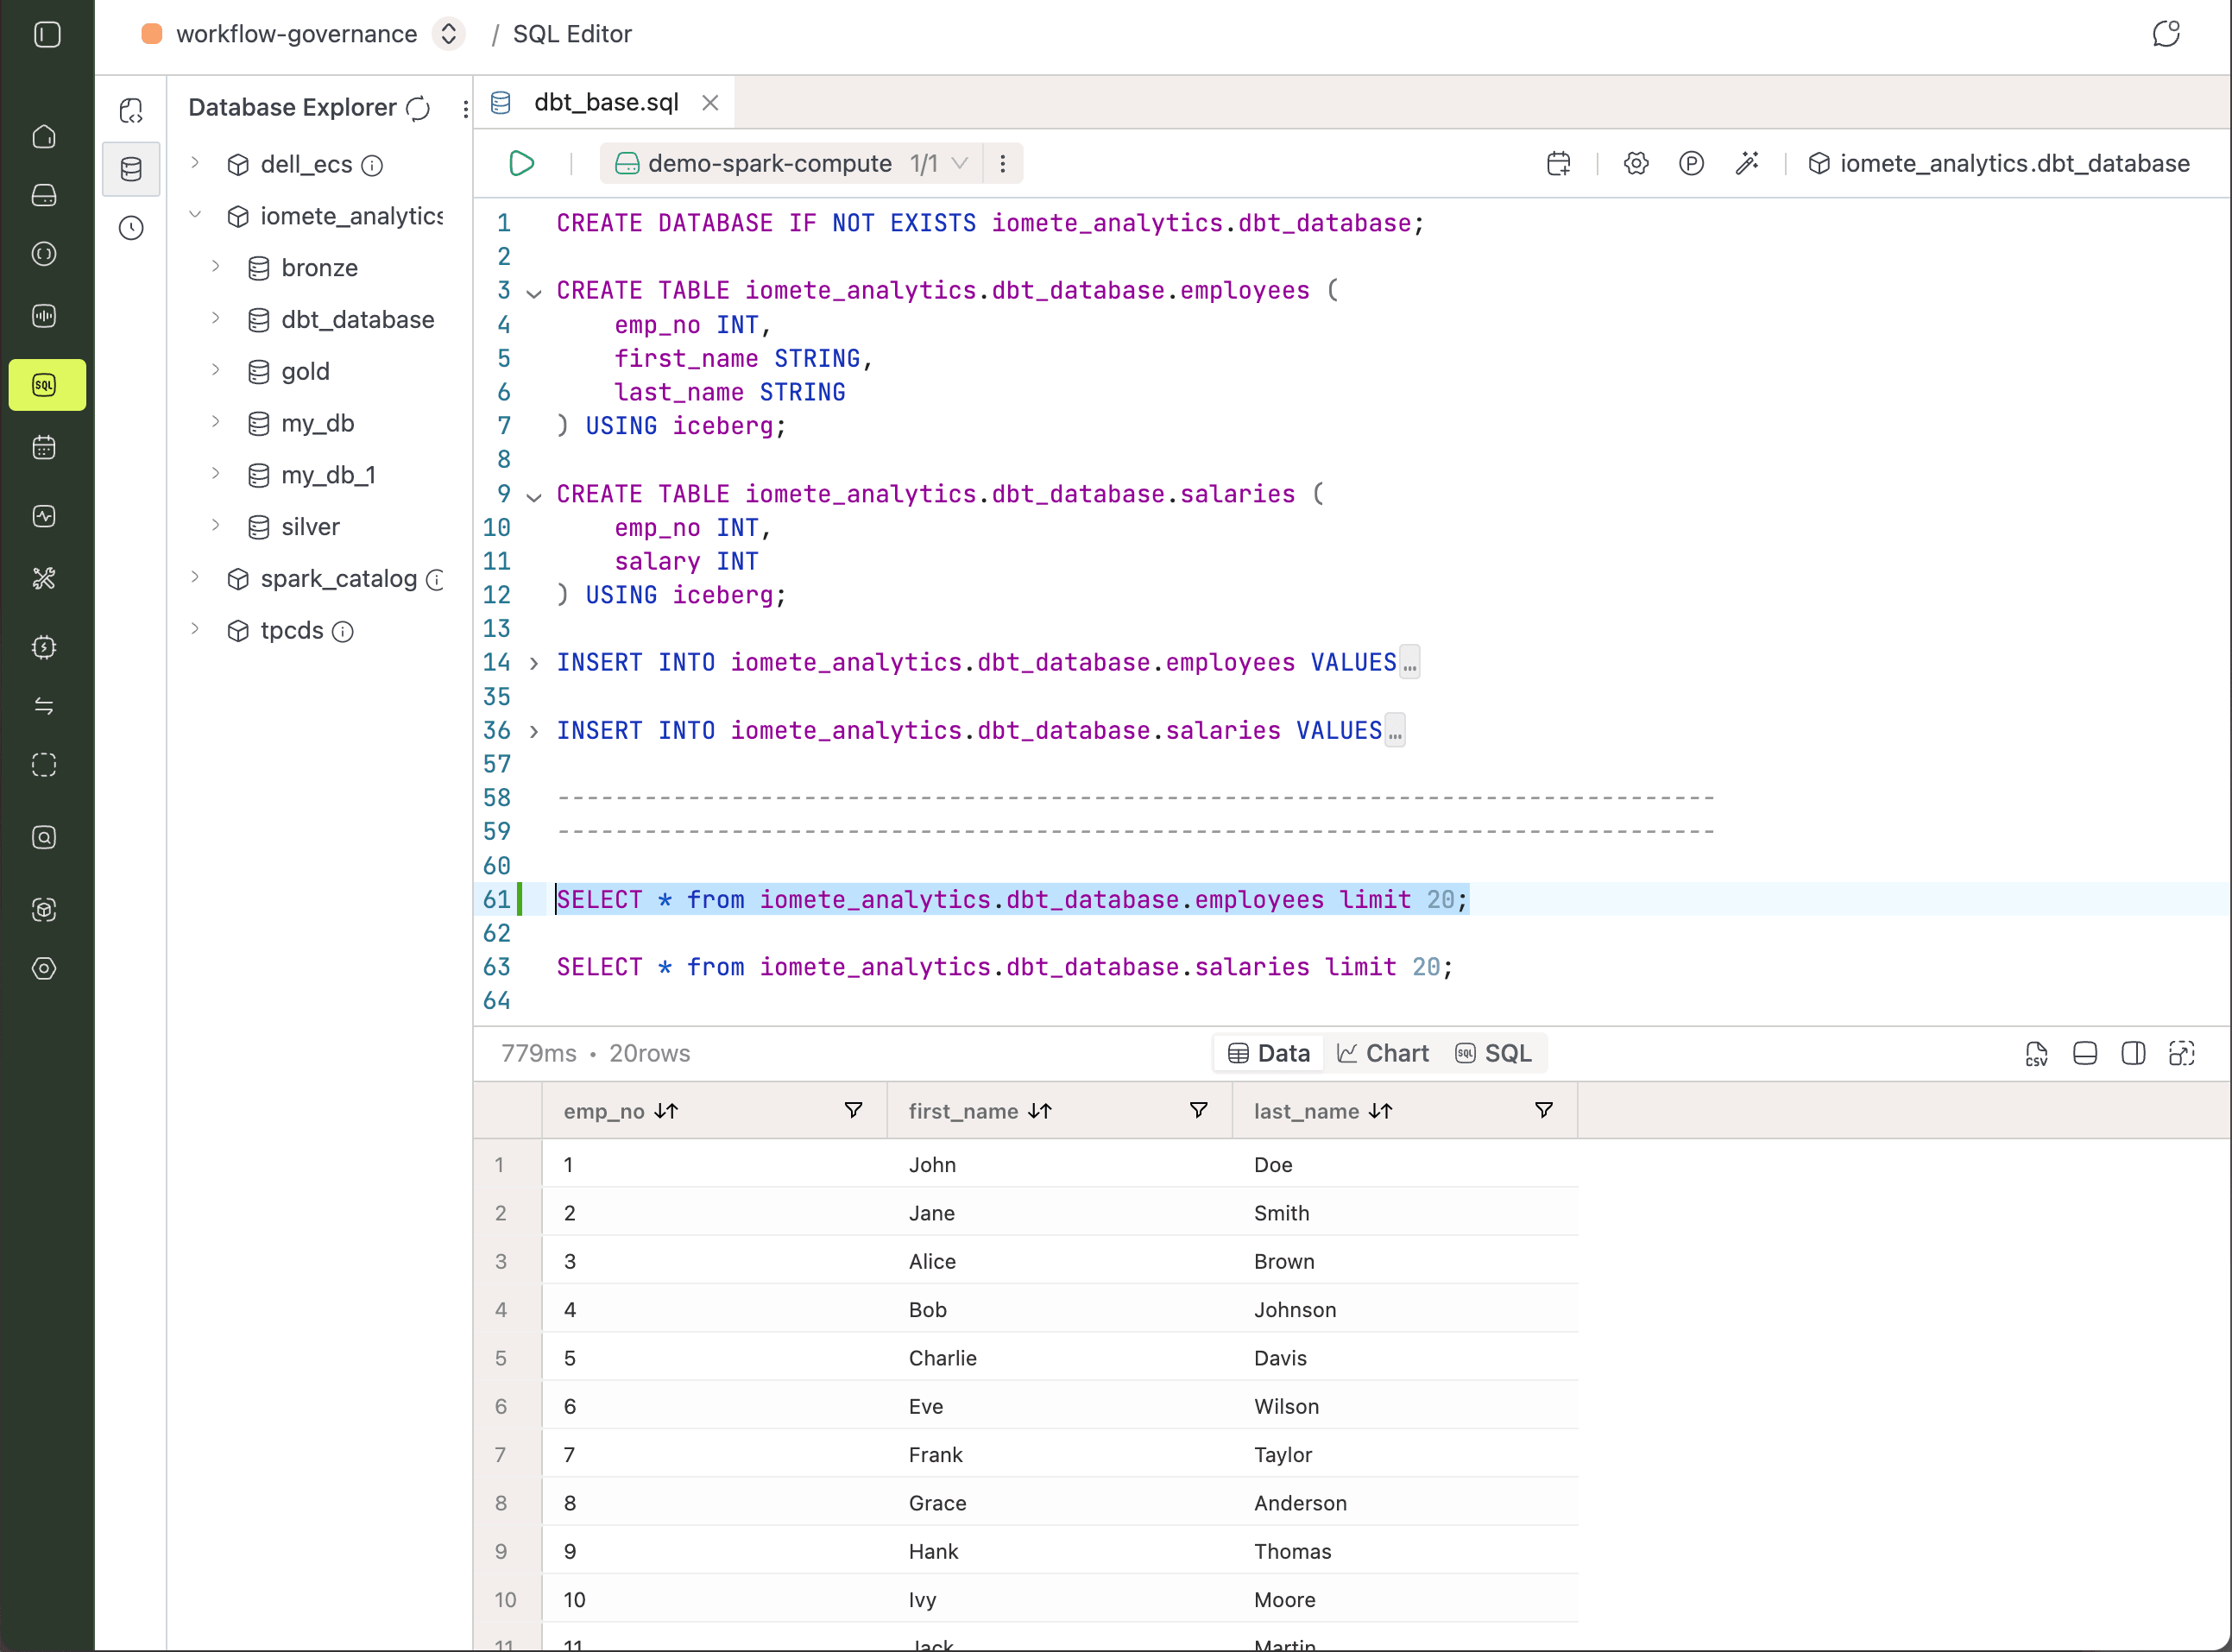
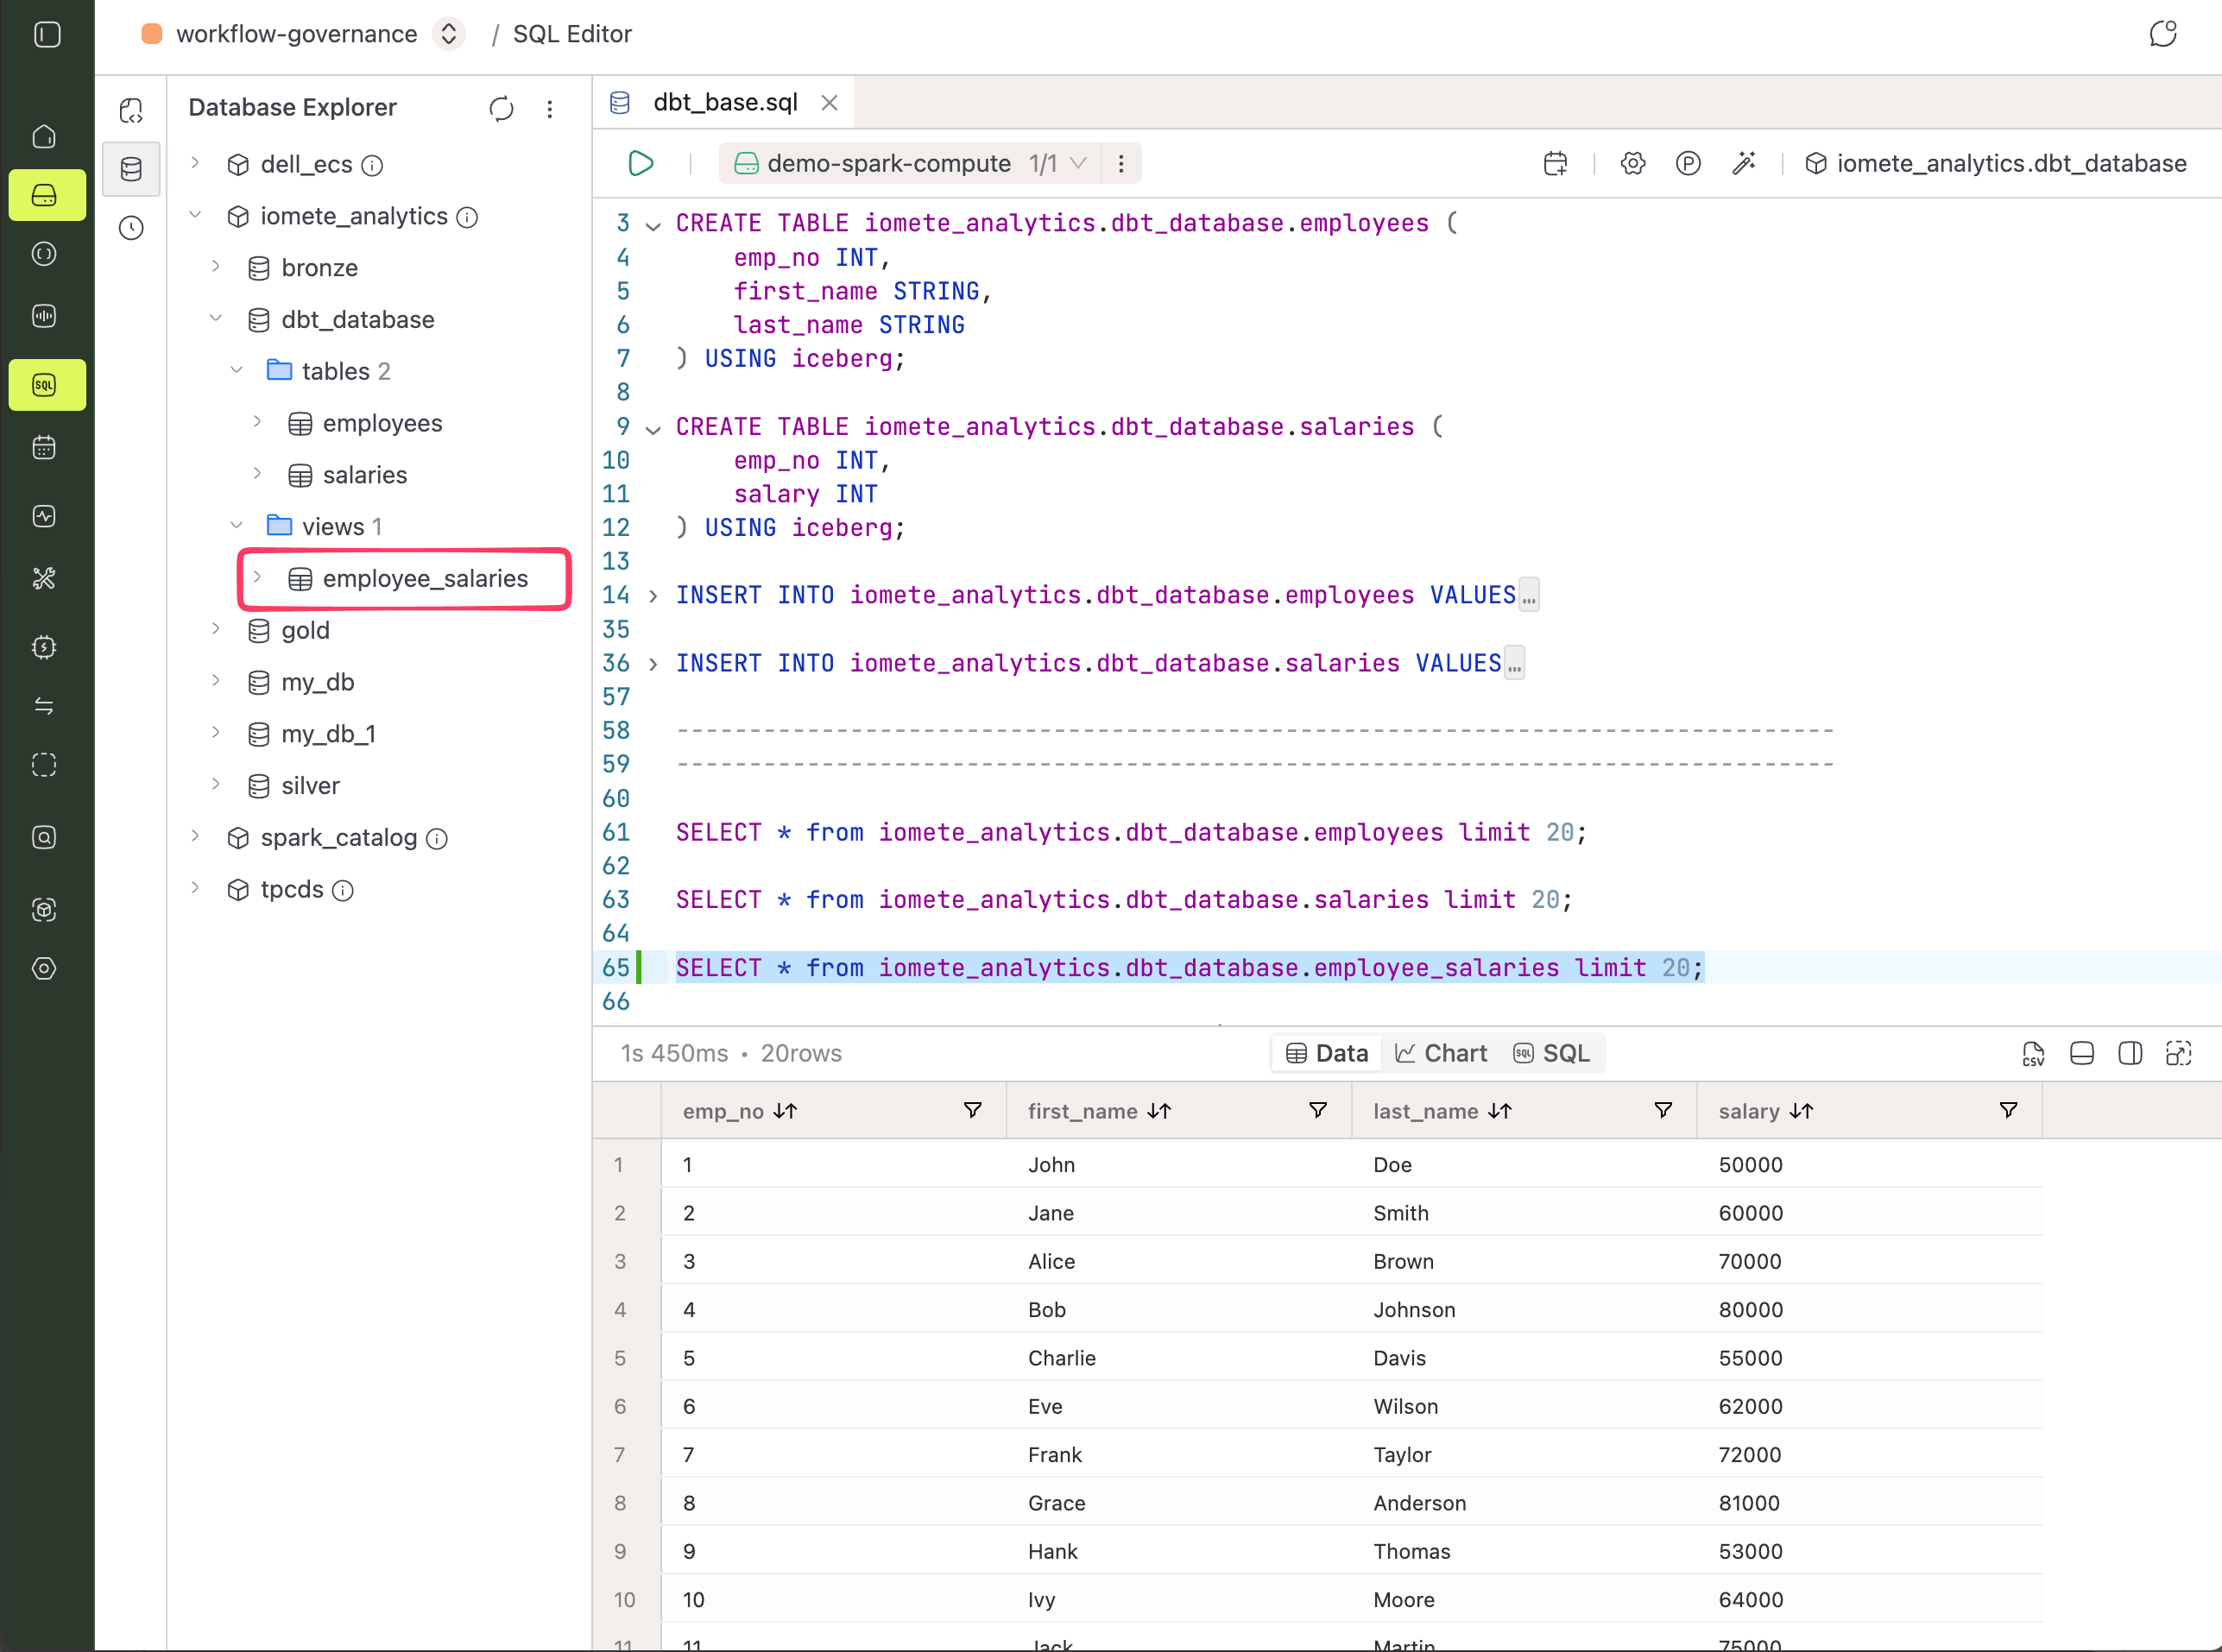
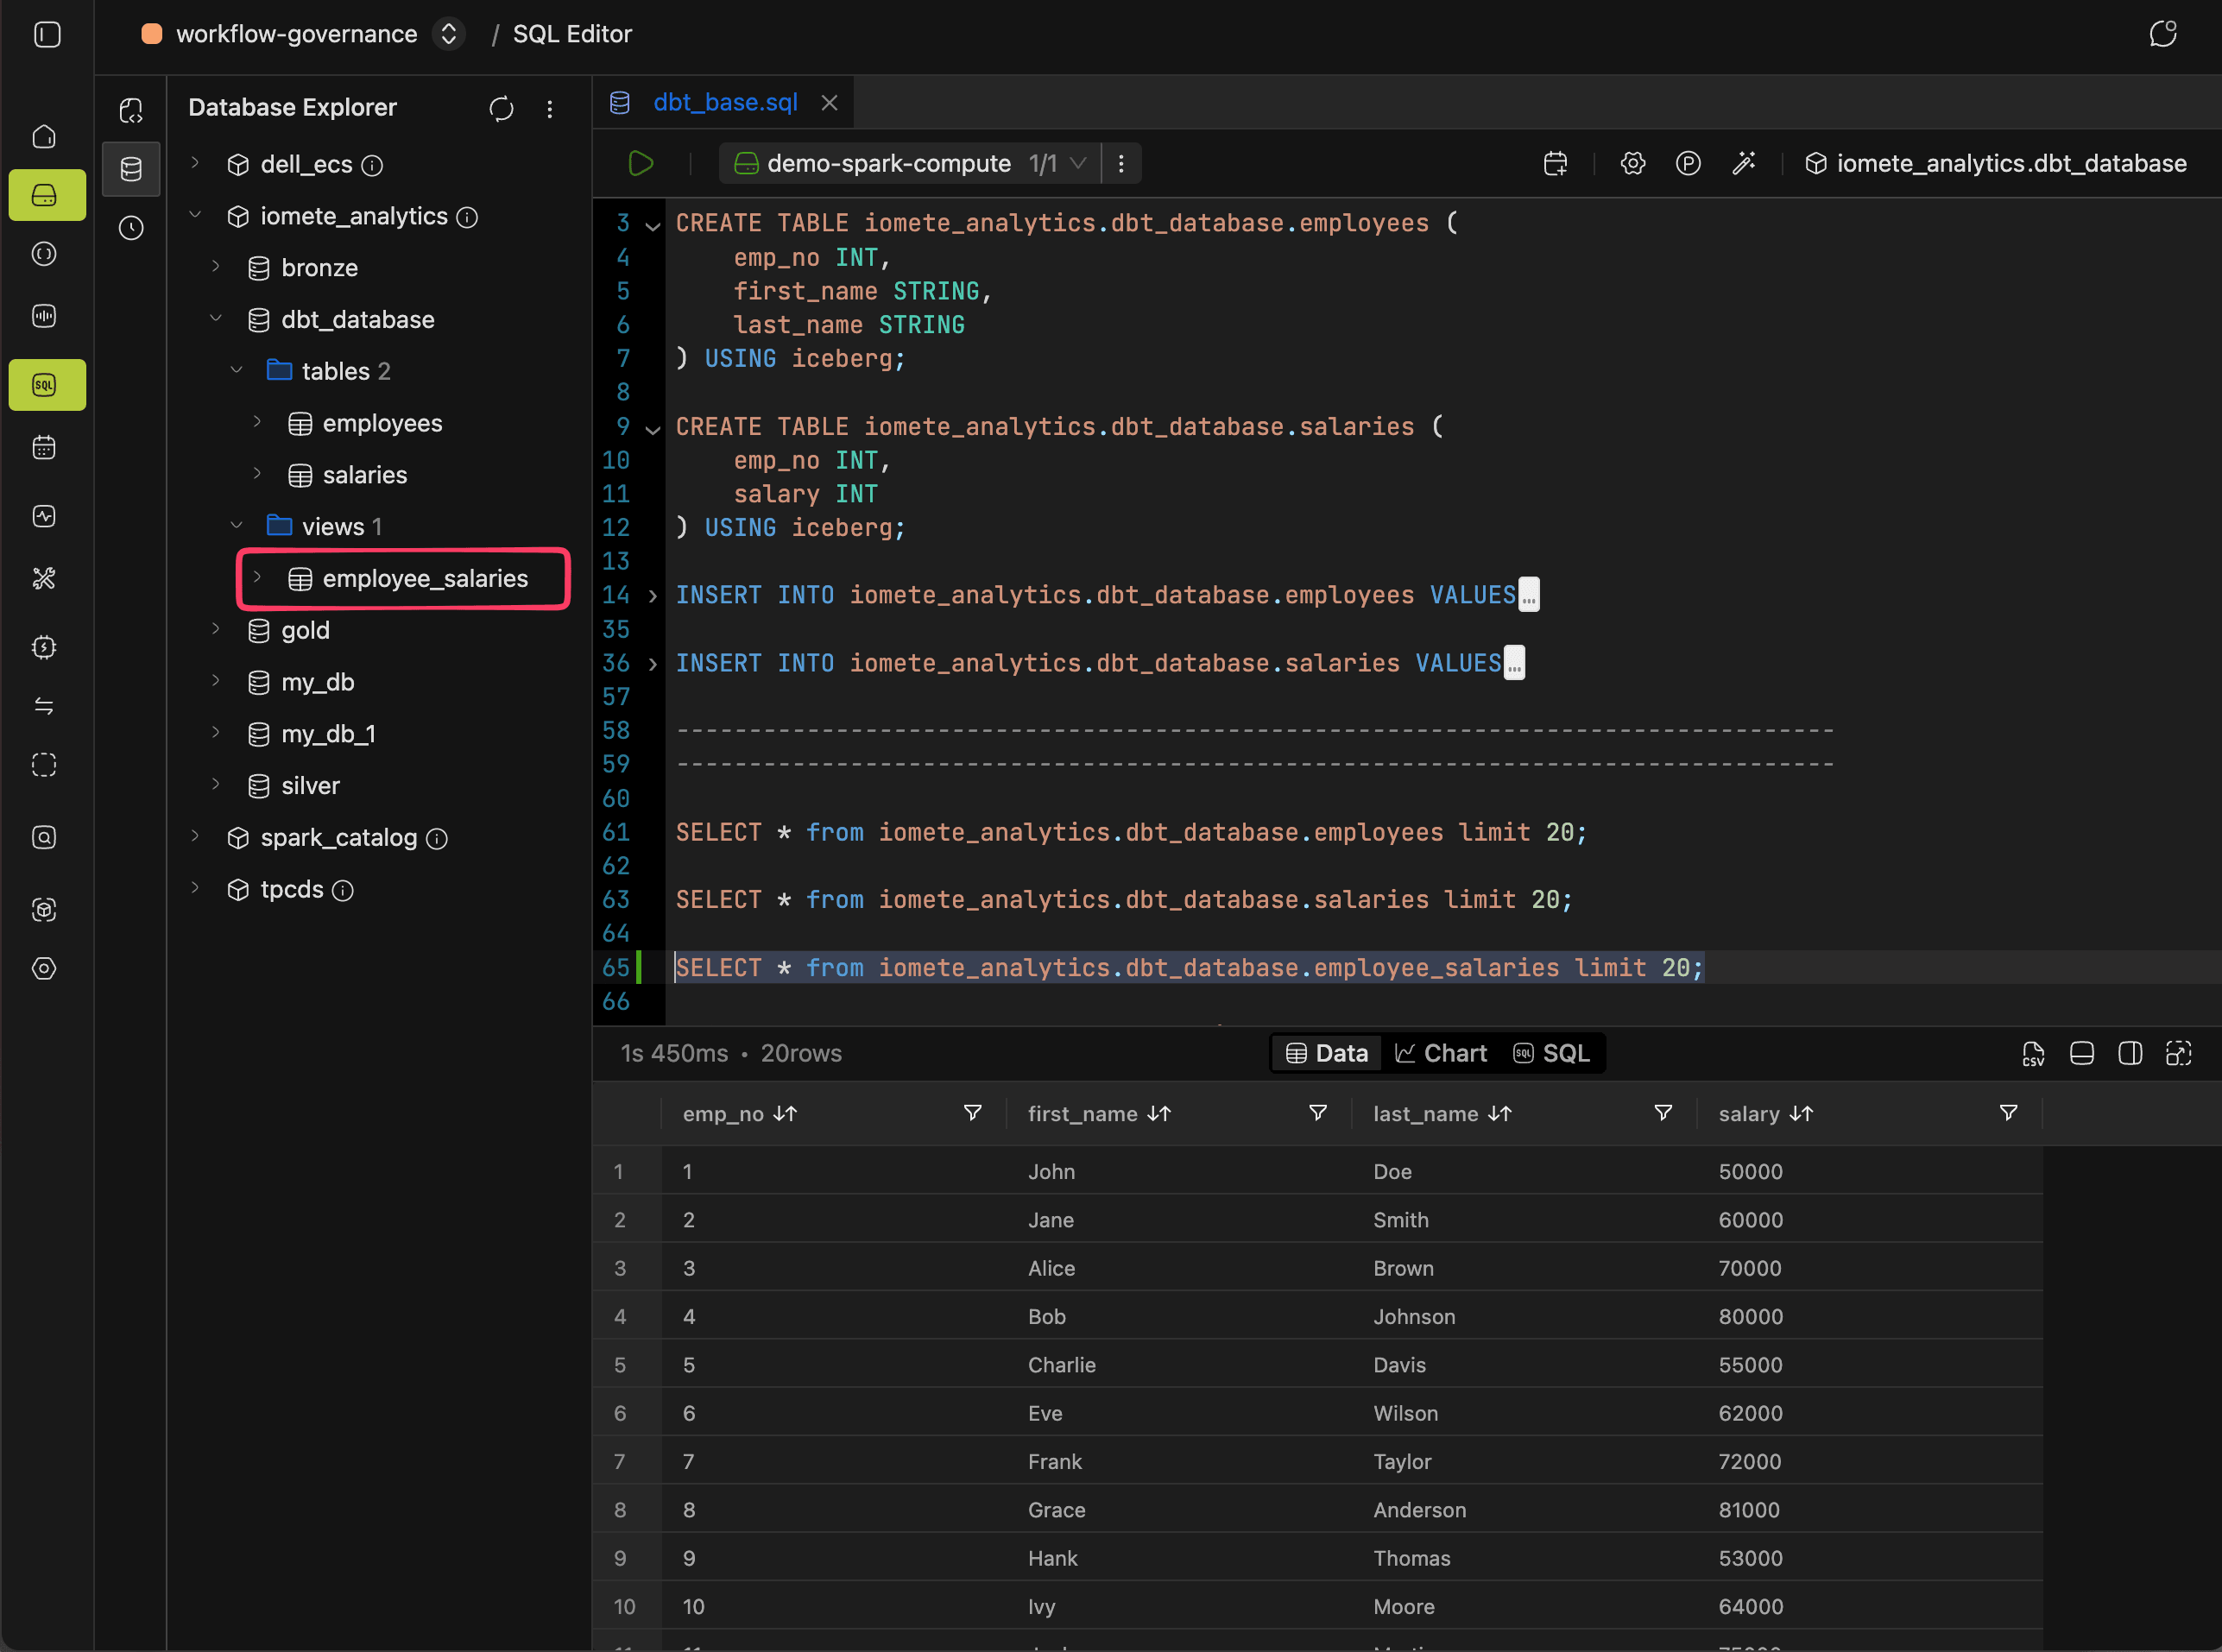
Your dbt project needs something to transform, so start by seeding two small Iceberg tables. Run the following in the SQL editor:
CREATE DATABASE IF NOT EXISTS iomete_analytics.dbt_database;

CREATE TABLE iomete_analytics.dbt_database.employees (
    emp_no INT,
    first_name STRING,
    last_name STRING
) USING iceberg;

CREATE TABLE iomete_analytics.dbt_database.salaries (
    emp_no INT,
    salary INT
) USING iceberg;

-- Add as many rows as needed
INSERT INTO iomete_analytics.dbt_database.employees VALUES
(1, 'John', 'Doe'),
(2, 'Jane', 'Smith');

-- Add as many rows as needed
INSERT INTO iomete_analytics.dbt_database.salaries VALUES
(1, 50000),
(2, 60000);
Installing and Configuring dbt-iomete
With the source tables in place, the next step is getting the adapter onto your machine and pointed at your lakehouse.
Installing the Adapter
Work inside a virtual environment to keep dbt-iomete isolated from your system Python:
# Create a working directory
mkdir dbt-samples
cd dbt-samples

# Install dbt-iomete in a virtual Python environment
virtualenv .env
source .env/bin/activate
pip install --upgrade dbt-iomete
Initializing the Project
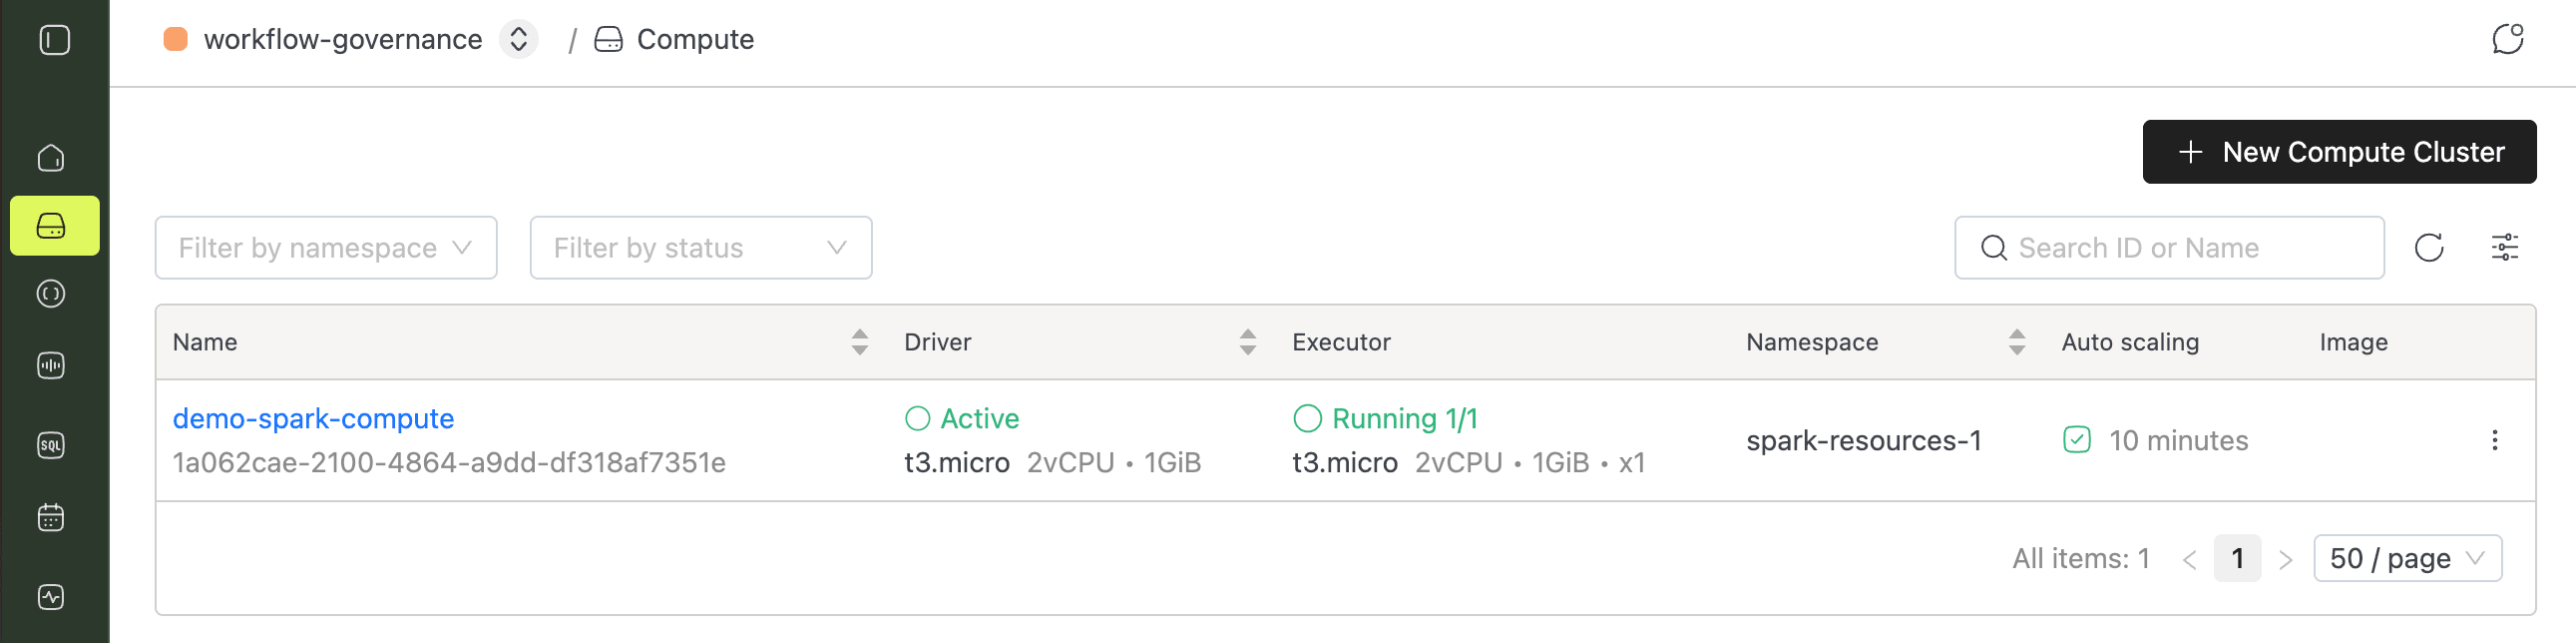
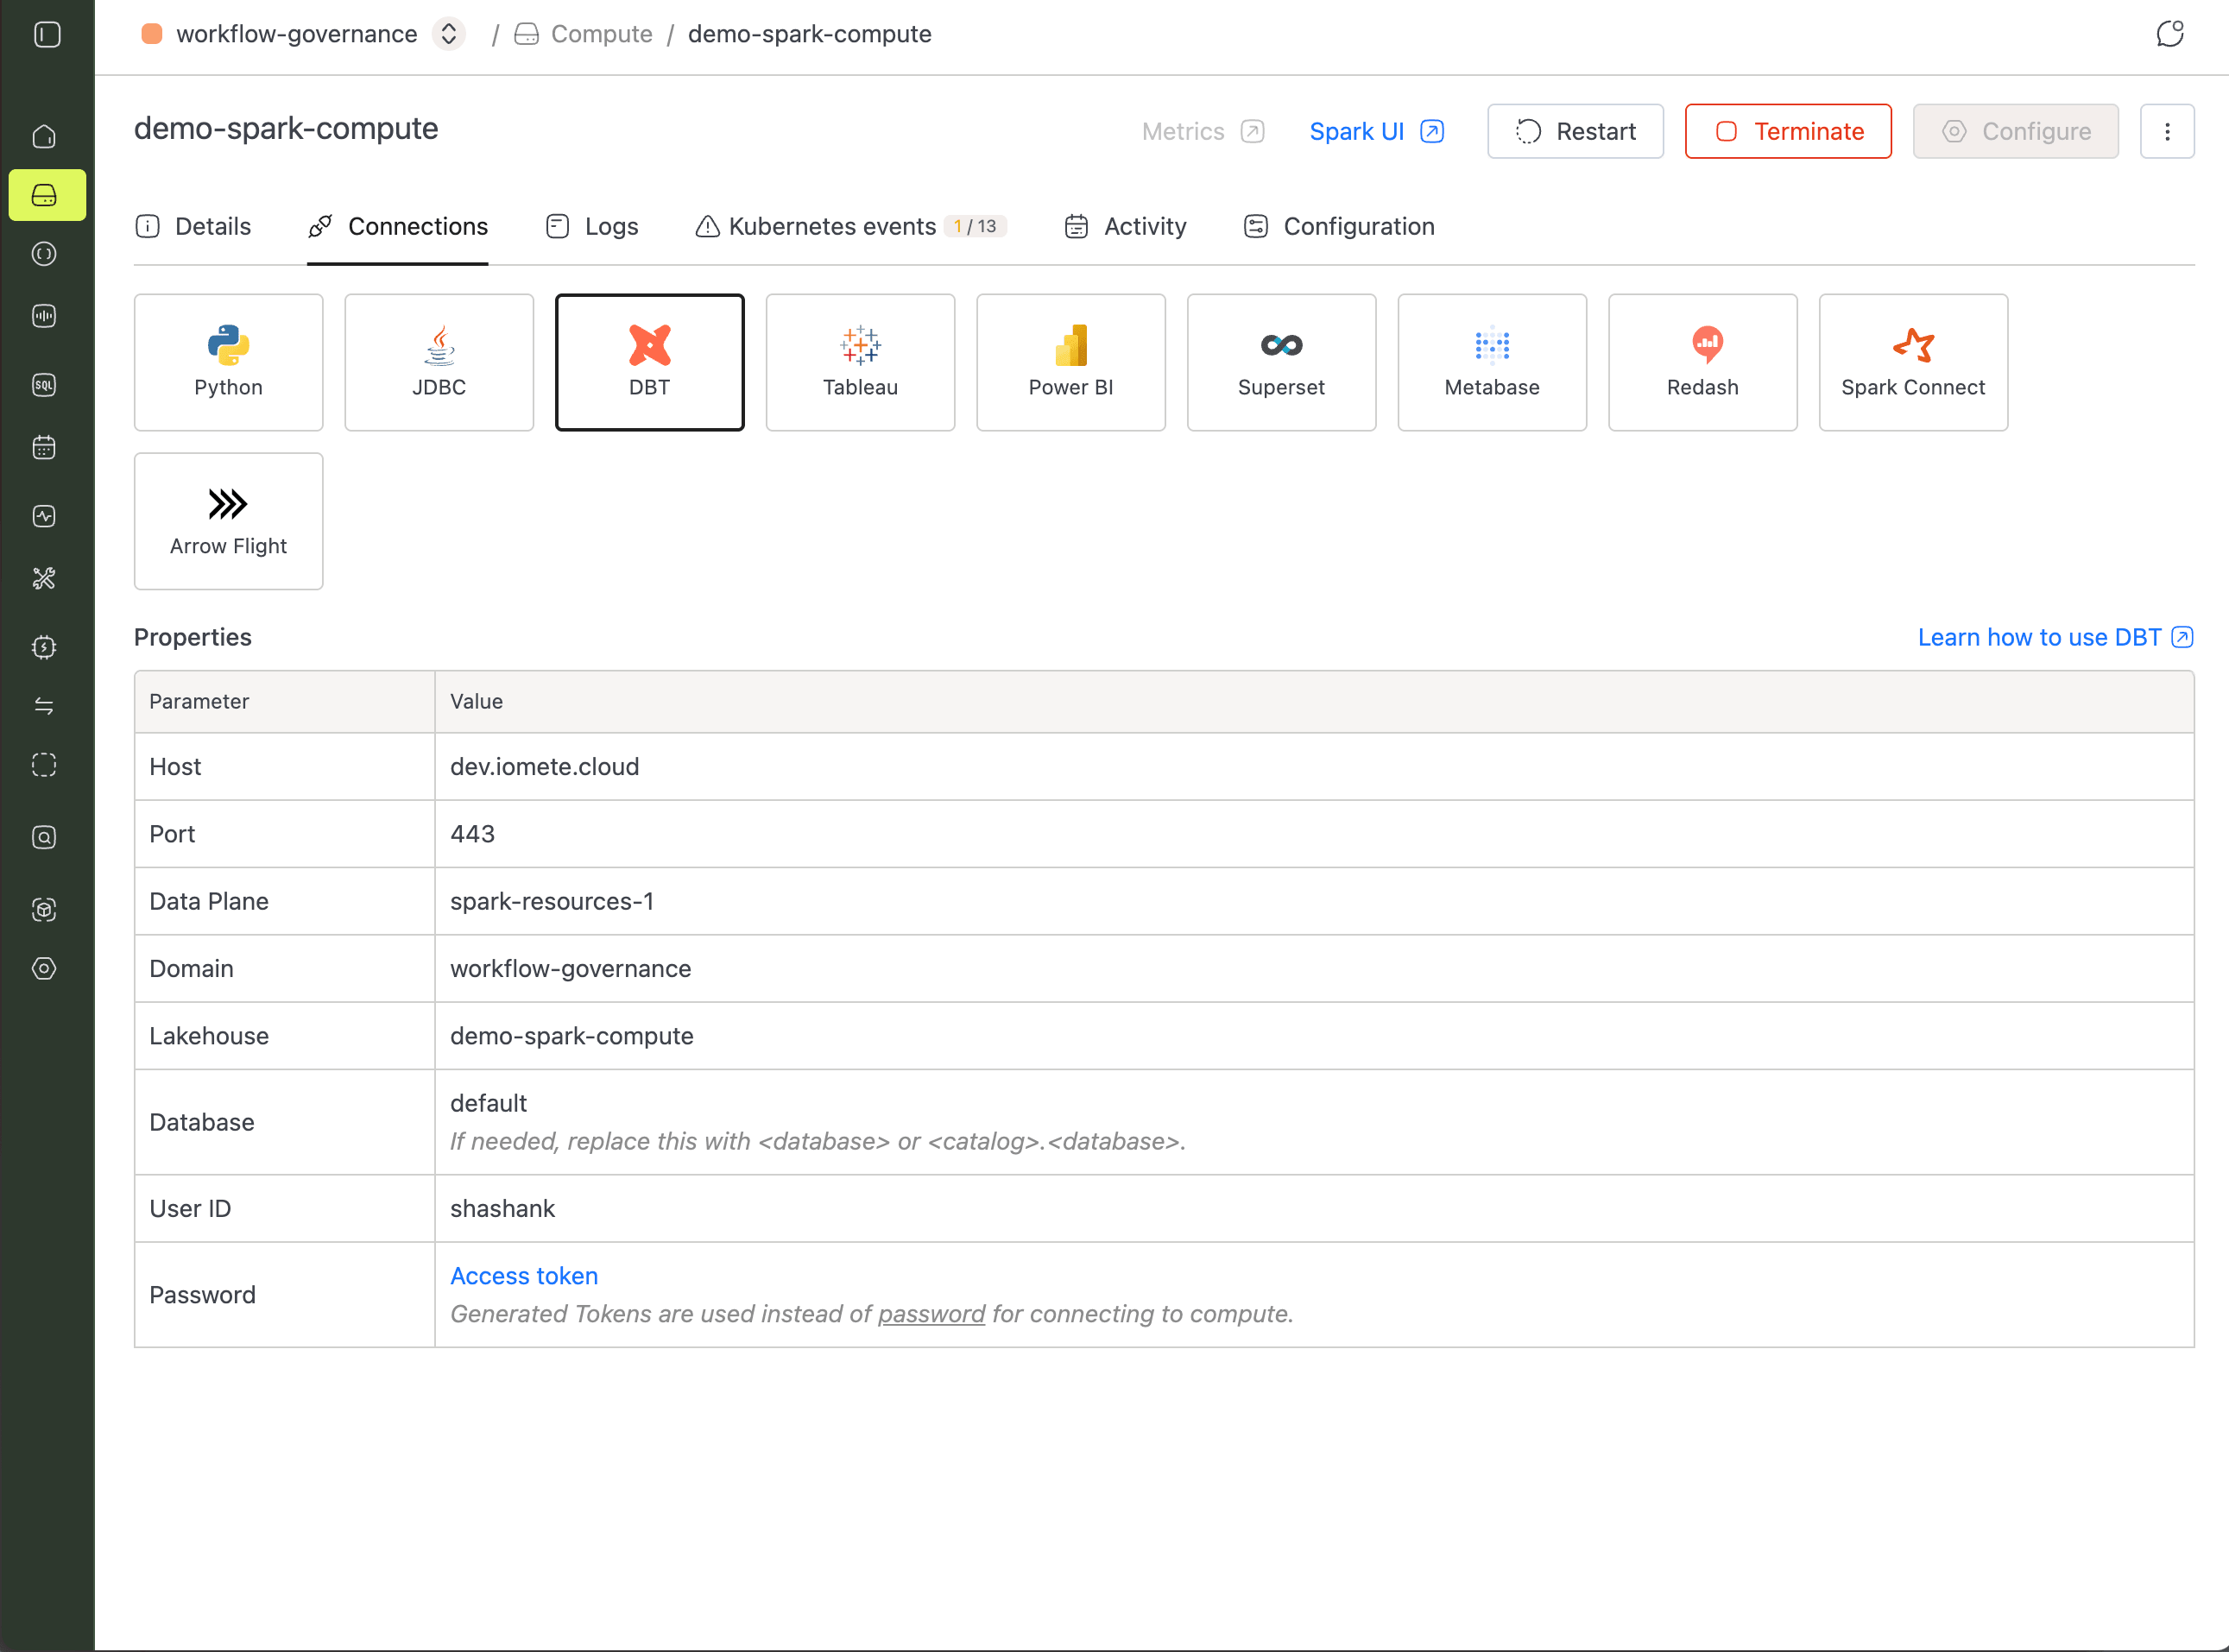
dbt init asks for connection details, so grab them first. In the IOMETE console, open your compute instance, switch to the Connect tab, and select dbt.
Now run the init command and answer the prompts. When it asks for a schema, enter dbt_database (the database you created earlier).
dbt init dbt_project
→ dbt init dbt_project

08:27:06 Running with dbt=1.7.19
Your new dbt project "dbt_project" was created!

08:27:06 Setting up your profile.
Which database would you like to use?
[1] iomete

Enter a number: 1
host (Data plane host.): dev.iomete.cloud
port (Data plane port. e.g., 443) [443]: 443
https (Connection is https. Set to false for http.) [True]: True
dataplane (dataplane name that dbt will connect): spark-resources-1
domain (domain name that dbt will connect): workflow-governance
lakehouse (lakehouse name that dbt will connect): demo-spark-compute
catalog (default catalog that dbt will build objects in): iomete_analytics
schema (default schema/database that dbt will build objects in): dbt_database
user (username): shashank
token (personal access token):
connect_timeout (connection timeout in seconds) [120]:
connect retries [0]:
threads (1 or more) [1]:
dbt writes your answers to ~/.dbt/profiles.yml. Pull sensitive values from environment variables so credentials never end up in source control:
# ~/.dbt/profiles.yml
dbt_project:
  target: dev
  outputs:
    dev:
      type: iomete
      host: dev.iomete.cloud
      port: 443
      https: true
      dataplane: spark-resources-1
      domain: workflow-governance
      lakehouse: demo-spark-compute
      catalog: iomete_analytics
      schema: dbt_database
      user: "{{ env_var('DBT_IOMETE_USER_NAME') }}"
      token: "{{ env_var('DBT_IOMETE_TOKEN') }}"
      threads: 1
      connect_timeout: 120
      connect_retries: 0
Testing the Connection
Before writing any models, confirm dbt can actually reach IOMETE. dbt debug validates your profile and runs a connection test:
cd dbt_project
dbt debug
➜ dbt debug
09:01:43  Running with dbt=1.7.19
09:01:43  dbt version: 1.7.19
09:01:44  adapter type: iomete
09:01:44  adapter version: 1.7.9
09:01:44  Configuration:
09:01:44    profiles.yml file [OK found and valid]
09:01:44    dbt_project.yml file [OK found and valid]
09:01:44  Required dependencies:
09:01:44   - git [OK found]

09:01:44  Connection:
09:01:44    host: dev.iomete.cloud
09:01:44    port: 443
09:01:44    dataplane: spark-resources-1
09:01:44    lakehouse: demo-spark-compute
09:01:44    database: iomete_analytics
09:01:44    schema: dbt_database
09:01:44  Registered adapter: iomete=1.7.9
09:01:48    Connection test: [OK connection ok]

09:01:48  All checks passed!
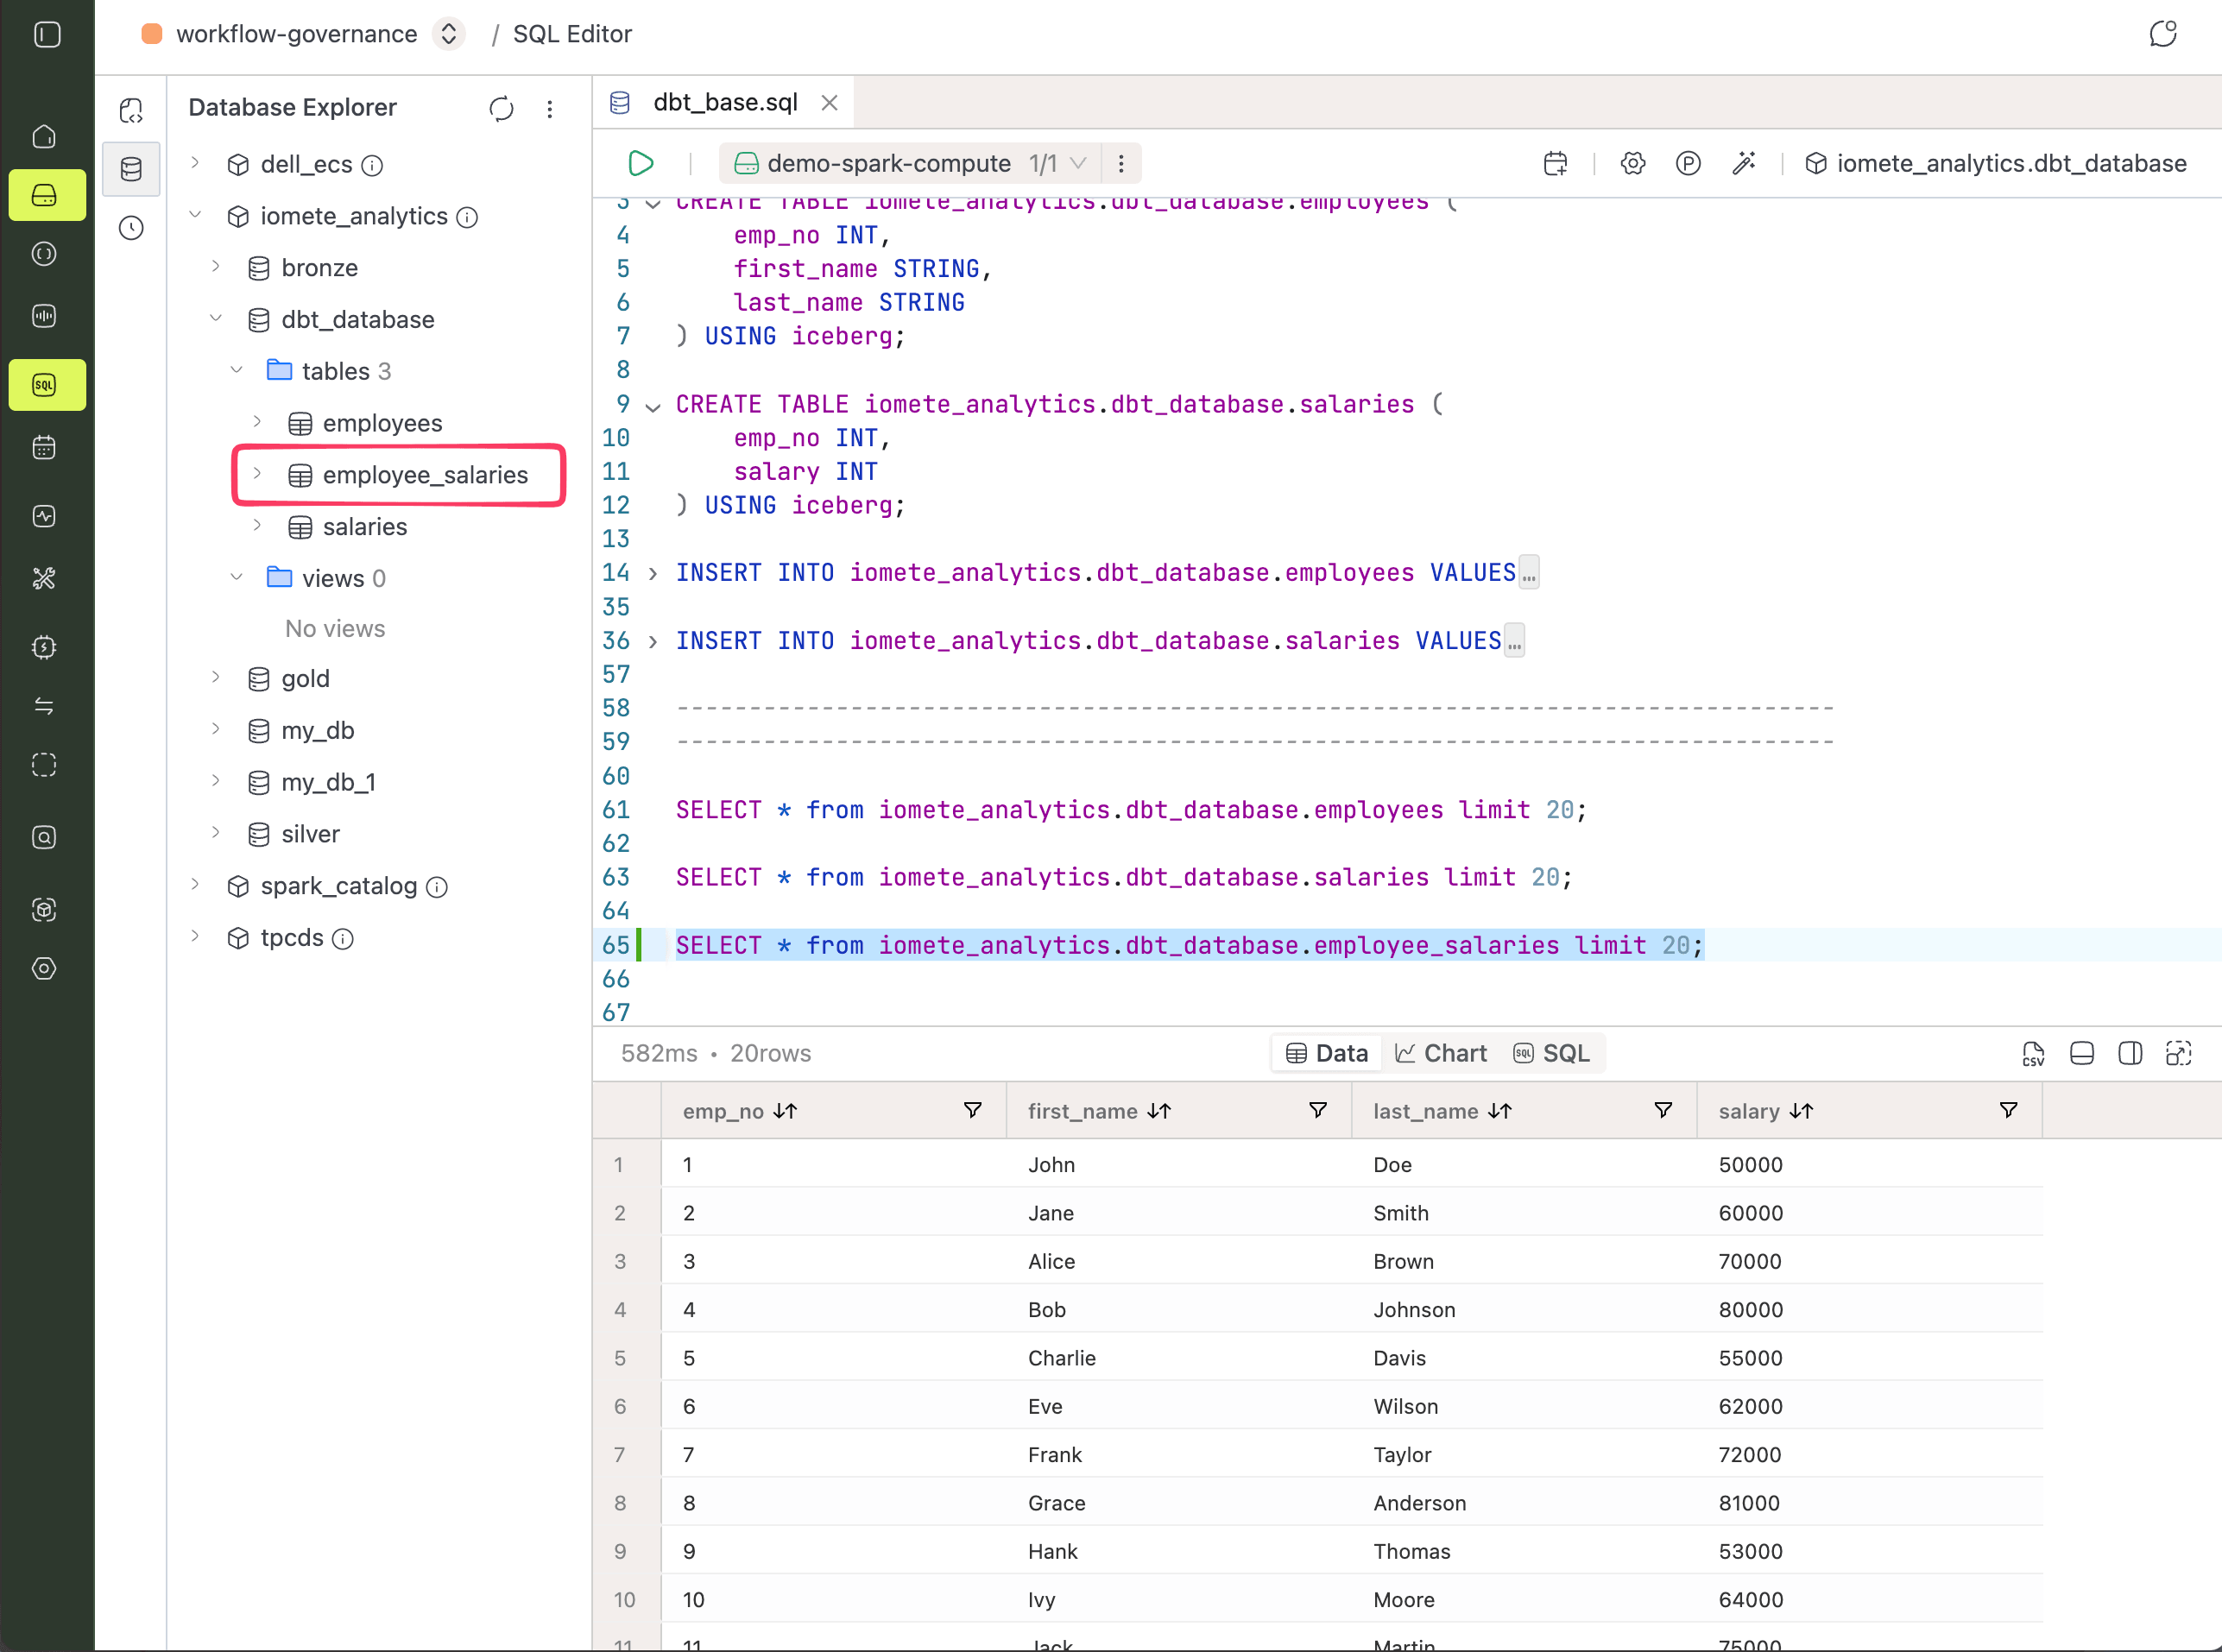
Running Your First Transformation
In dbt, you write a SELECT and the adapter handles the DDL. A model is a SELECT statement in a .sql file, and the file name becomes the model name.
Creating a View Model
By default, dbt materializes models as views. Drop the following file into your models directory, then run dbt to create the employee_salaries view:
SELECT e.emp_no,
       e.first_name,
       e.last_name,
       s.salary
FROM dbt_database.employees e
       JOIN dbt_database.salaries s
            ON e.emp_no = s.emp_no;
dbt run
➜ dbt run
09:45:59  Registered adapter: iomete=1.7.9
09:45:59  Found 1 model, 0 sources, 0 exposures, 0 metrics, 397 macros, 0 groups, 0 semantic models
09:46:08  Concurrency: 1 threads (target='dev')
09:46:08  1 of 1 START sql view model dbt_database.employee_salaries ..................... [RUN]
09:46:12  1 of 1 OK created sql view model dbt_database.employee_salaries ................ [OK in 3.90s]
09:46:14  Done. PASS=1 WARN=0 ERROR=0 SKIP=0 TOTAL=1
Switching to a Table Materialization
Views work well for lightweight transformations, but a physical table is faster for anything you query repeatedly. Switching takes one line: add a config block at the top of the model. IOMETE supports table, view, and incremental materializations (see dbt-iomete materializations for the full picture).
{{ config(materialized='table') }}

SELECT e.emp_no,
       e.first_name,
       e.last_name,
       s.salary
FROM dbt_database.employees e
       JOIN dbt_database.salaries s
            ON e.emp_no = s.emp_no;
A view with the same name already exists from the previous run, so drop it first in the SQL editor:
DROP VIEW dbt_database.employee_salaries;
Then run dbt again:
dbt run
This time the result is an Iceberg table instead of a view:
Next Steps
You now have a working dbt project on IOMETE. From here:
- Explore dbt-iomete materializations for
table,view,incremental, and snapshots. - Learn about incremental models to handle large datasets efficiently.
- See incremental models by example for hands-on patterns.