Tableau - Connecting to IOMETE
Overview
If you're using Tableau for dashboards and reporting, you can point it straight at your IOMETE data. There's no need to copy anything into a separate analytics database.
Two connection methods are available:
- Spark SQL driver: Tableau's built-in Spark SQL connector (recommended)
- CData Spark SQL connector: a third-party option from CData
Both use the Spark Thrift Server (Hive2 protocol) over HTTP transport, which is enabled by default on every IOMETE compute cluster.
Prerequisites
You'll need a few things in place before connecting Tableau to IOMETE:
- A running IOMETE compute cluster (setup instructions)
- Tableau Desktop or Tableau Cloud (download Tableau Desktop)
- A Personal Access Token for authentication, since Tableau doesn't accept regular passwords (how to create one)
- For the CData method only: the Spark SQL by CData connector
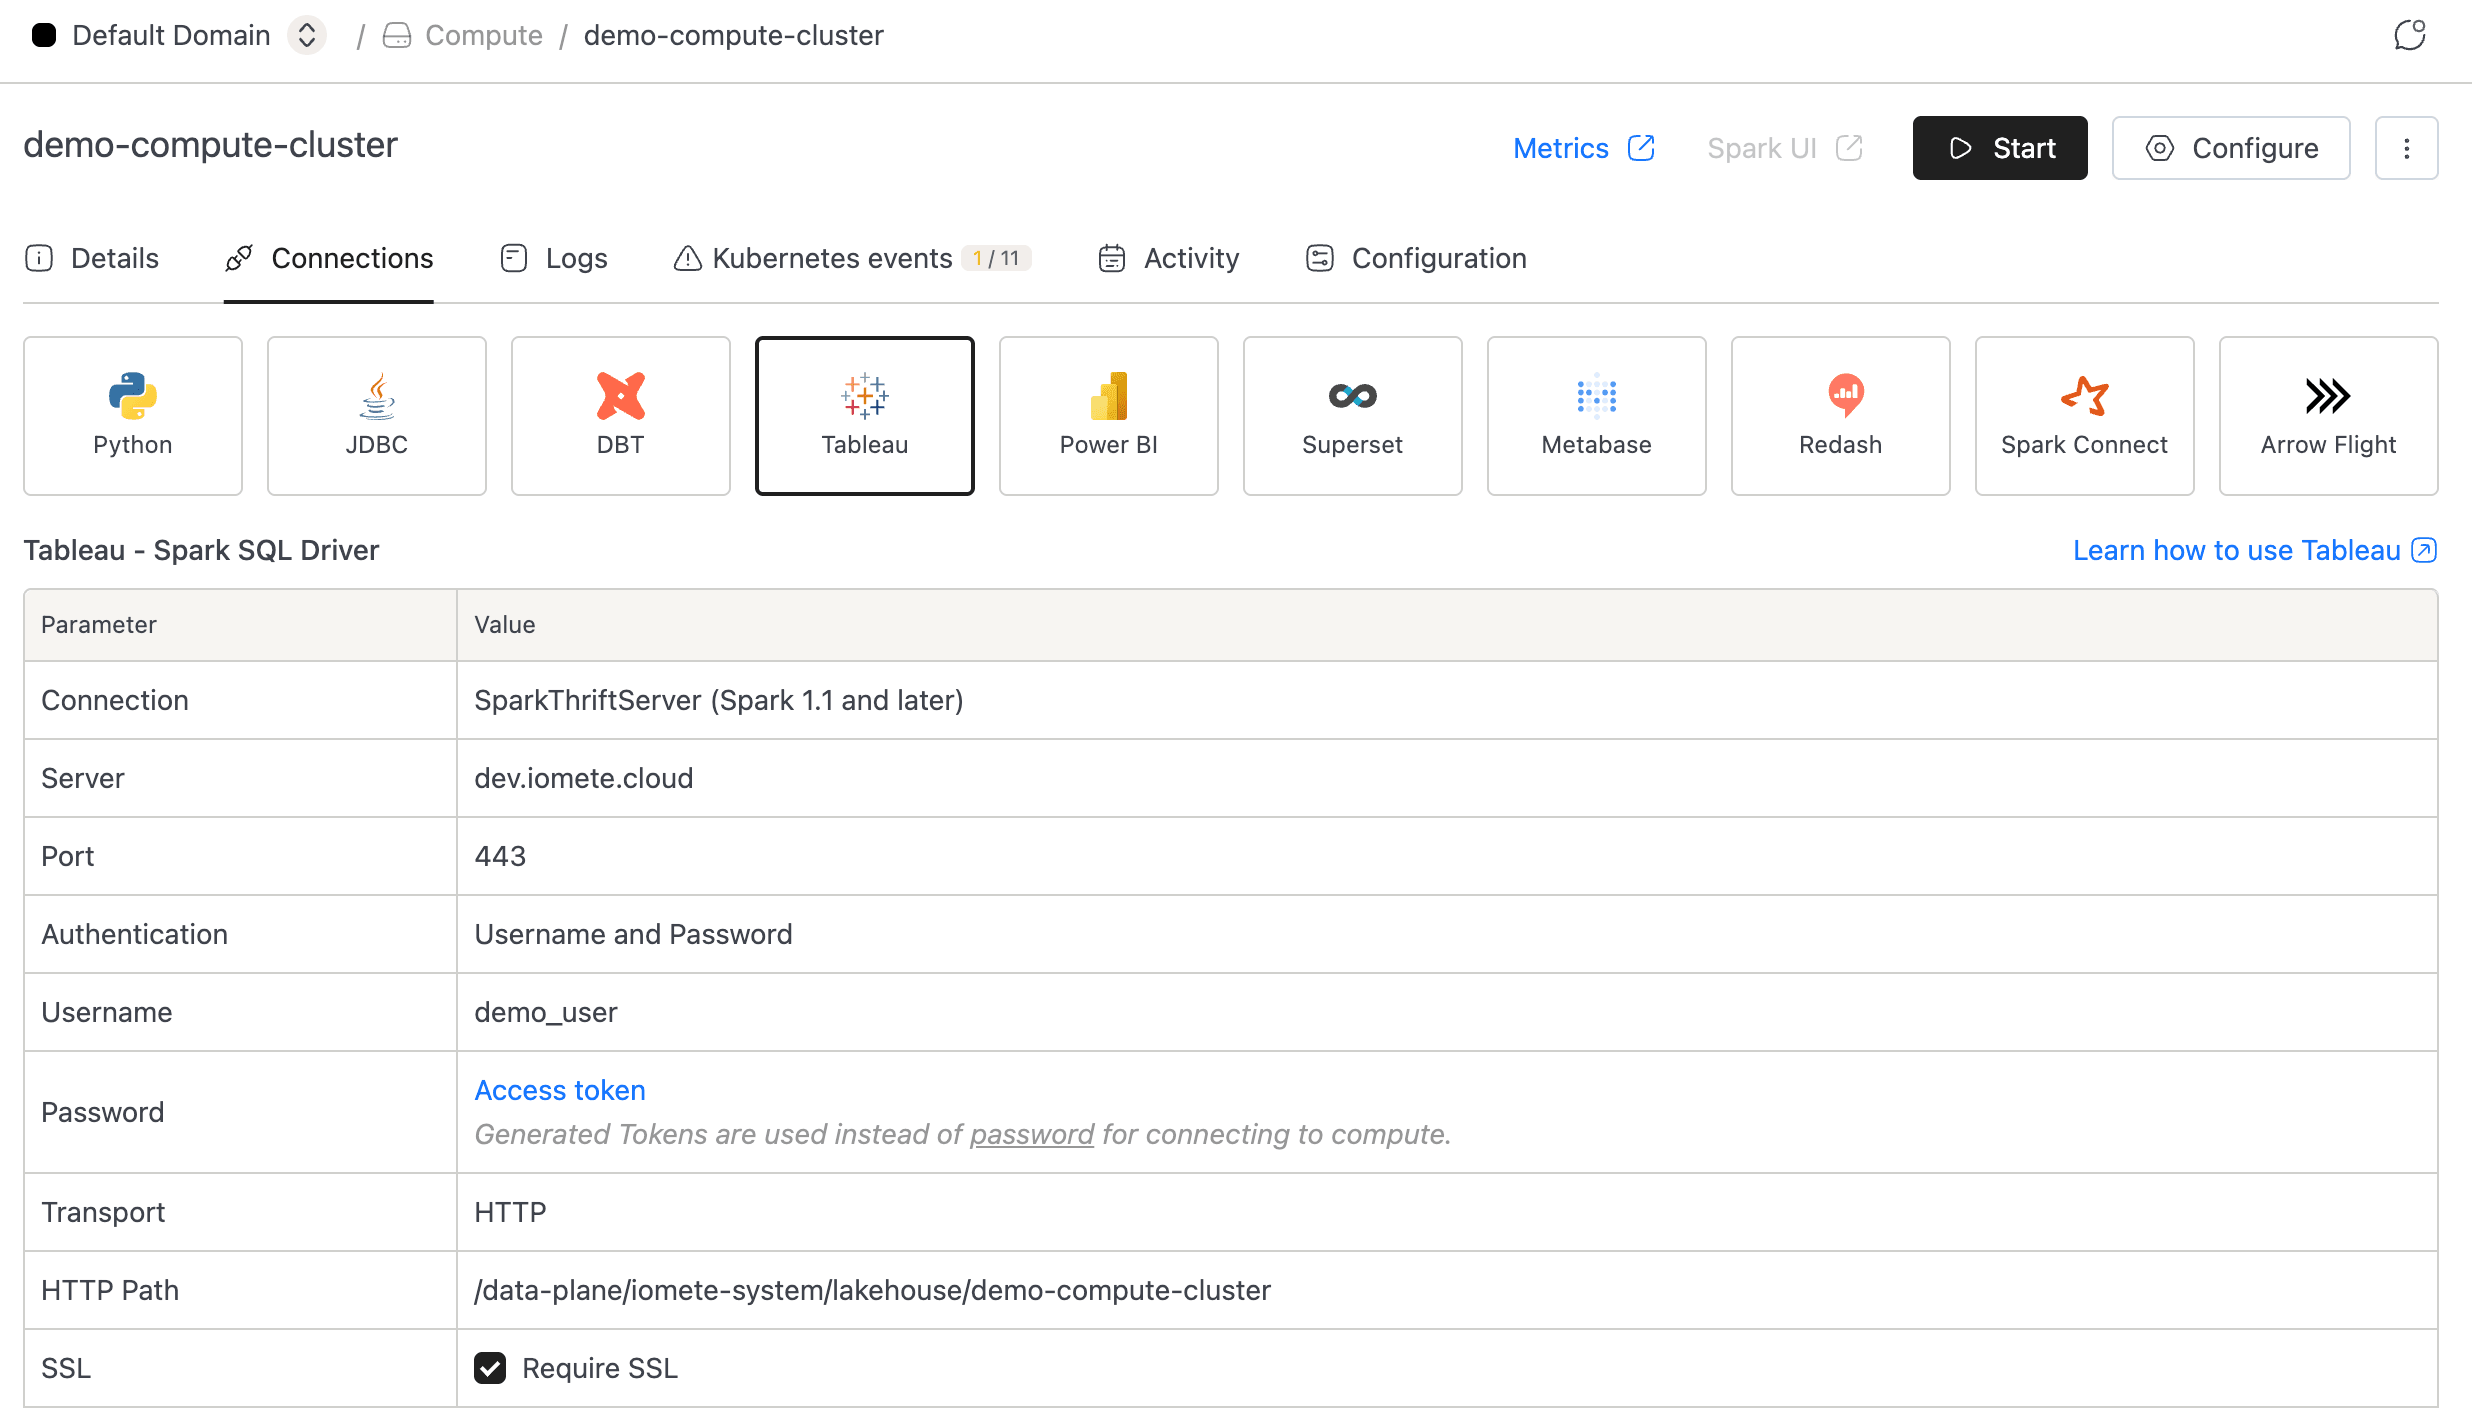
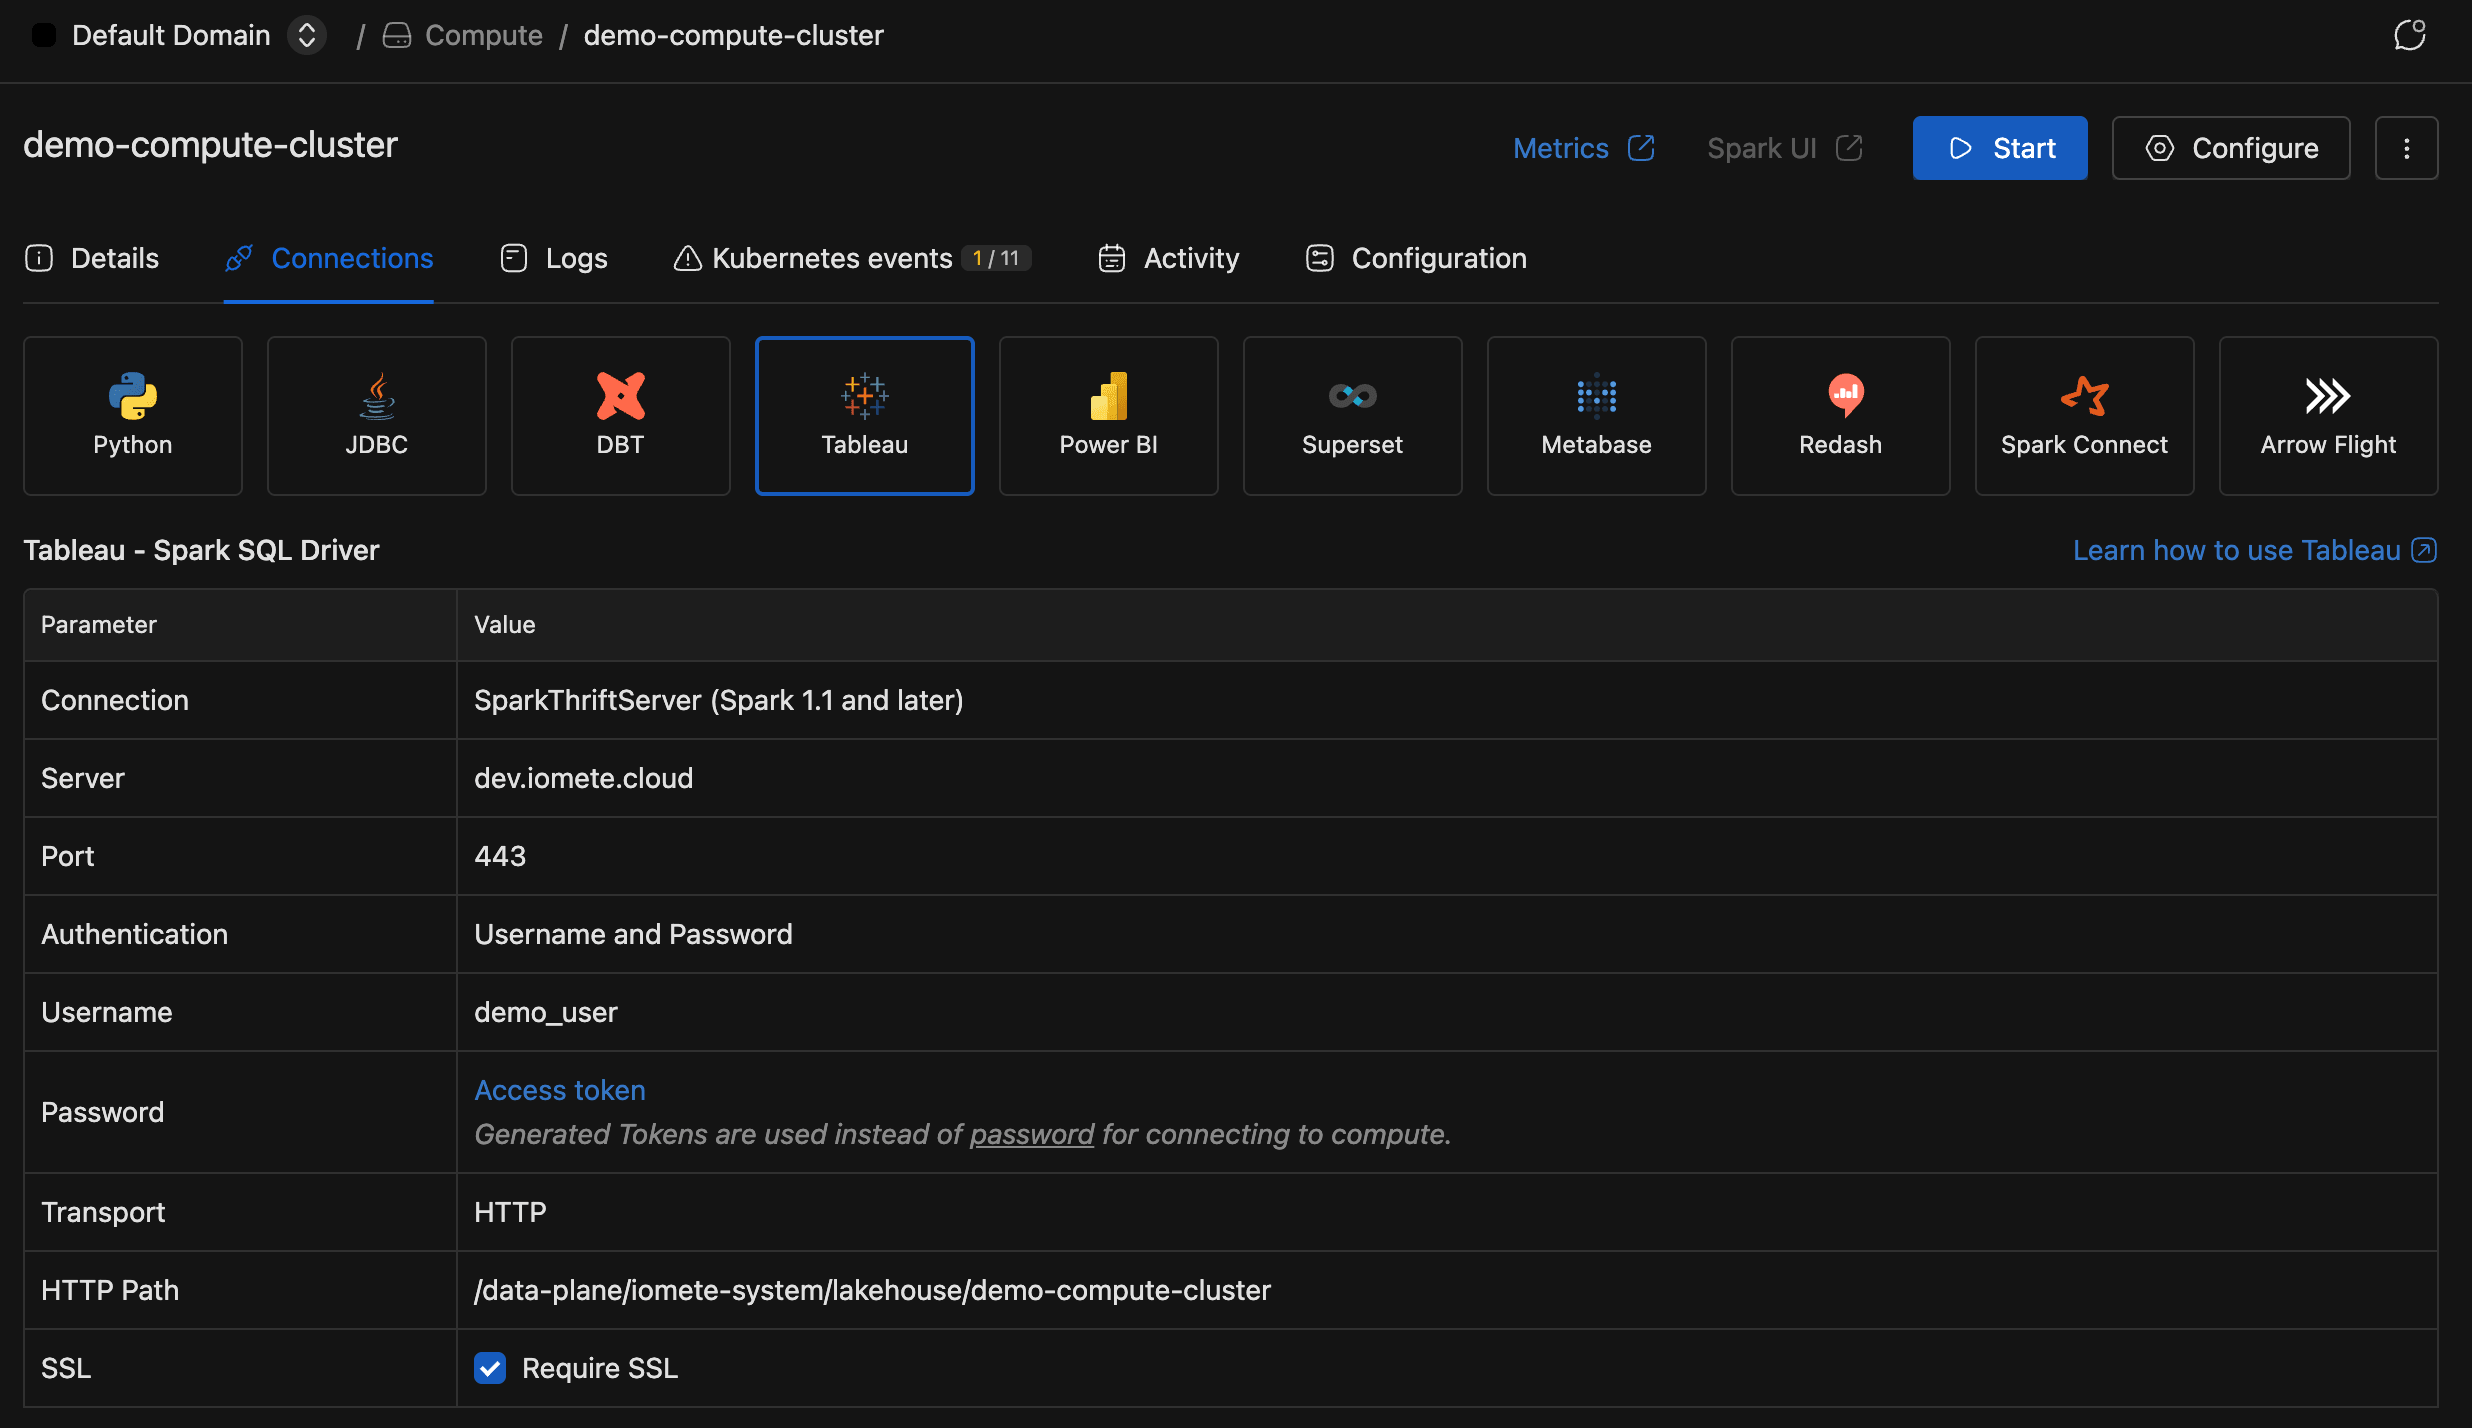
Finding Connection Parameters
You don't need to assemble connection strings by hand. IOMETE generates them for each compute cluster.
- Open Compute from the sidebar.
- Click the cluster you want to connect.
- Select the Connections tab.
- Click the Tableau card.
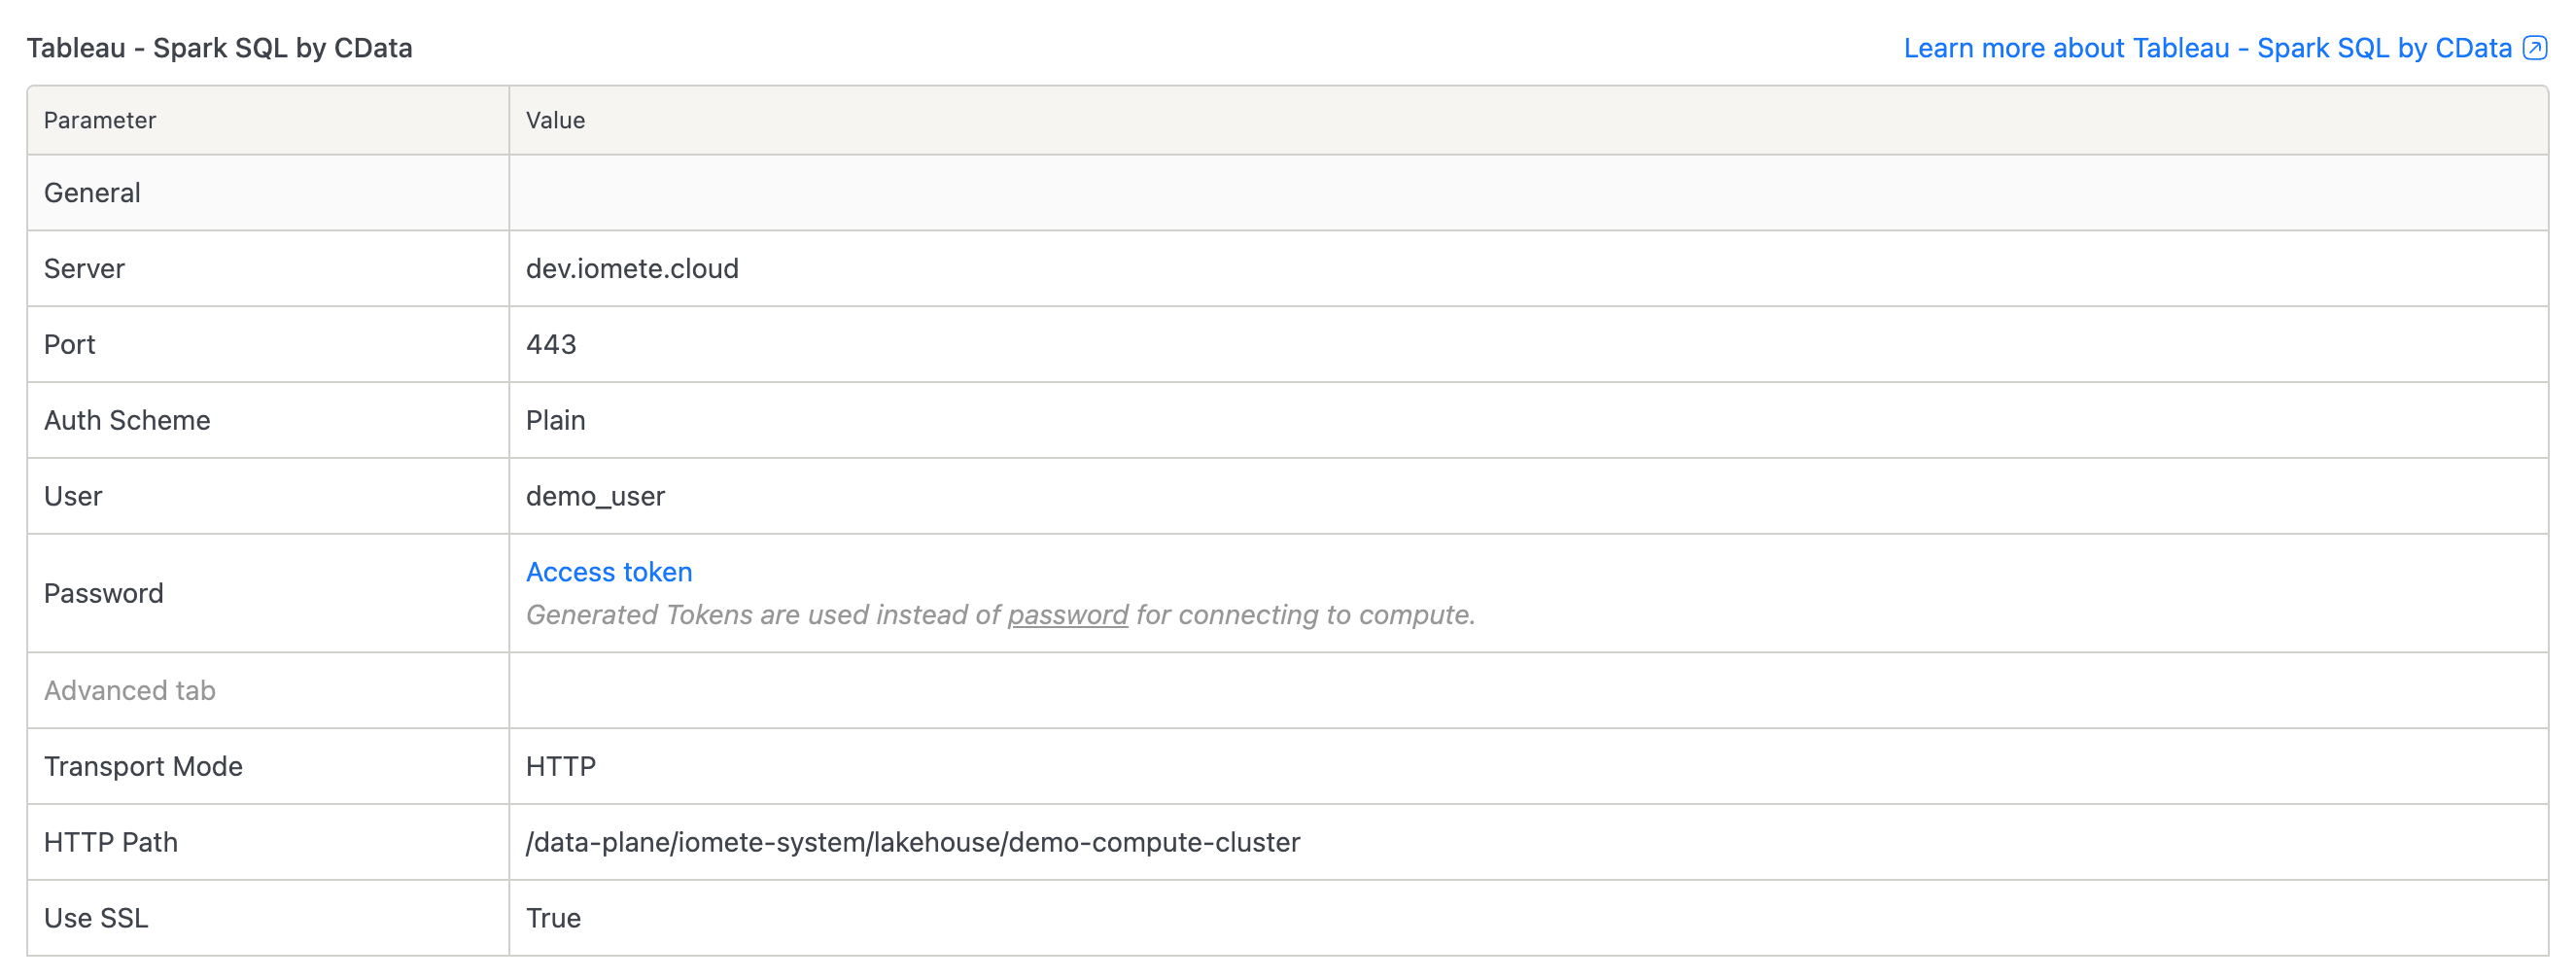
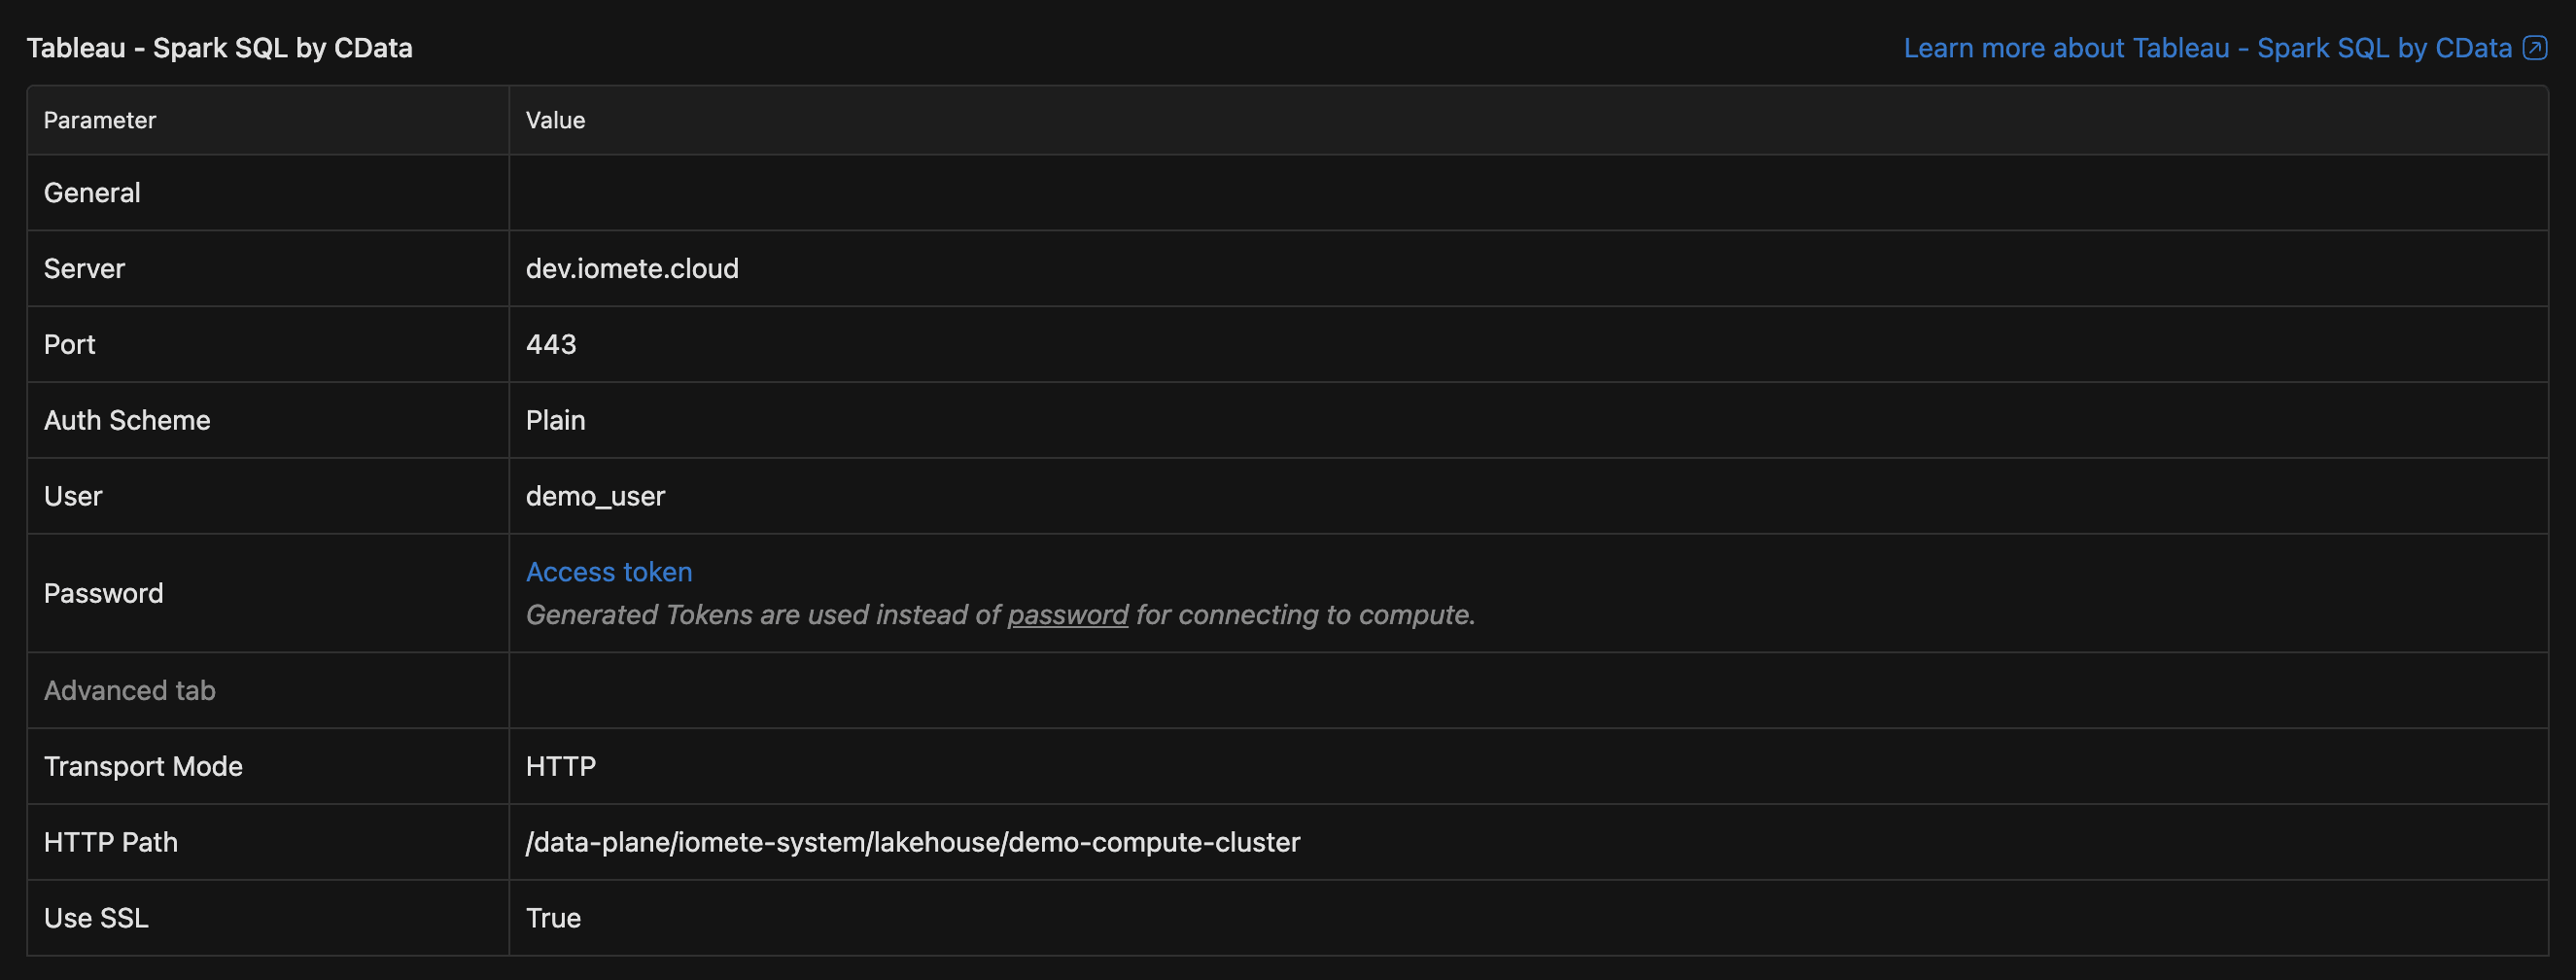
You'll see two parameter tables, one for the Spark SQL Driver and one for Spark SQL by CData. Every value is pre-filled for your environment. Hover over any value and click the copy button to grab it.
Connecting Using the Spark SQL Driver
This is the simplest path because Tableau ships with a built-in Spark SQL connector. Nothing extra to install.
- Open Tableau and create a new workbook (or open an existing one).
- Click New Data Source.

- Go to the Connectors tab and select Spark SQL.
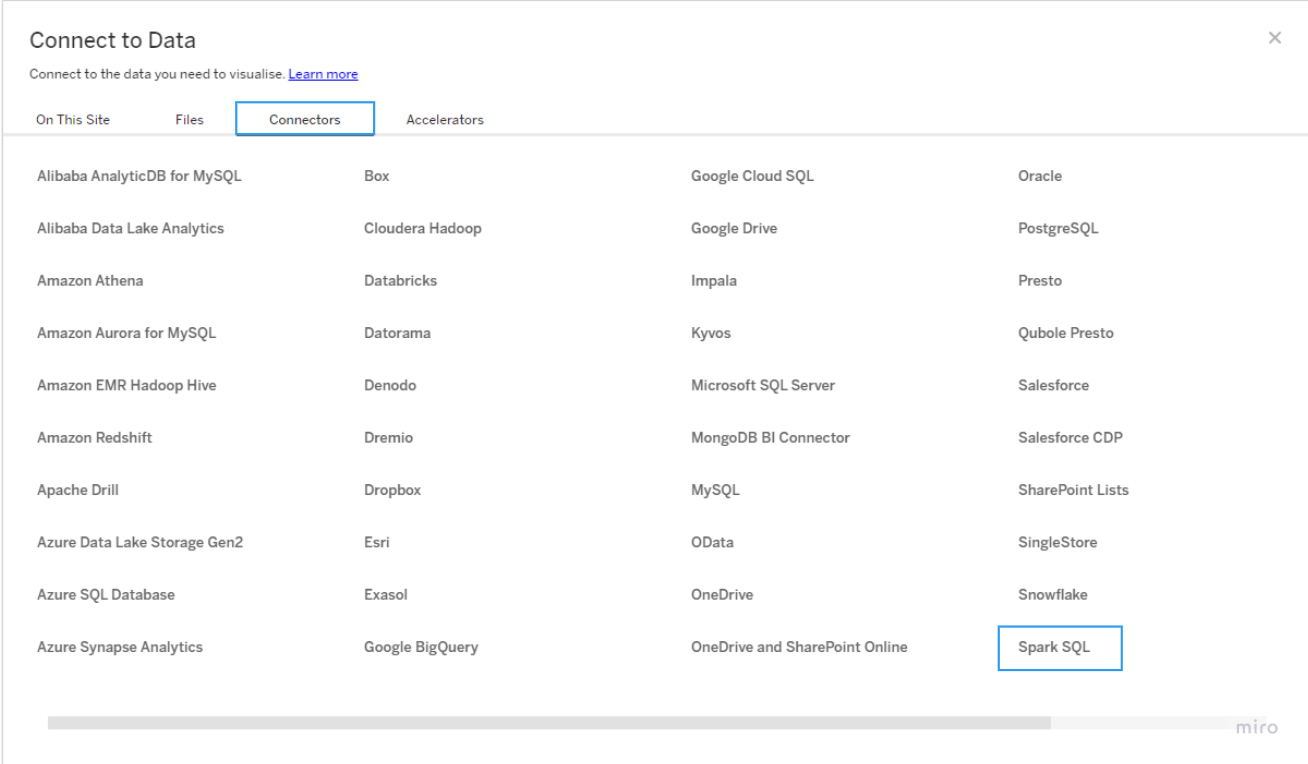
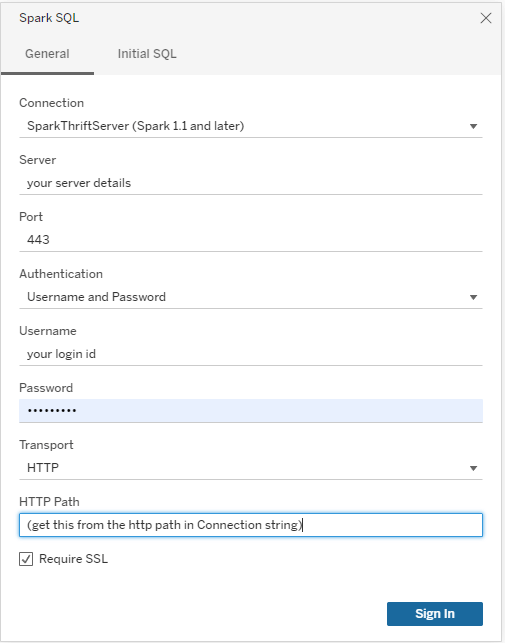
- Fill in the Spark SQL connection dialog with these parameters:
| Parameter | Value |
|---|---|
| Connection | SparkThriftServer (Spark 1.1 and later) |
| Server | Your IOMETE platform hostname (shown as HOST_NAME in the console) |
| Port | 443 for HTTPS or 80 for HTTP (shown as PORT in the console) |
| Authentication | Username and Password |
| Username | Your IOMETE user ID |
| Password | {personal access token} |
| Transport | HTTP |
| HTTP Path | /data-plane/\{namespace\}/lakehouse/\{compute-name\} |
| SSL | Check Require SSL if your platform uses HTTPS |
The Password field takes a Personal Access Token, not your account password. Generate one under Settings > Access Tokens in the IOMETE console. See Creating a Personal Access Token.
The HTTP Path includes lakehouse in the URL (e.g., /data-plane/default/lakehouse/my-compute). Copy it exactly as shown in the IOMETE console, including the leading /.
- Click Sign In.
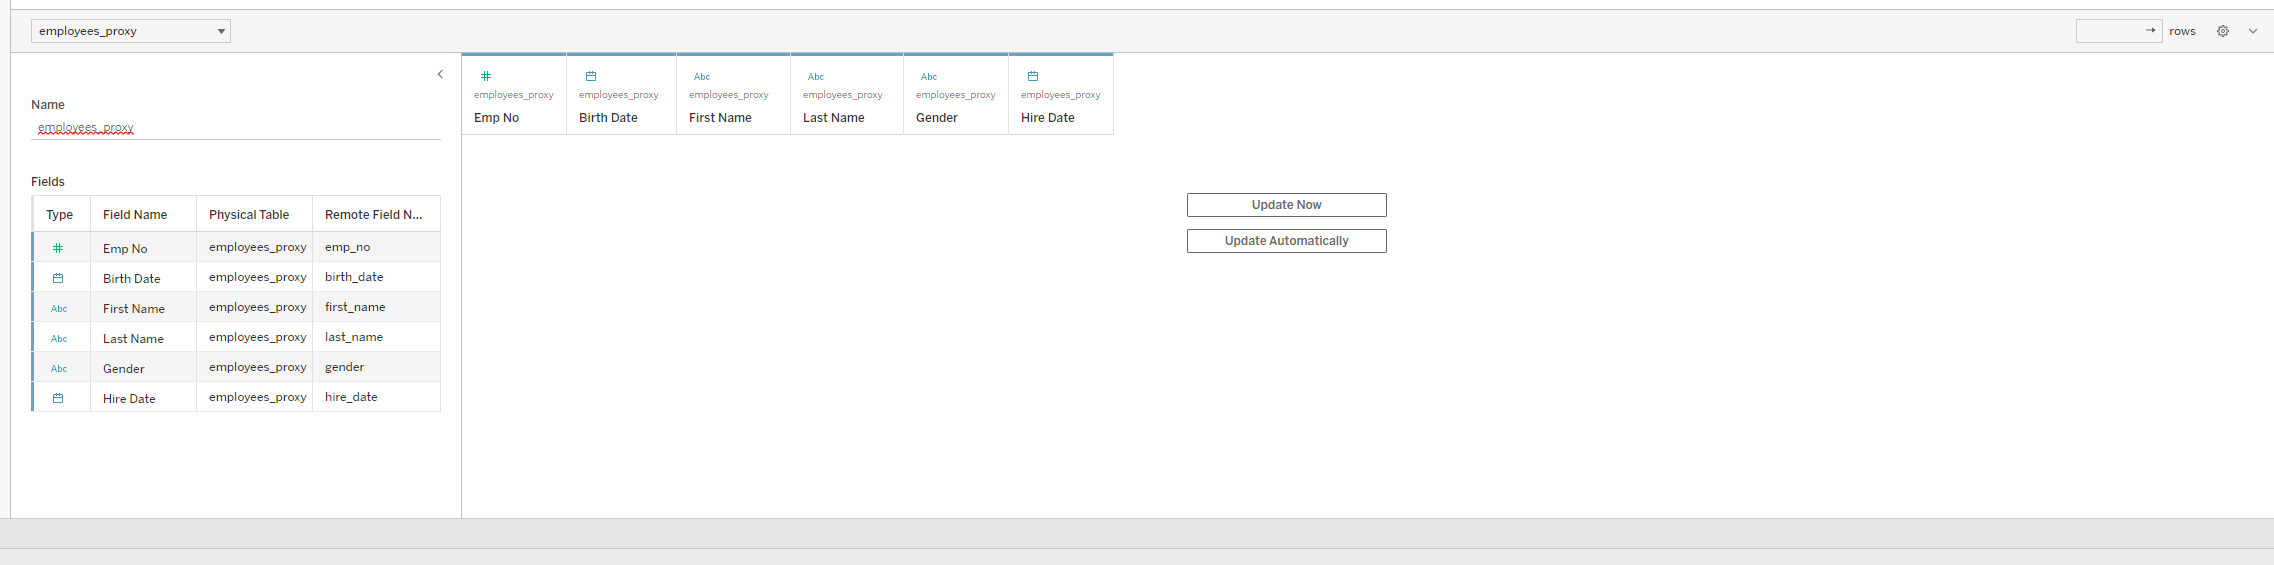
- Once connected, your IOMETE database appears. Select a Schema to browse its tables.

- Drag tables into the canvas to begin building your reports and dashboards.
Connecting Using the CData Spark SQL Connector
If you need the extra configuration options that CData offers, use this method instead. It requires a separate connector install.
- Install Tableau Desktop and the Spark SQL by CData connector.
- Open Tableau.
- Click To a server, then select Spark SQL by CData.
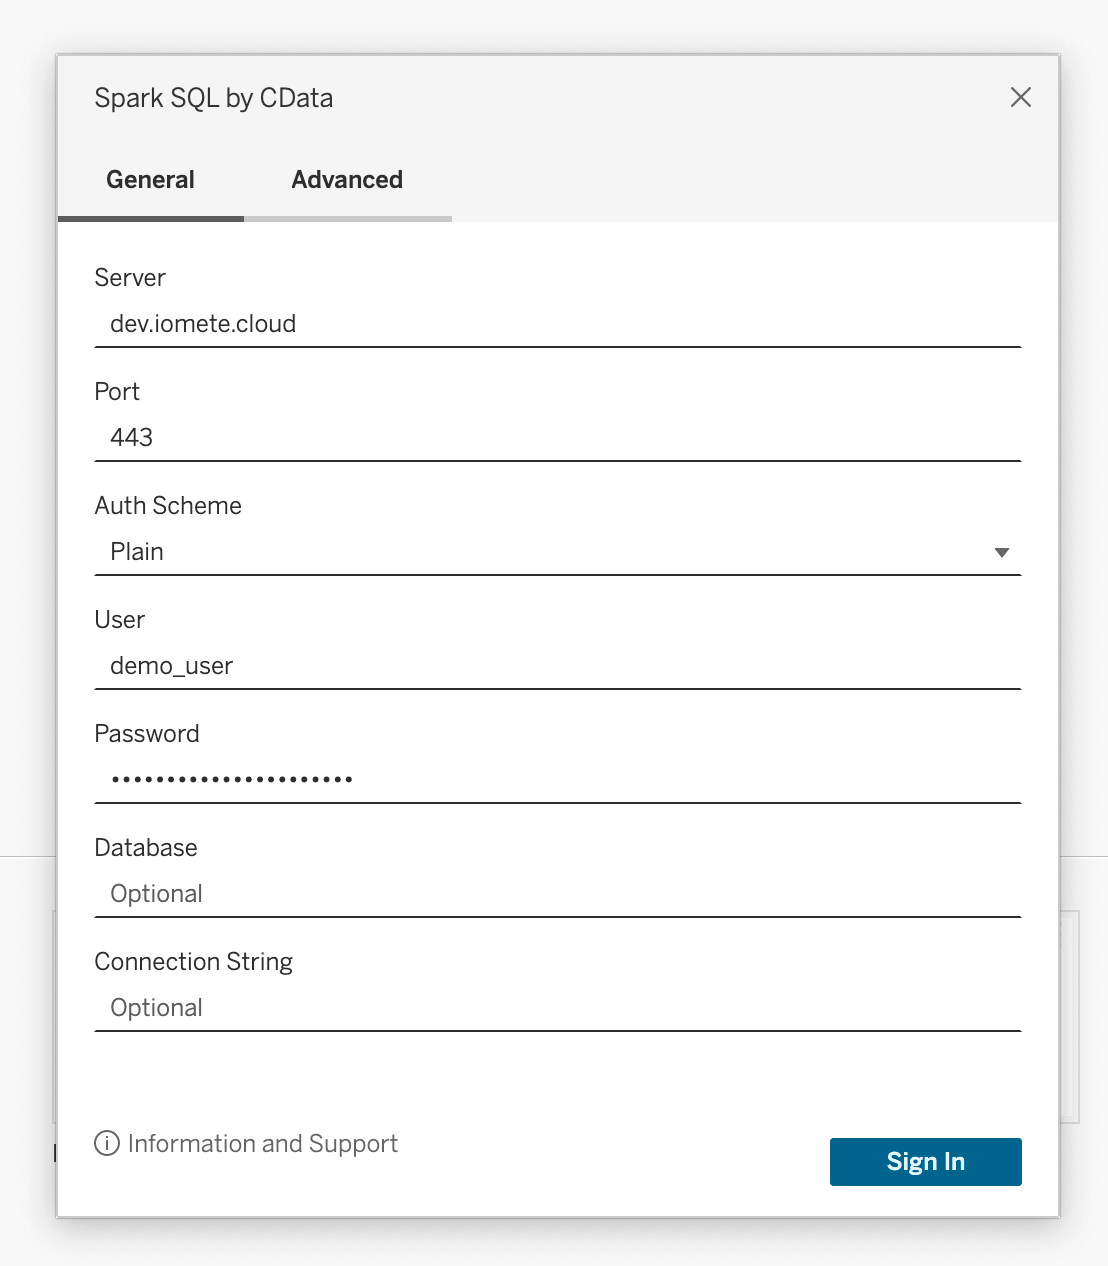
- Enter the following connection parameters.
General tab:
| Parameter | Value |
|---|---|
| Server | Your IOMETE platform hostname |
| Port | 443 for HTTPS or 80 for HTTP |
| Auth Scheme | Plain |
| User | Your IOMETE user ID |
| Password | {personal access token} |
Advanced tab:
| Parameter | Value |
|---|---|
| Transport Mode | HTTP |
| HTTP Path | /data-plane/\{namespace\}/lakehouse/\{compute-name\} |
| Use SSL | True |
The Password field takes a Personal Access Token, not your account password. See Creating a Personal Access Token.
- Click Connect.
Building a Dashboard
With the connection in place, you're ready to turn your IOMETE data into visualizations.
- Select a schema, drag tables into the canvas, then click Sheet 1 to open a new sheet.
- Right-click a dimension or measure and select Add to Sheet.
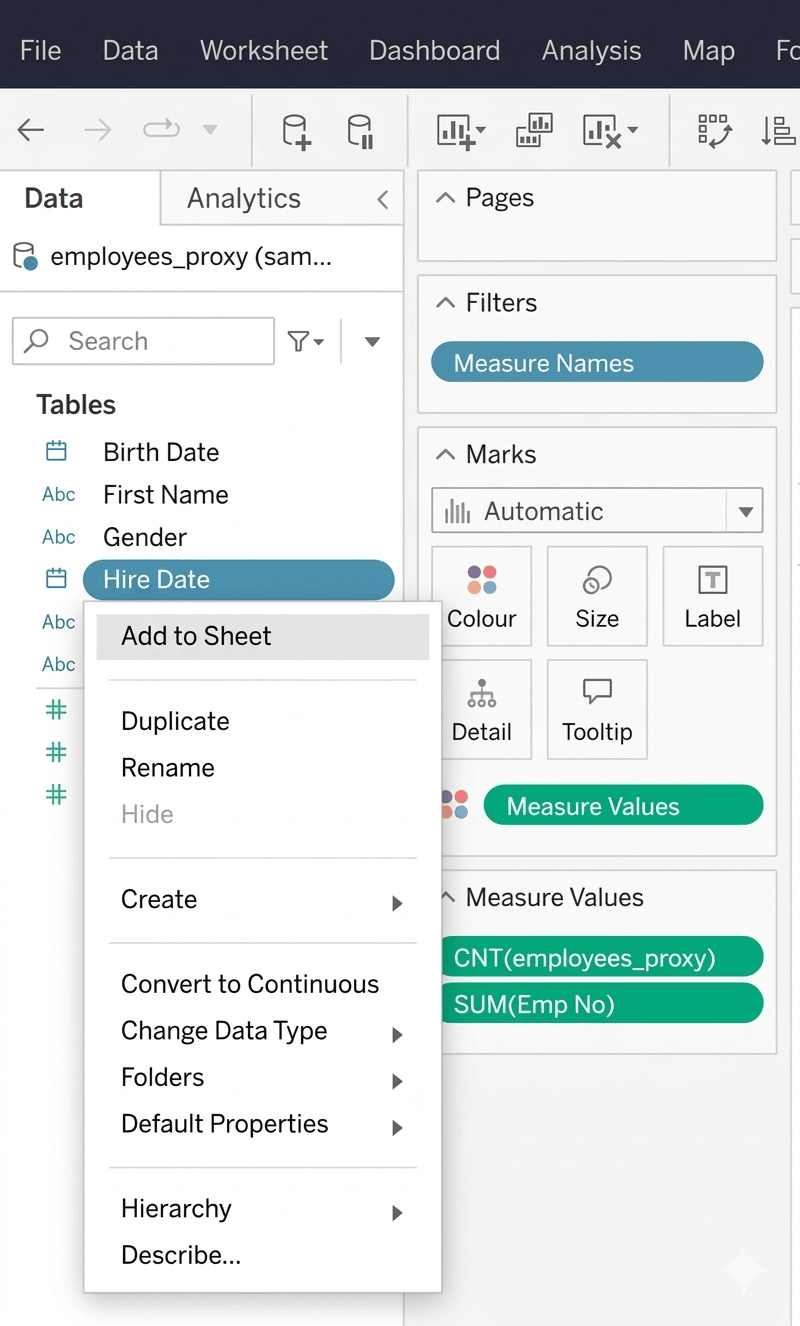
- Drag additional fields into rows, columns, or filters to refine the report.

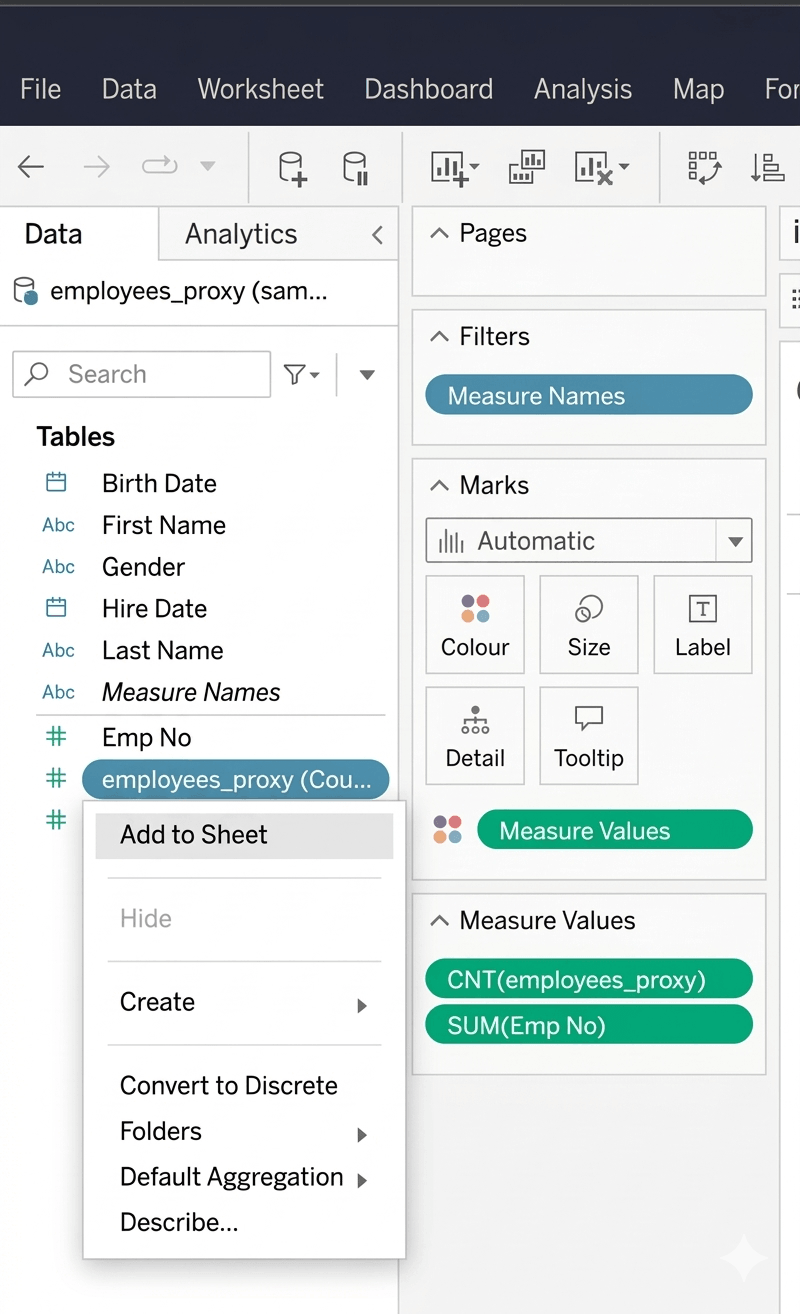
- Pick a visualization type and customize the layout to finish your dashboard.

Next Steps
- Creating a Personal Access Token: generate tokens for Tableau authentication
- Compute Clusters: create and manage the compute clusters Tableau connects to
- Power BI: connect Power BI to IOMETE as an alternative BI tool