Power BI (ODBC) - Connecting to IOMETE

If you need to connect to the default Spark Catalog, and work with Iceberg and Metastore tables, please refer to Power BI documentation. However, if you need to connect to an additional Spark Catalog, you must use the ODBC driver.
This guide will show you how to connect Power BI to IOMETE using the ODBC driver.
Let’s get started.
Create ODBC Data Source
First, you need to create an ODBC Data Source. Go to the Windows search bar and type ODBC Data Sources and click on the ODBC Data Sources (64-bit).
This will open the ODBC Data Source Administrator.
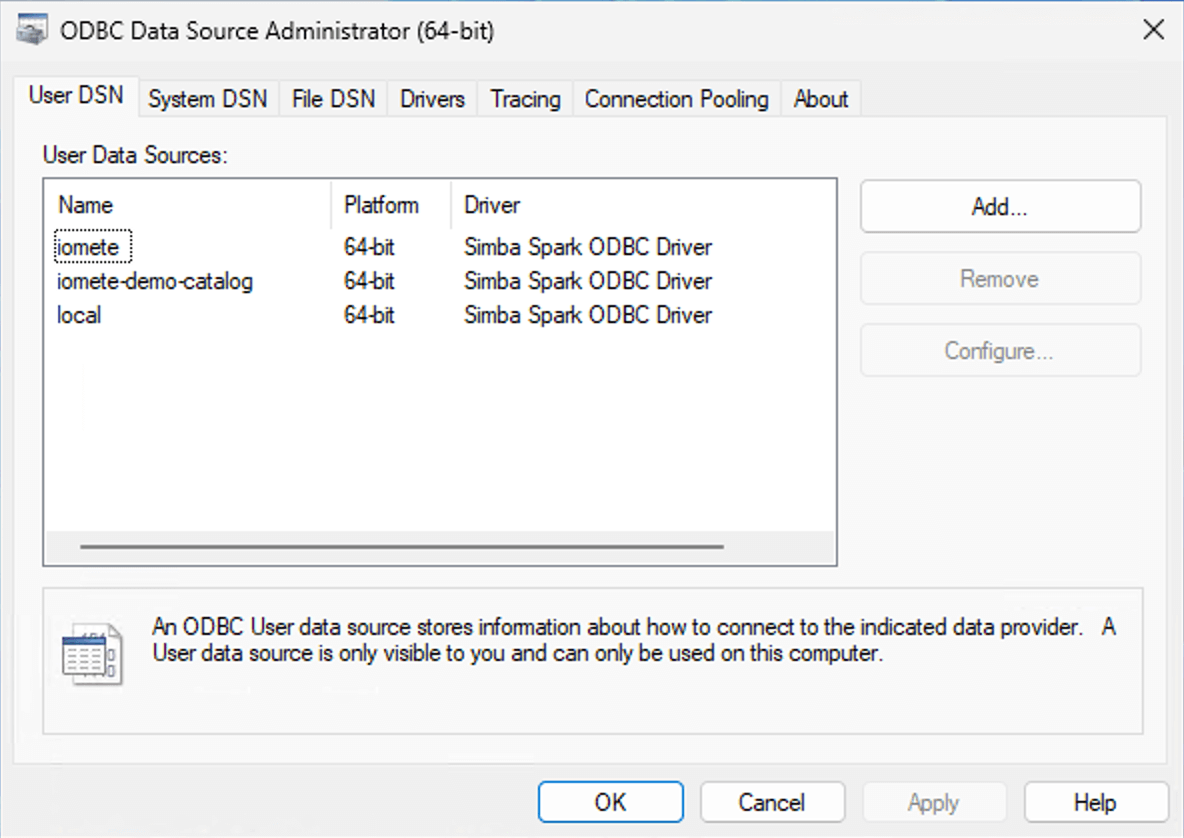
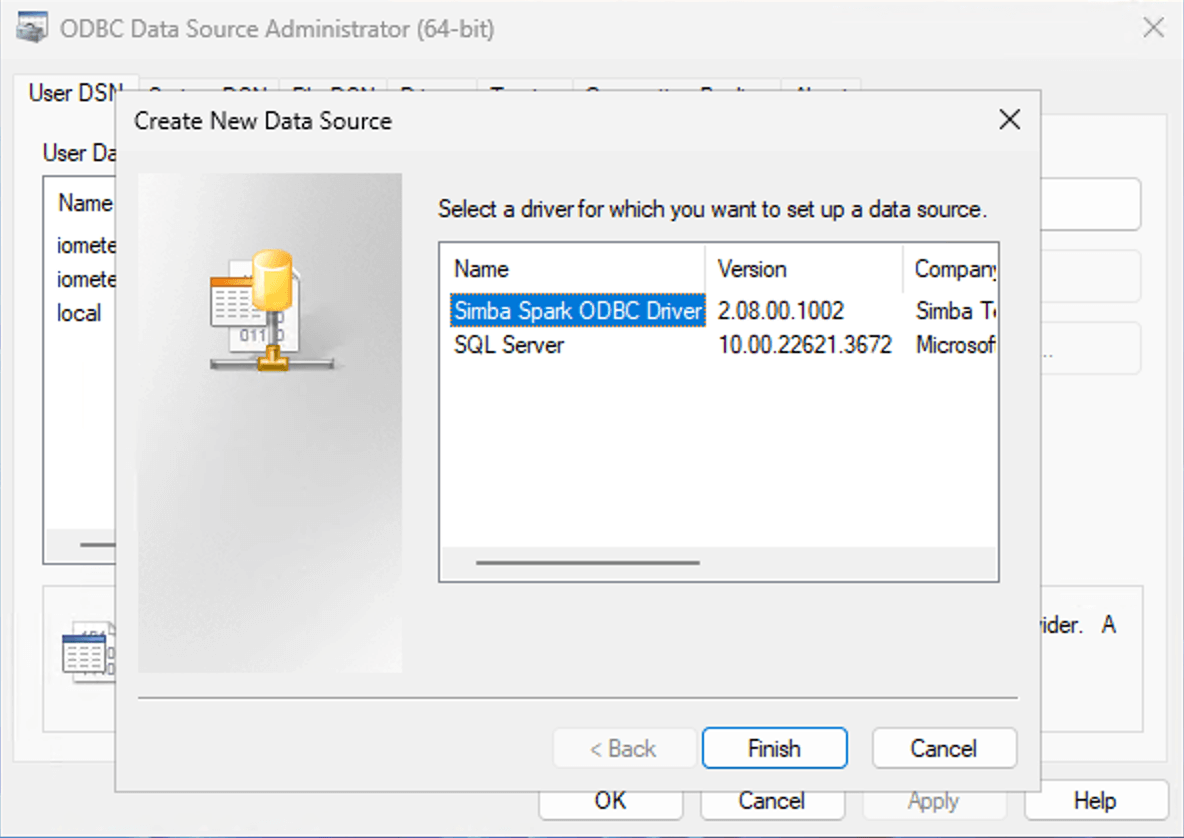
Click on the User DSN tab and then click on the Add button. Choose the "Simba Spark ODBC Driver" from the list of drivers and click Finish.
If you don't see the driver in the list, you can download it from the Simba website or contact us for assistance.
Data Source Details
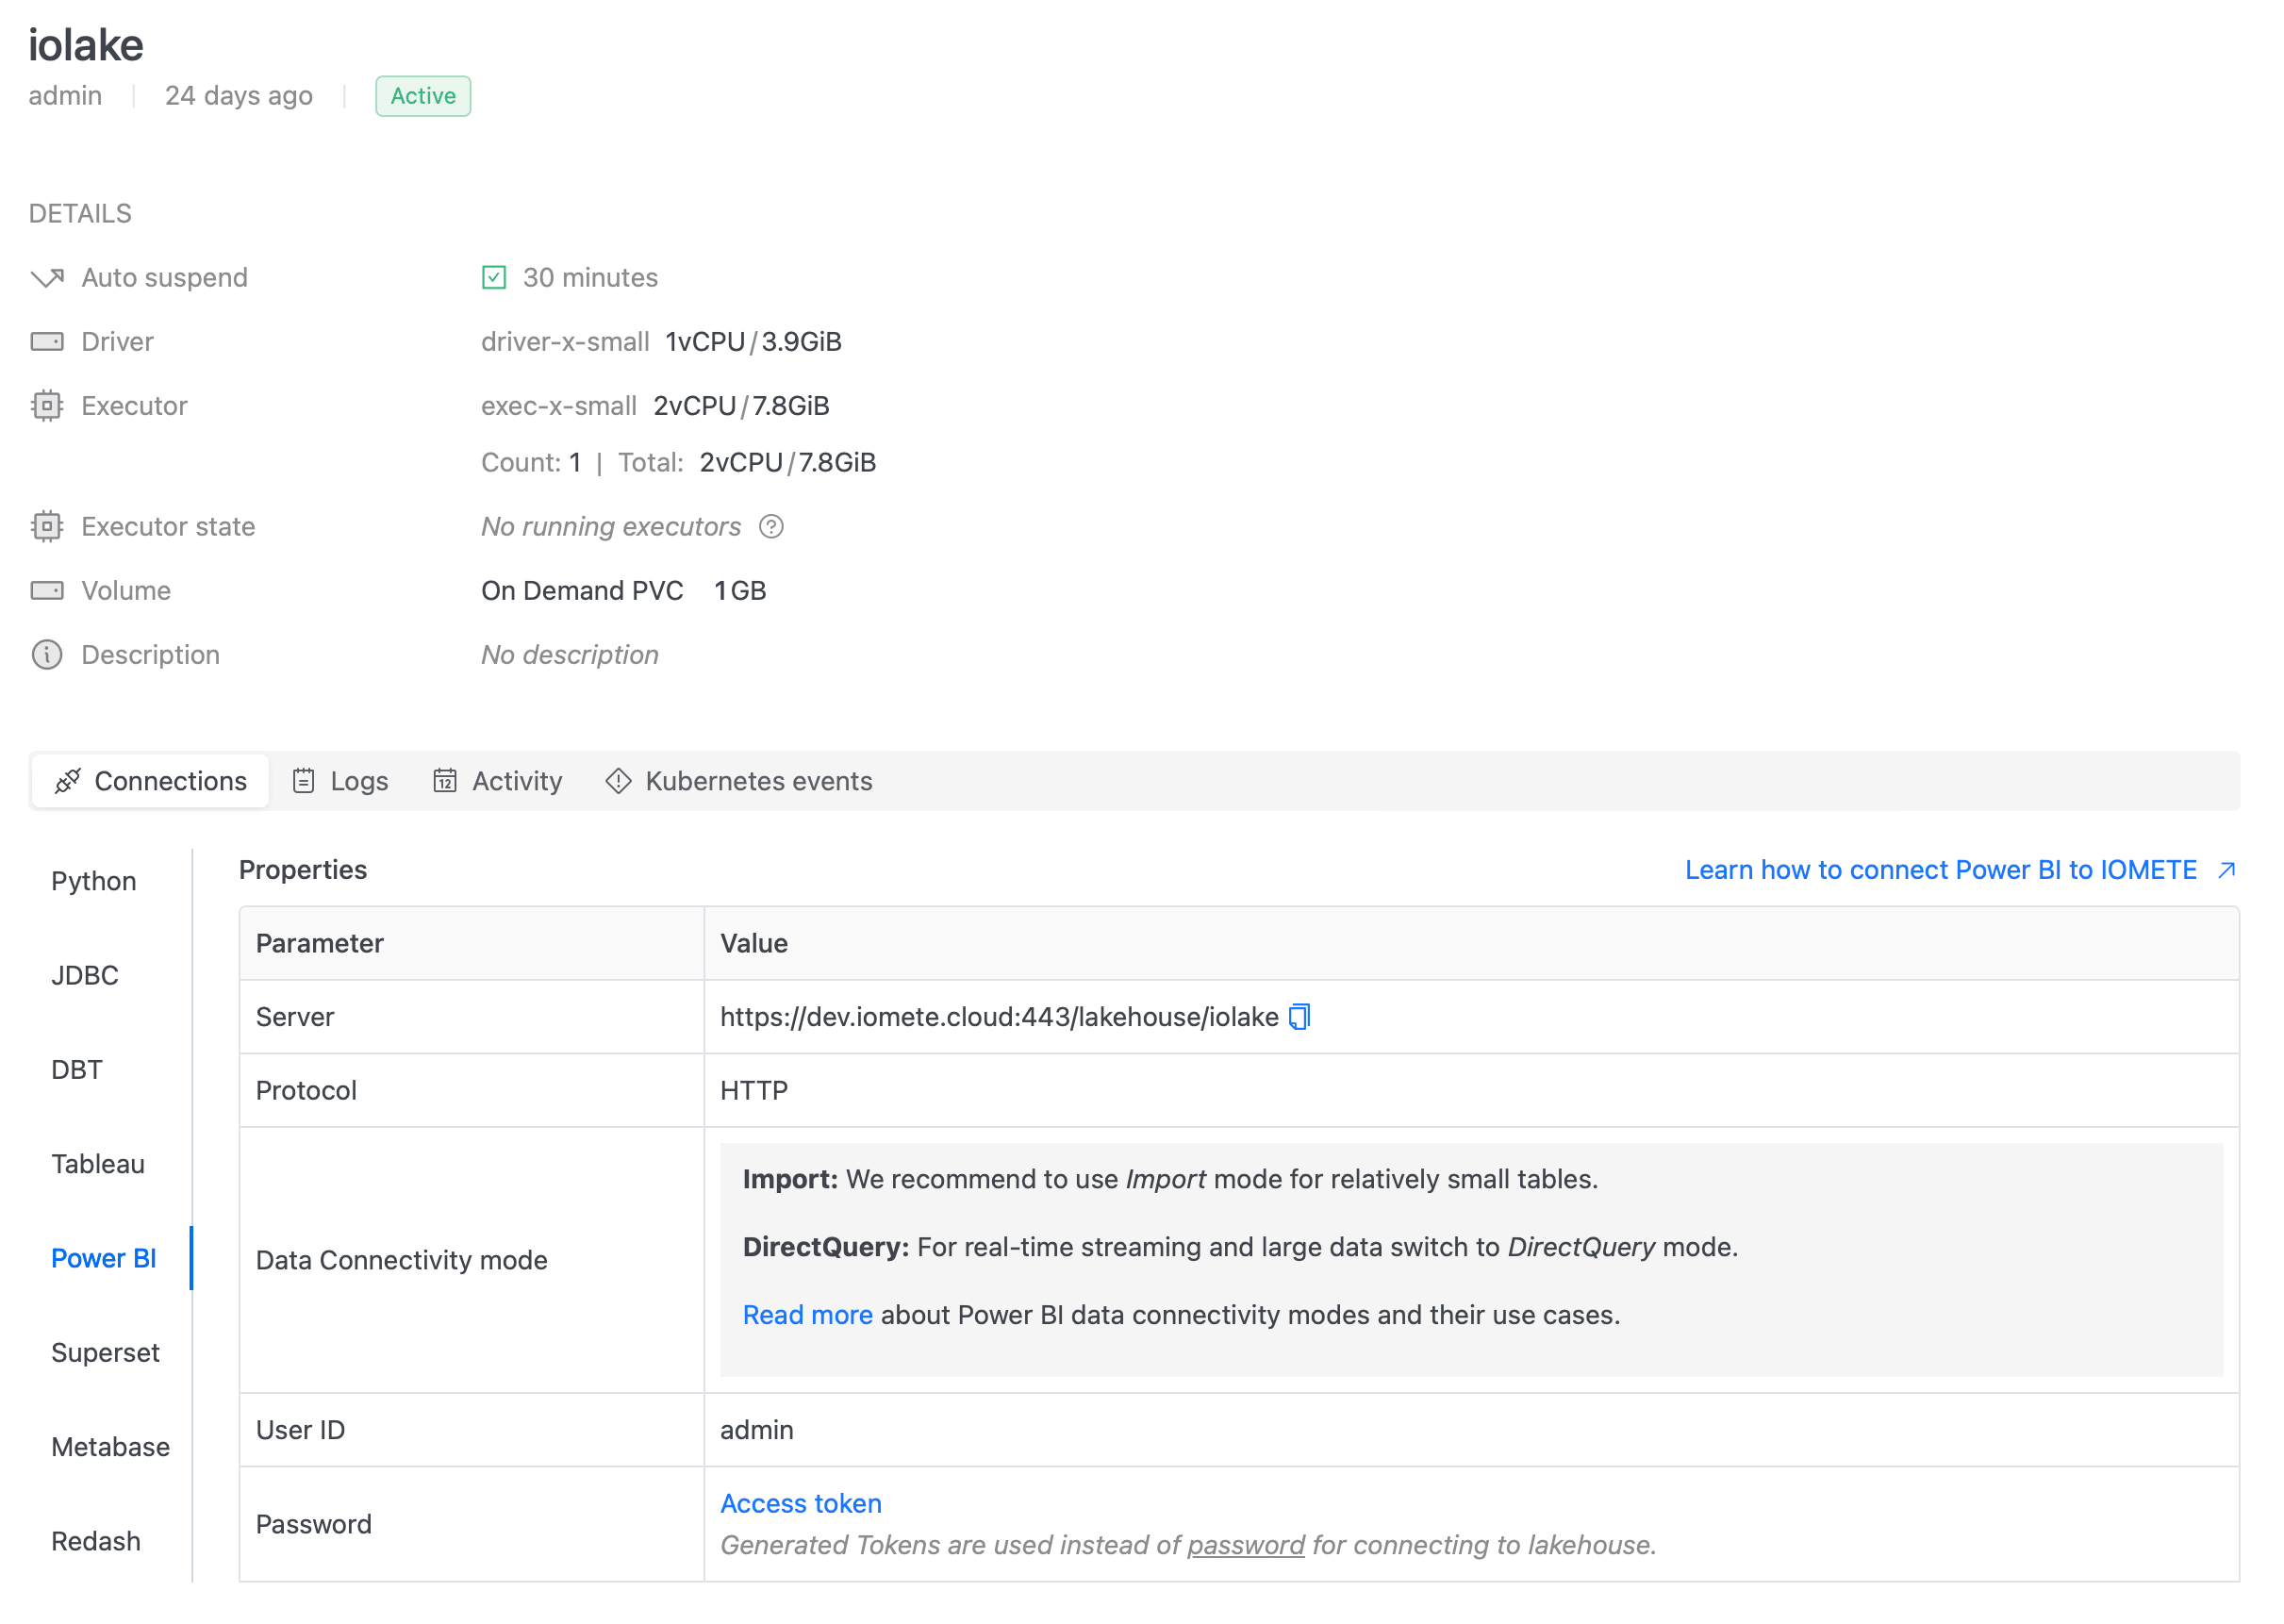
Please refer to the IOMETE Platform to get the connection details. Go to the Lakehouse you want to connect and open Power BI tab in the Connections section.
Now, fill in the connection details in the ODBC Data Source Administrator as shown below.
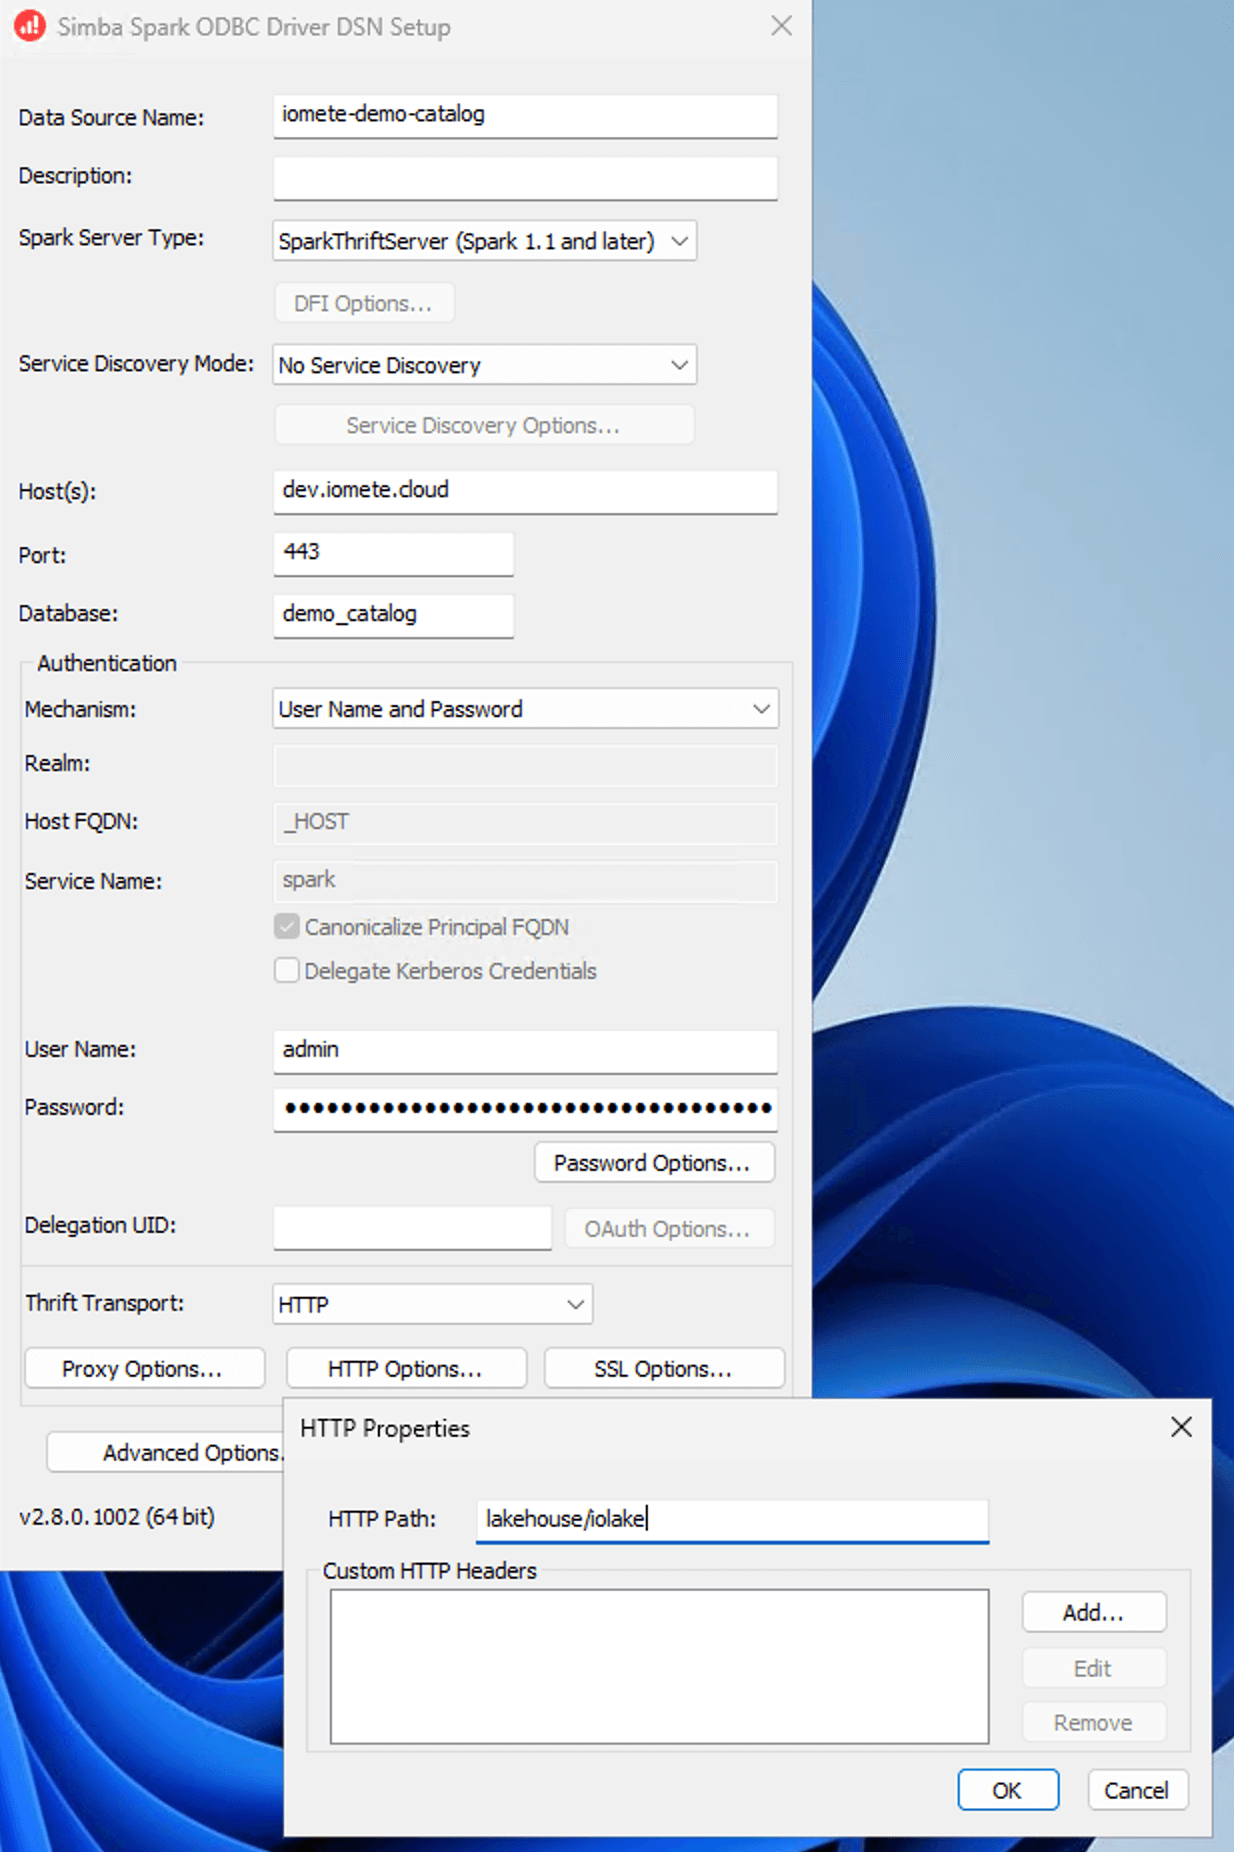
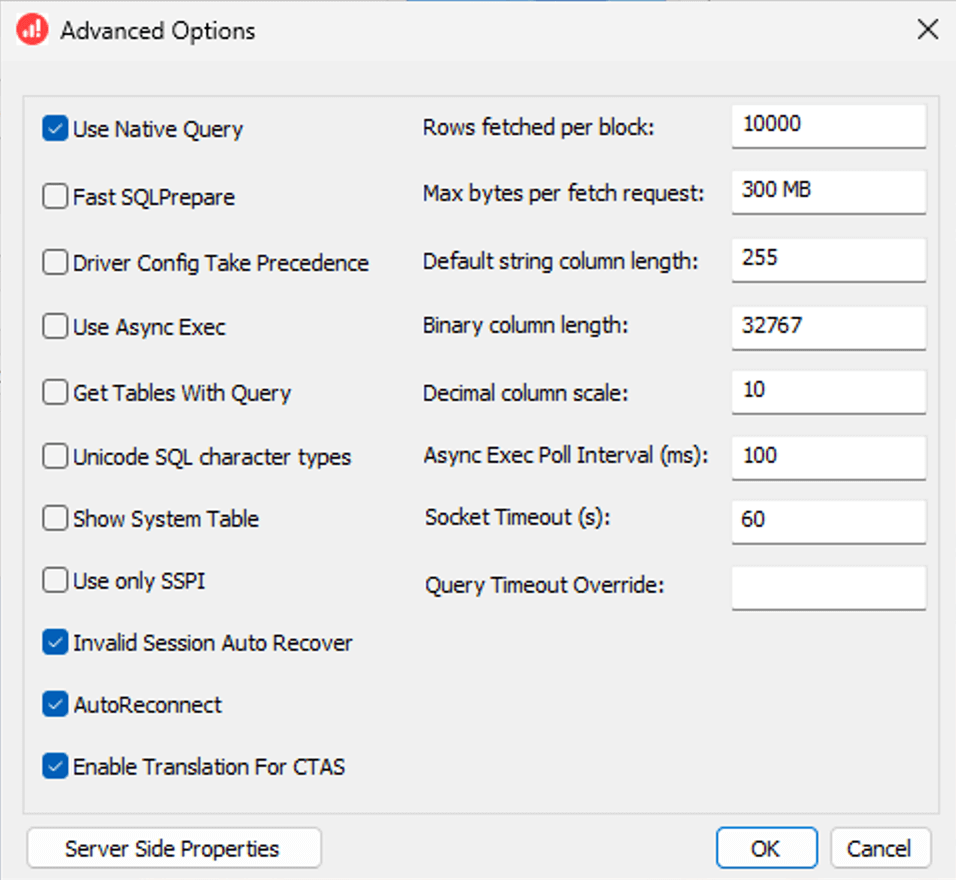
Optionally, you can click on the Advanced button and add additional properties.
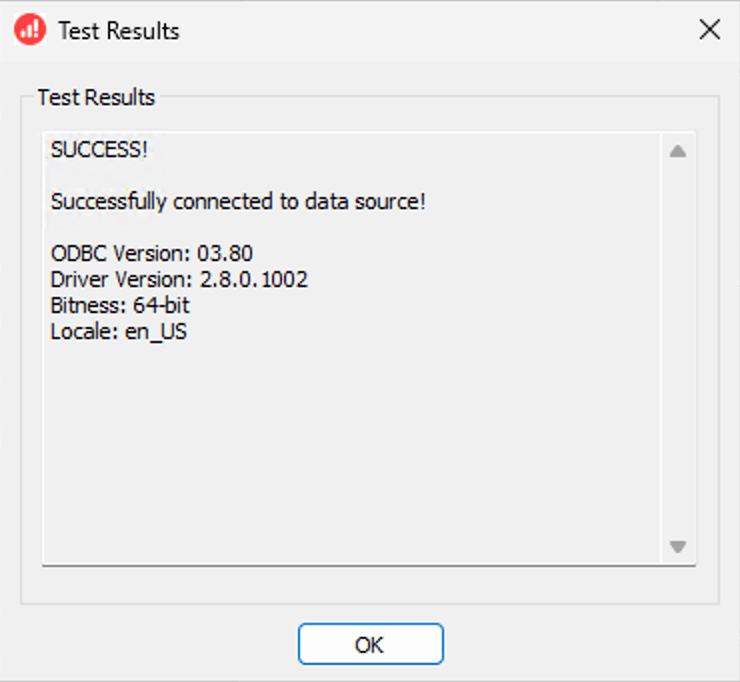
Finally, click on the Test button to verify the connection. If everything is correct, you will see a success message.
Connecting Power BI
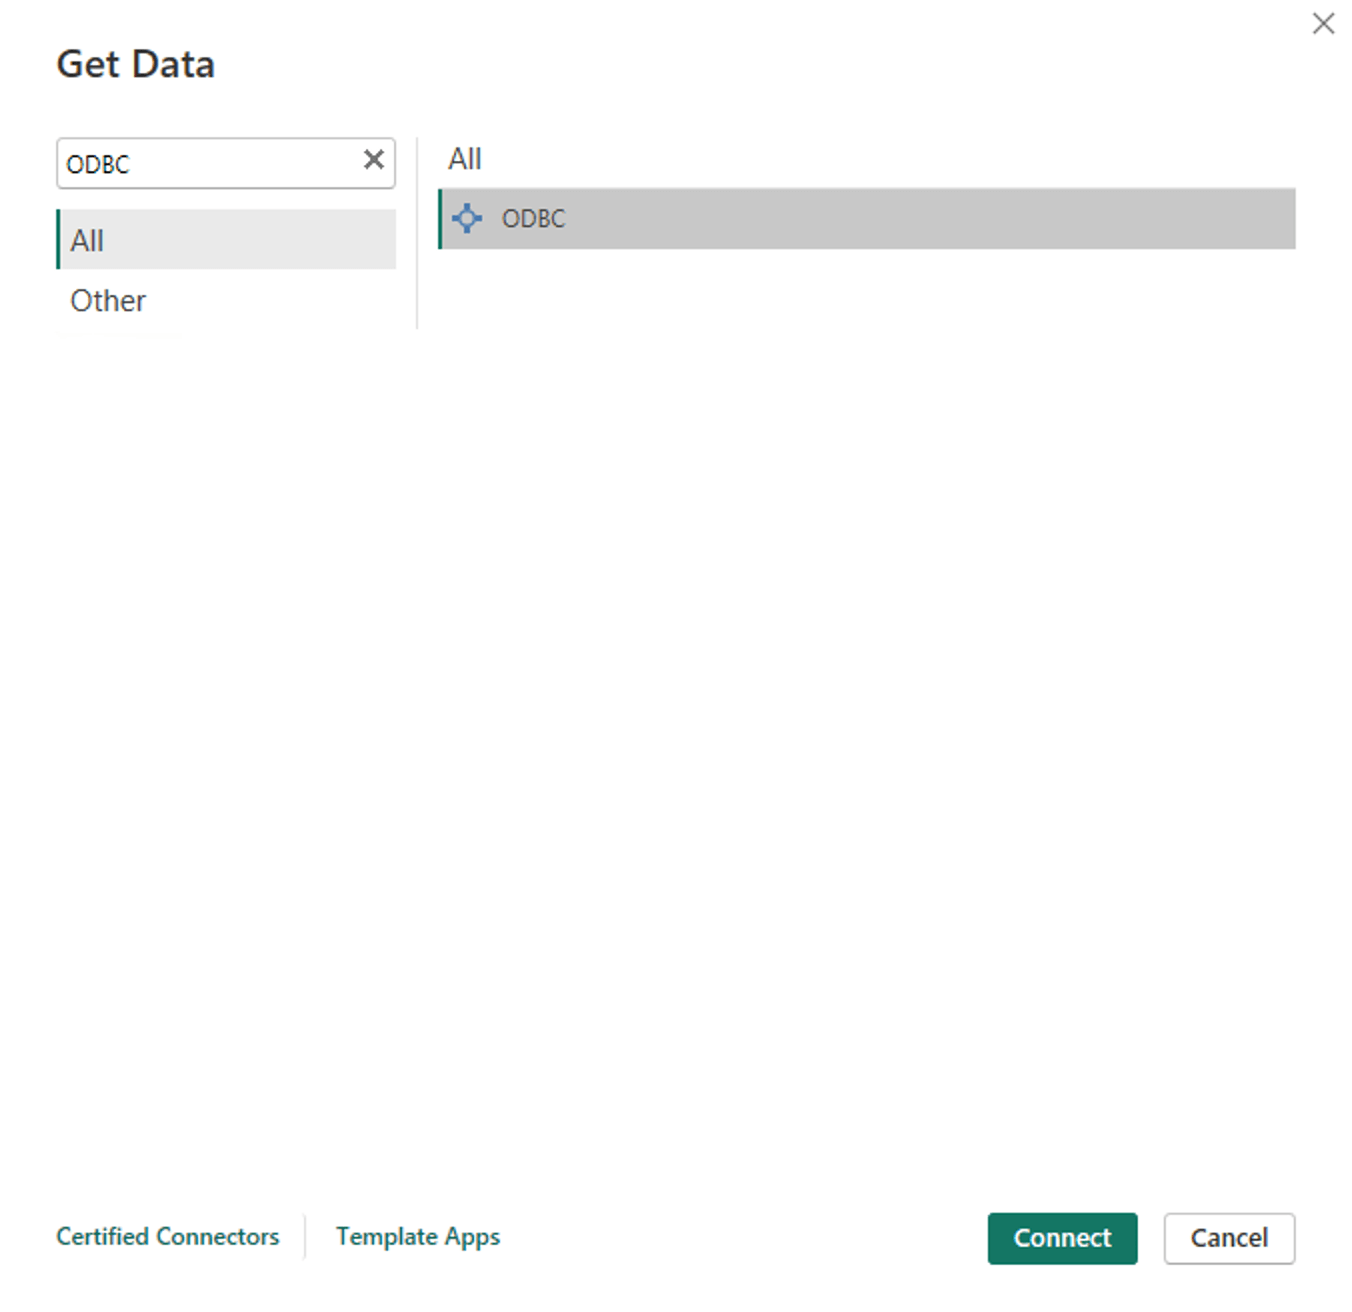
Click “Get Data” from the menu and select ODBC as a data source.
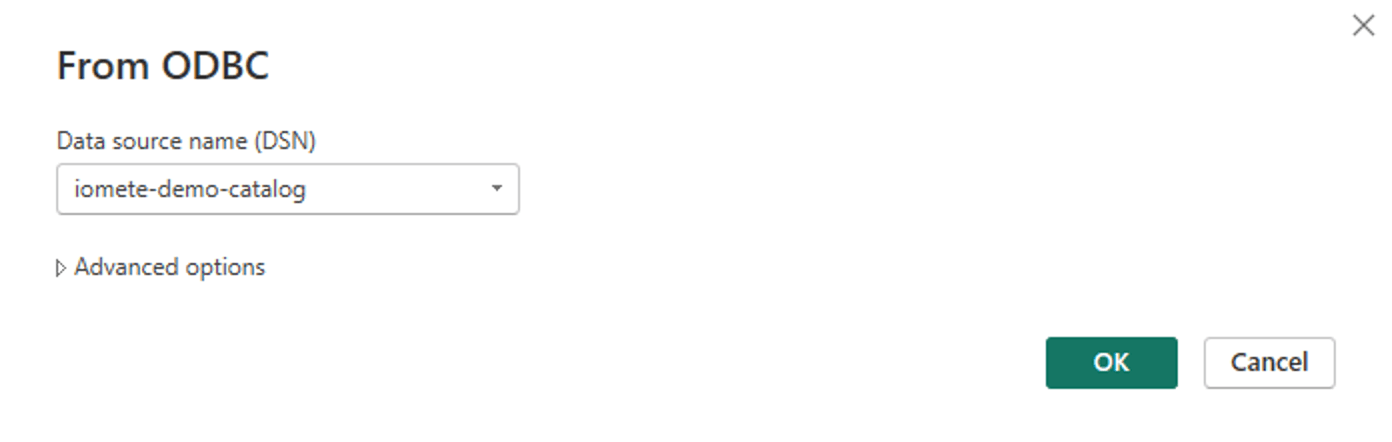
Then choose the ODBC Data Source you created and click Connect.
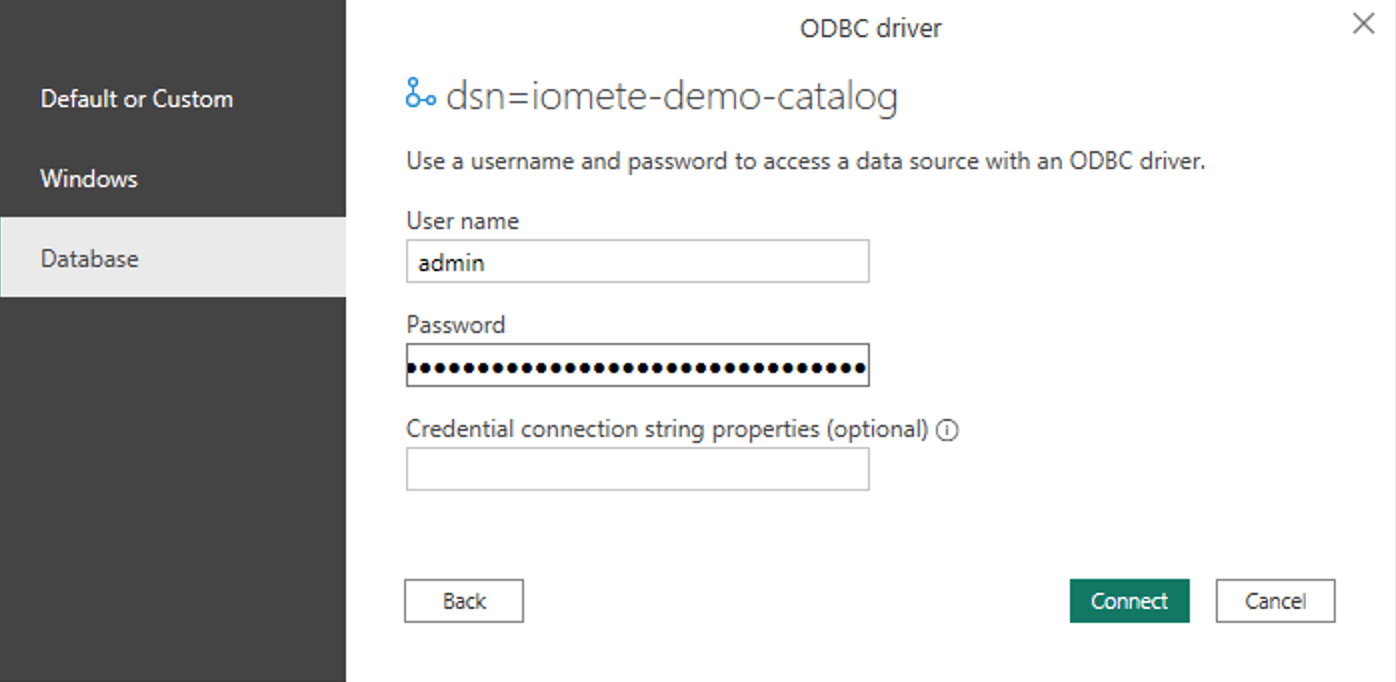
After clicking the OK button, you will be directed to an authentication page where you can establish a connection and input your username and password.
You will need to create a Personal Access Token and use as the password.
Now in the next step, you will see your databases and tables. Select the tables you want to use in Power BI.
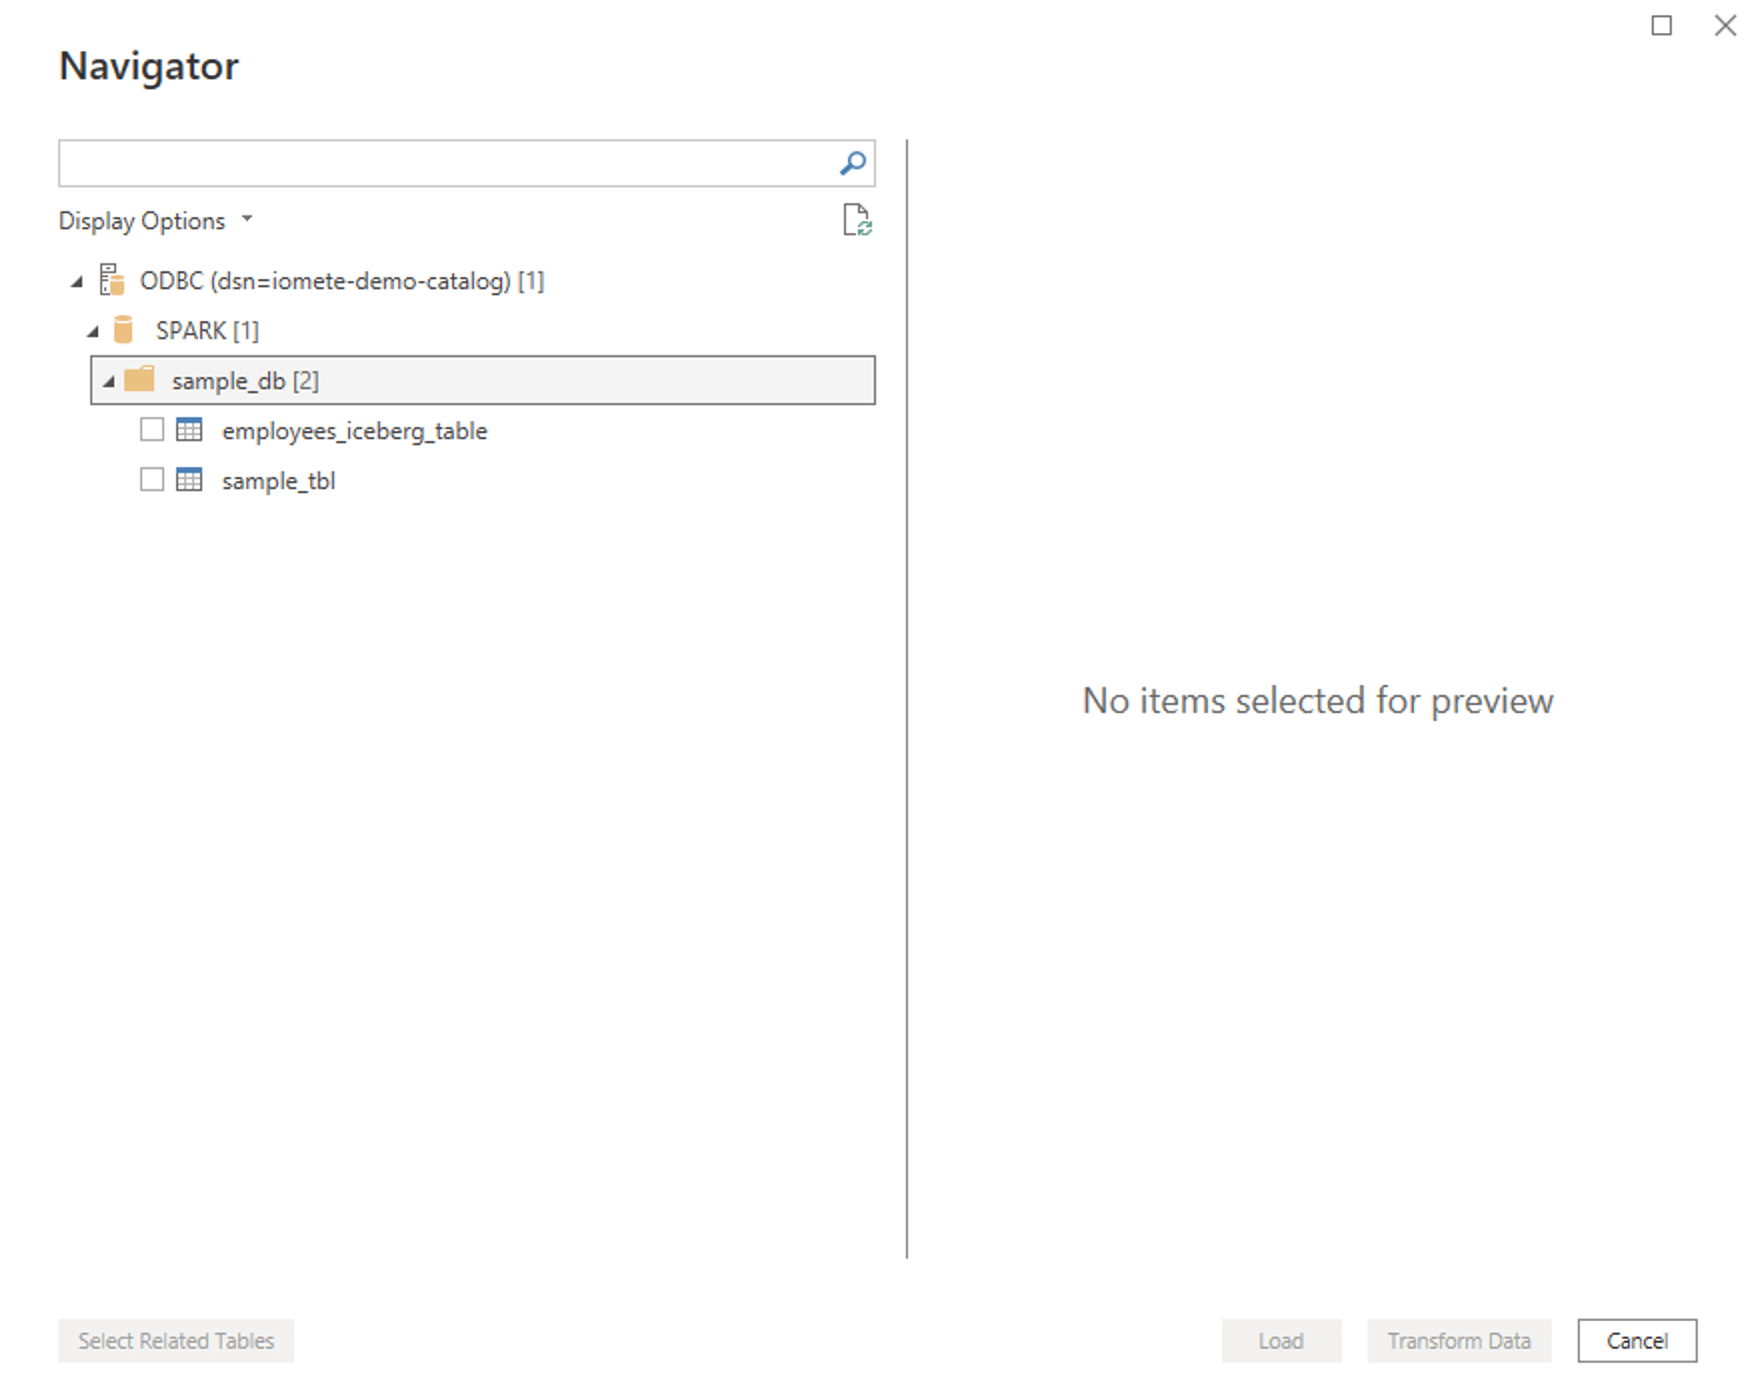
You will have to wait a couple of minutes before Power BI will load the data sets.
Congratulations, you have successfully connected Power BI to IOMETE.
From this point, you can create, save and publish your reports. You can learn how to create dashboards and detailed visualizations with Power BI resources.
Thanks.