Starting with Notebook
Jupyter Notebook is a powerful tool for interactive data exploration and prototyping. By connecting to IOMETE's Jupyter Gateway you will be able to explore and analyze data stored in IOMETE's data lake directly from your local environment.
Installing Jupyter Clients
There are a lot of Jupyter clients that you can use to connect to Jupyter Gateway. To quickstart we will provide installation instruction for official web-based client Jupyter Lab. For more detailed information please refer to official website.
To install Jupyter Notebook on your local machine, you can use pip (Python Package Installer). Open your terminal or command prompt and type the following command:
pip install jupyterlab
Once the installation is complete you will need to connect to Jupyter Gateway provided by IOMETE. Please follow the instructions below.
P.S: We recommend to use Visual Stuido Code as your Jupyter Client. For more information read this.
Connecting to Jupyter Gateway
Jupyter Gateway is used to manage Jupyter kernels and provide access to remote kernels.
To connect to a Jupyter Gateway, you will need to specify the gateway URL and token.
Go to IOMETE Console app → Notebook menu → Copy connection string as in screenshot below

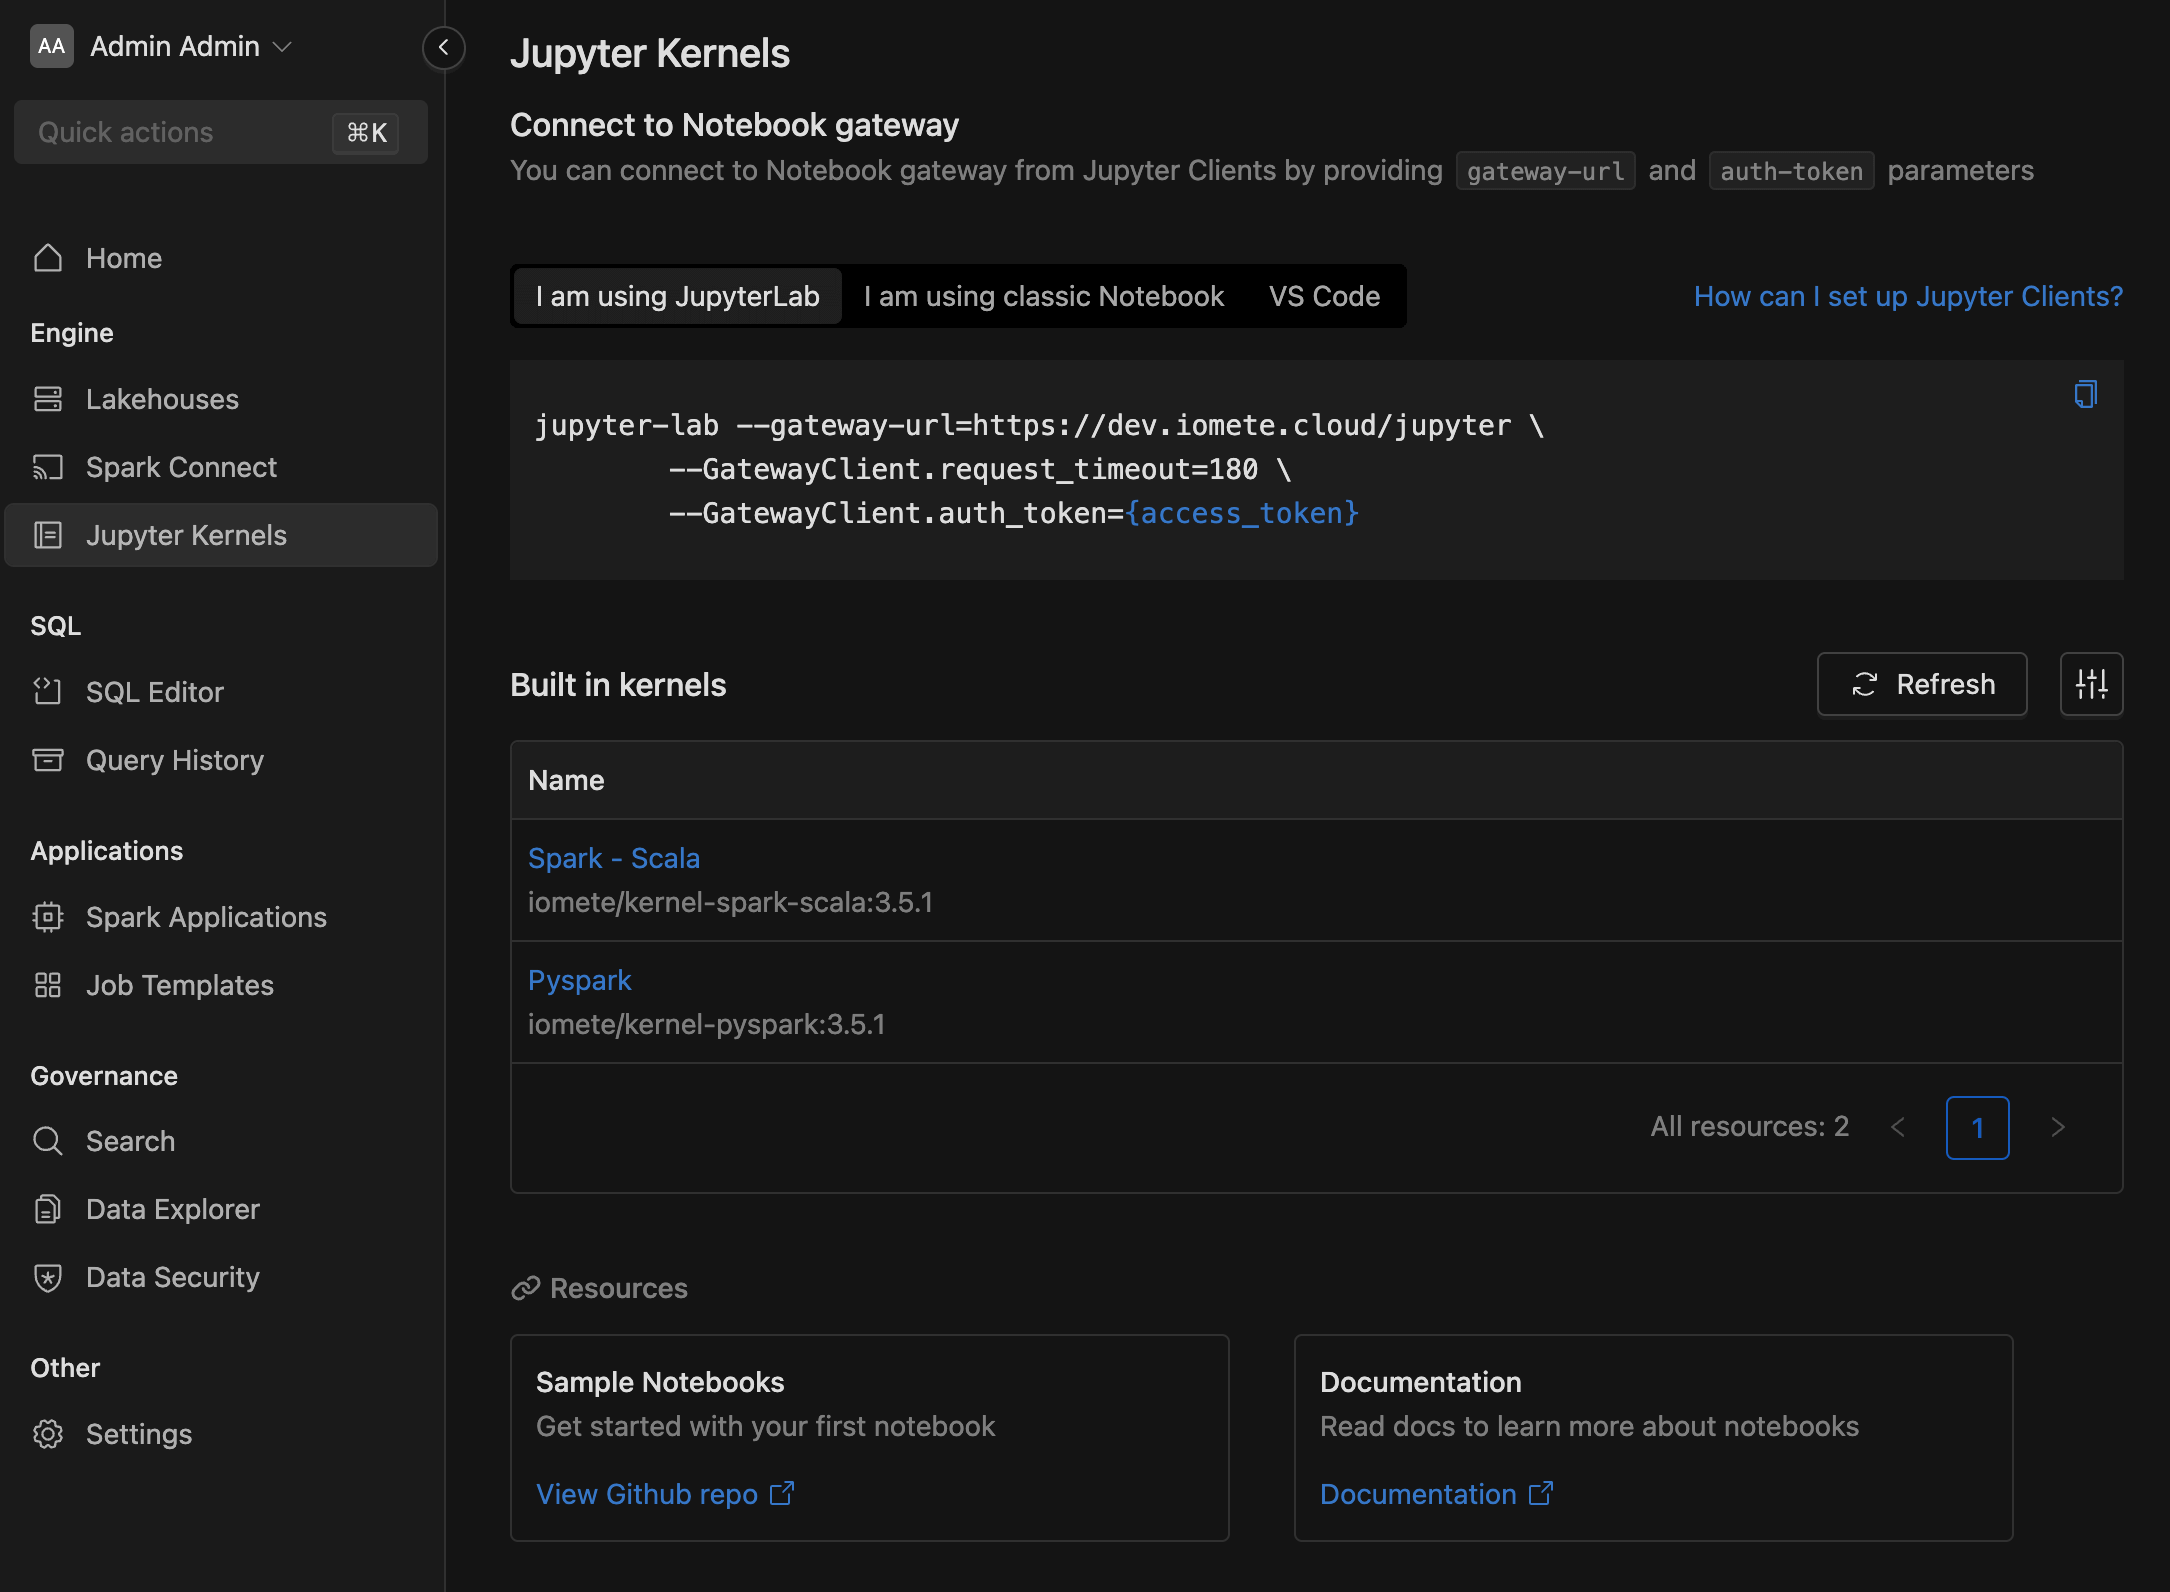
The --gateway-url is different for each workspace.
Below you can find a template for connection string depending on your client.
Jupyter Lab
Replace values in the template. You can find them in your IOMETE Console app.
jupyter-lab --gateway-url=GATEWAY_URL \
  --GatewayClient.request_timeout=180 \
  --GatewayClient.auth_token=TOKEN
Visual Studio Code
Replace values in the template. You can find them in your IOMETE Console app.
https://GATEWAY_URL/?token=TOKEN
Kernels Overview
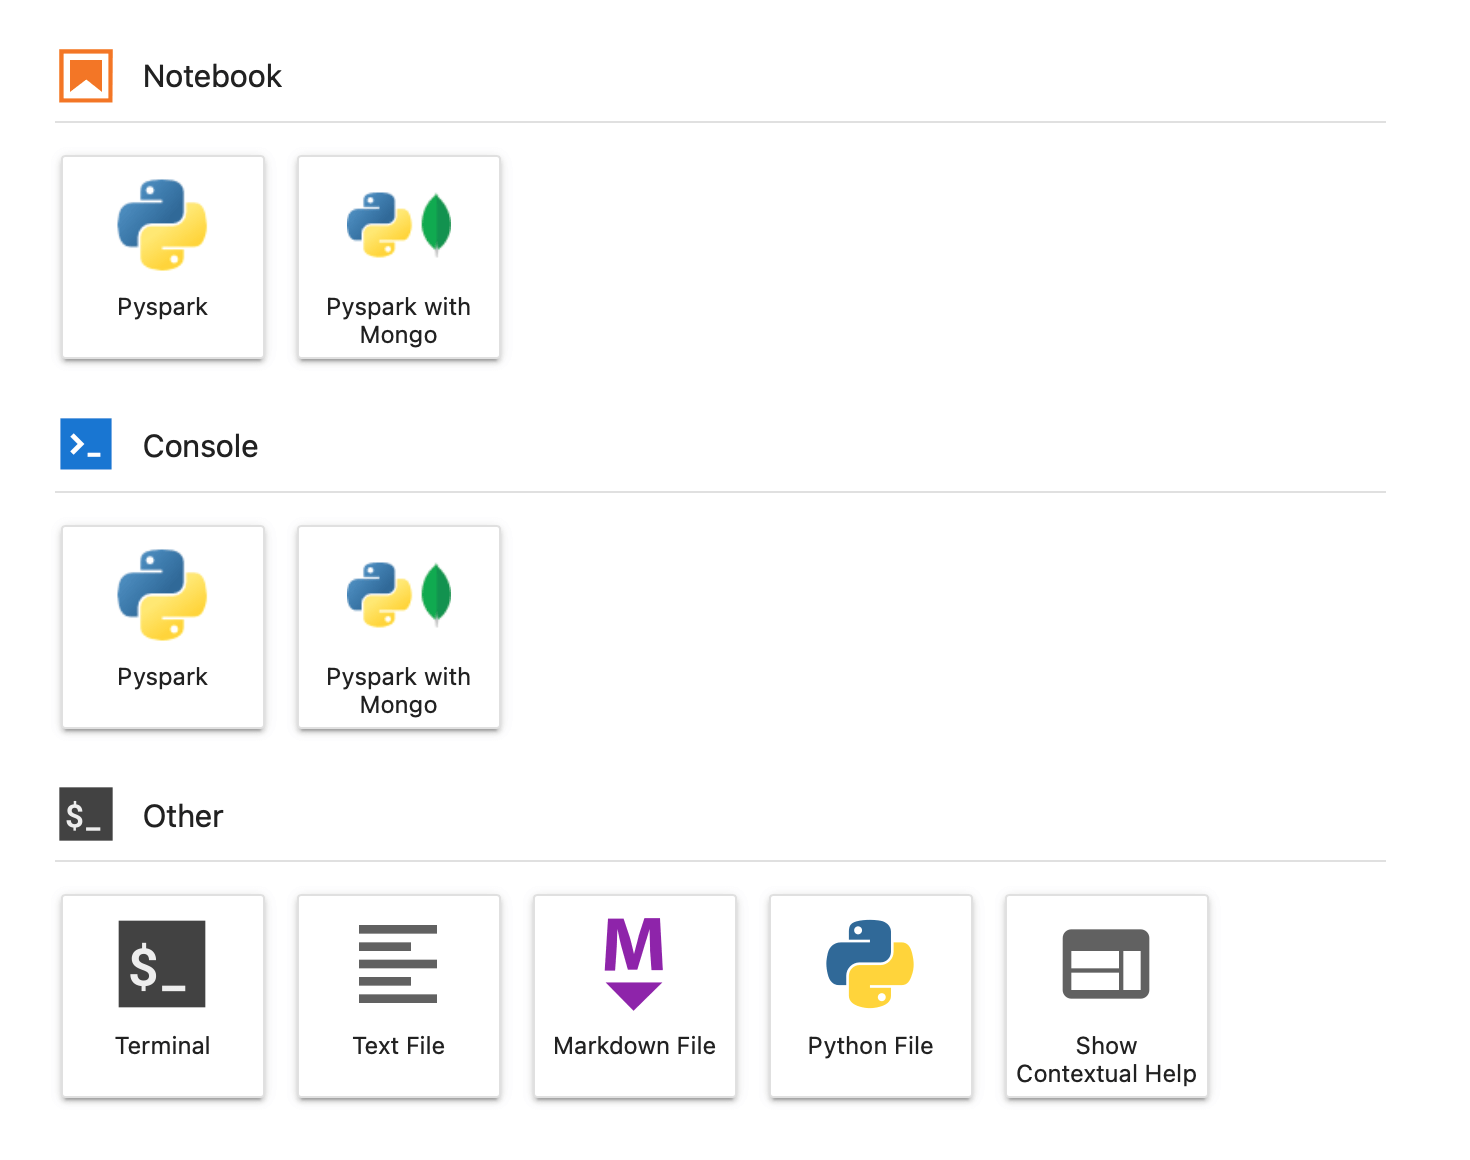
Currently IOMETE supports 2 python-based kernels. Creating custom kernels will be available soon.
- Pyspark Kernel
- Python Kernel with pre-intsalled Mongo libraries
When starting/selecting a kernel the Spark driver will be deployed in the background. This process may take up to 2 minutes. Please be patient. You can track the status of kernel from client UI or from IOMETE Console app under the section "Active Kernels".
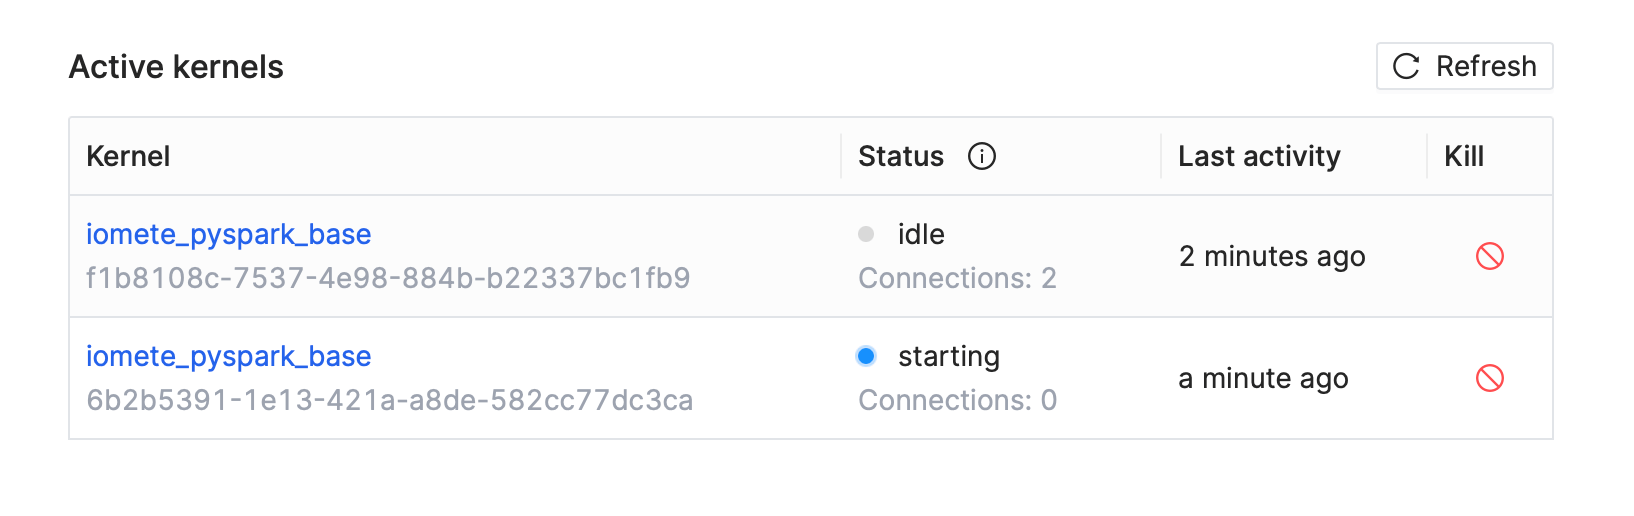
By default kernels are terminated after closing the client. You can do it manually from IOMETE Console app.
For cost-saving purposes it is strongly recommended to make sure that you closed the client, after finishing your job, and no kernels are running.
Accessing SparkSession object
To access the SparkSession in Python code, you can use the SparkSession.builder method to create a new session. Once you have a session, you can use it to create DataFrames, read data from various sources, and execute SQL queries.
For example, you can use the following code:
from pyspark.sql import SparkSession

spark = SparkSession.builder.appName("JupiterClient").getOrCreate()

df = spark.sql("show databases")
df.show()
Customizing Spark Environment
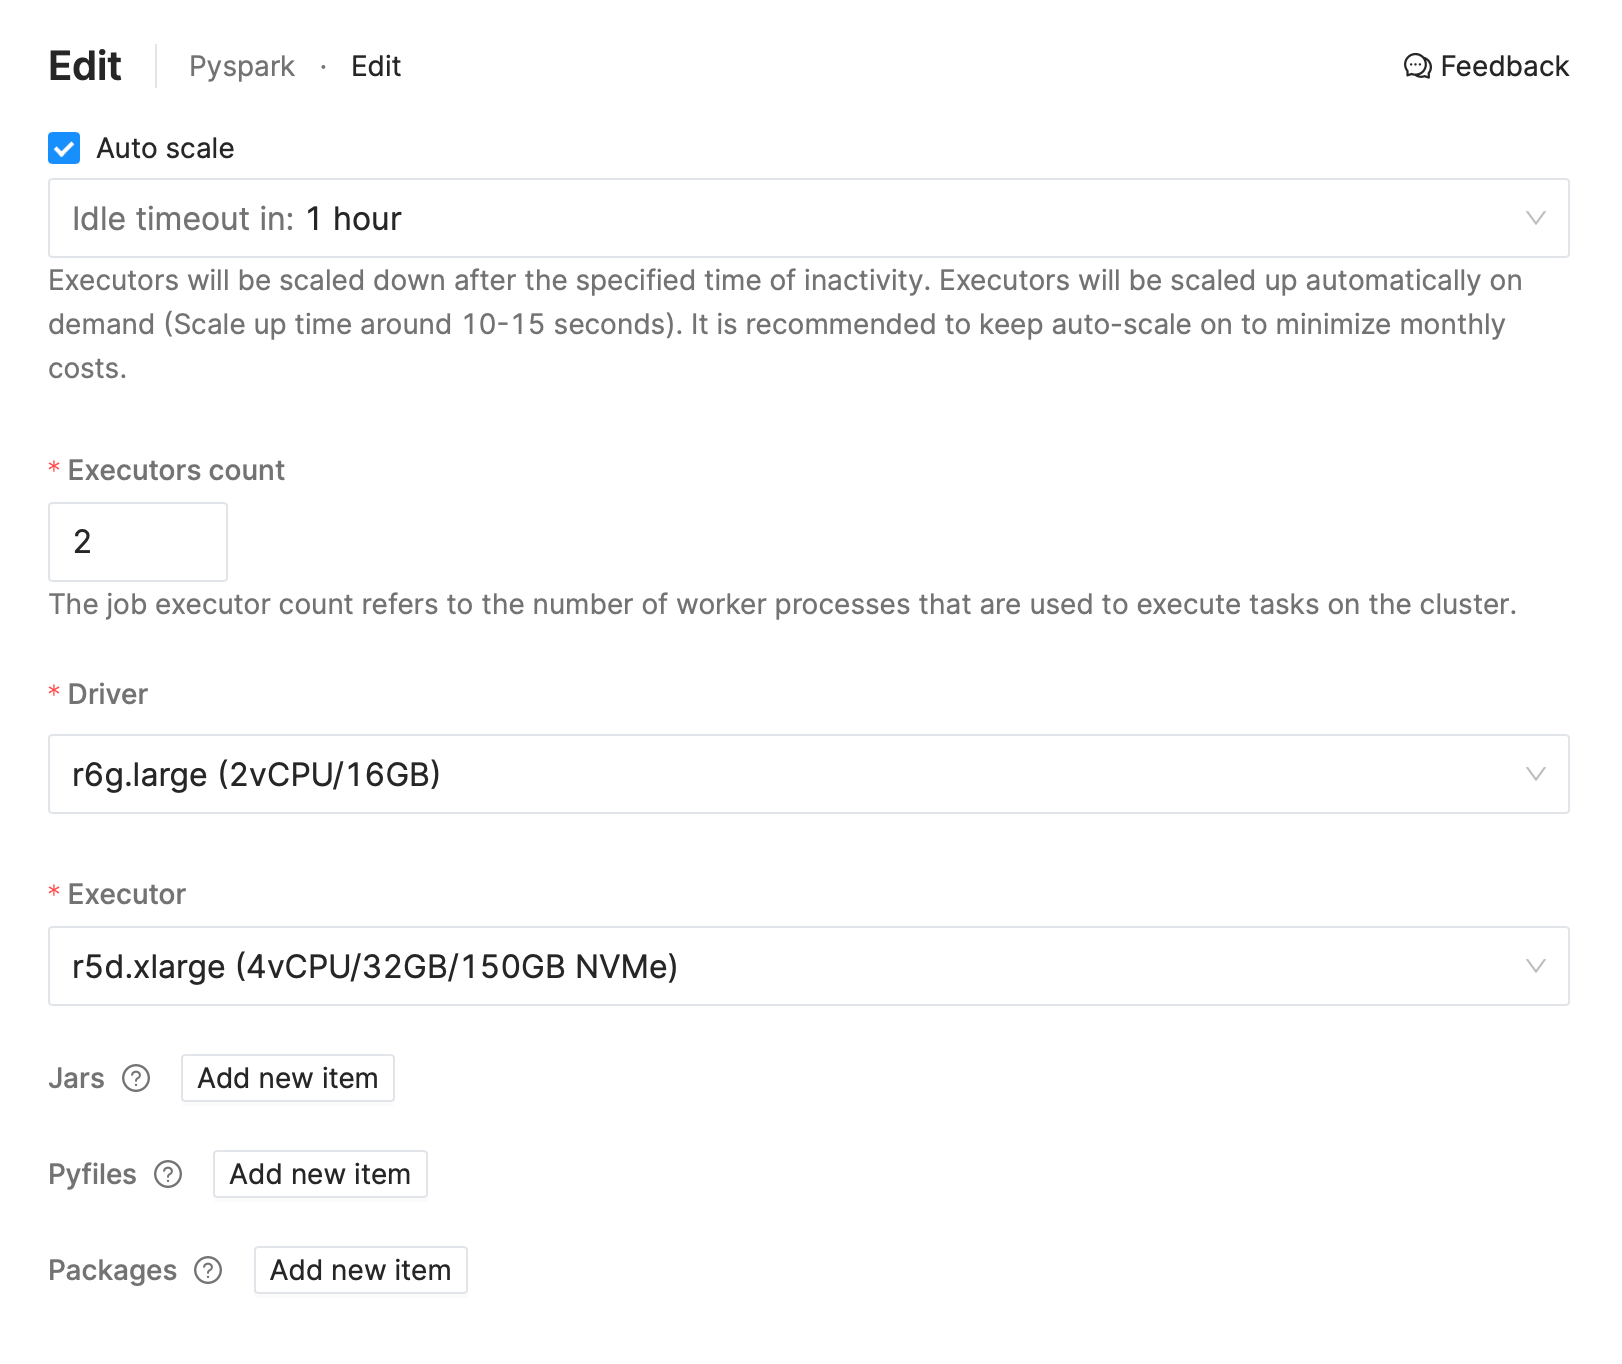
Kernels are basically Spark Applications, you can provide and override various spark parameters (like environment variables, executors count, dynamic allocation, etc).
To customize the Spark environment in Jupyter Notebook go to
IOMETE Console app → Notebook menu → Built-in Kernels → Select kernel → Edit
Another method to modify the Spark configuration properties is directly from python code.
You can modify the Spark configuration properties by creating a SparkConf object and setting
the properties you want to modify. For example, to set the log level to WARN, you can use
the following code:
from pyspark.conf import SparkConf
from pyspark.sql import SparkSession

conf = SparkConf().set("spark.log.level", "WARN")
spark = SparkSession.builder.config(conf=conf).getOrCreate()
But this configuration will only be applied to the current Notebook session.
Installing additional libraries
To install and use additional Python libraries in Jupyter Notebook, you can use pip. For example, to install the NumPy library, you can use the following commands (install and load):
%pip install numpy
%load_ext numpy
This will install the NumPy library and its dependencies