SCIM Okta Configuration
This guide provides step-by-step instructions for integrating Okta with SCIM to provision users and groups in the IOMETE Account Console. Follow the steps below to seamlessly configure Okta for SCIM with IOMETE.
Okta SCIM Configuration Steps
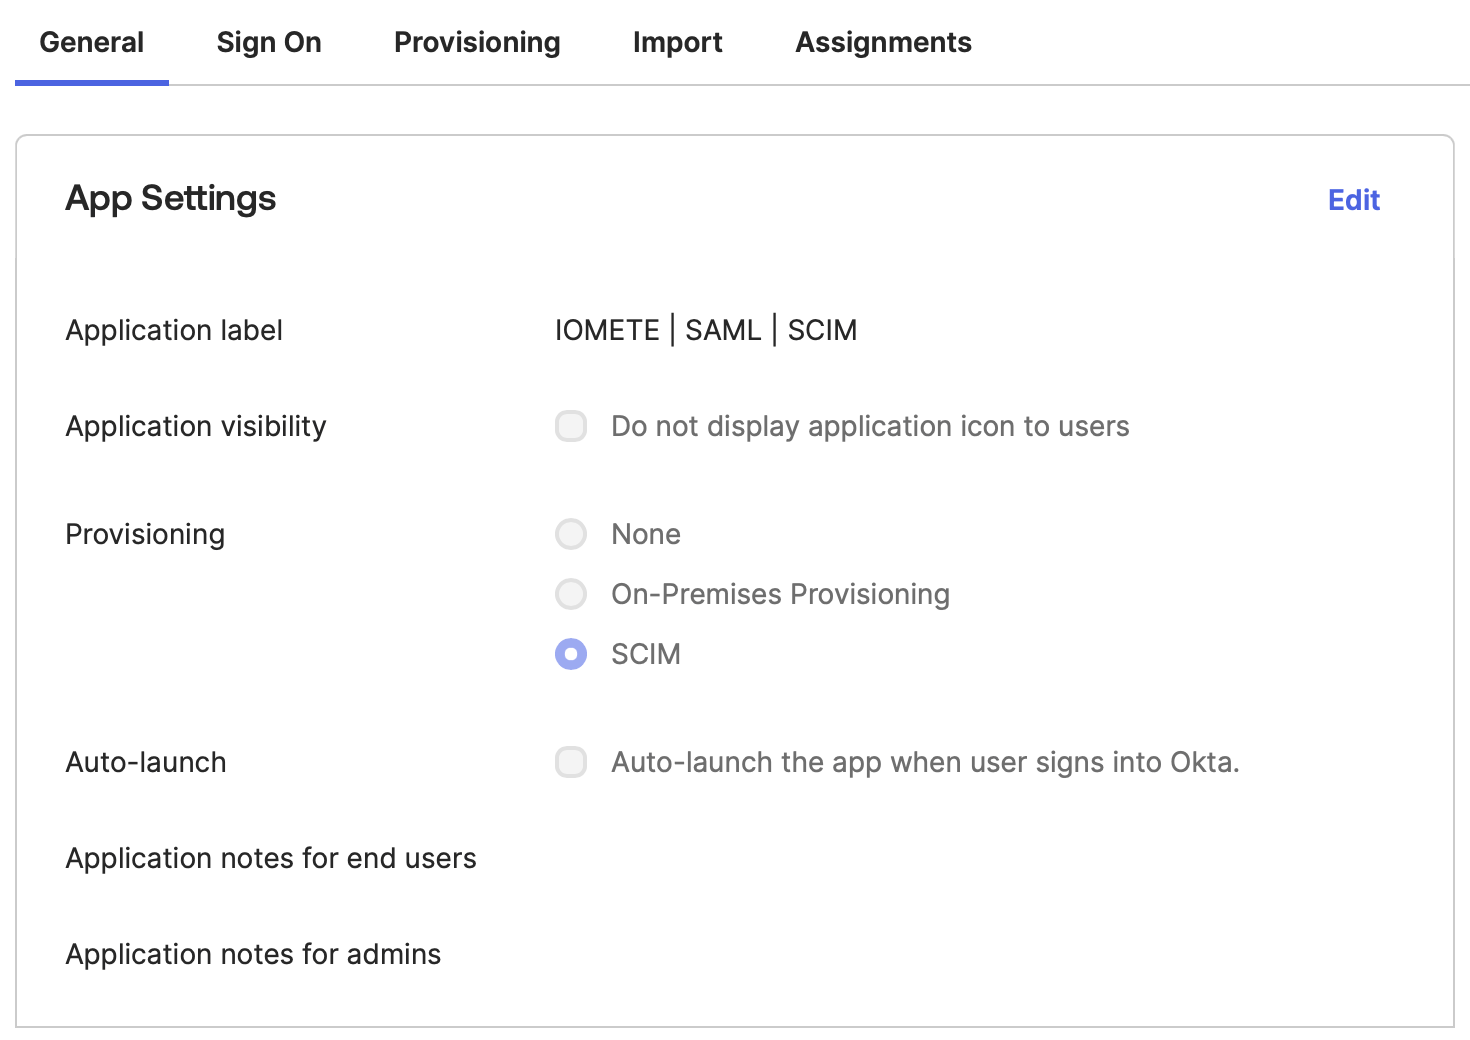
1. Enable SCIM Provisioning
- In
Generaltab of theSAML client you created for IOMETE, editApp Setting. - Select option
SCIMforProvisioning. - Click
Savebutton to enable SCIM Provisioning
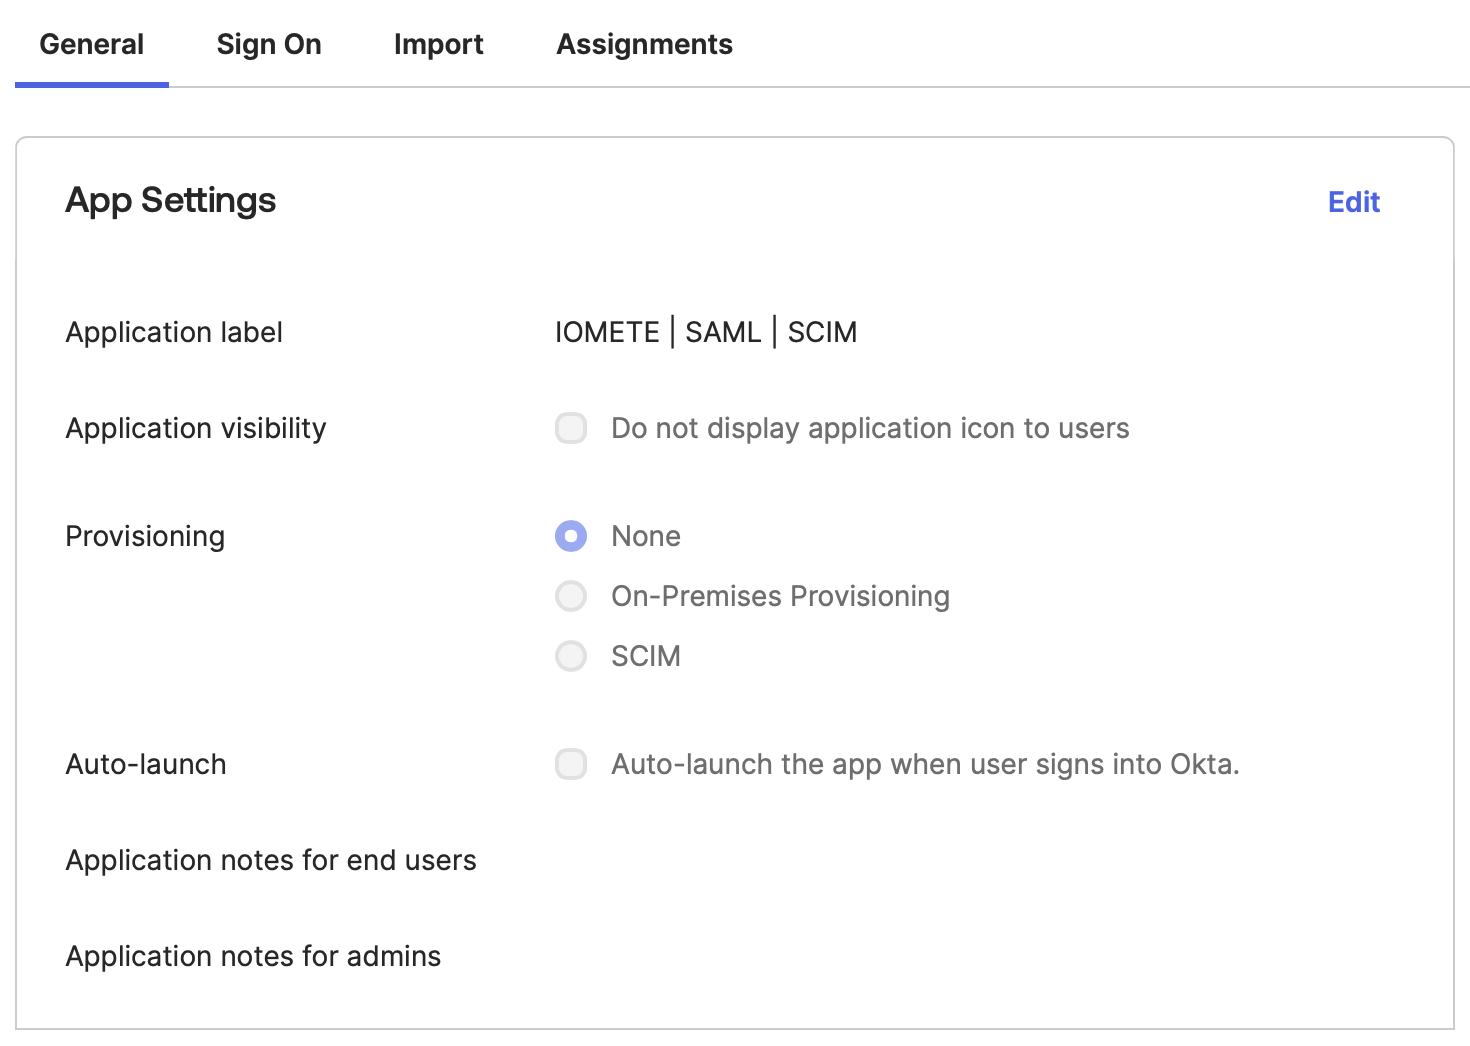
Once saved, a tab labeled Provisioning will appear.
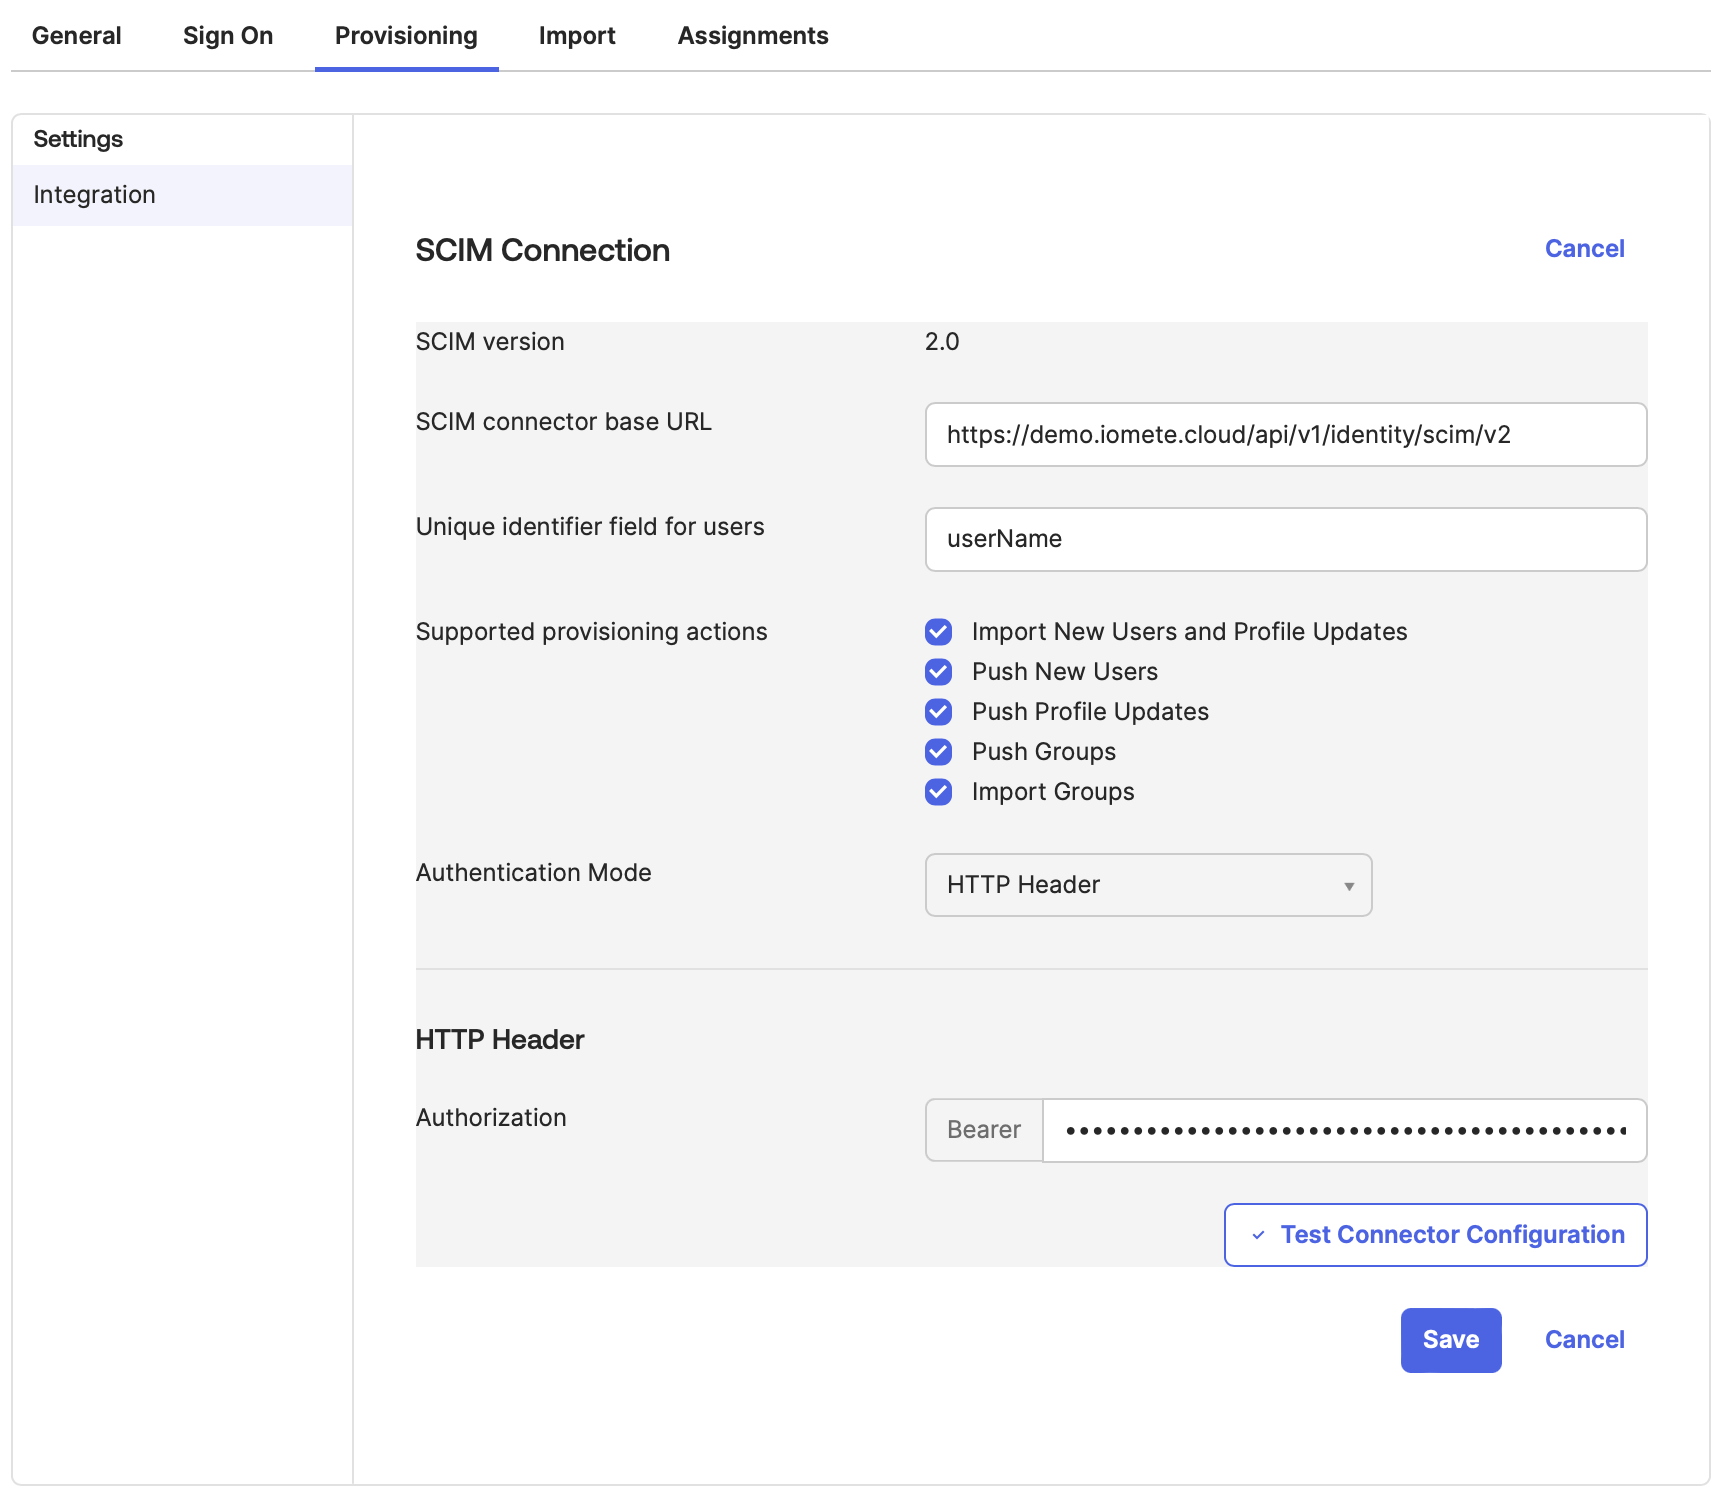
2. Configure SCIM Provisioning
- Go to
Provisioningtab, and clickEditbutton - Ensure all relevant information is entered into the input fields.
- Follow the steps here for a detailed guide on the required inputs and configurations for setting up SCIM.
- Click the
Test Connector Configurationbutton to verify if the configuration is valid. - Close this window and proceed to the next section.
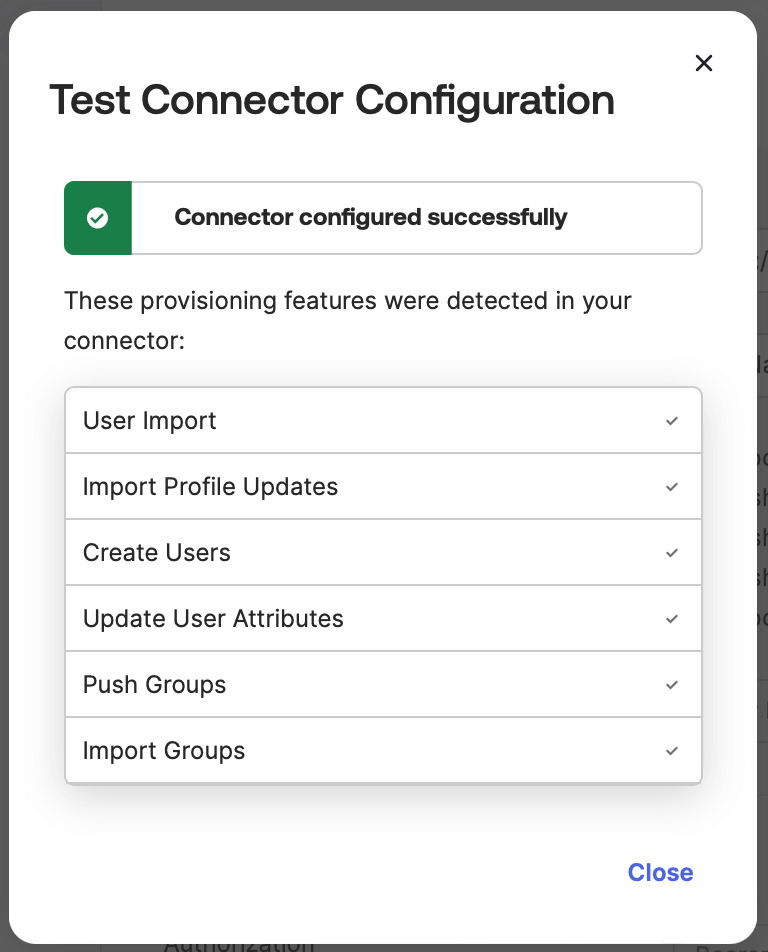
If everything is configured correctly, the window shown in the image on the right will appear.
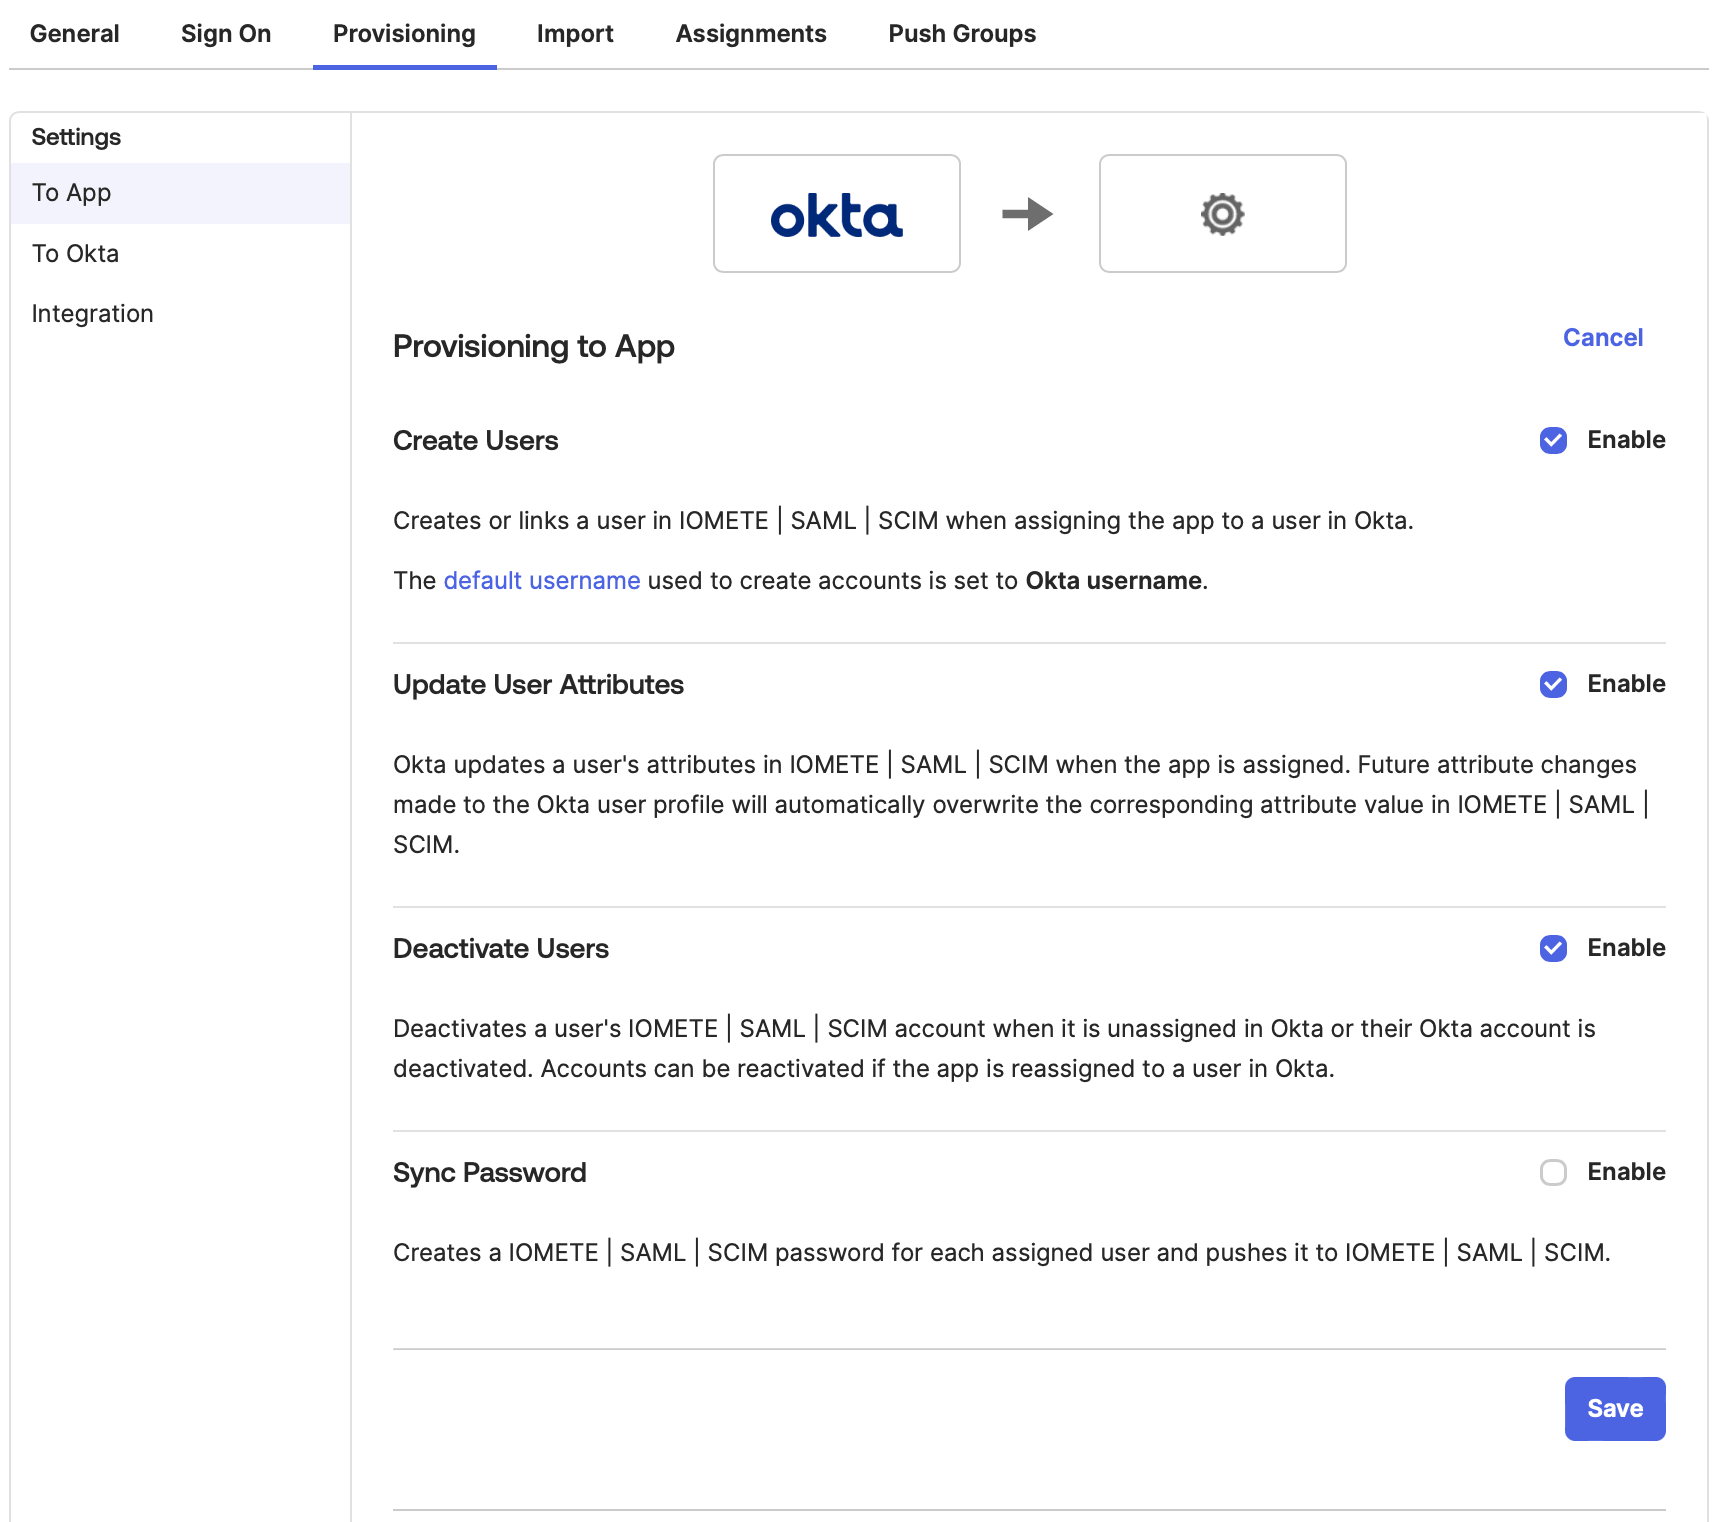
Once everything is set up, check the Enable checkboxes based on the actions you want to provision, as illustrated in the picture below.
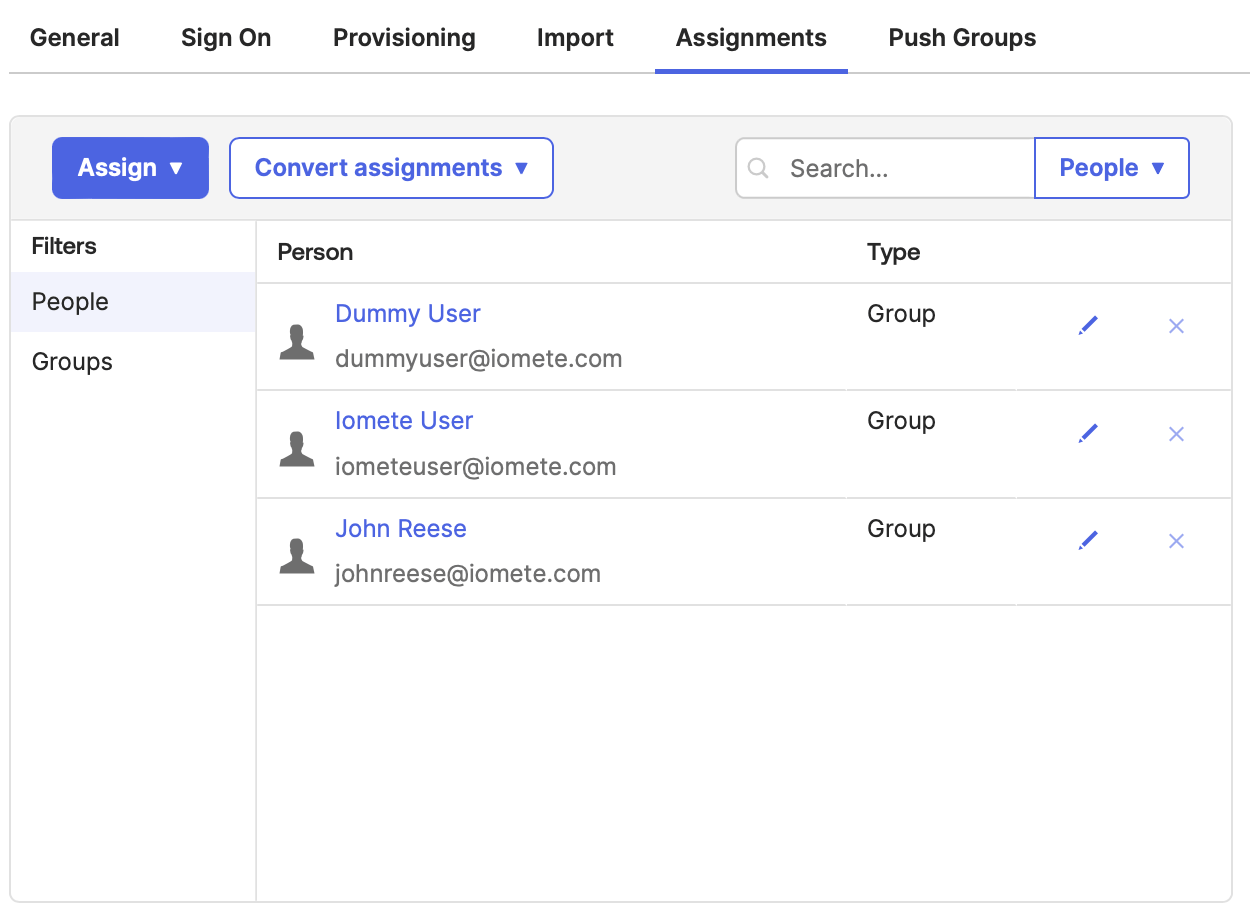
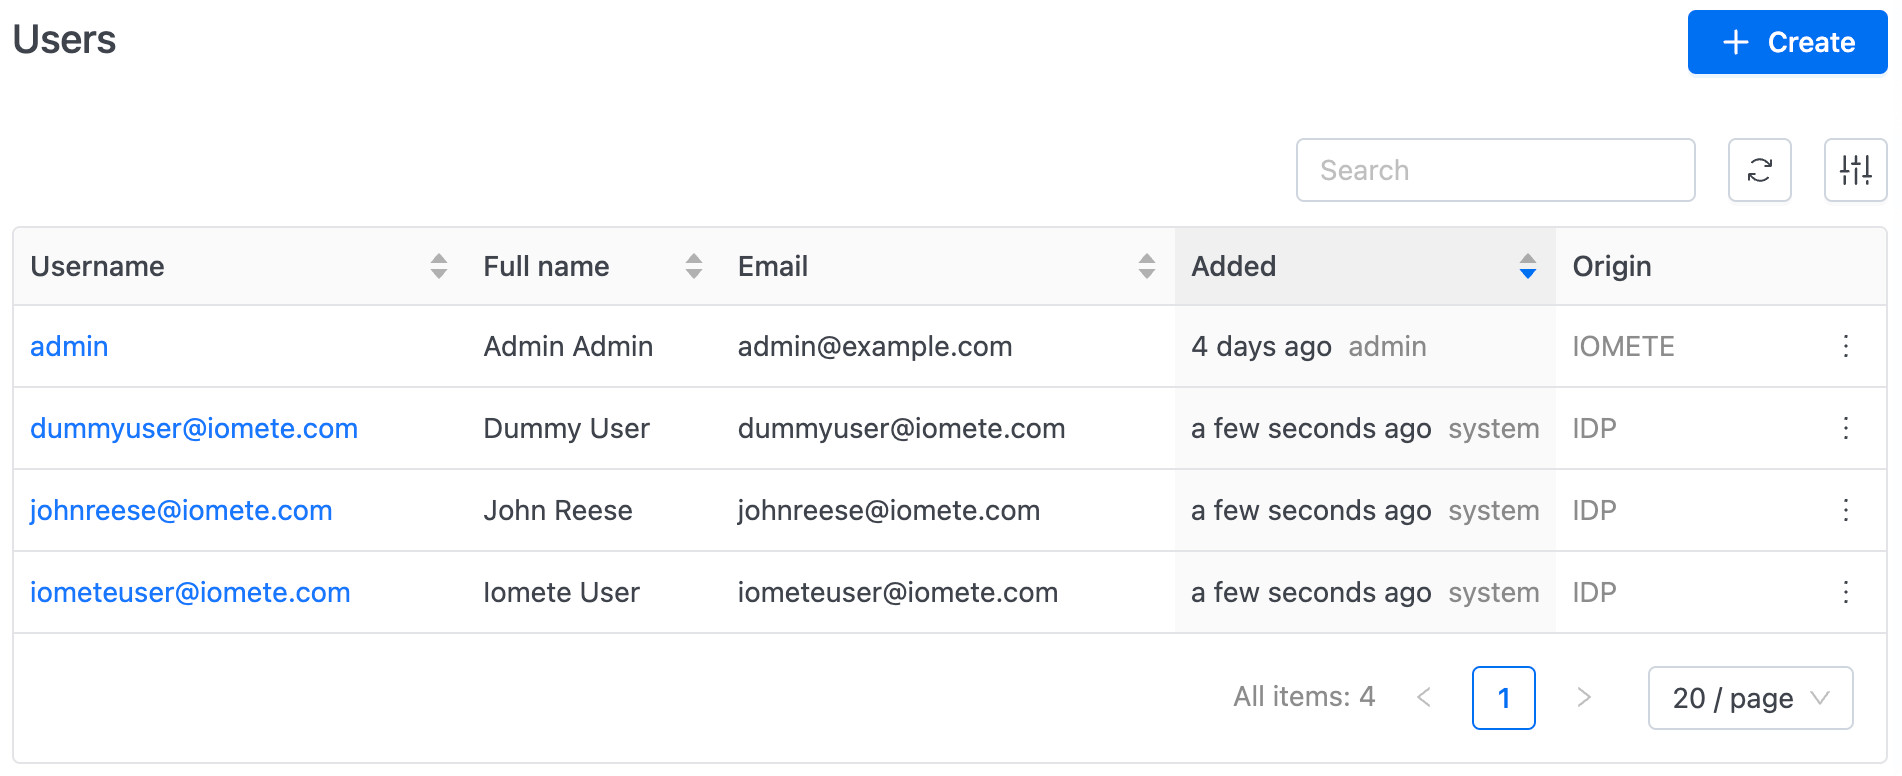
3. Provision Users
- Navigate to the
Assignmentstab and assign the desired users or groups to theSAML client you created for IOMETE.
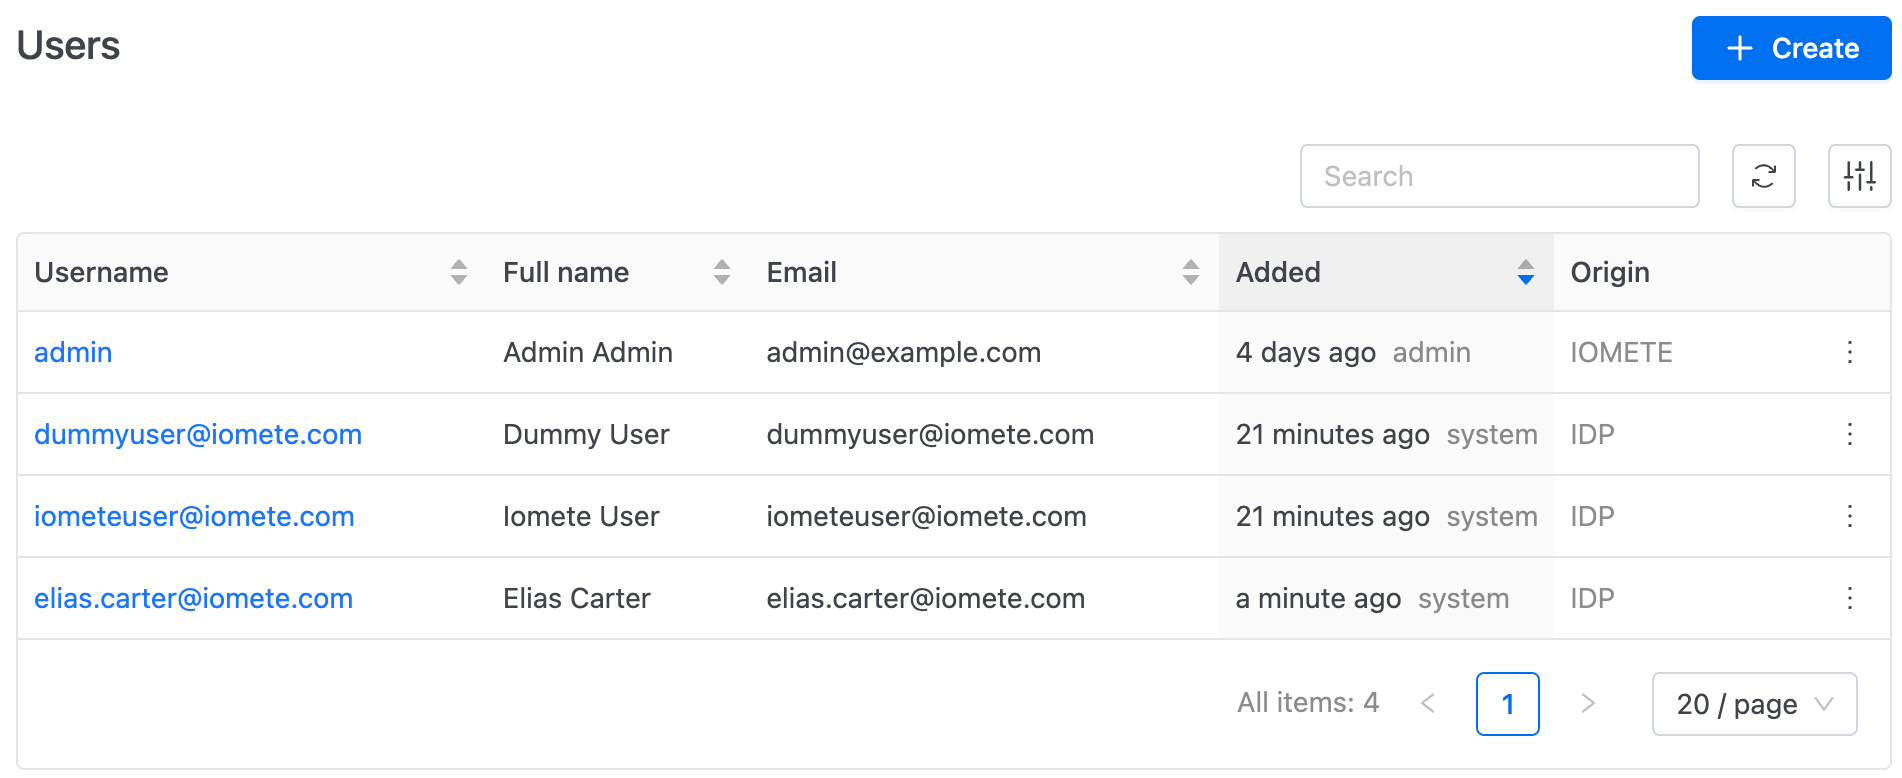
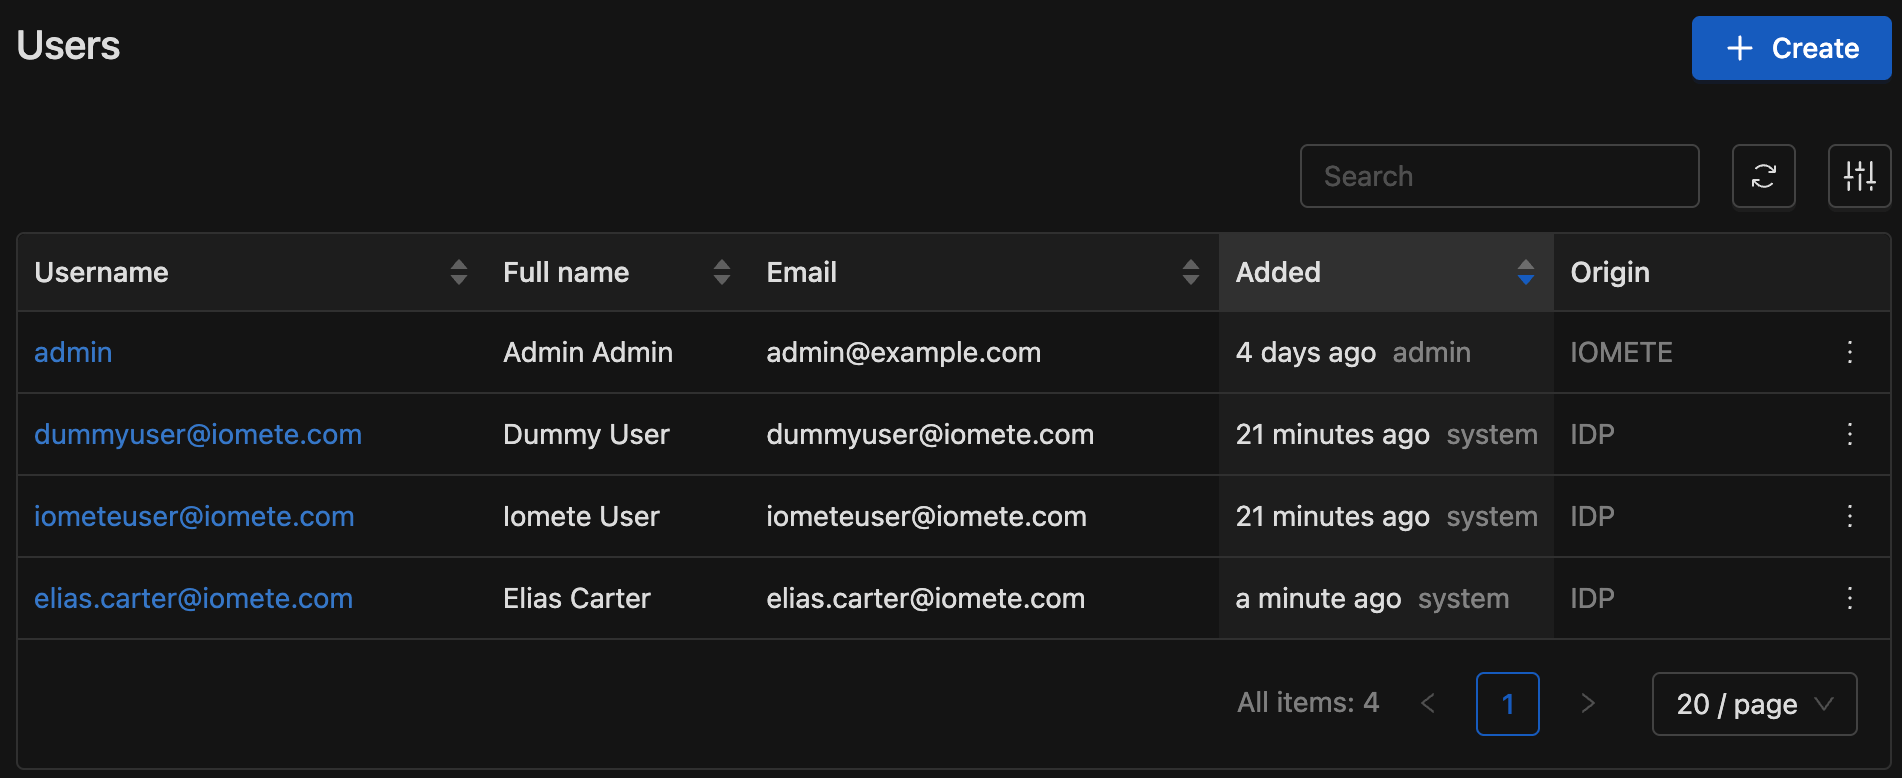
Once this is done, the assigned users or members of the assigned groups will be provisioned from Okta to IOMETE with an IDP origin
4. Provision Groups
- Navigate to the
Push Groupstab. - Click
+ Push Groups ▼button, and select group or groups to provision. - Push status
Activemeans that group has been provisioned to IOMETE.
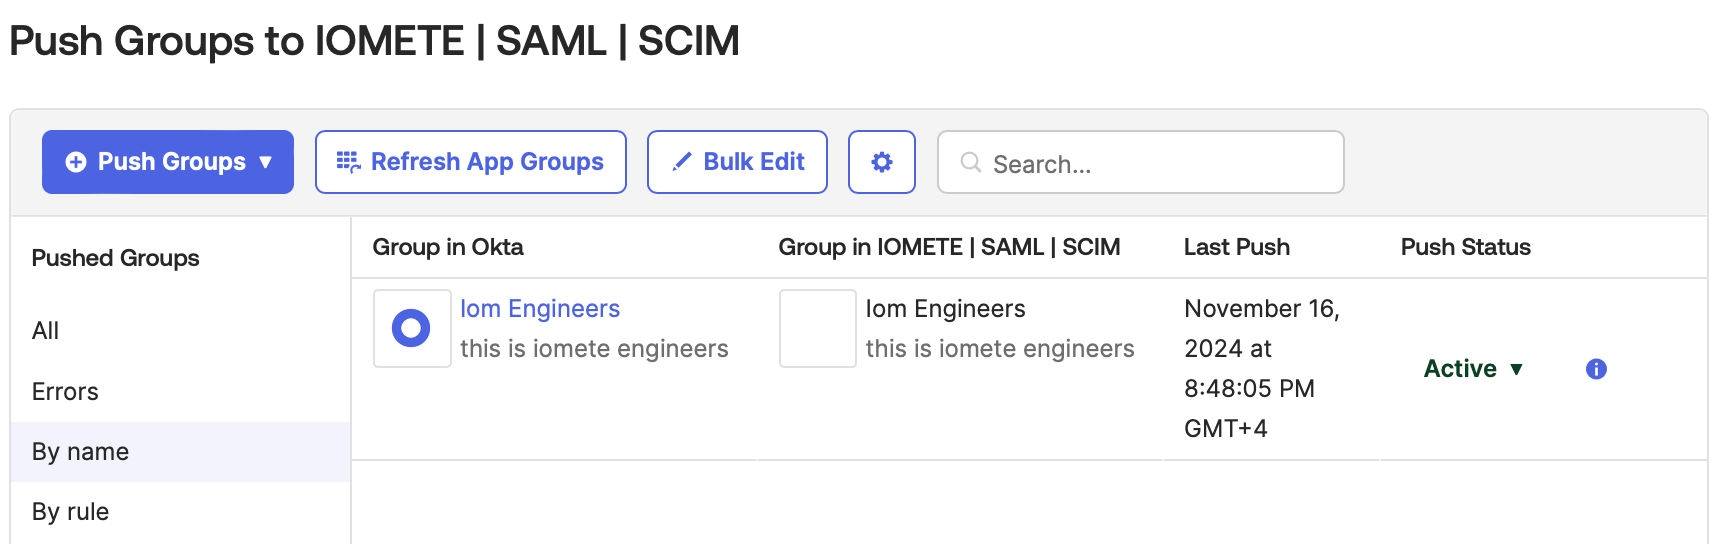
Once this is done, the pushed group or groups will be provisioned from Okta to IOMETE with an IDP origin.
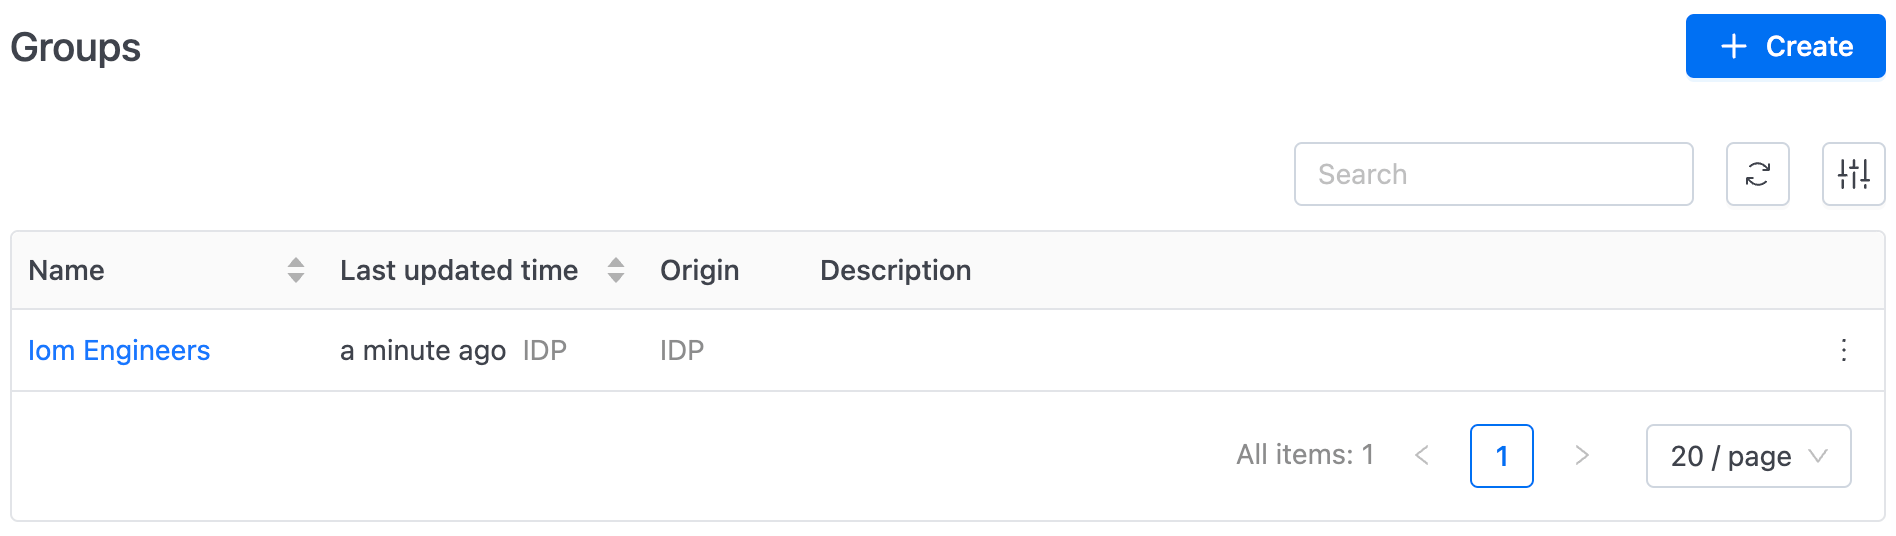
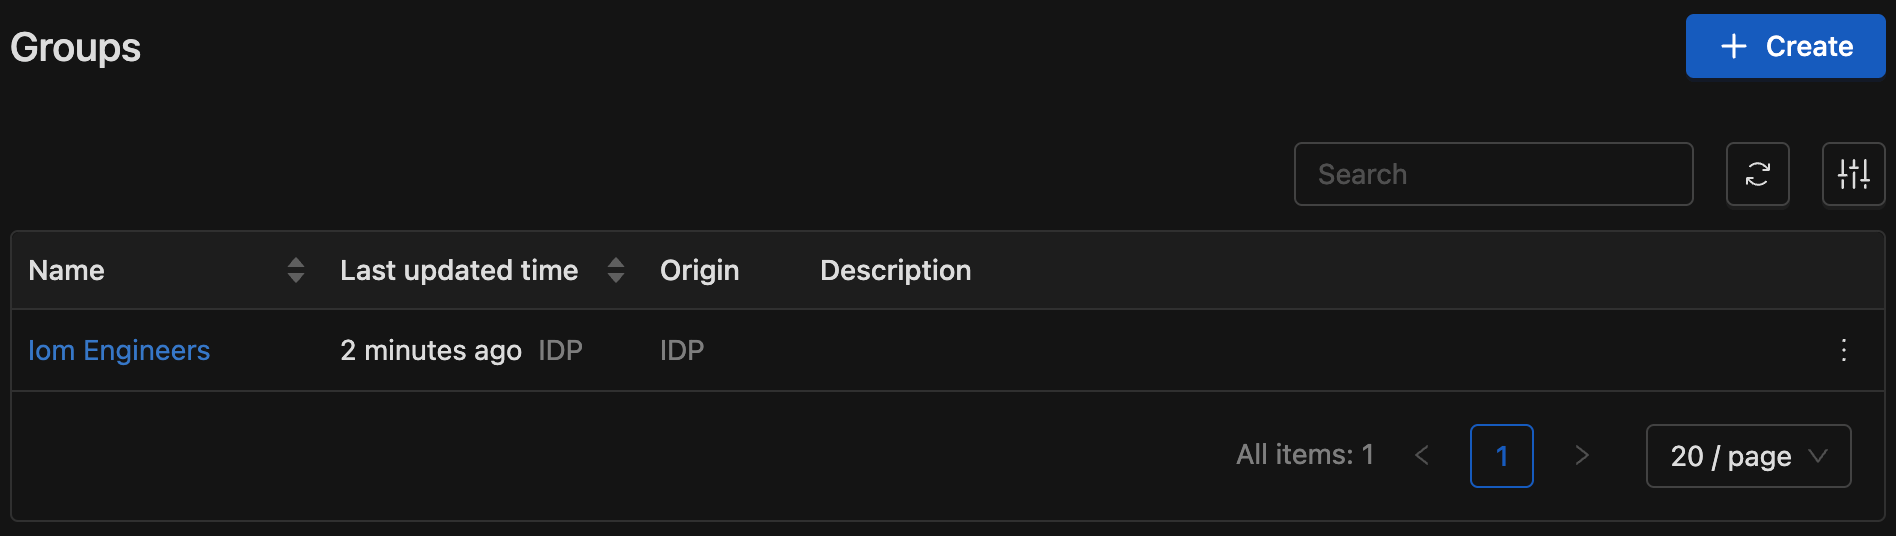
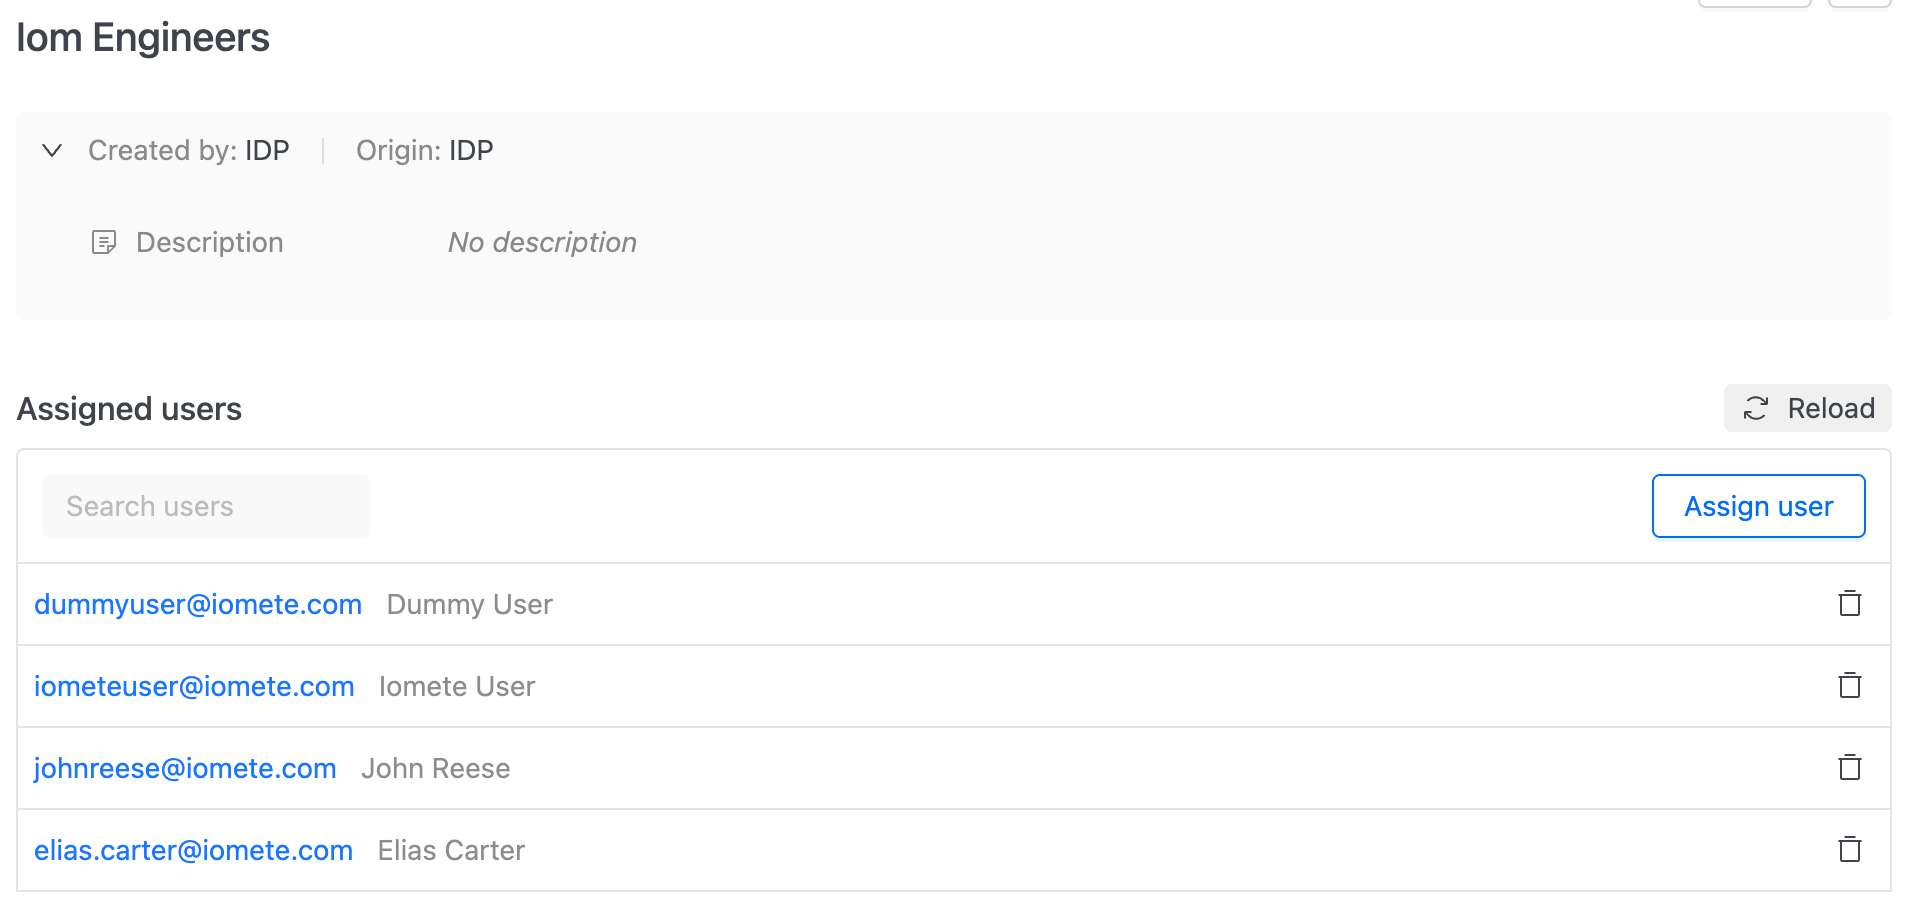
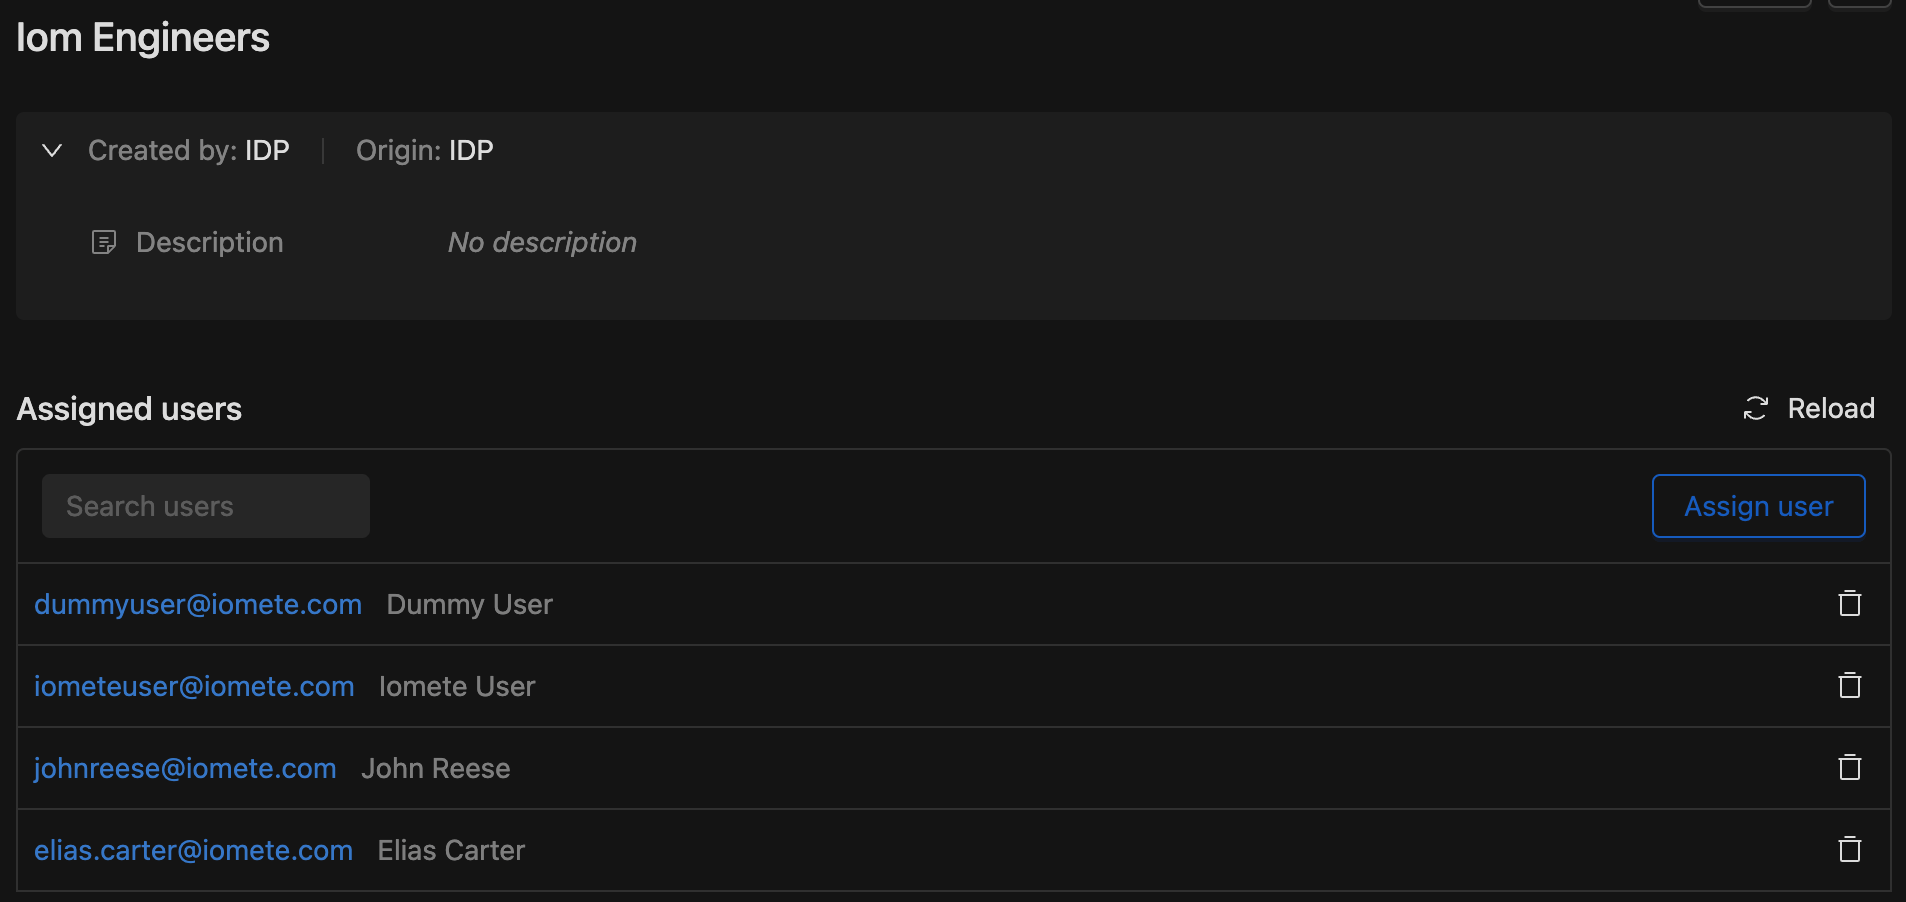
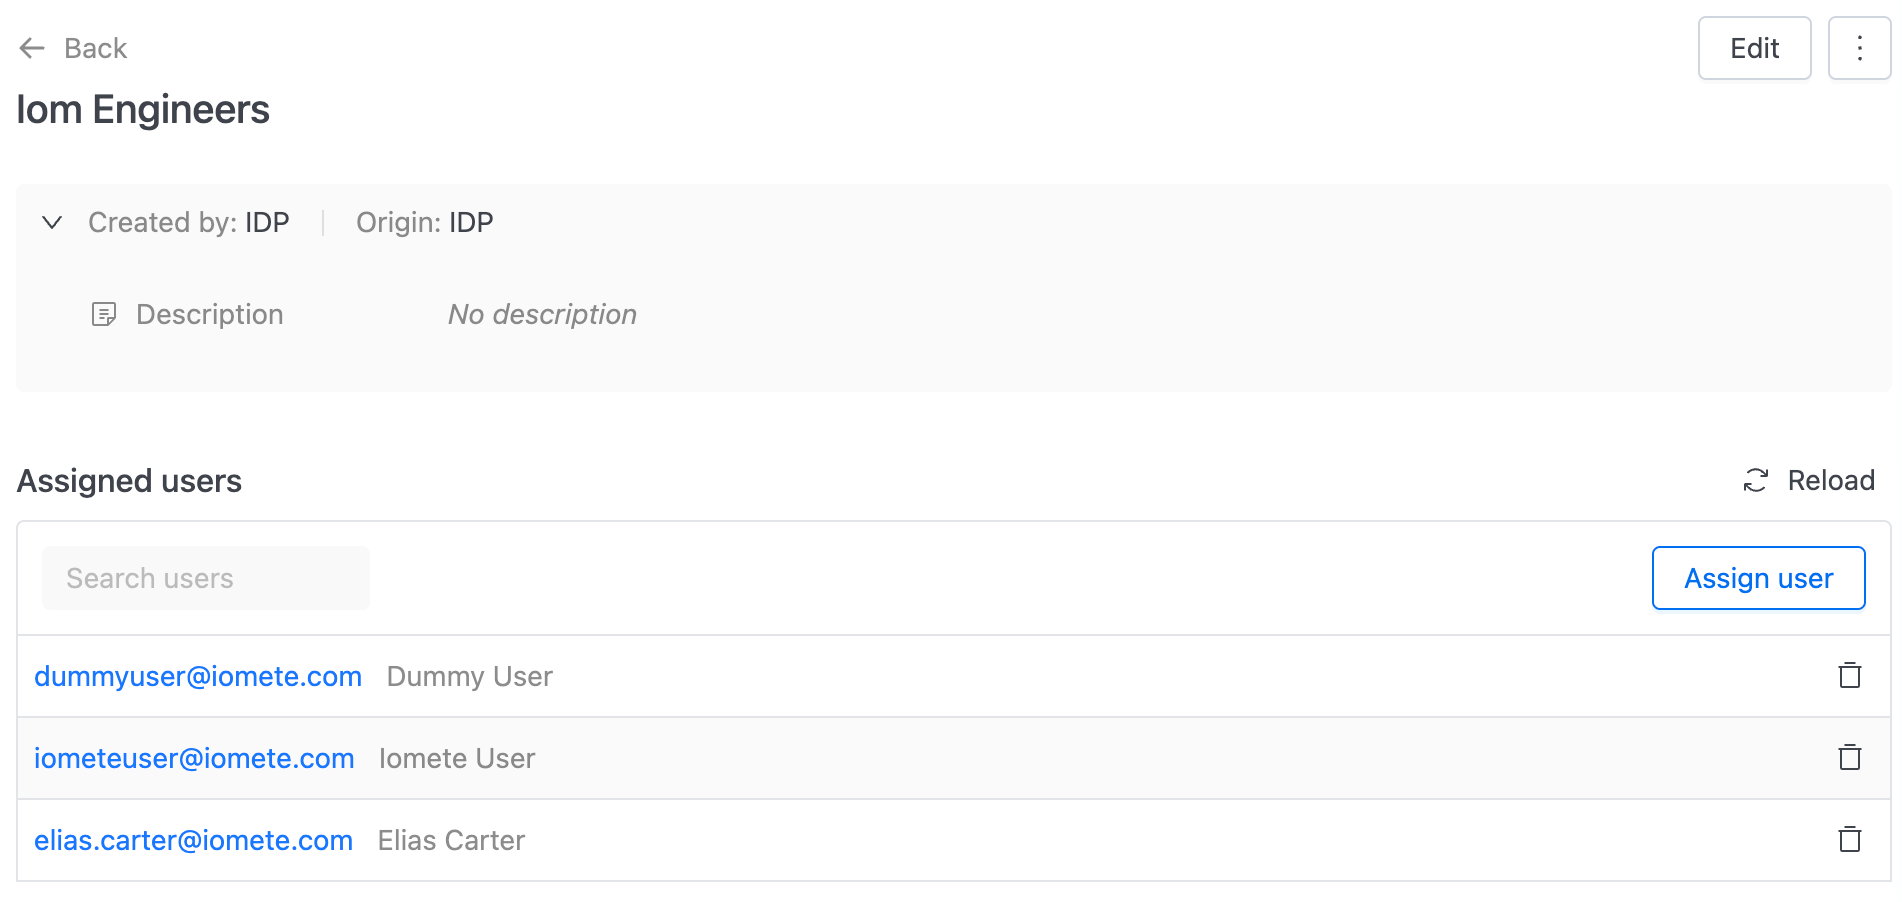
Picture below shows groups in IOMETE console Groups page.
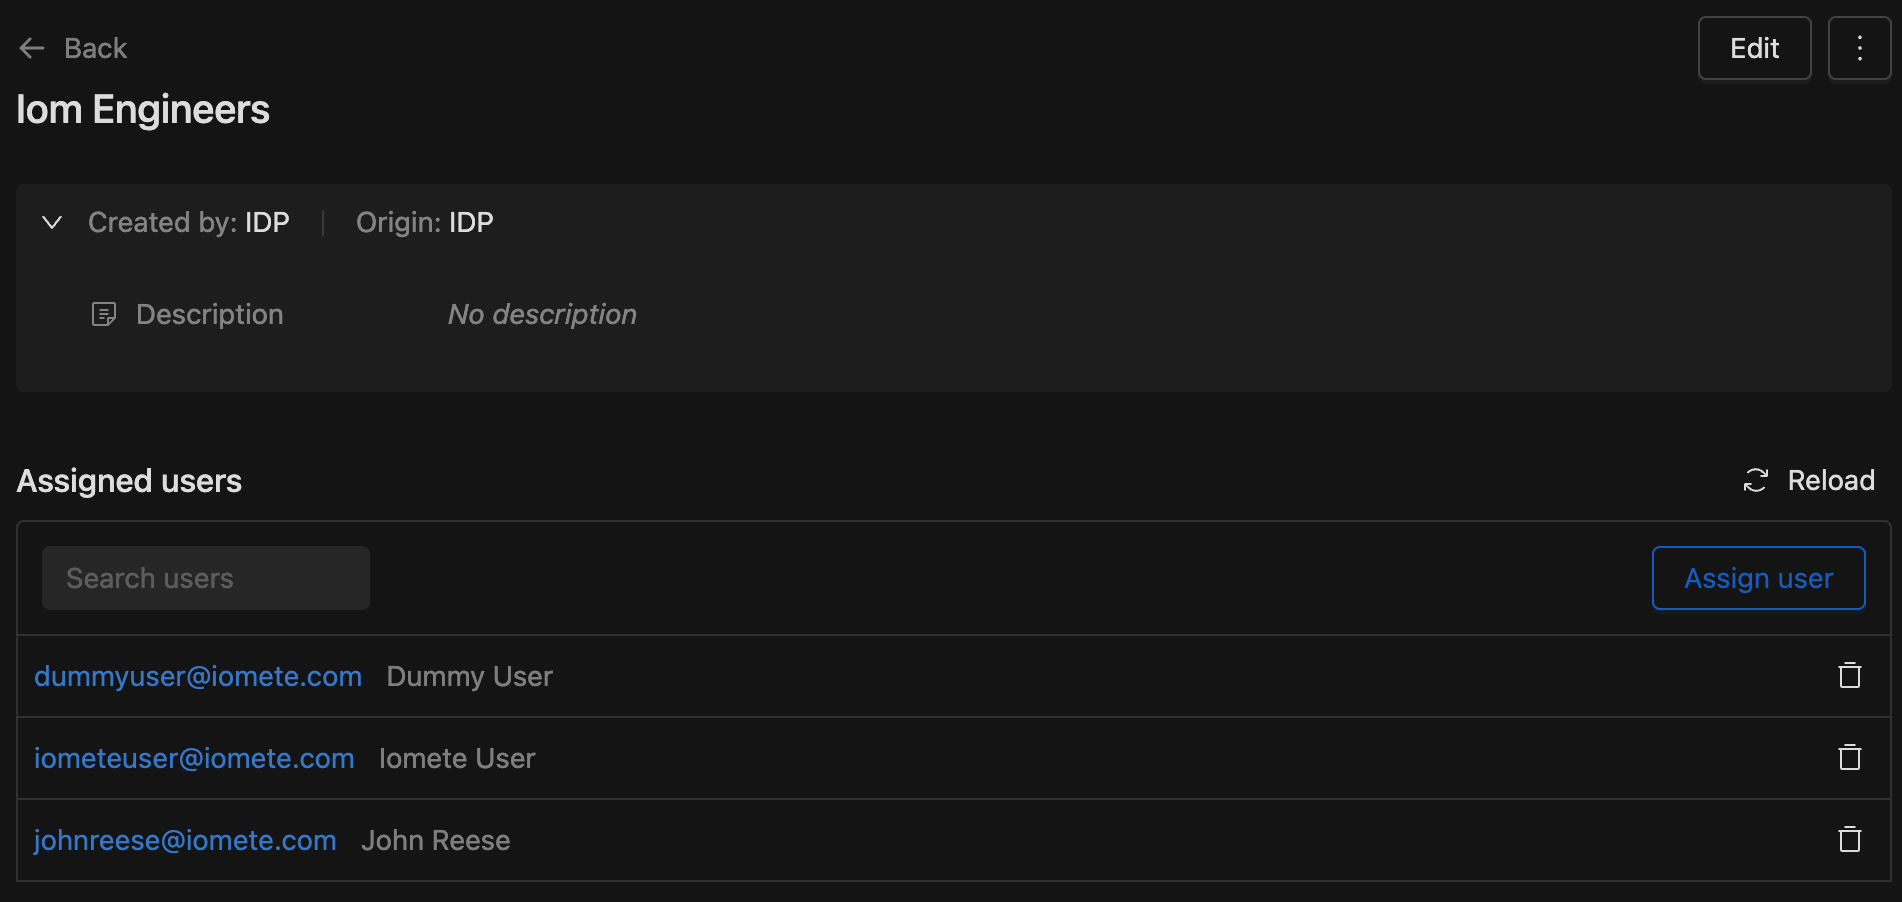
If you navigate to the group's information page, you will see IDP mappings between Okta users and groups,
as members are provisioned along with the group.

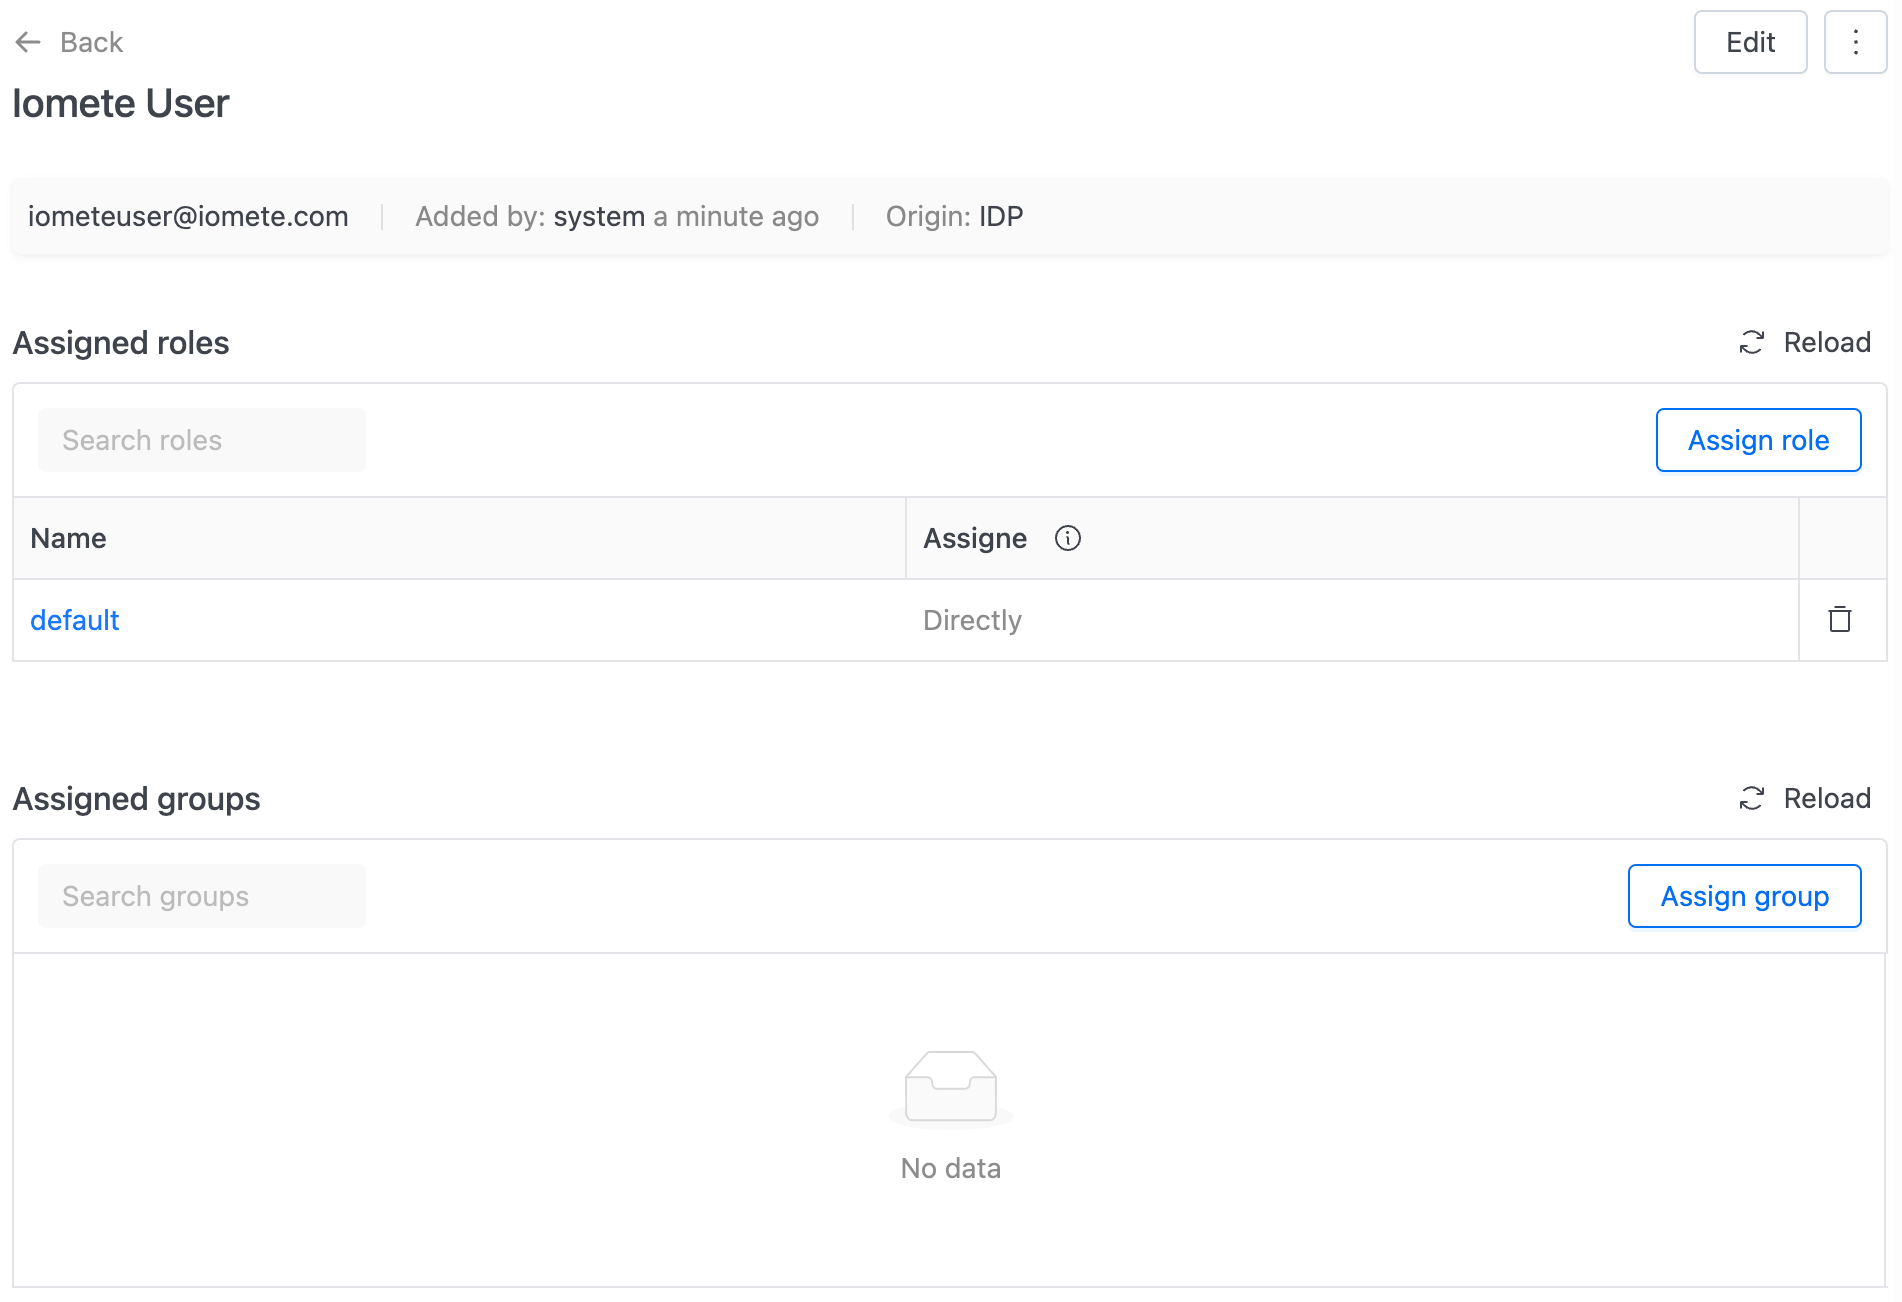
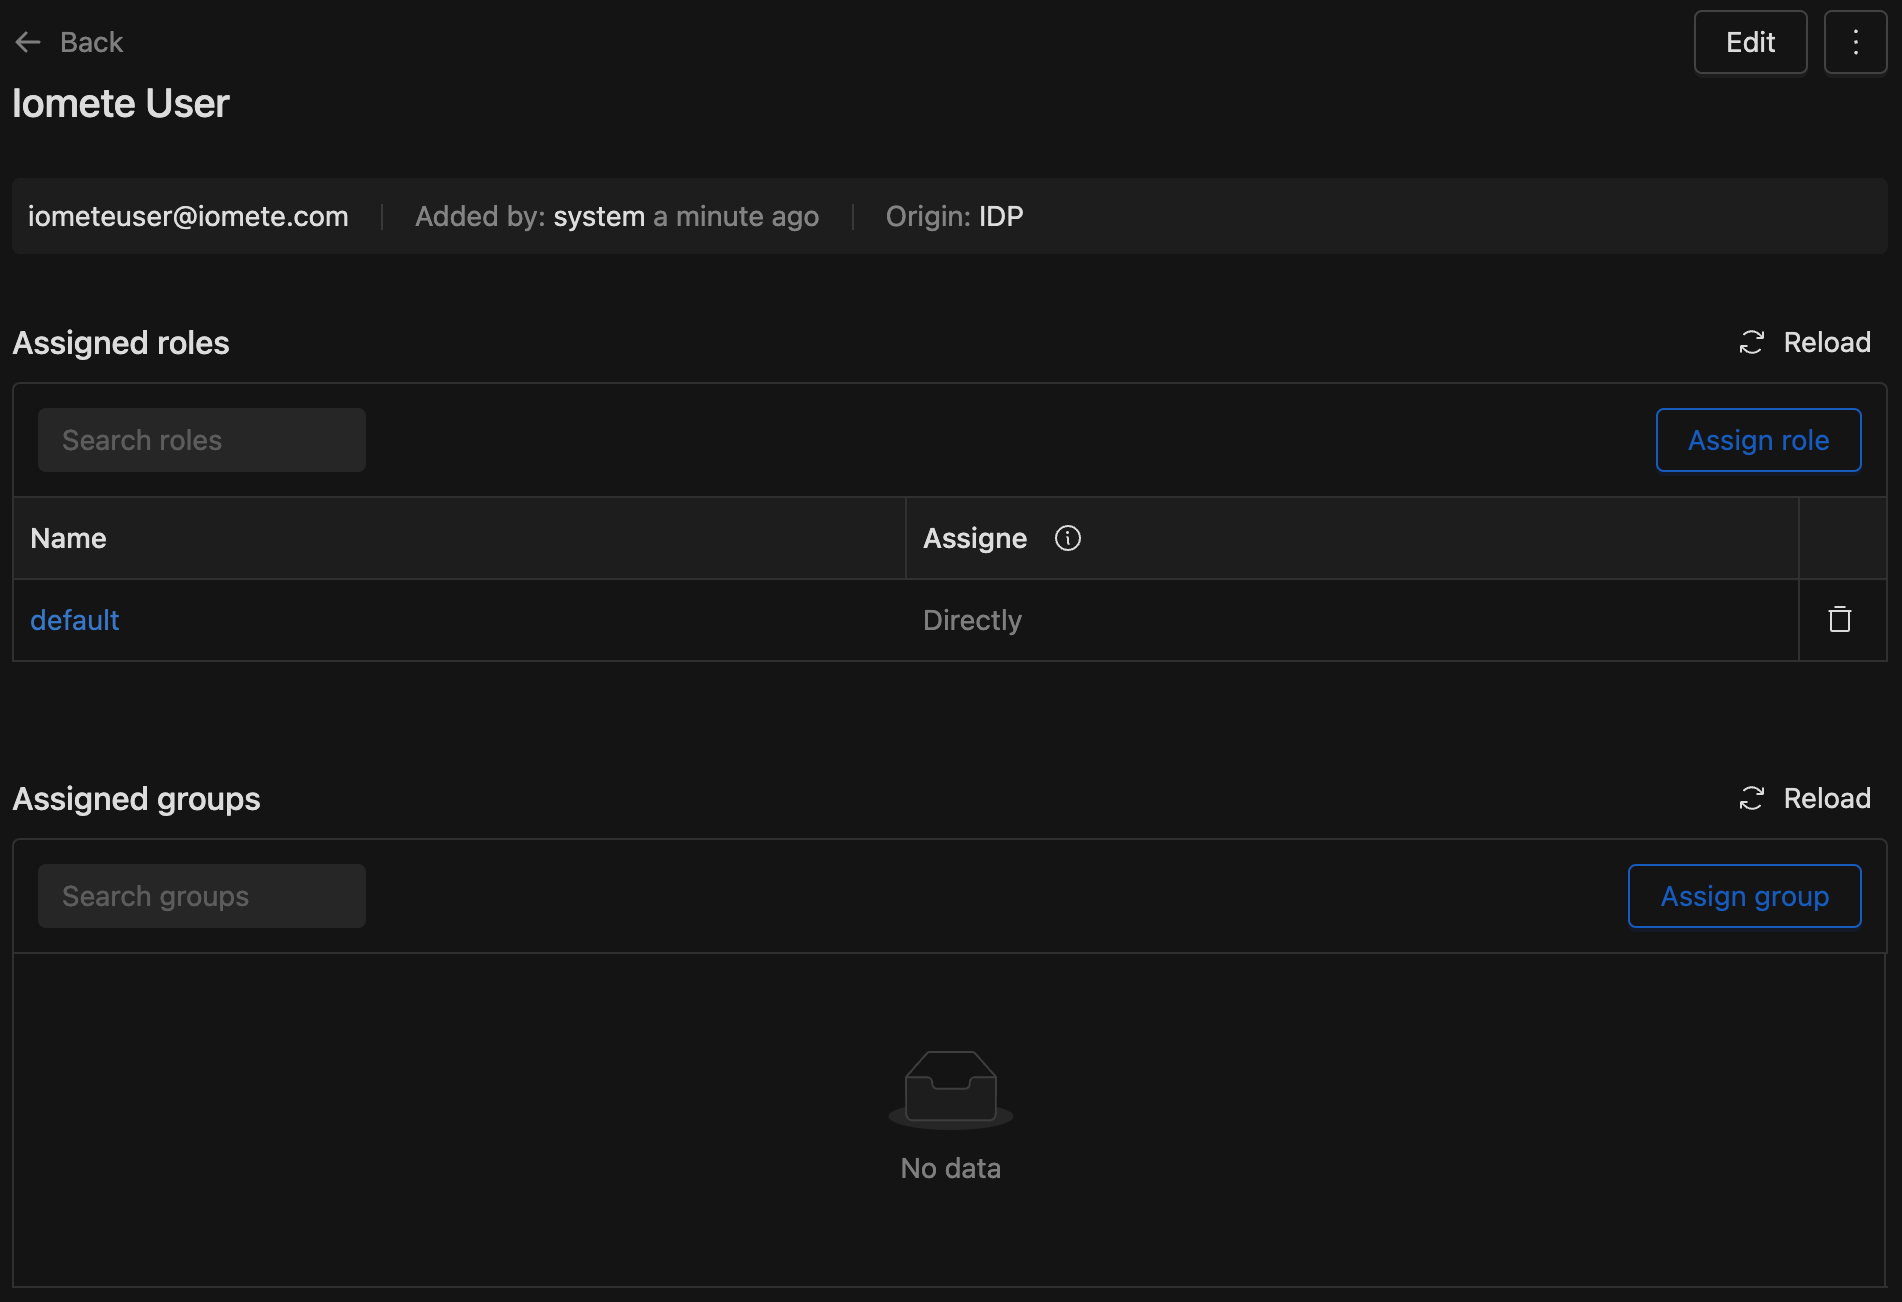
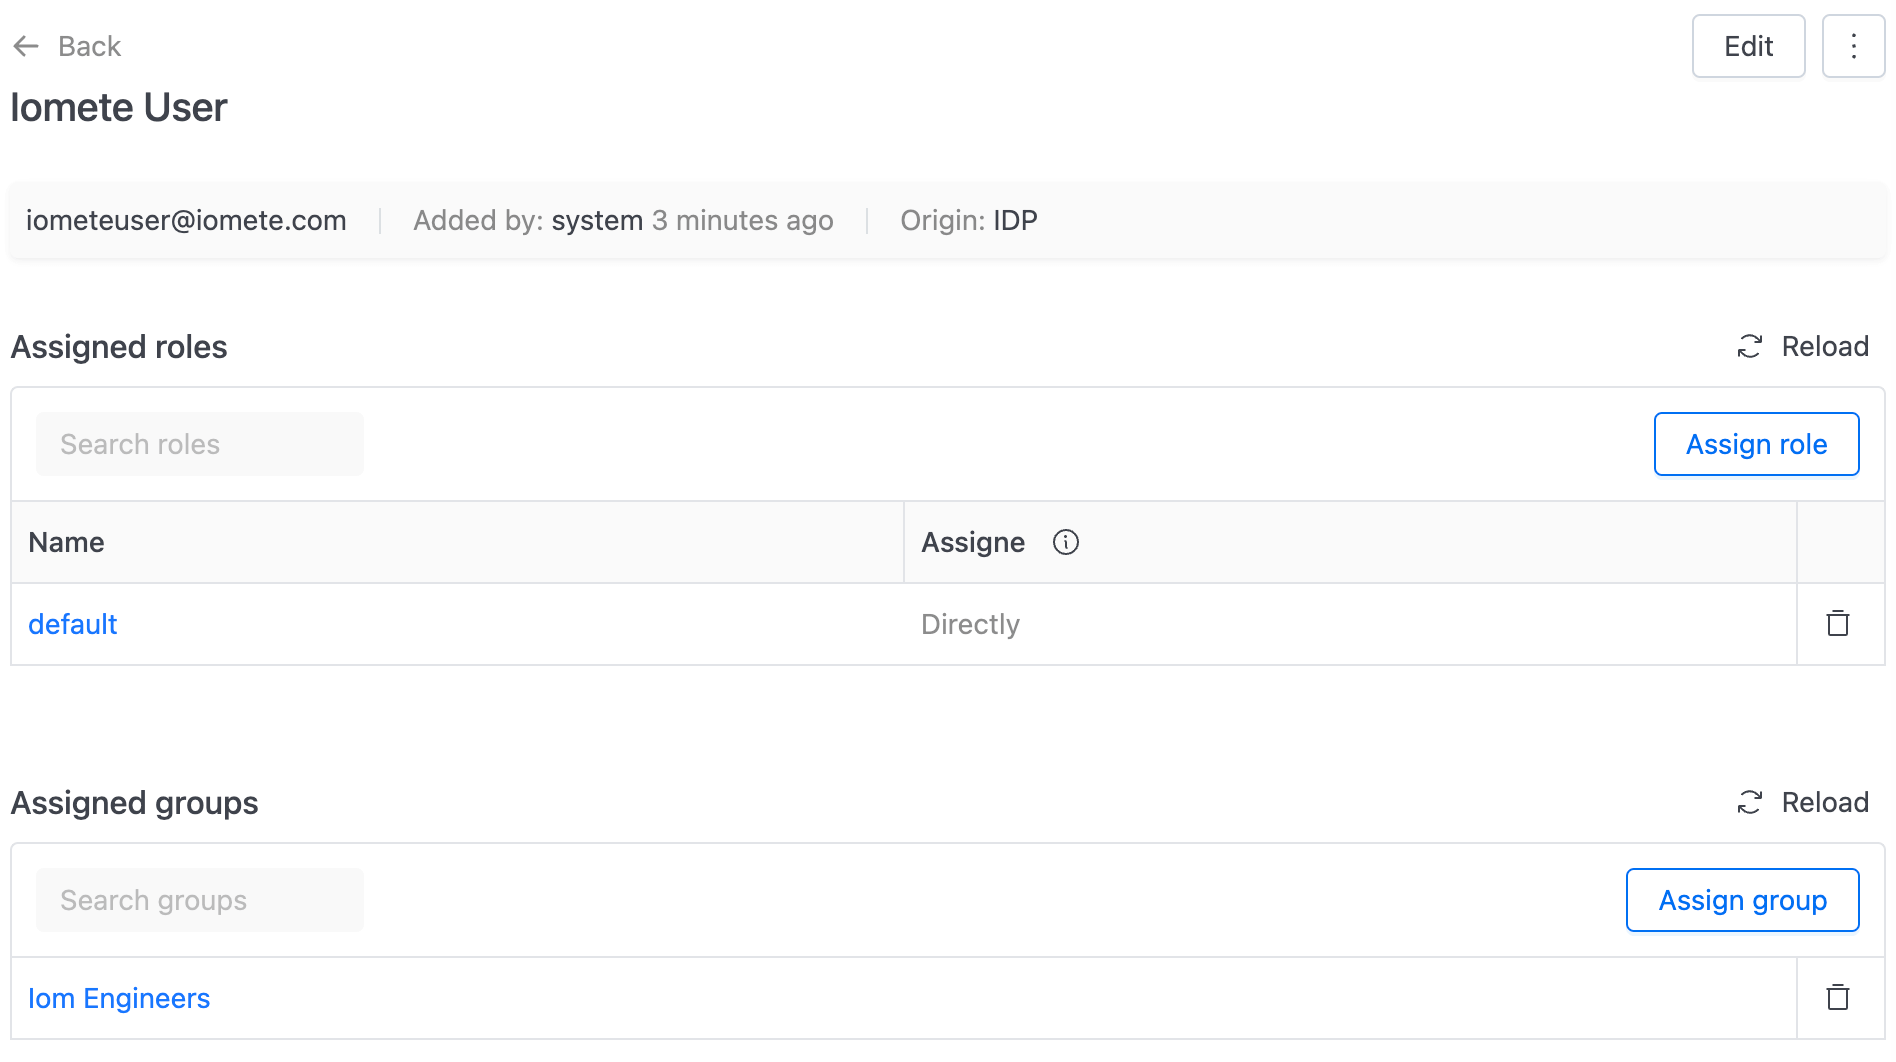
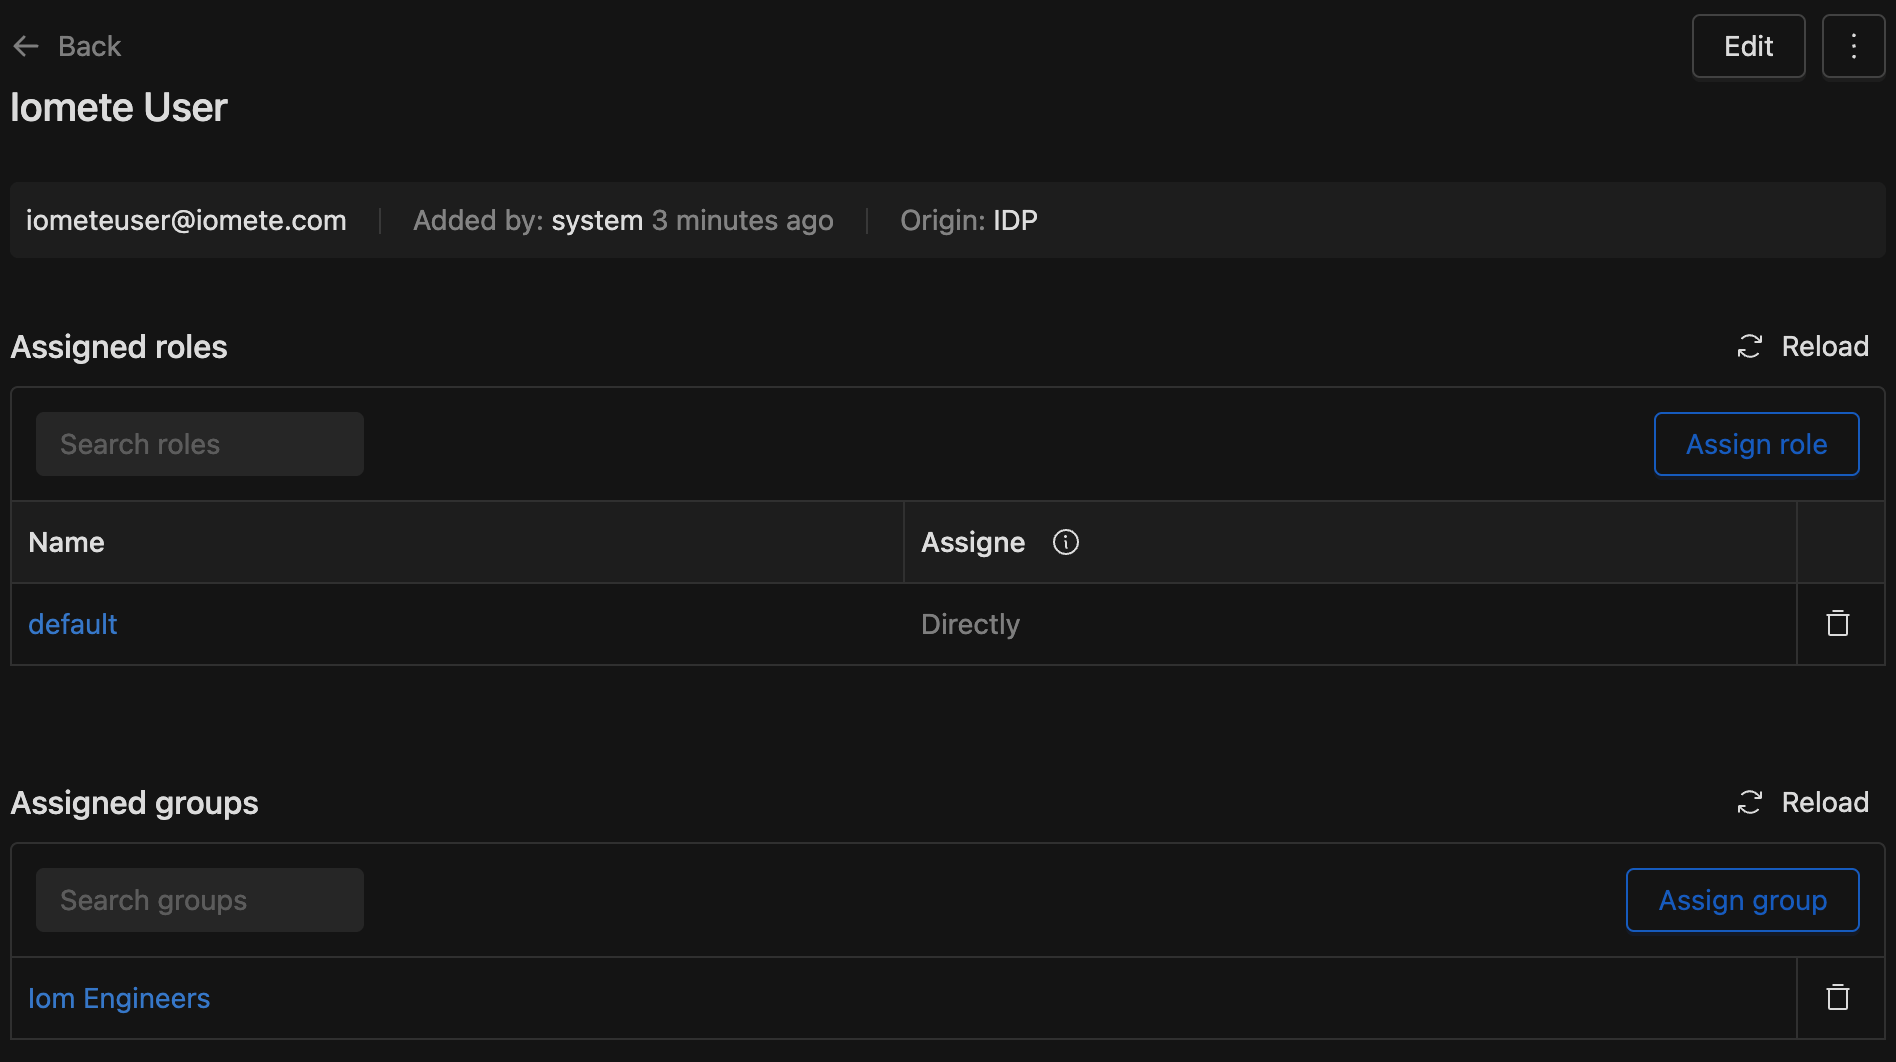
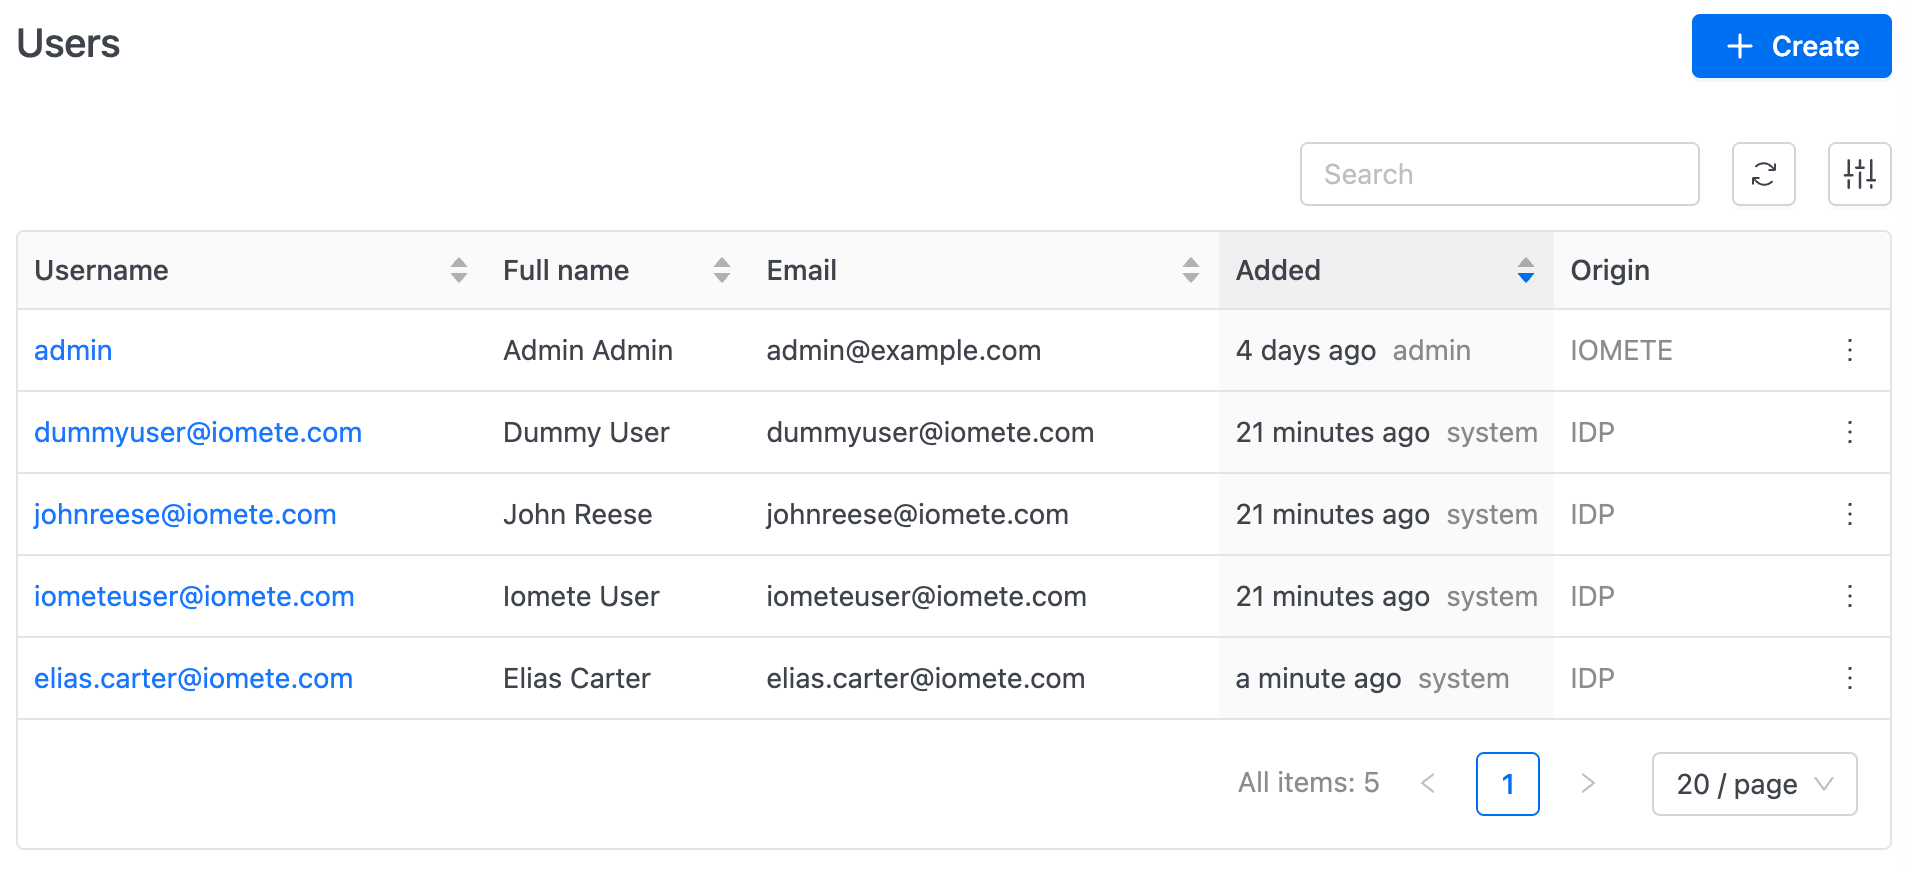
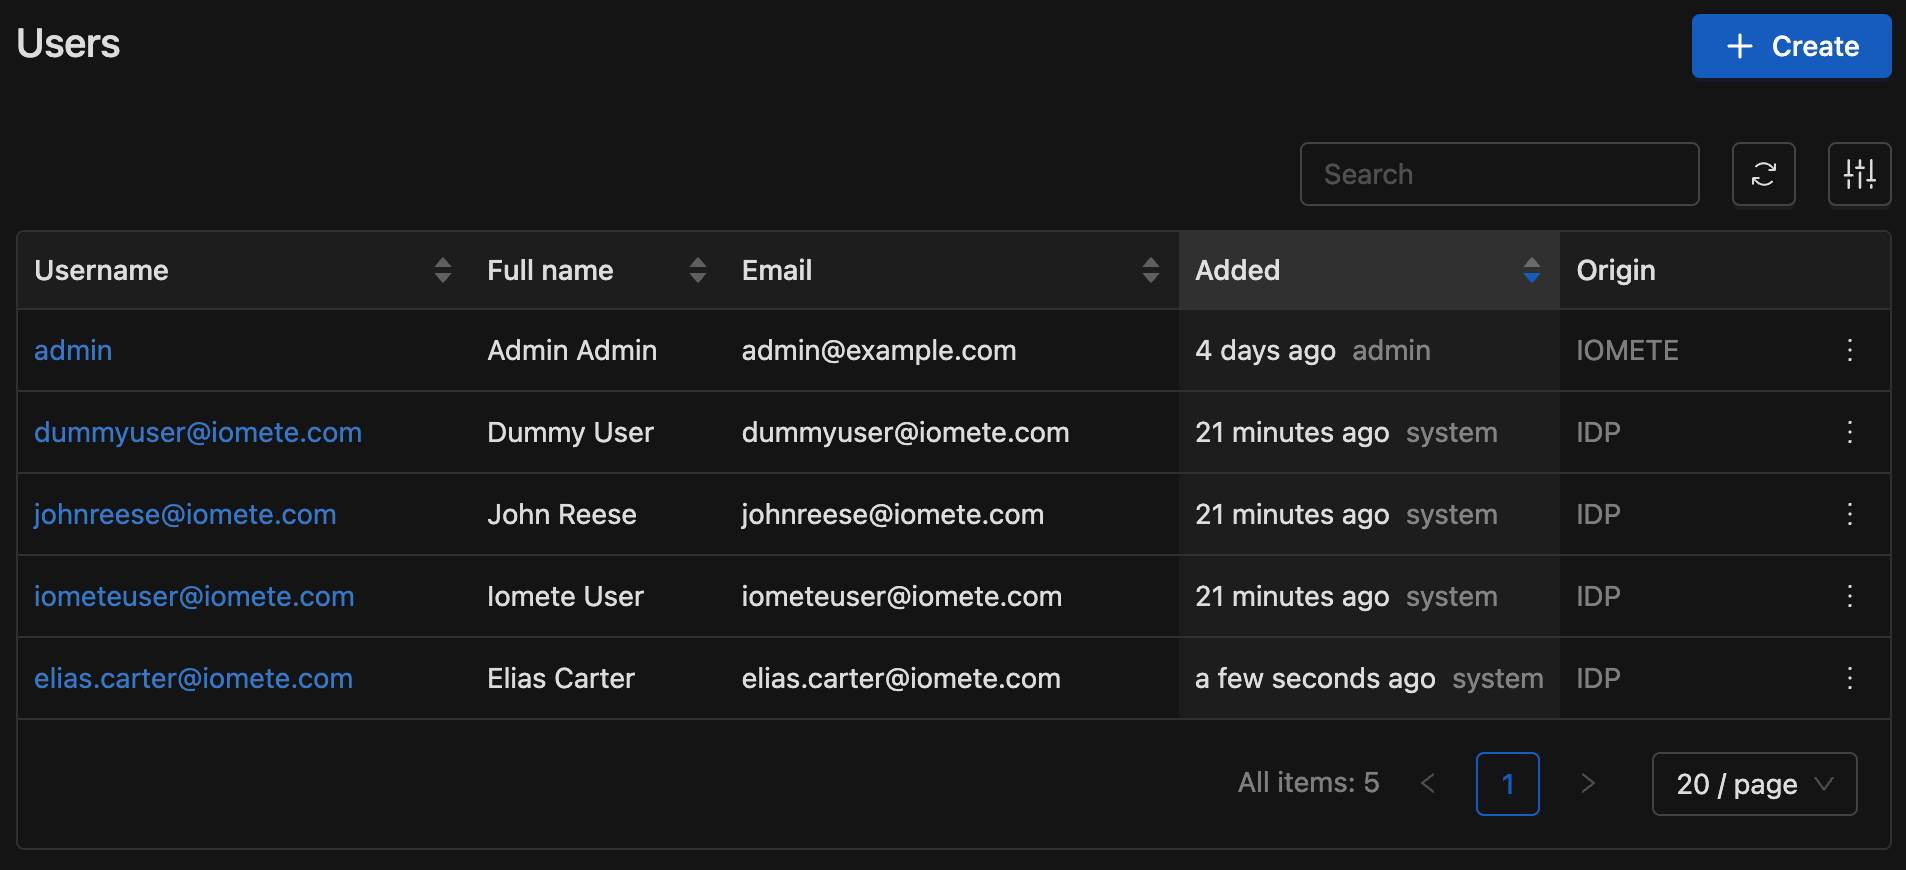
As user-group mappings are provisioned, the user's information page is updated accordingly. The pictures below illustrate the before and after versions of the user's information page following group provisioning in IOMETE.
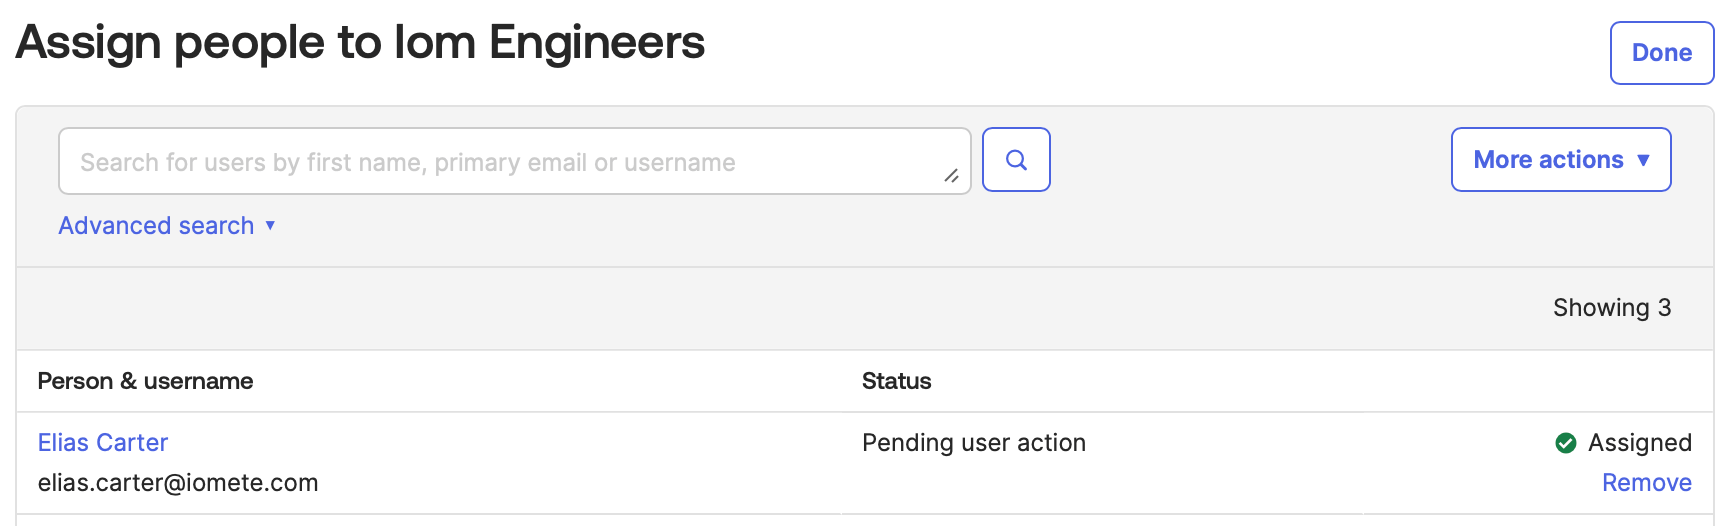
Add user to a group in Okta
- Navigate to group's information page in Okta
- Click
Assign Peoplebutton - Add a user to this group by clicking
+button
Once this process is complete, the group members in IOMETE will be updated after a short interval.
When members of the provisioned group are assigned to the SAML client you created for IOMETE,
a new user will be created in IOMETE if that user does not already exist.
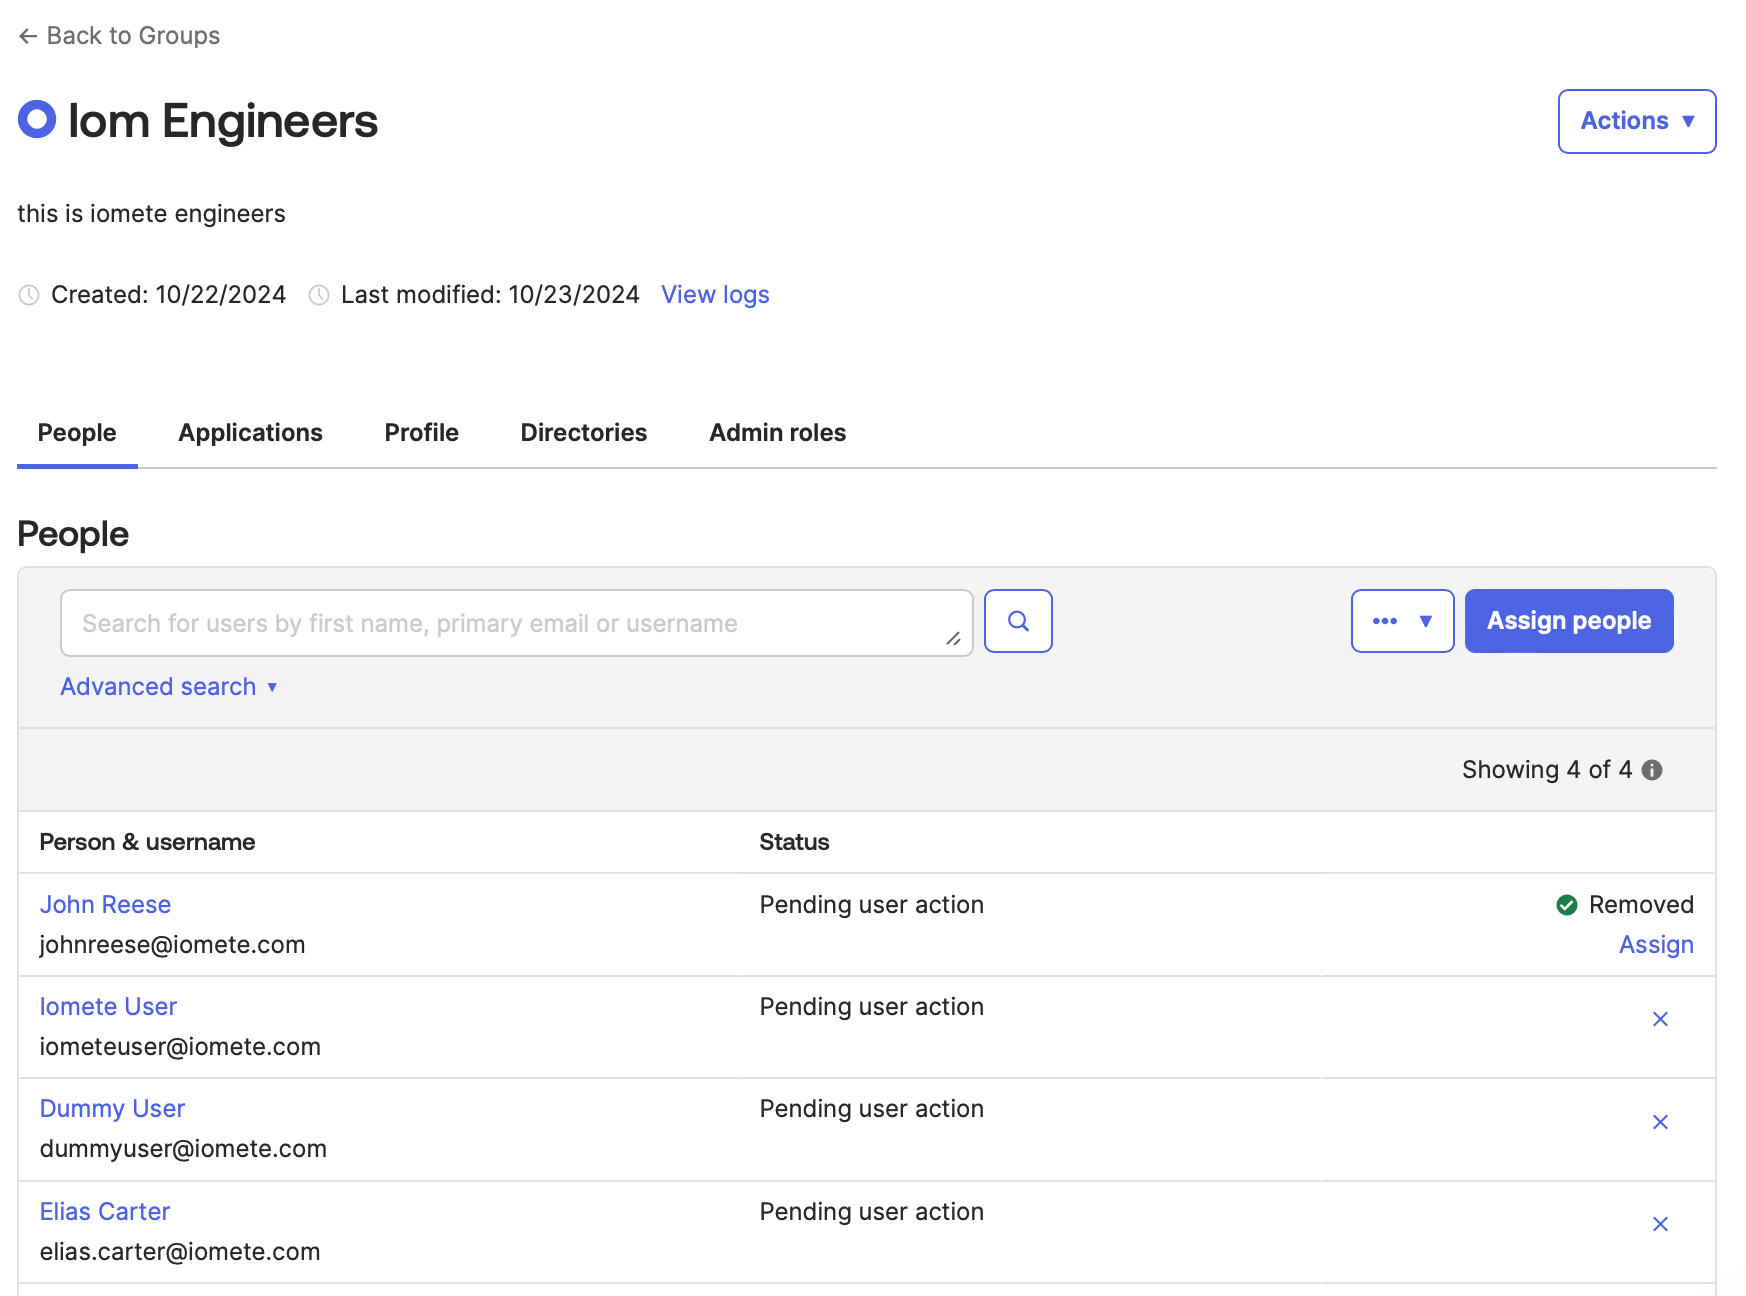
Remove user from a group in Okta
- Navigate to group's information page in Okta
- Remove any user grom this group by clicking
xbutton
Once this process is complete, the group members in IOMETE will be updated after a short interval.
When members are removed from the provisioned group assigned to the SAML client you created for IOMETE,
the corresponding user will be deleted in IOMETE if they are no longer part of any provisioned group.