Creating a Cluster
Creating a dedicated cluster for each workload ensures isolation, eliminates resource contention, and delivers consistent performance. The setup process is simple and takes about a minute. Here's how to create a compute cluster:
- Go to the Compute page.
- Click New Compute Cluster in the top-right corner.
- Walk through the six tabs: General, Configurations, Dependencies, Docker settings, Tags, and Review & Create.
- On Review & Create, verify the summary and click Create.
Move between tabs with Previous and Next, or click any tab directly. Next validates the current tab before advancing. If validation fails, the tab shows a red exclamation mark; fix the flagged fields before continuing.
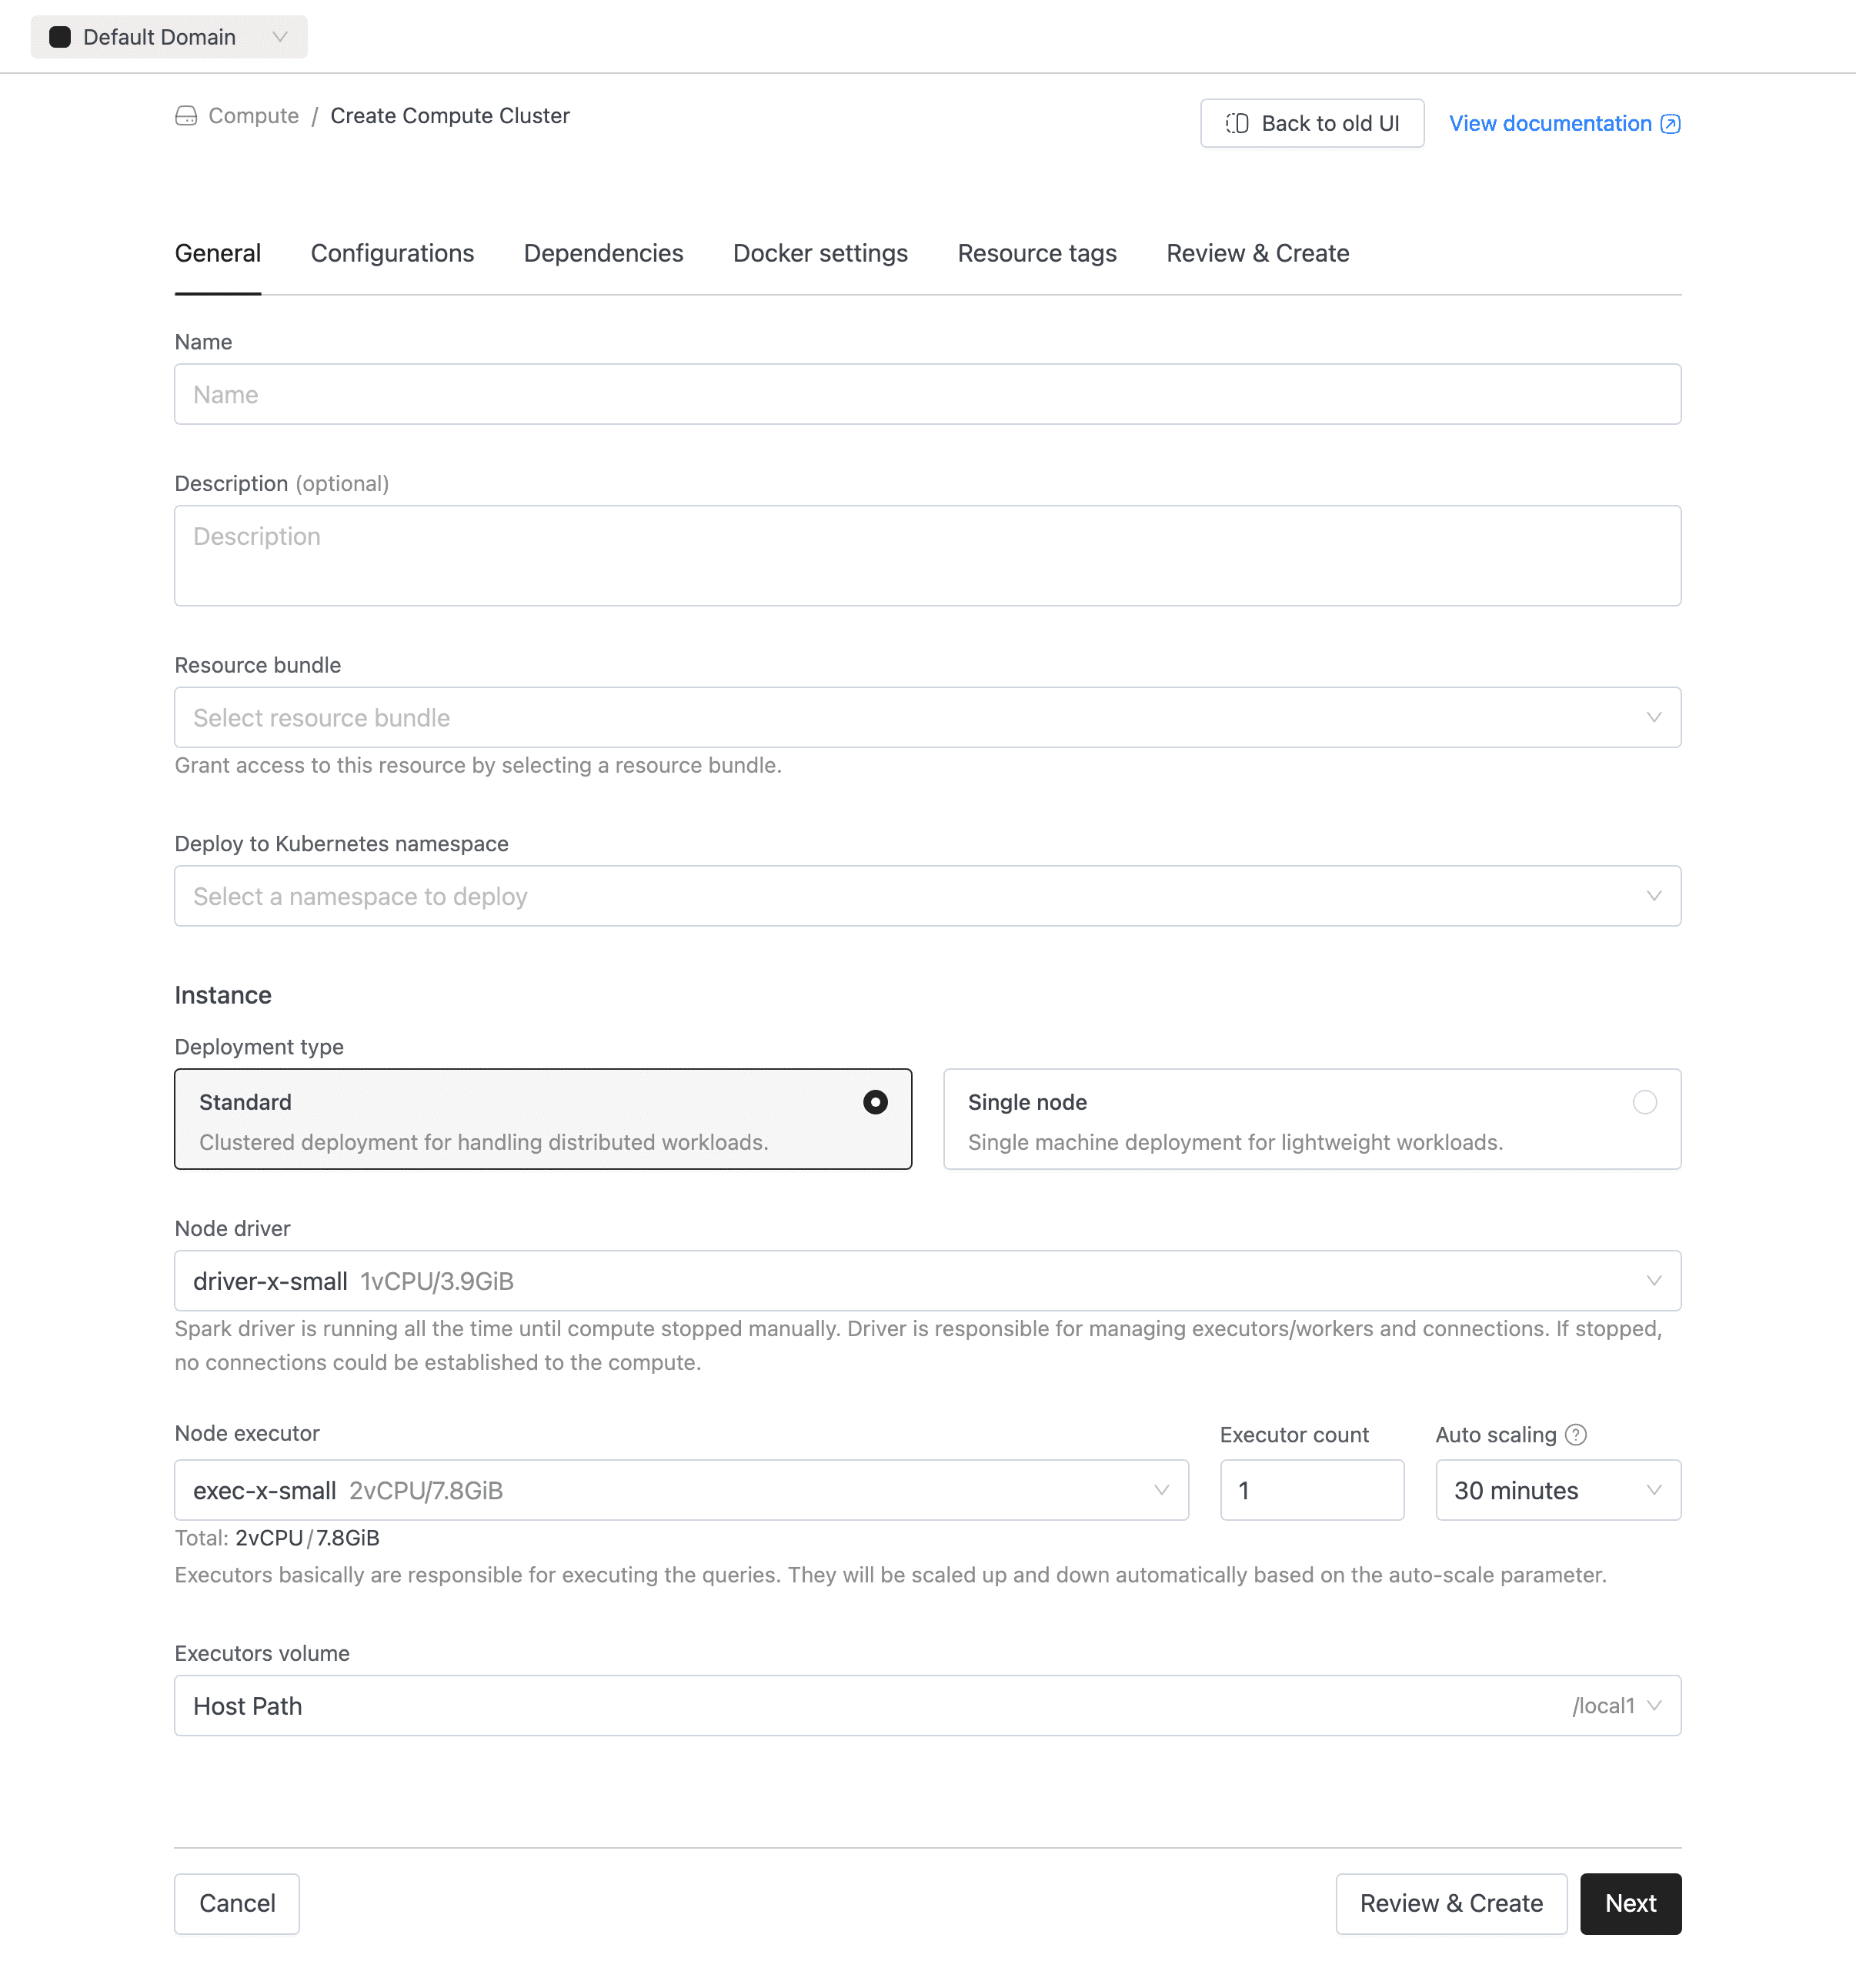
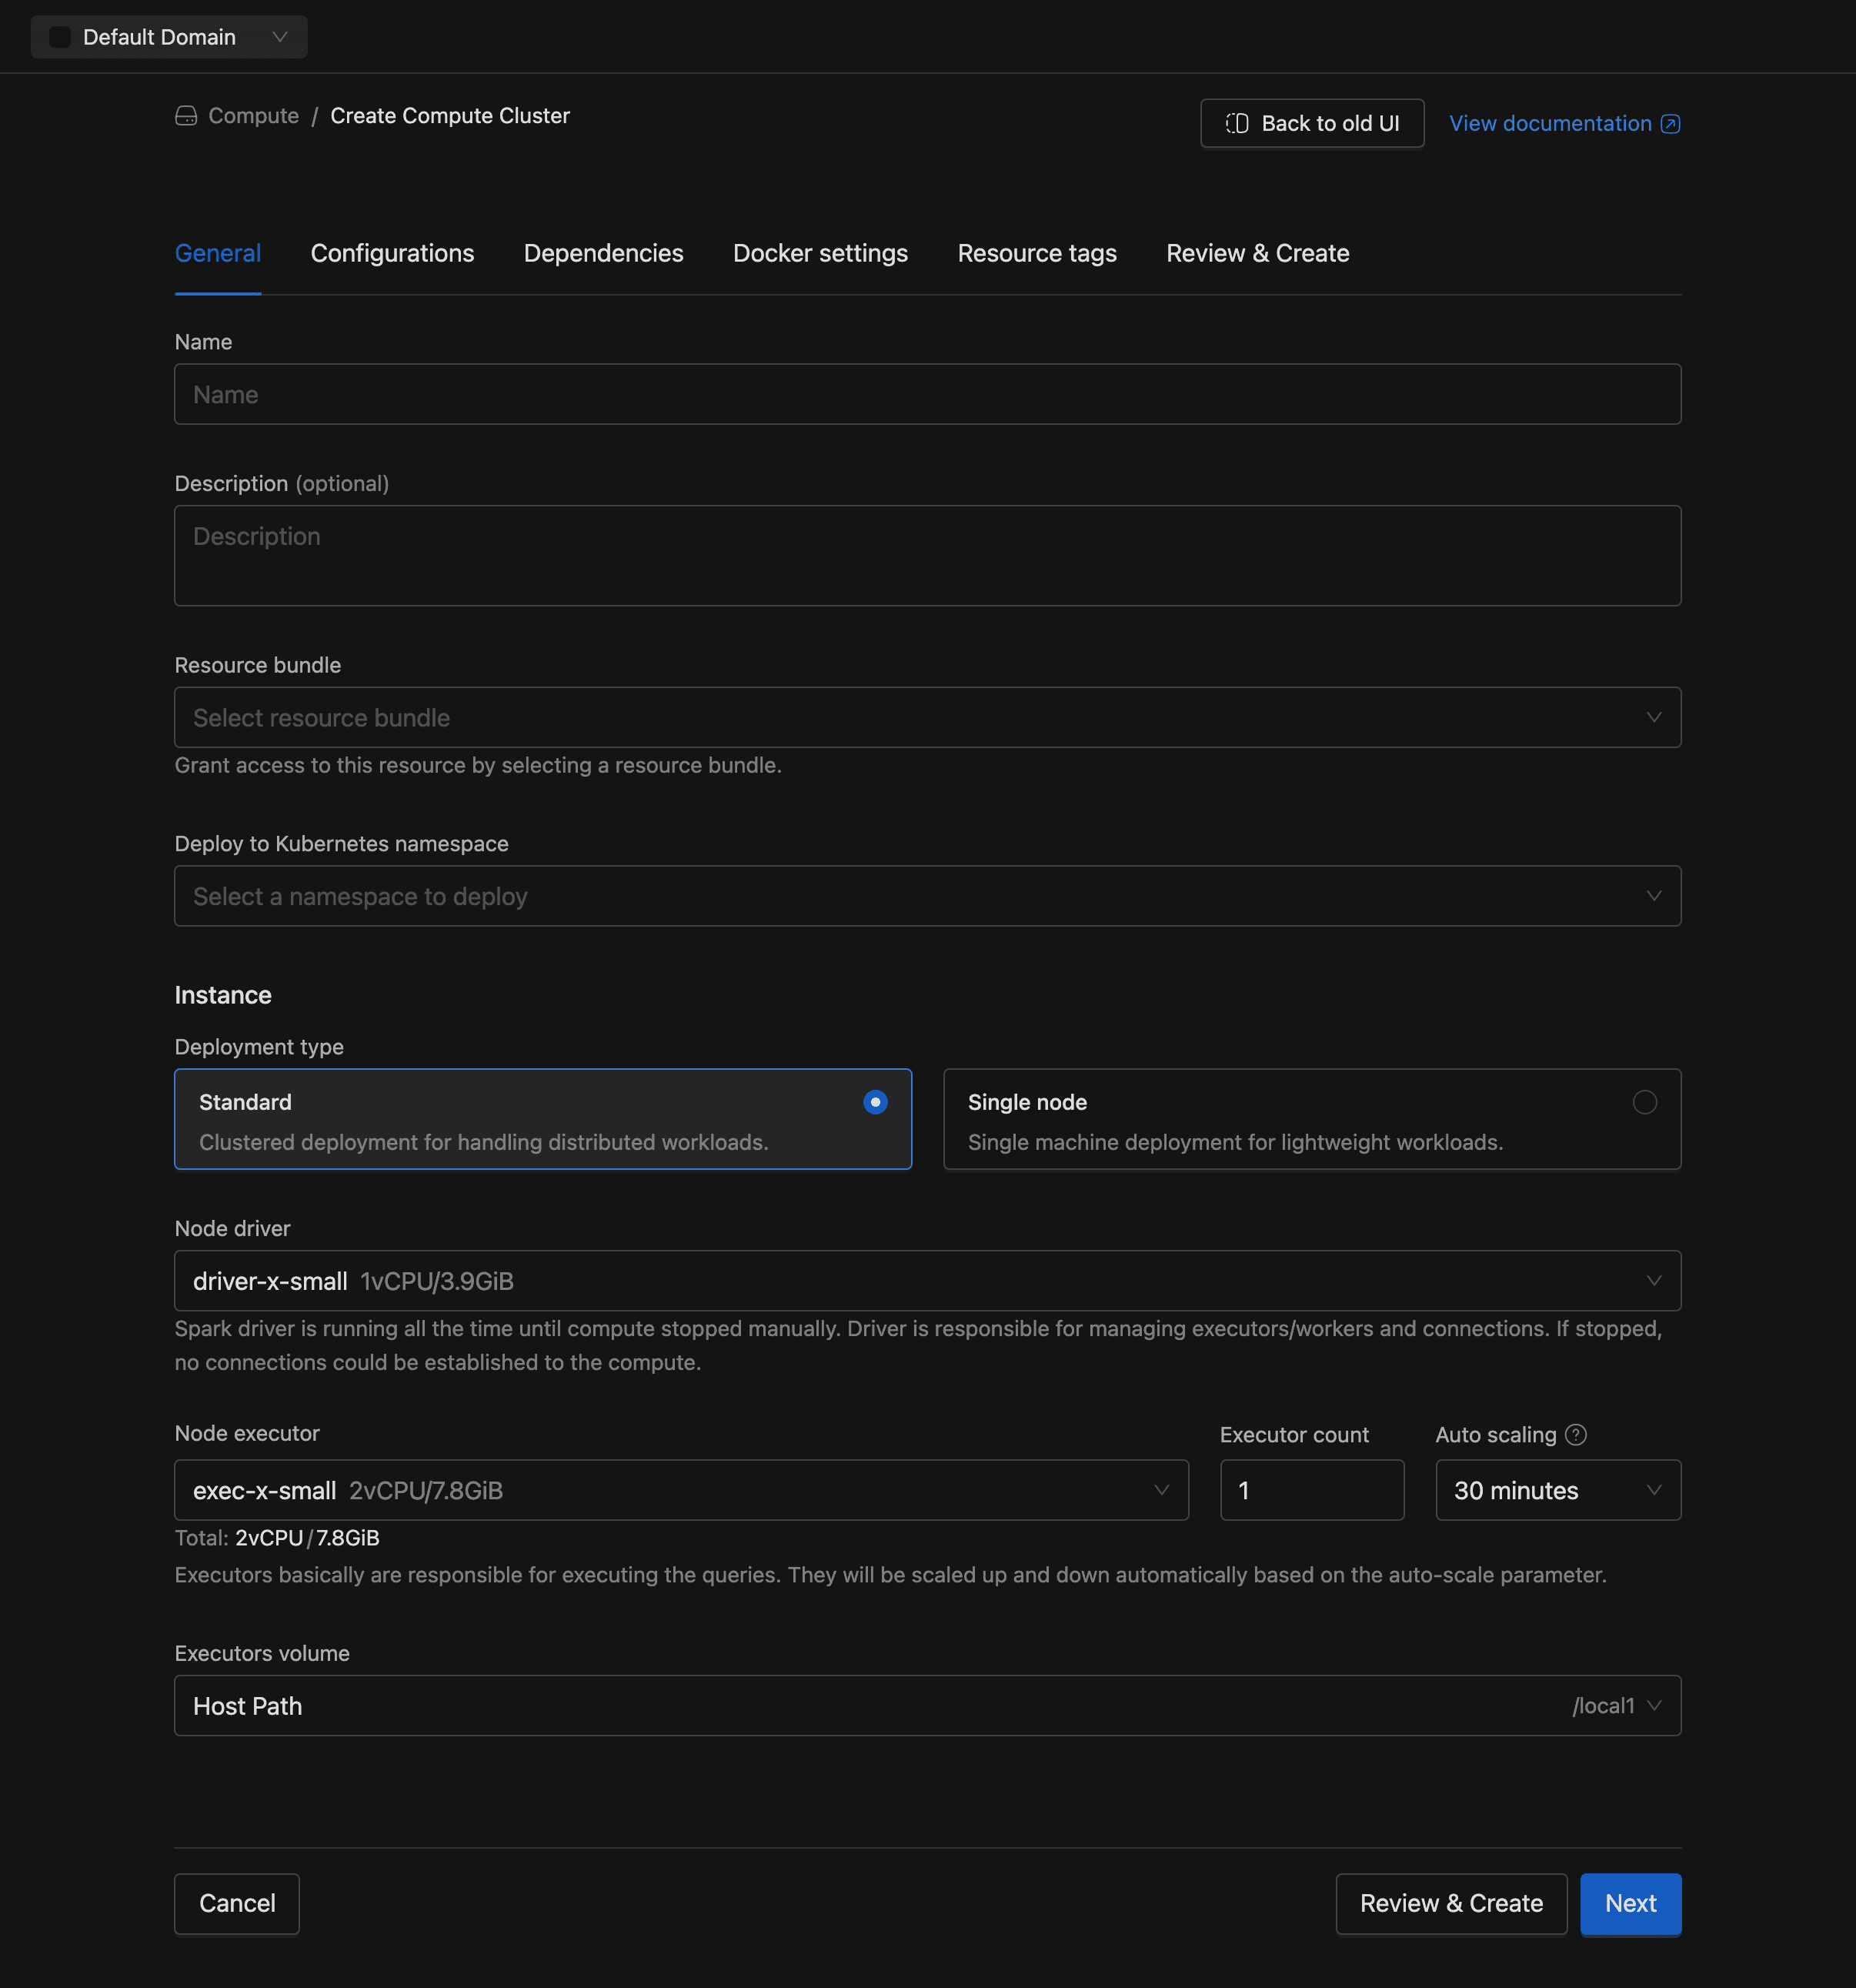
General Tab
This is where you set identity, sizing, and scaling for the cluster.
-
Name (required): A unique name using lowercase letters, numbers, and hyphens. Must start and end with a letter or number. Can't be changed after creation.
Naming ConstraintsMaximum 53 characters. Pattern:
^[a-z0-9]([-a-z0-9]*[a-z0-9])?$. -
Description (optional): A short explanation of the cluster's purpose.
-
Bundle (required if resource-level access control is enabled): Links the cluster to a resource bundle that defines access permissions. Hidden when resource-level access control is disabled. Like the name, this can't be changed later.
-
Namespace (required): Kubernetes namespace where the cluster runs. Only namespaces available to your account appear.
-
Deployment type: Choose between:
- Multi-node (default): Uses separate driver and executor pods.
- Single-node: Runs only the Spark driver. Executor-related fields and Auto scaling are hidden.
-
Node driver (required): The node type assigned to the Spark driver. The driver coordinates executors and handles incoming connections.
-
Node executor (required for multi-node): The node type used for executor pods.
-
Max executor count (required for multi-node): Maximum number of executor pods. Default is
1. The minimum cannot exceed the maximum. -
Min executor count (required for multi-node): Minimum number of executor pods. Default is
0. The maximum cannot be less than the minimum. -
Use spot instances (optional): Enables spot or preemptible instances for executor pods to reduce cost. Disabled by default.
-
Auto scaling (multi-node only): Enabled by default. Executors scale down to minimum executors configured after the configured idle period and scale back up when a query runs. Idle timeout options range from 1 minute to 3 hours. Default is 30 minutes. Select Disabled to keep executors running continuously.
-
Executors Volume (optional): Attach a persistent volume. See Volumes for configuration details.
Keep Auto Scaling EnabledYou're only billed for executors in the
Runningstate. Scale-up takes 10 to 15 seconds with a hot pool, or 1 to 2 minutes otherwise.
Configurations Tab
Use this tab to tune Spark behavior, inject secrets, and set JVM options without rebuilding a Docker image.
- Environment variables: key-value pairs injected at runtime, supporting both plain text and secret-backed values.
- Spark config: standard Spark properties (for example,
spark.executor.memoryOverhead = 512m). Also supports secrets. - Arguments: command-line arguments passed to the Spark application.
- Java options: JVM flags for driver and executor processes (for example,
-XX:+UseG1GC).


Dependencies Tab
Pull in external JARs, Python packages, and Maven artifacts at Spark startup.
- Jar file locations: URLs or paths to JAR files on the classpath (for example,
https://repo.example.com/my-udf.jar). - Files: URLs or paths to additional files available at runtime.
- PY file locations: Python files (
.py,.egg, or.zip) for PySpark (for example,local:///app/package.egg). - Maven packages: Maven coordinates resolved at startup (for example,
org.apache.spark:spark-avro_2.13:3.5.0).


Docker Settings Tab
Override the default Spark runtime image here. The Docker image field (optional) lists images from your registered Docker registries. See Private Docker Registry for setup details.


Tags Tab
Attach Resource tags (key-value metadata pairs) to categorize the cluster. Tags show up on the detail page and are handy for cost allocation or operational filtering.


Review & Create Tab
This tab shows a read-only summary of your configuration. Look it over, and if anything needs adjusting, click the relevant tab to go back. When everything looks correct, click Create.
If creation succeeds, IOMETE provisions the cluster and redirects you to its detail page. If the cluster name is already taken, you're returned to the General tab with a validation error. If resource quotas are exceeded, the form highlights the affected fields with error messages.

