Query Scheduling
From release 4.0.0 forward, IOMETE allows you to schedule your queries directly from the SQL Editor. This feature enables you to automate query execution based on custom intervals, manage resources, and monitor run histories effectively.
Creating a Schedule
You can create a new schedule based on the content of your currently open worksheet.
- Open the worksheet containing the query you wish to automate.
- Click the Schedule icon located in the new UI.


- A configuration modal will appear with four tabs to customize your schedule.
Configuration Tabs
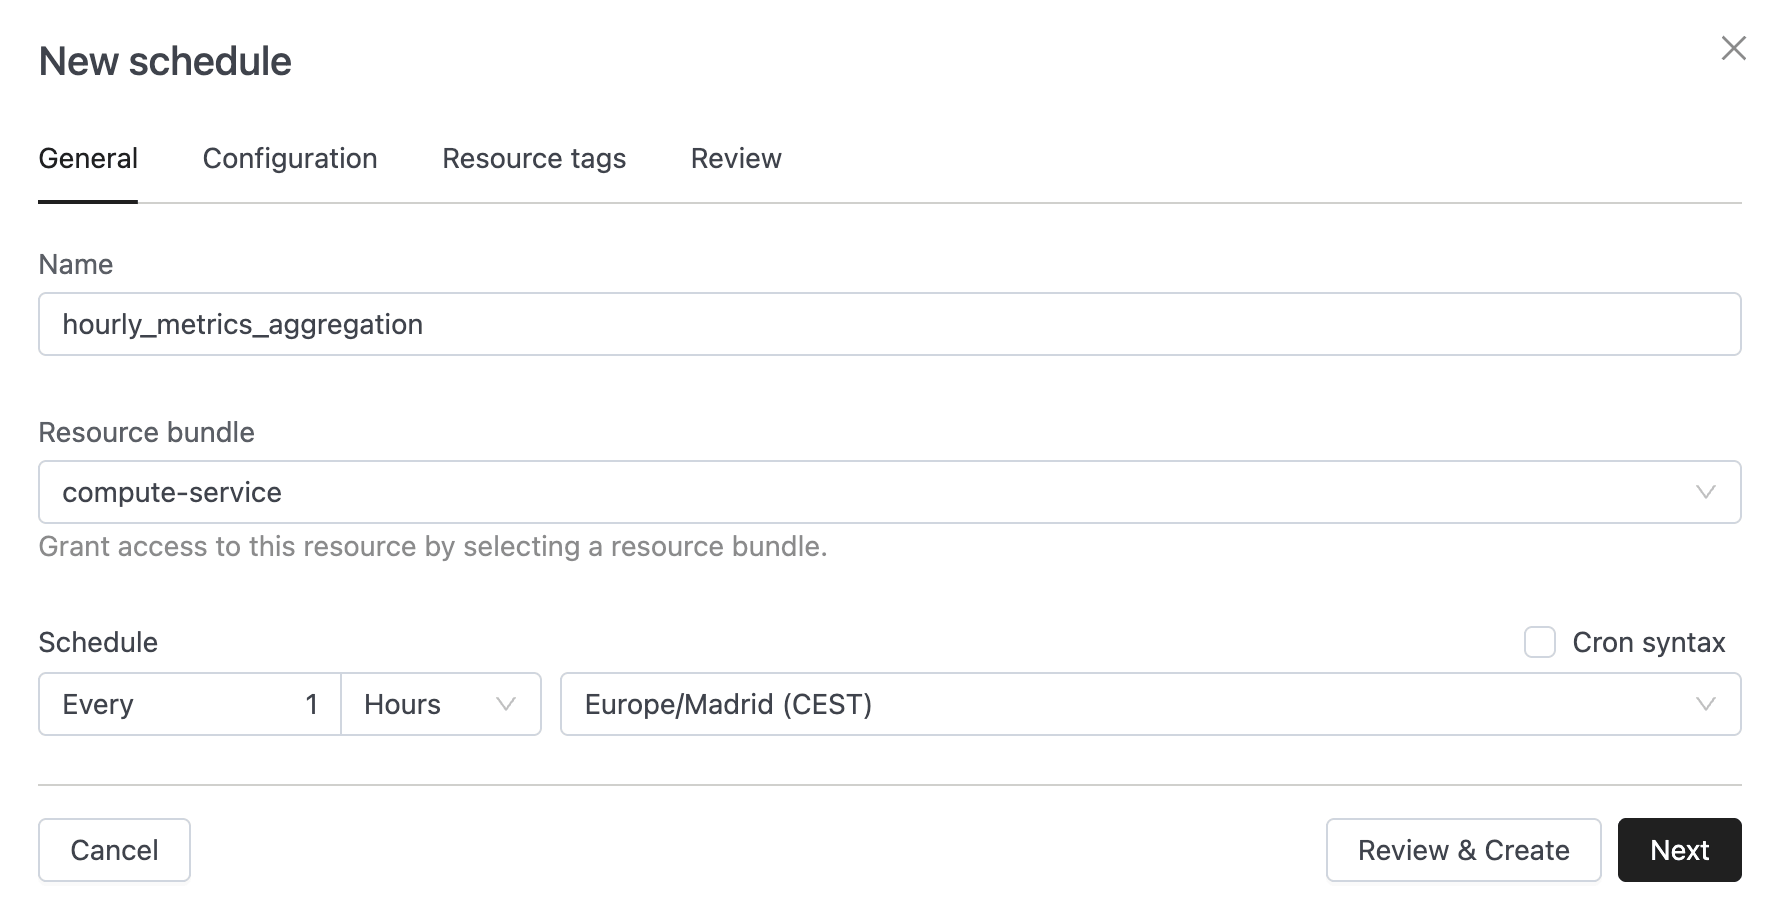
- General: This tab contains the mandatory fields required to create a schedule with minimum effort. You must provide a Name and select a Resource Bundle. Here, you also define the scheduling information, including the Time Zone and Interval. You can also enable Cron Syntax to define more complex schedule intervals.
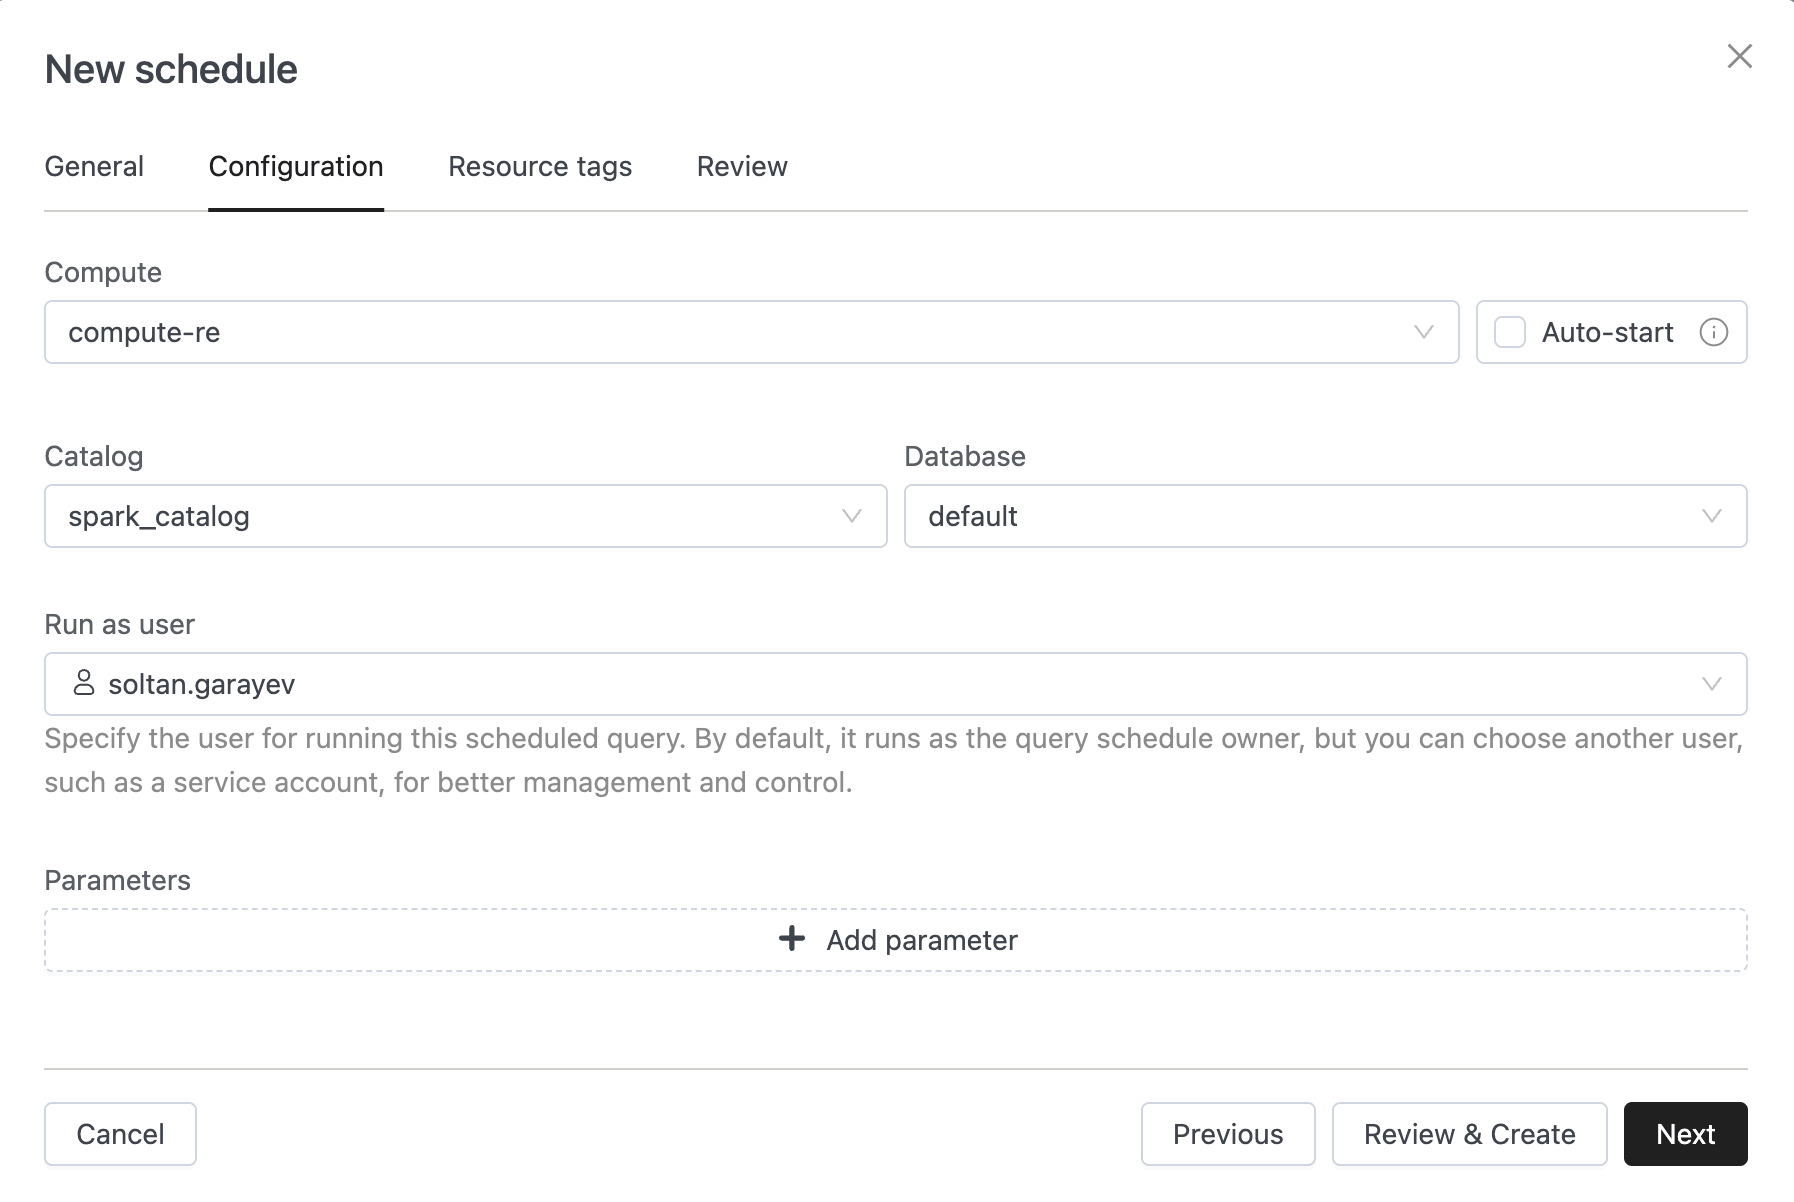
- Configuration: Configure the execution environment. The Compute, Catalog, and Database fields are automatically pre-filled based on your worksheet selections.
- Auto-start: Enable the checkbox next to the Compute dropdown to automatically start the compute cluster if it is not running when the schedule triggers. Auto-start is disabled by default — if the compute is stopped when the schedule fires and this option is off, the run fails to connect. You must have execute permission on the selected compute to enable Auto-start.
- Run as user: This is a required field. You can select either yourself or a Service Account to execute the query.
- Parameters: If your query contains parameters, they will be listed here for configuration.
- Resource Tags: Define resource tags for your schedule to help with organization and cost tracking.
- Review: A final view to verify your settings before creation.
Managing Schedules
Once created, you can manage your automation via the Schedules menu item, located in the Workspace section below the SQL Editor and Query Monitoring.
The Schedules list provides an overview of all your scheduled jobs, displaying:
- Schedule Name and ID
- Compute resource used
- Run as user
- Schedule Interval
- Activity sparkline showing recent run history
- Status (Active or Paused)


Hovering over the activity sparkline reveals a tooltip with the run name, status, duration, and start time.


Monitoring Runs and Details
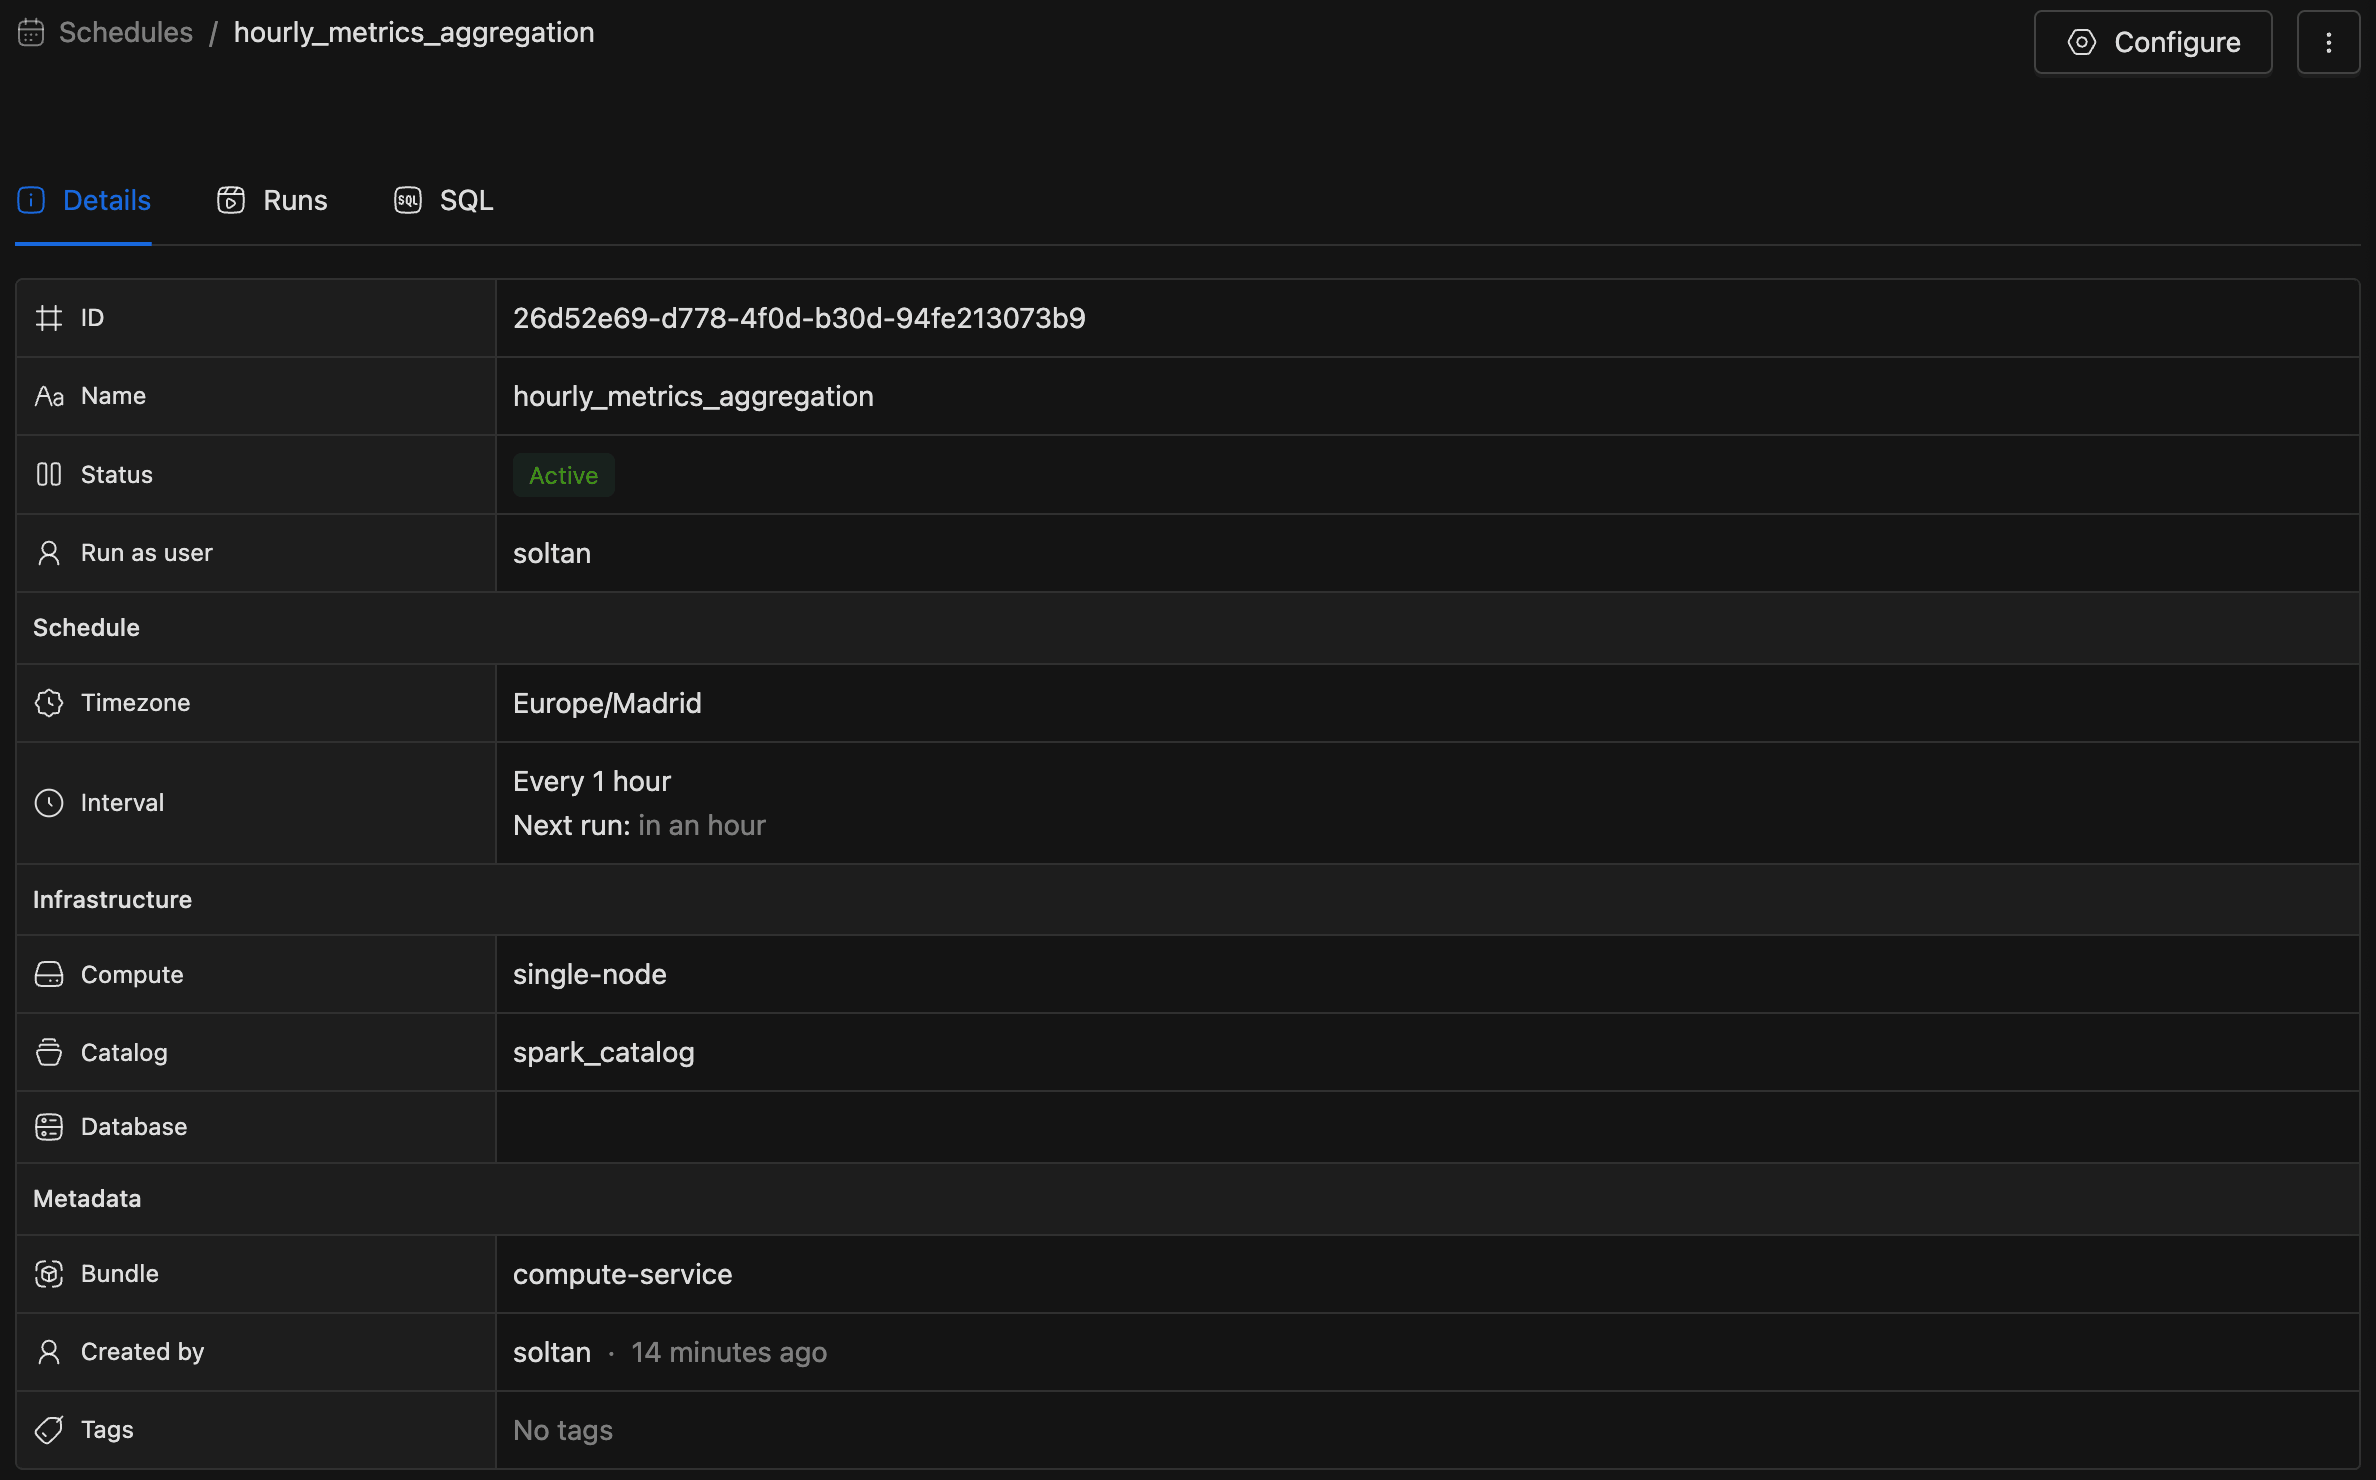
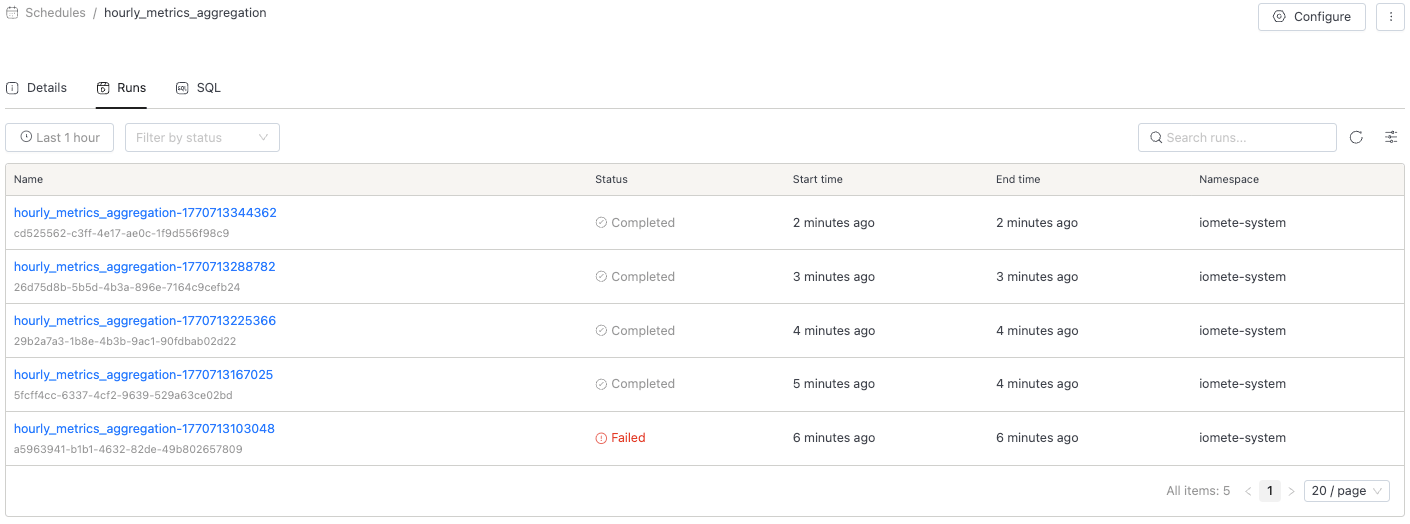
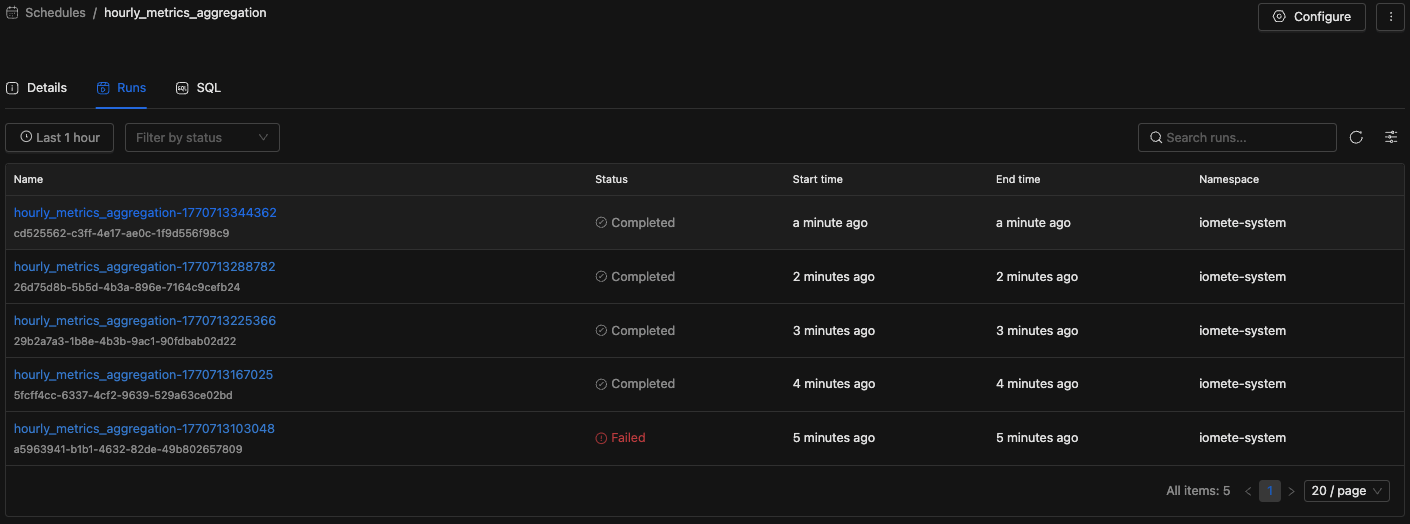
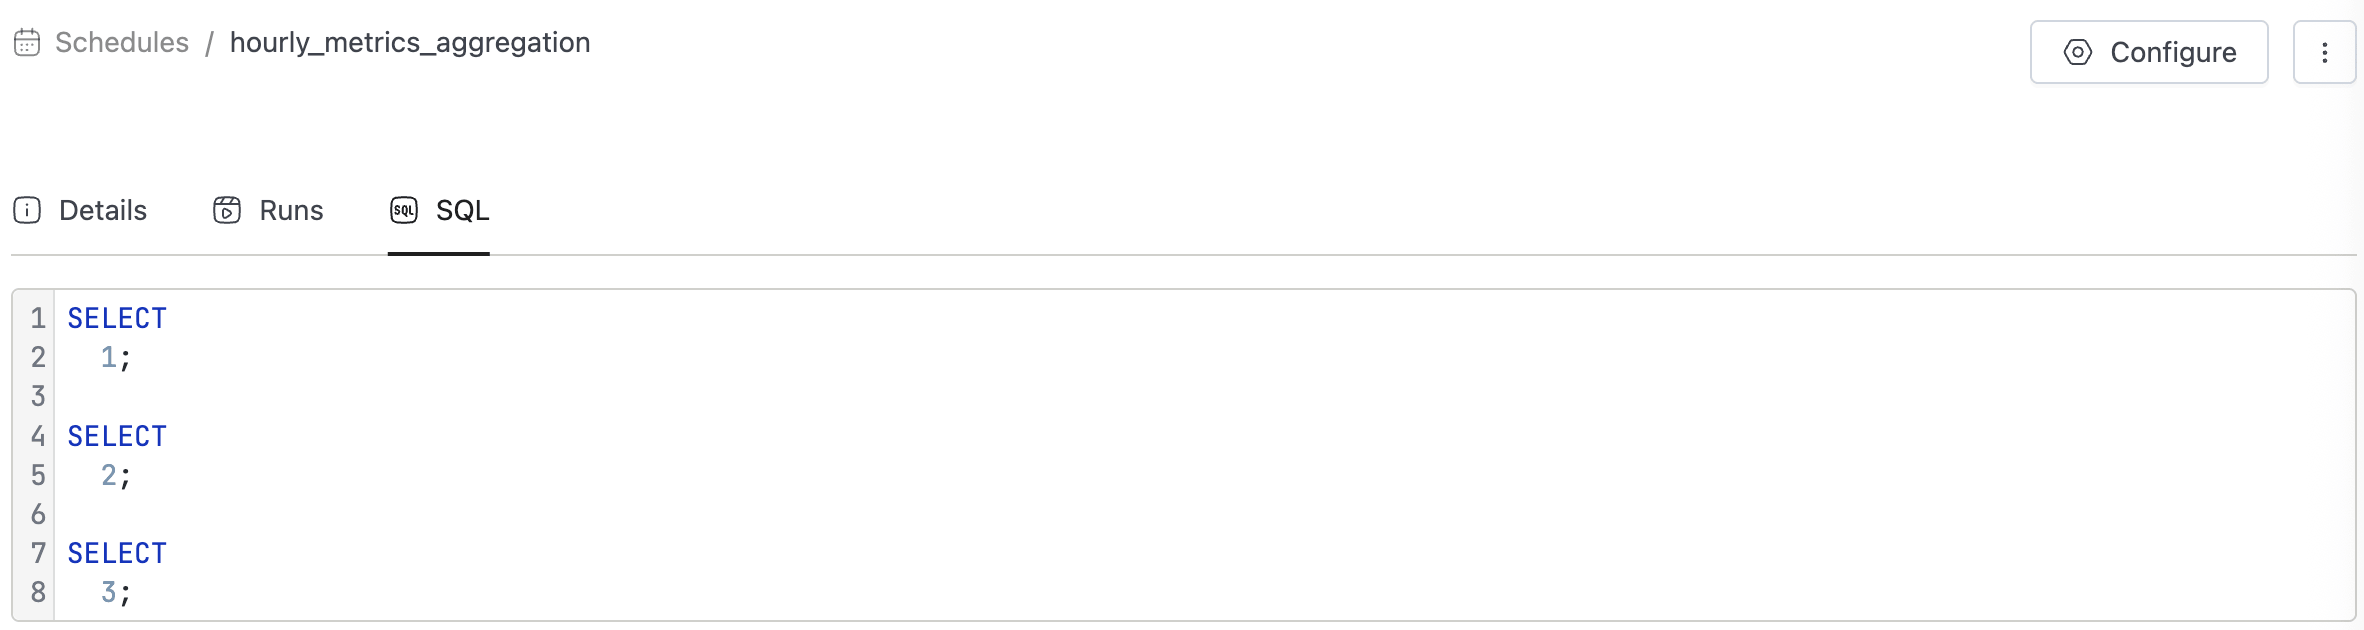
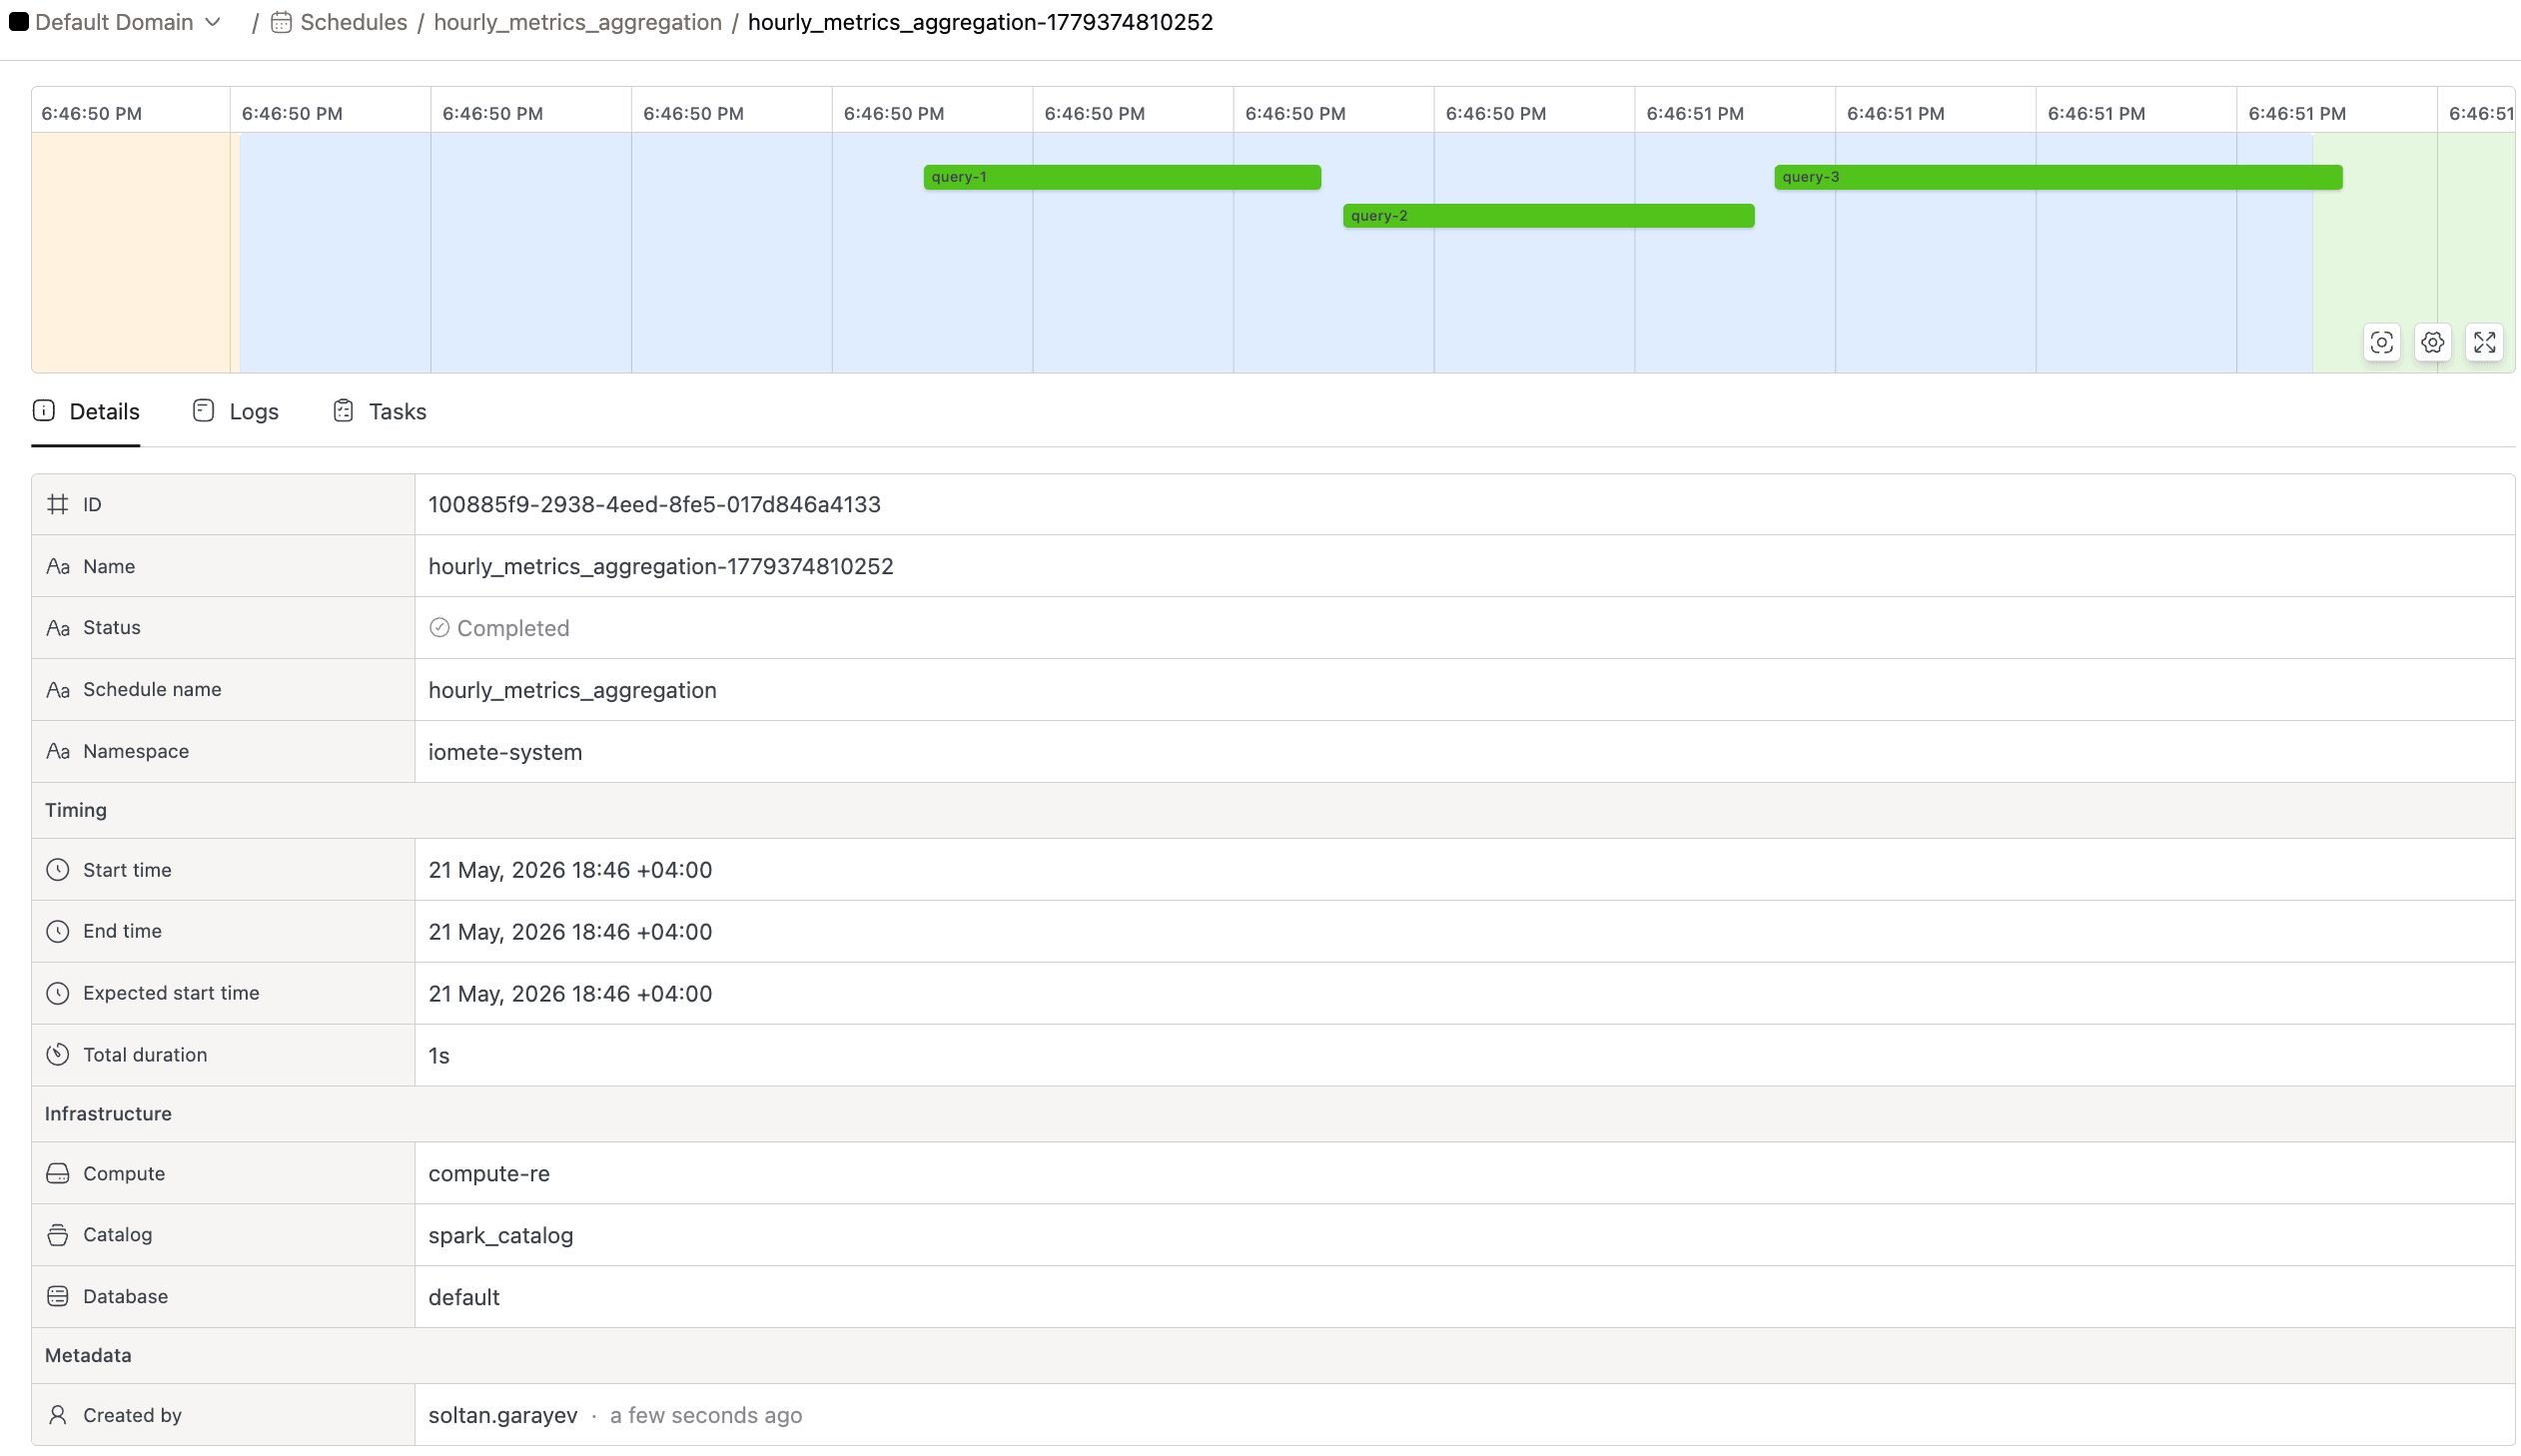
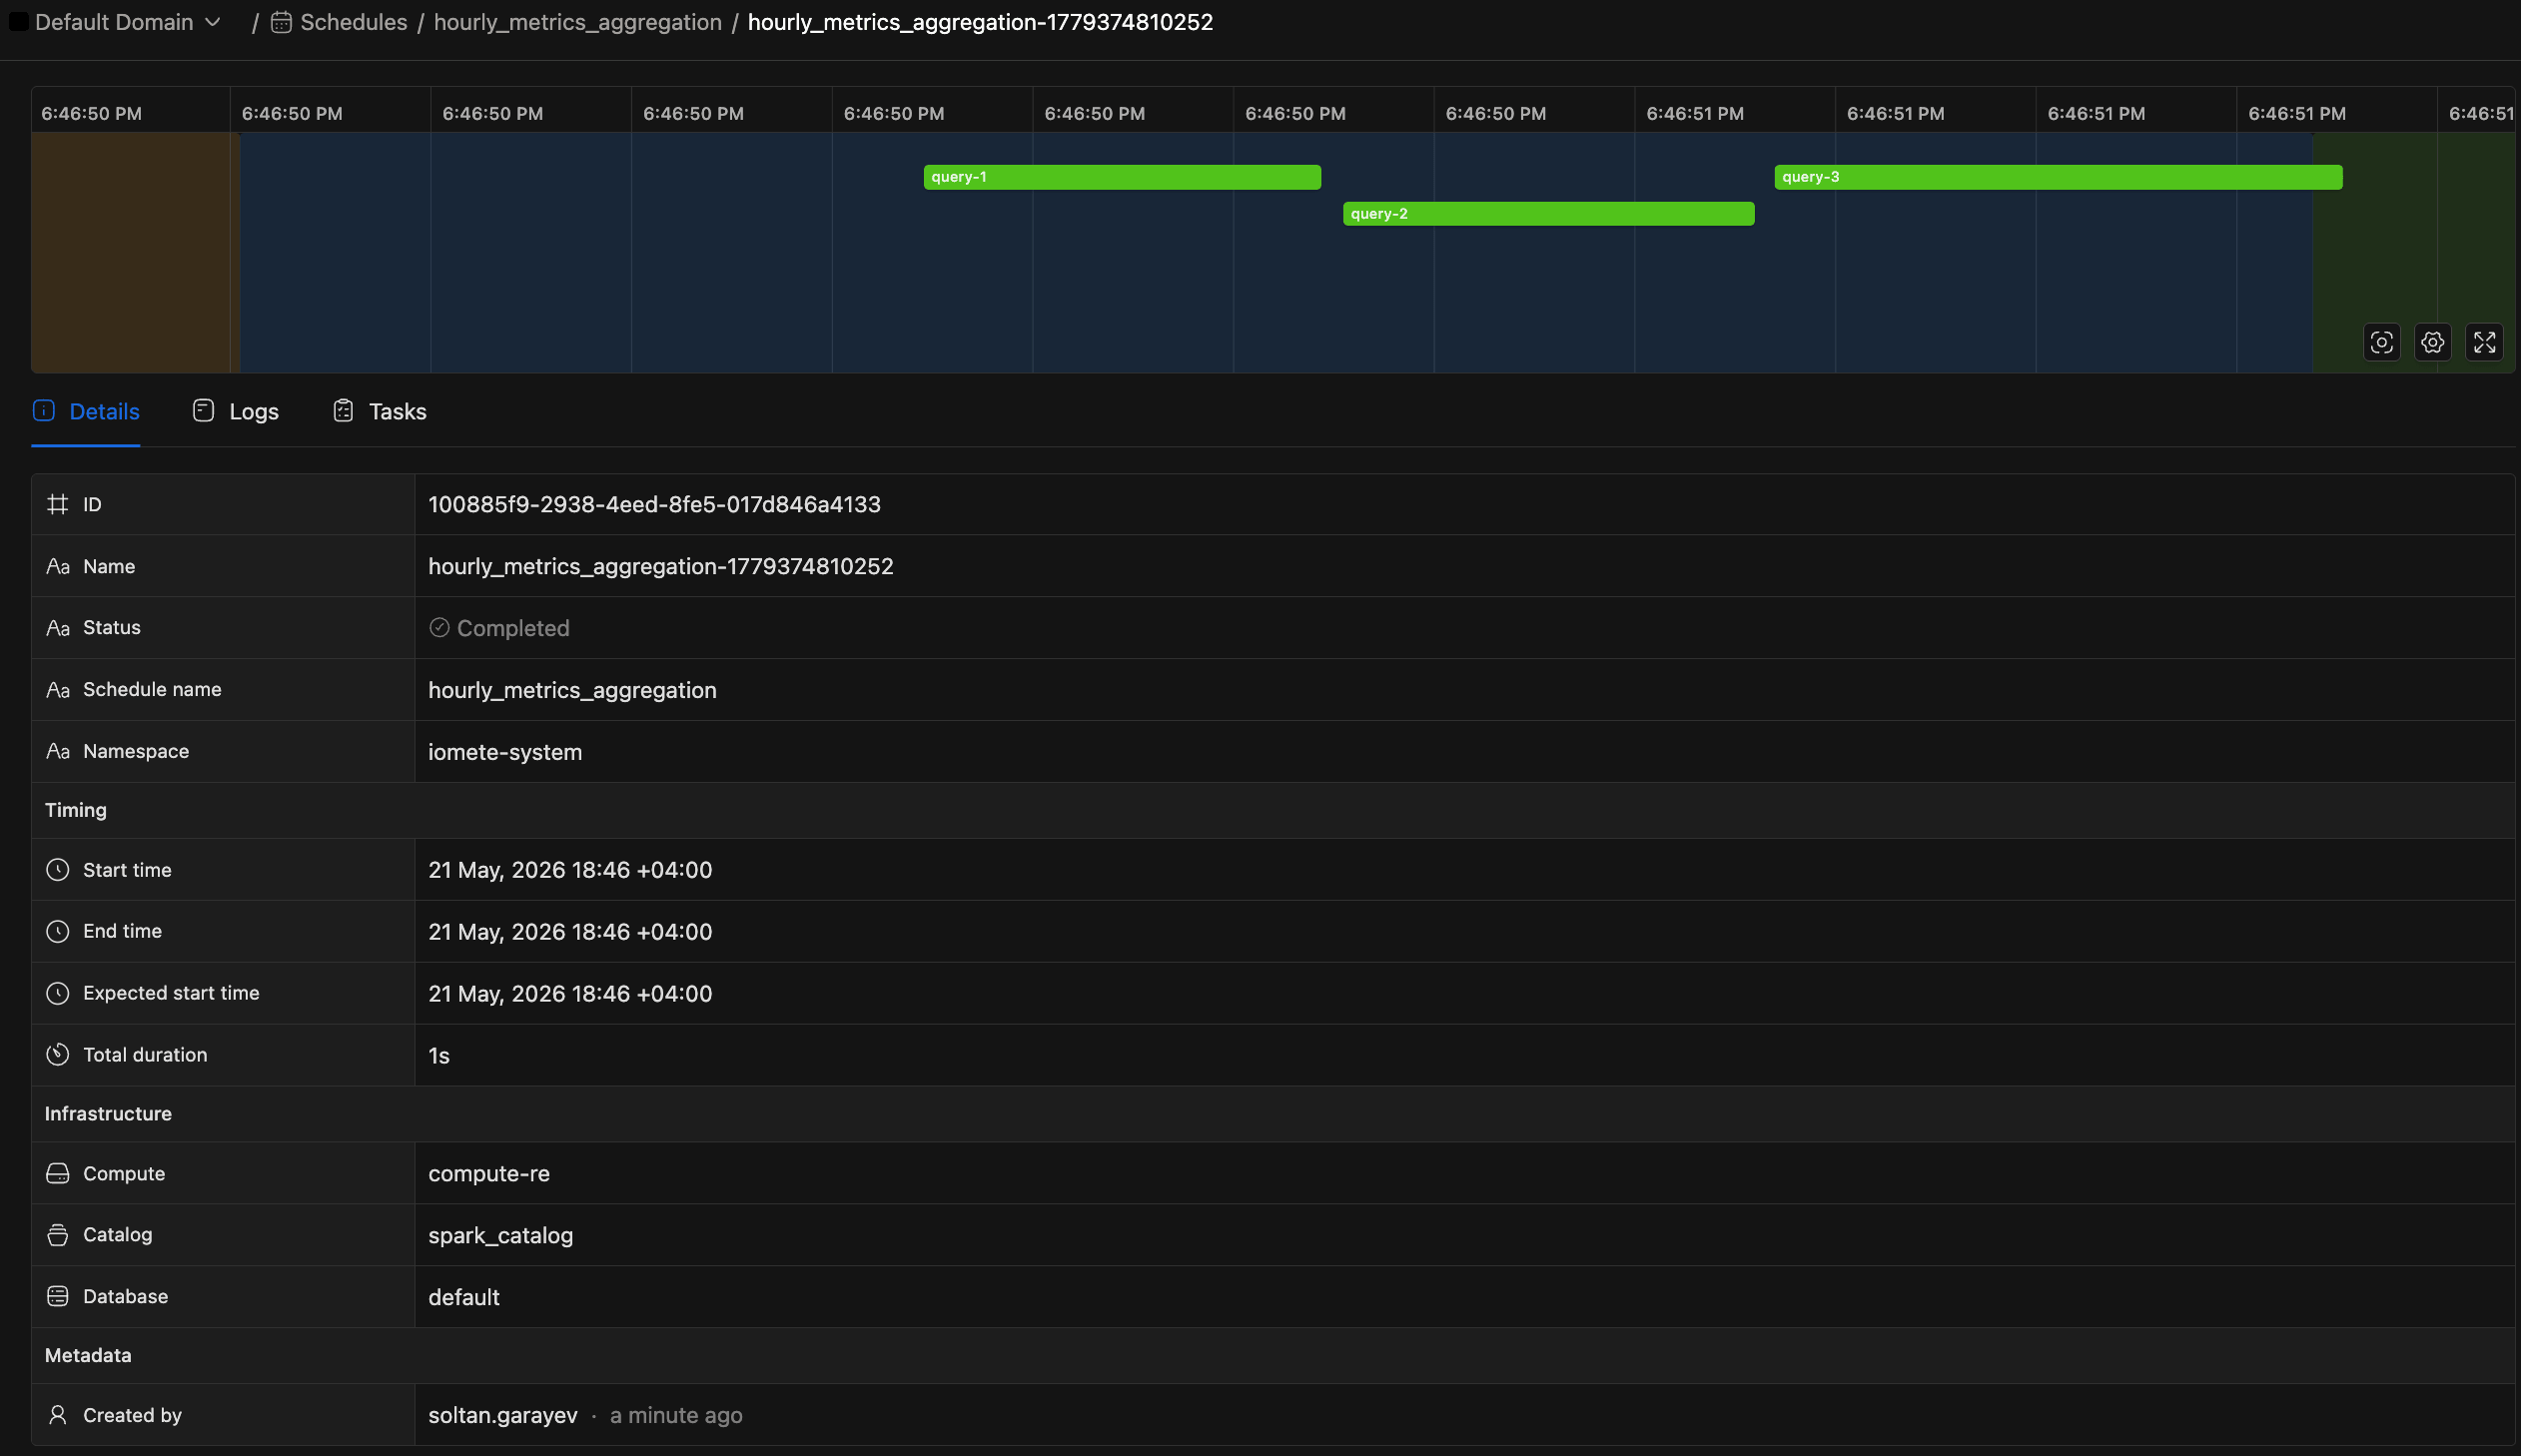
Clicking on a schedule's name or selecting View (in action menu) navigates you to the details page. This page contains three tabs:
- Details: Displays information including ID, status, run as user, infrastructure configuration, and metadata.

- Runs: Automatically opens upon navigation. It lists historical executions, showing the status, start time, end time, and namespace for each run. You can filter runs by time range (e.g., "Last 1 hour"), status, and search by run name.
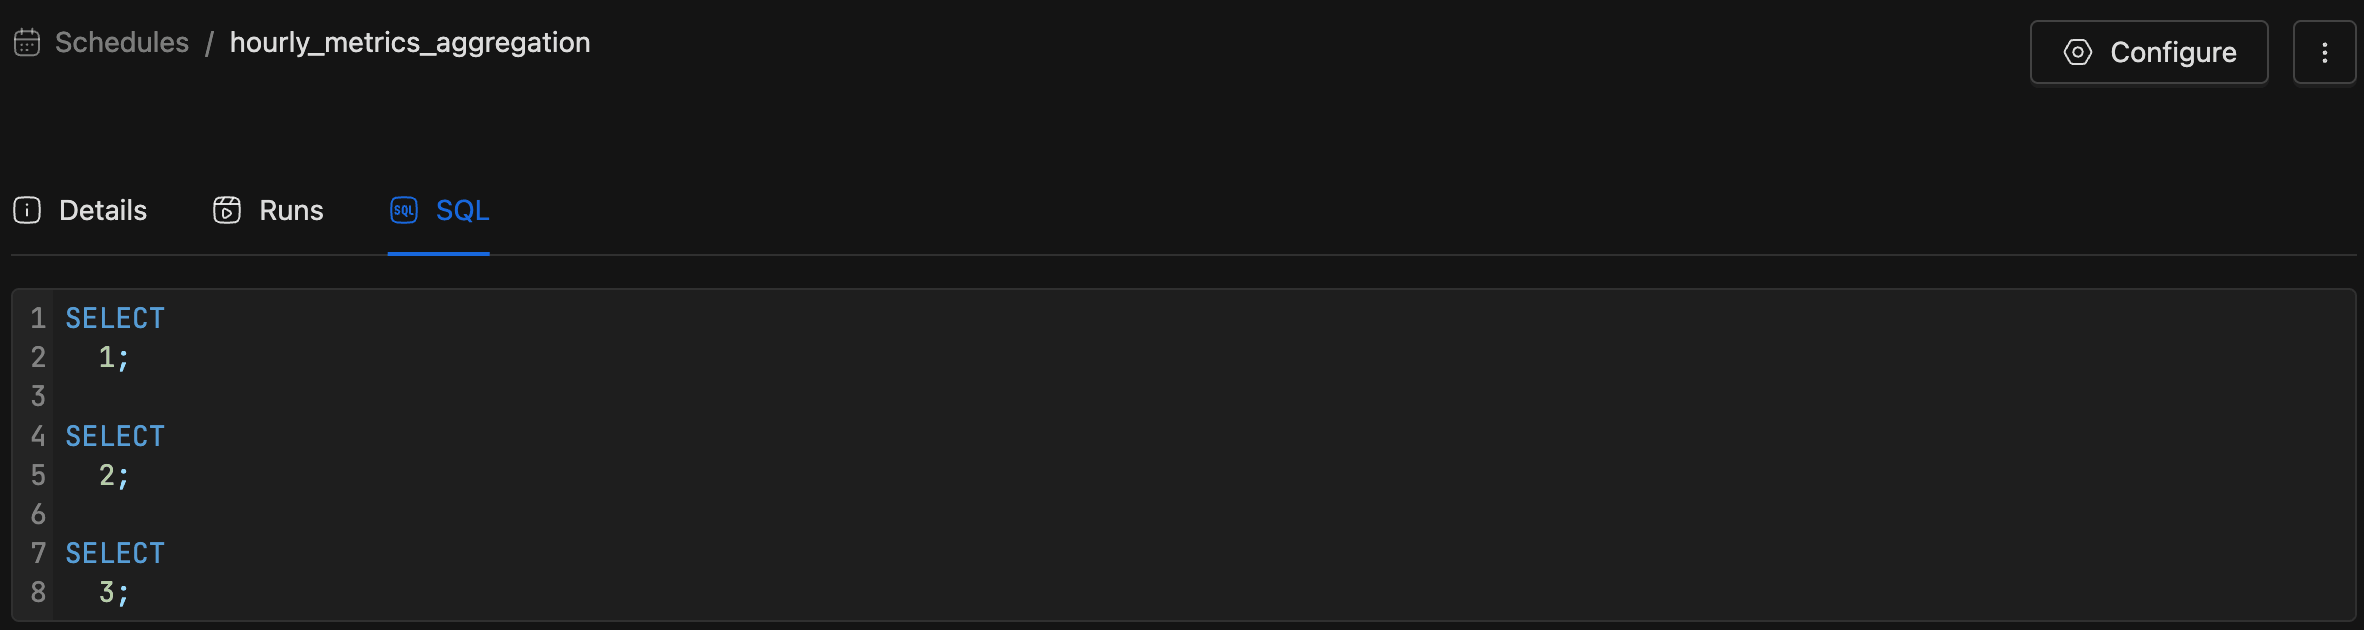
- SQL: Displays the actual SQL queries currently scheduled.
Run Details
To investigate a specific execution, click on the Run Name or ID in the Runs tab. This opens the Run Details page, providing a detailed view of that specific execution instance.
A visual timeline chart at the top of the page shows query execution across time, giving you a quick overview of how tasks were scheduled and how long each one took. Beneath the timeline, the run information is organized into three tabs: Details, Logs, and Tasks.
Viewing Run Logs
The Logs tab streams the orchestration logs produced during the run, including compute readiness checks (when Auto-start is enabled), query submission, and any errors raised by the scheduler. Use the time-range selector (defaults to the last 30 minutes), auto-refresh interval, and line-wrap toggle to navigate the output, or use the download icon to export the visible logs.
The Logs tab shows scheduler logs, not Spark executor output. For per-query status and duration, switch to the Tasks tab.
Viewing Run Tasks
By navigating to the Tasks tab within the Run Details page, you can see the individual queries executed within that run. Clicking a task bar in the timeline opens a side panel displaying the task's State, Task Run ID, Duration, and Start/End Time.
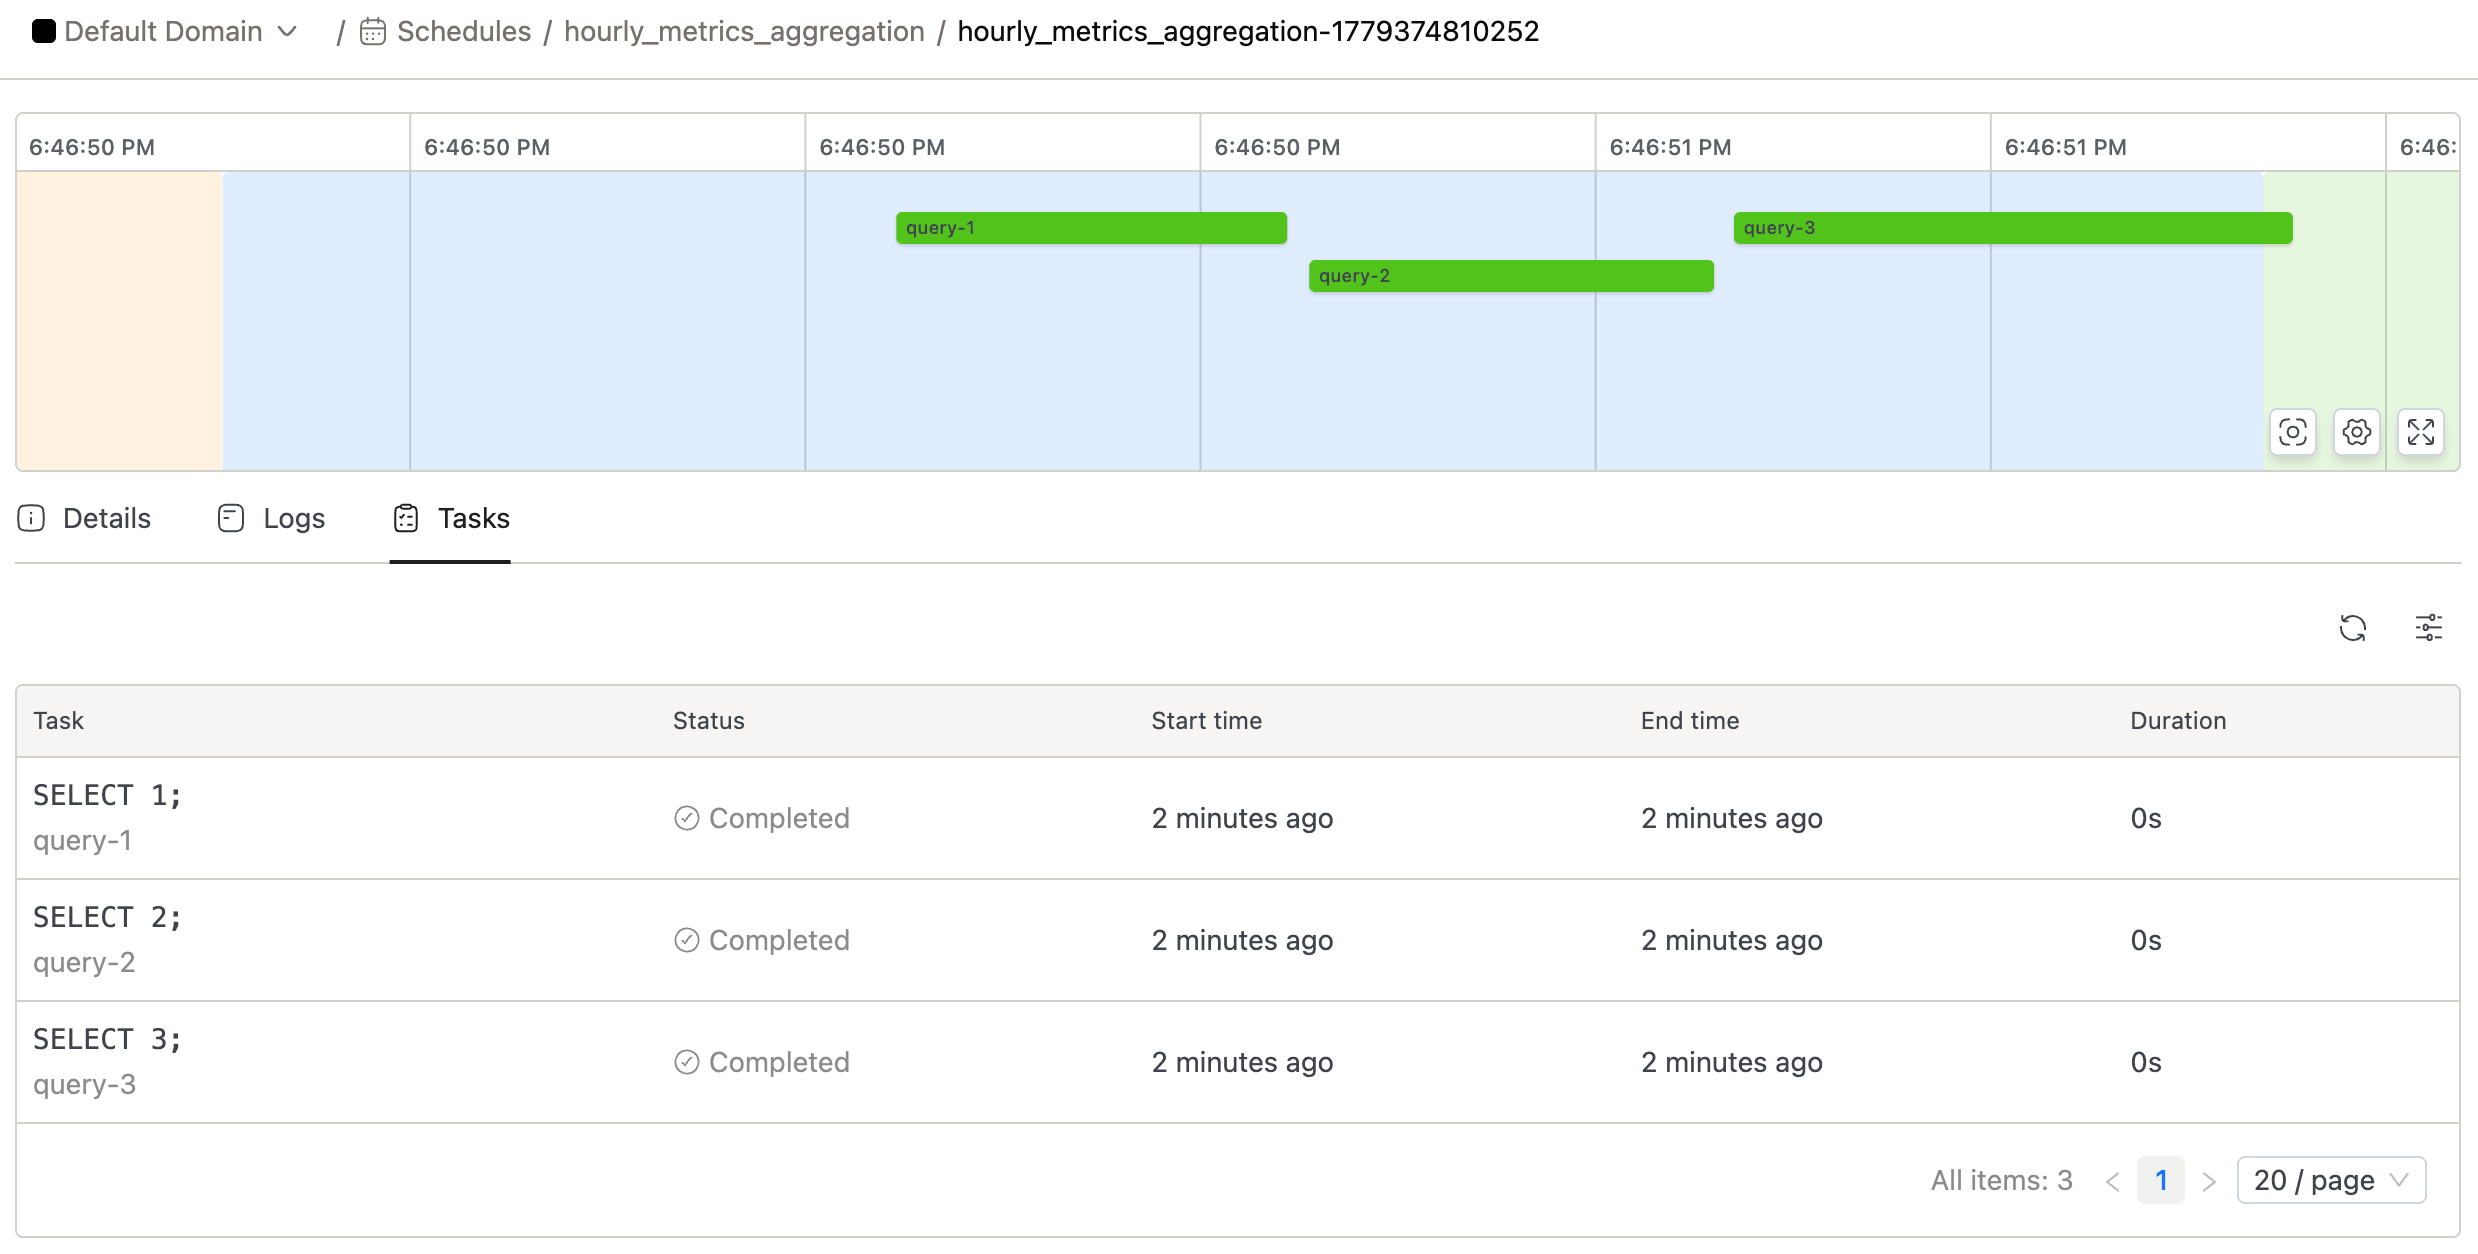
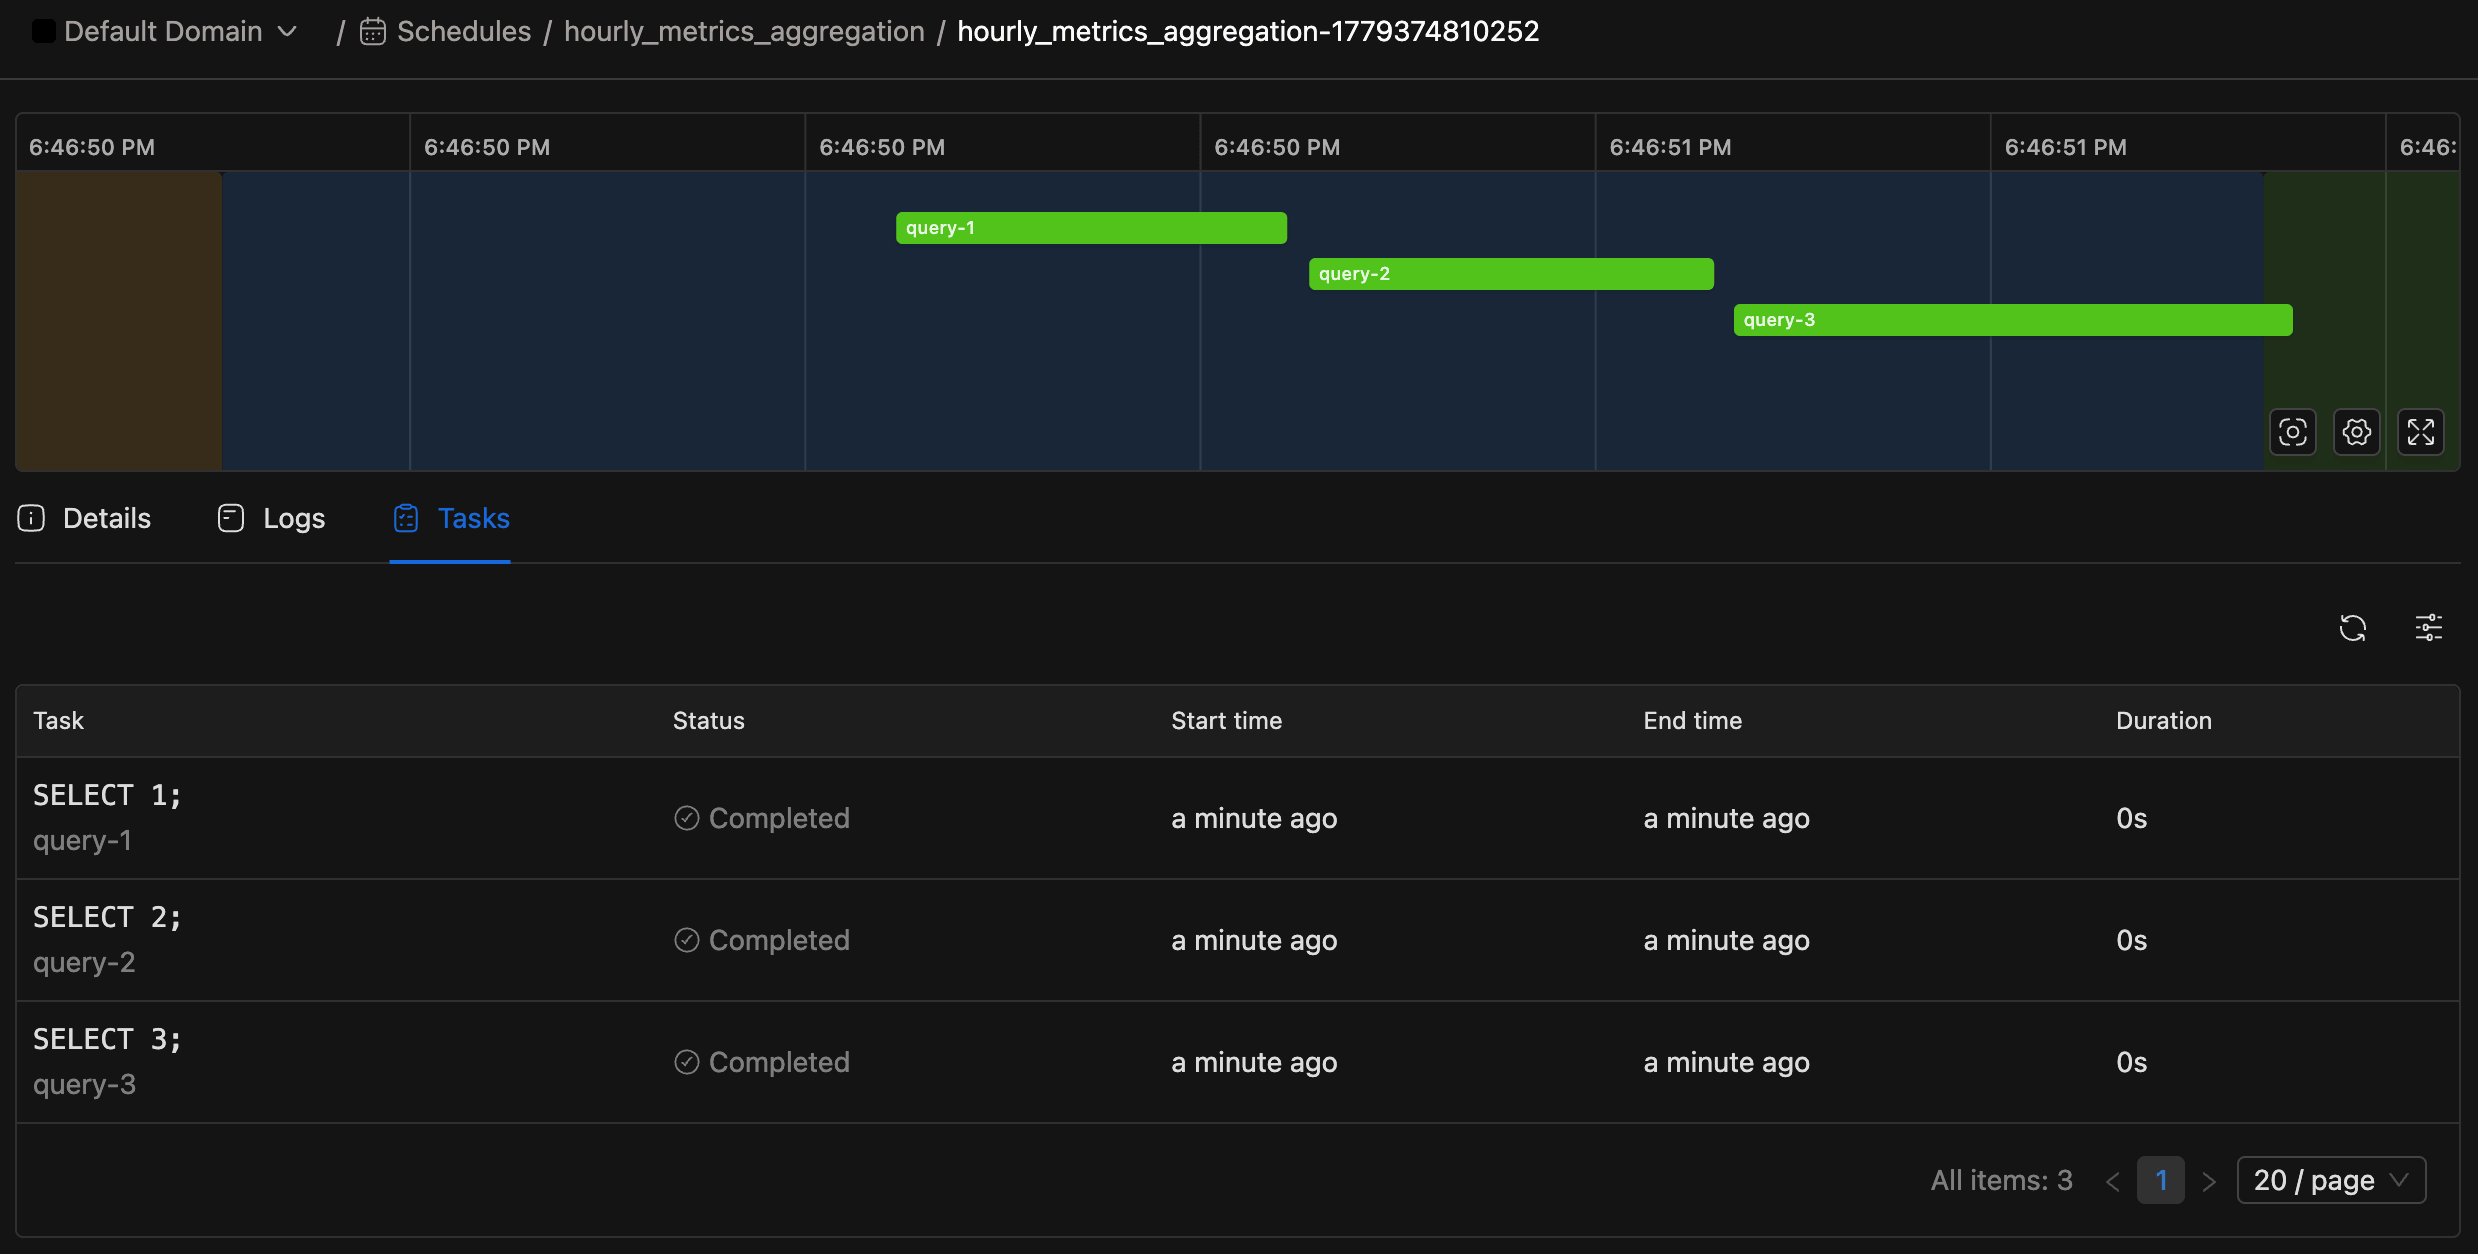
Each query counts as a single task. If your schedule contains two queries, each run will generate two tasks.
Editing a Schedule
To modify an existing schedule:
- Navigate to the schedule's details page and click the Configure button.
- This opens a tab in the SQL Editor displaying your scheduled queries.
- You can modify the SQL code directly. In order to save query changes or to update schedule settings (such as Interval, Time Zone, or Infra), click the highlighted Edit schedule settings icon.
If you attempt to close the tab without saving, you will be prompted to Discard, Keep Editing, or Save & Close.