Managing Jupyter Containers
Viewing the Container List
The container list gives you an overview of all Jupyter Containers and their current status. Open it by selecting Jupyter Containers under the Engine group in the left sidebar. The page shows a paginated table of all containers you have permission to access.
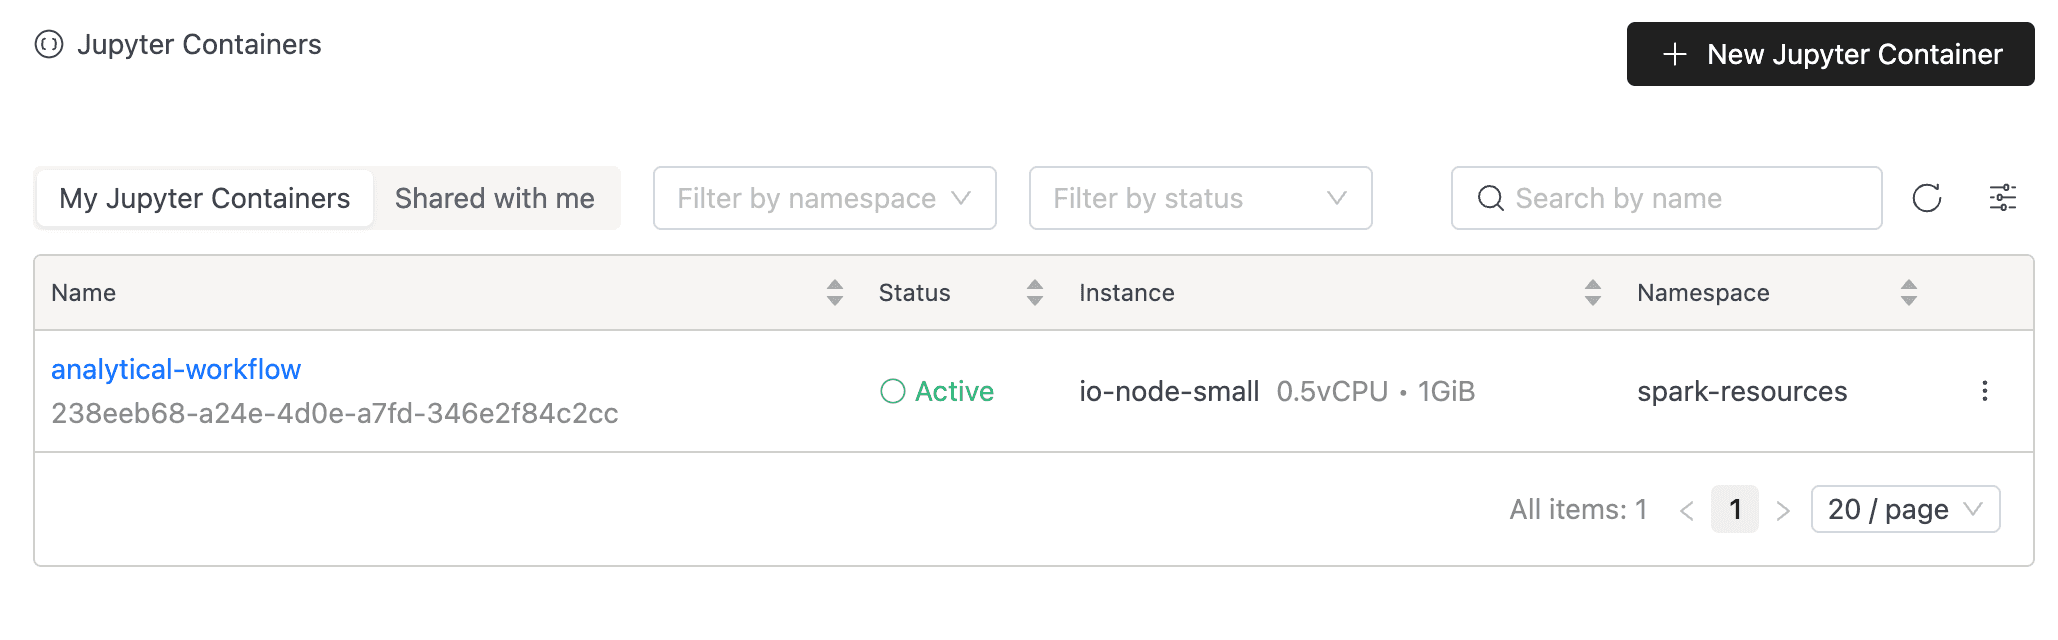
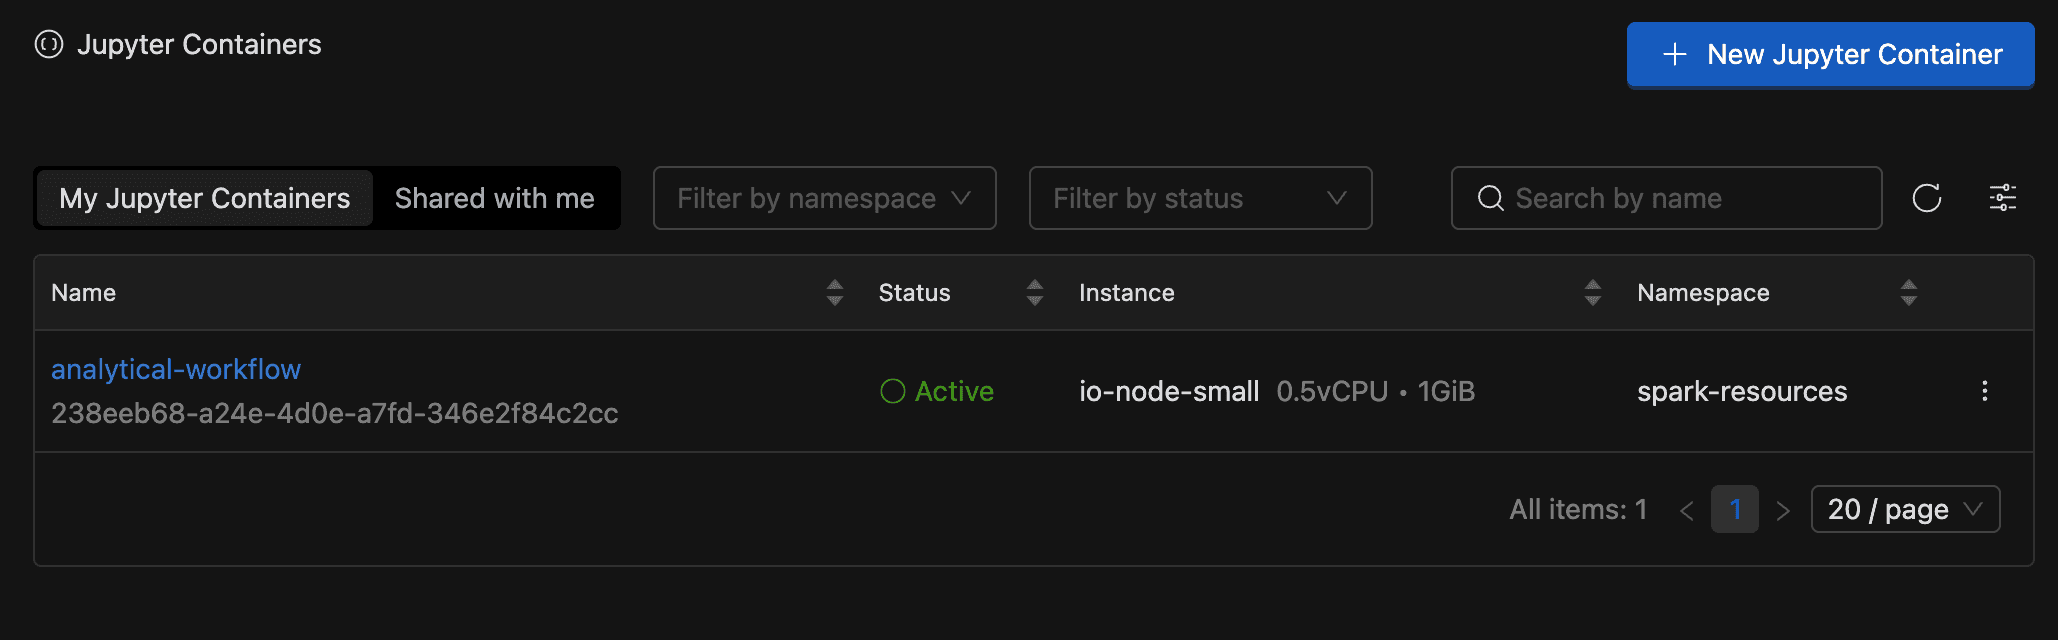
Each row includes the following columns:
| Column | Description |
|---|---|
| Name | Opens the container detail page. The container ID appears on hover and can be copied. |
| Status | Color-coded status badge (Starting, Active, Stopped, Failed). Hover over a failed status to see the error message. |
| Instance | The node type assigned to the container (CPU and memory). |
| Namespace | The Kubernetes namespace where the container runs. |
| Actions | Context menu with lifecycle and management actions. |
Filtering the List
Use the controls above the table to narrow results:
- View toggle: Switch between My Jupyter Containers (containers you created) and Shared with me (containers others created and shared with you through resource bundles).
- Namespace: Filter by deployment namespace.
- Status: Filter by container state (
Starting,Active,Stopped,Failed). - Search: Match containers by name.
Creating a Jupyter Container
Create a container to get a dedicated JupyterLab environment. The container starts automatically after creation.
- Go to the Jupyter Containers page.
- Click New Jupyter Container in the top-right corner.
- Complete the configuration across the four tabs: General, Configurations, Tags, and Review & Create.
- Open Review & Create, verify the summary, then click Create.
You can move between tabs using Previous and Next, or by selecting a tab directly. The Next button validates the current tab before proceeding. If validation fails, the tab shows a red exclamation mark and you must fix the errors before continuing.
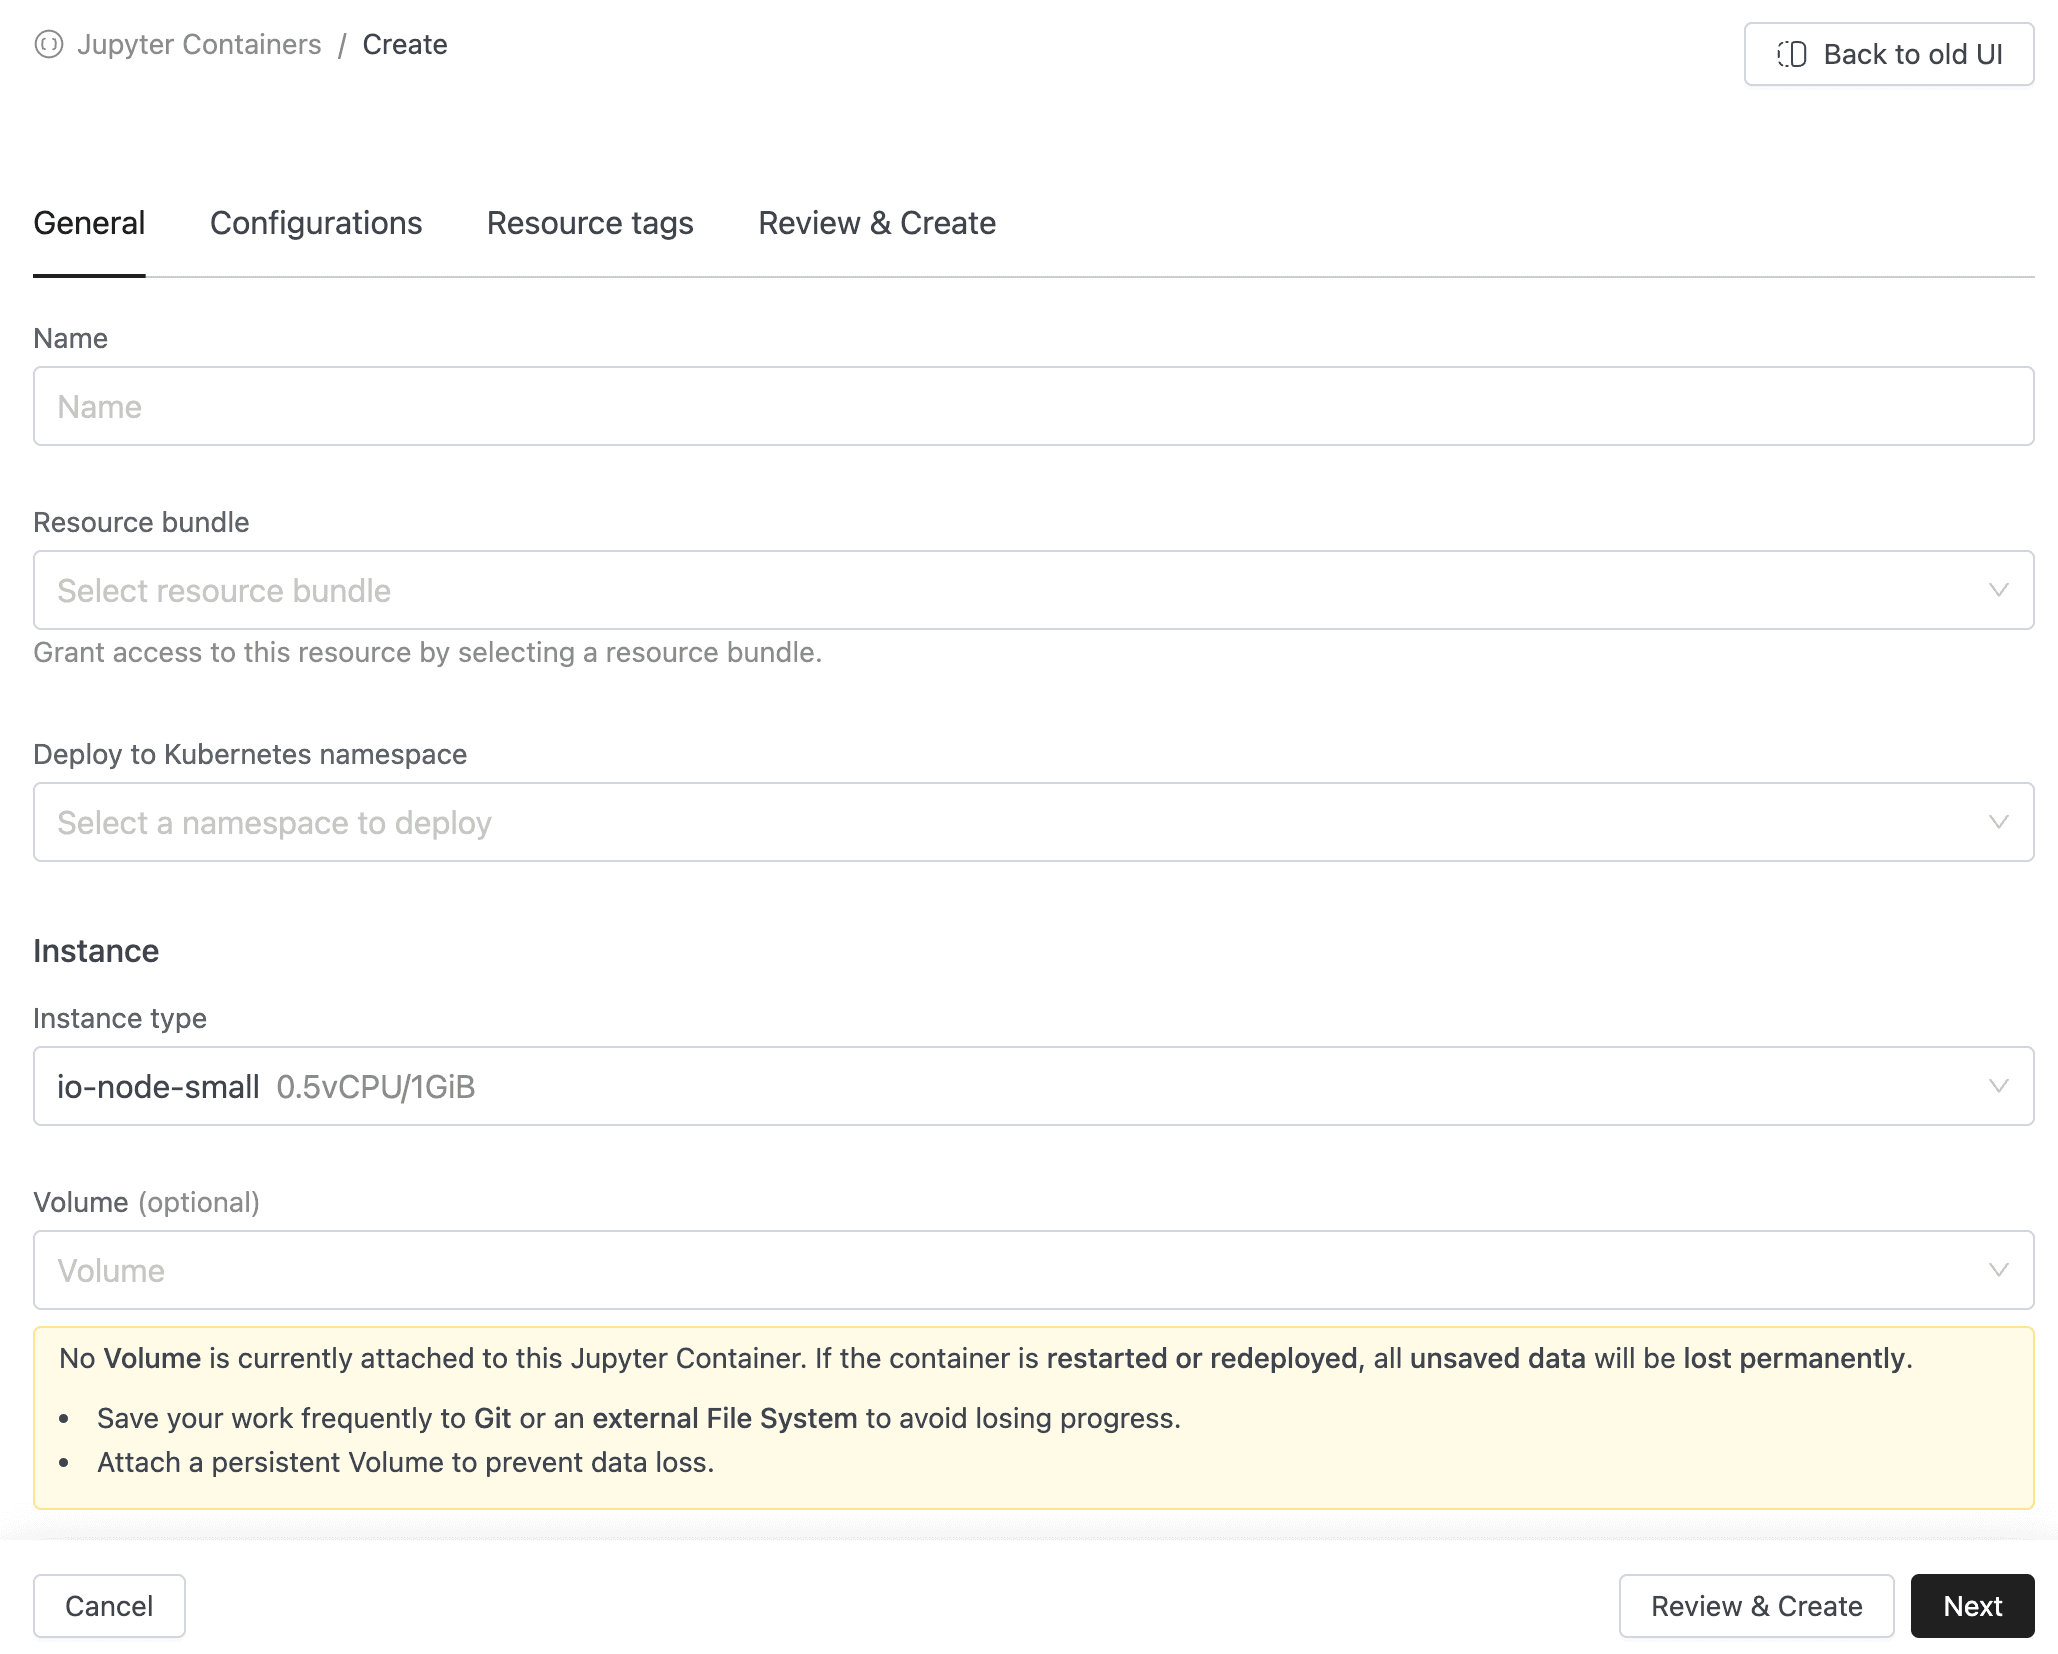
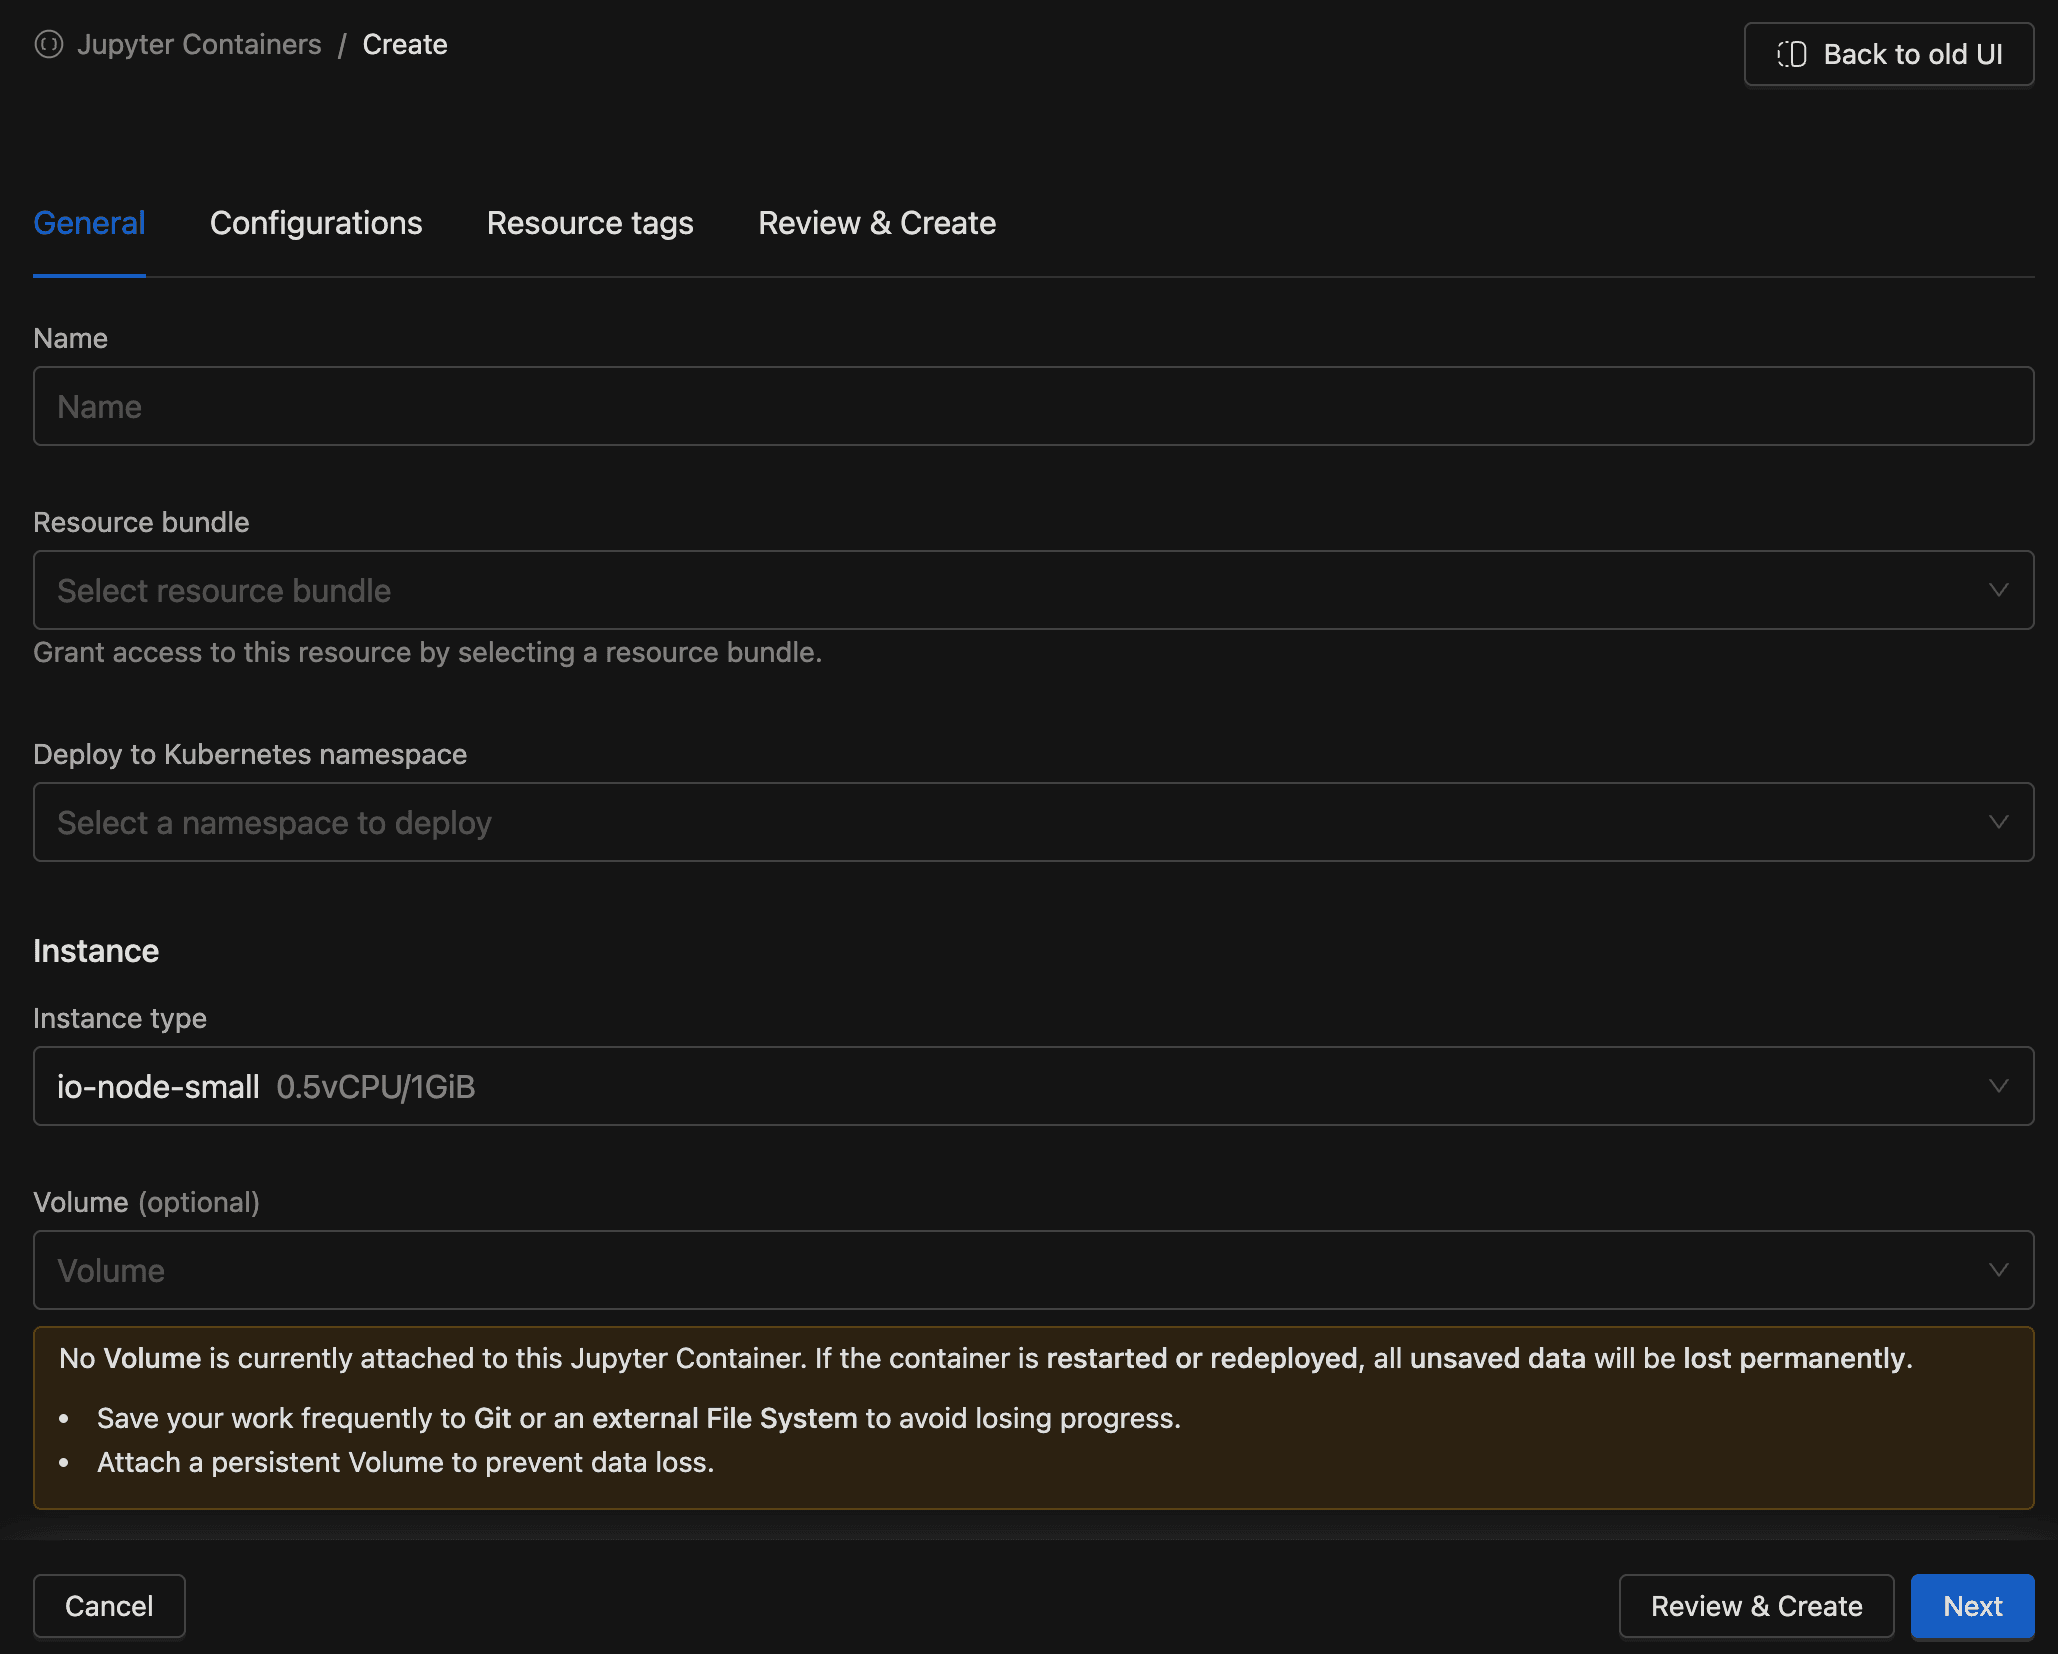
General Tab
The General tab defines the core settings of the container.
-
Name (required): A unique name using lowercase letters, numbers, and hyphens. Must start and end with a letter or number. This value cannot be changed after creation.
Maximum 53 characters. Pattern:
^[a-z0-9]([-a-z0-9]*[a-z0-9])?$. -
Resource bundle (required): Associates the container with a resource bundle that controls who can access it. This cannot be changed after creation. If you need a new bundle, click + Create Resource Bundle inside the dropdown (requires the
resource_bundle.createpermission). -
Namespace (required): The Kubernetes namespace where the container will be deployed. Only namespaces available to your account are shown.
-
Instance type (required): The node type that determines CPU and memory limits for the container. The first available node type is selected by default.
-
Volume (optional): Attach a persistent volume to preserve files across restarts. Only On Demand PVC and NFS volume types are supported.
Data loss without a volumeIf no volume is attached, all files saved inside the container are lost when the container stops, restarts, or is redeployed. Attach a volume to persist your notebooks and data.
Configurations Tab
The Configurations tab lets you inject environment variables and pass command-line arguments to the container.
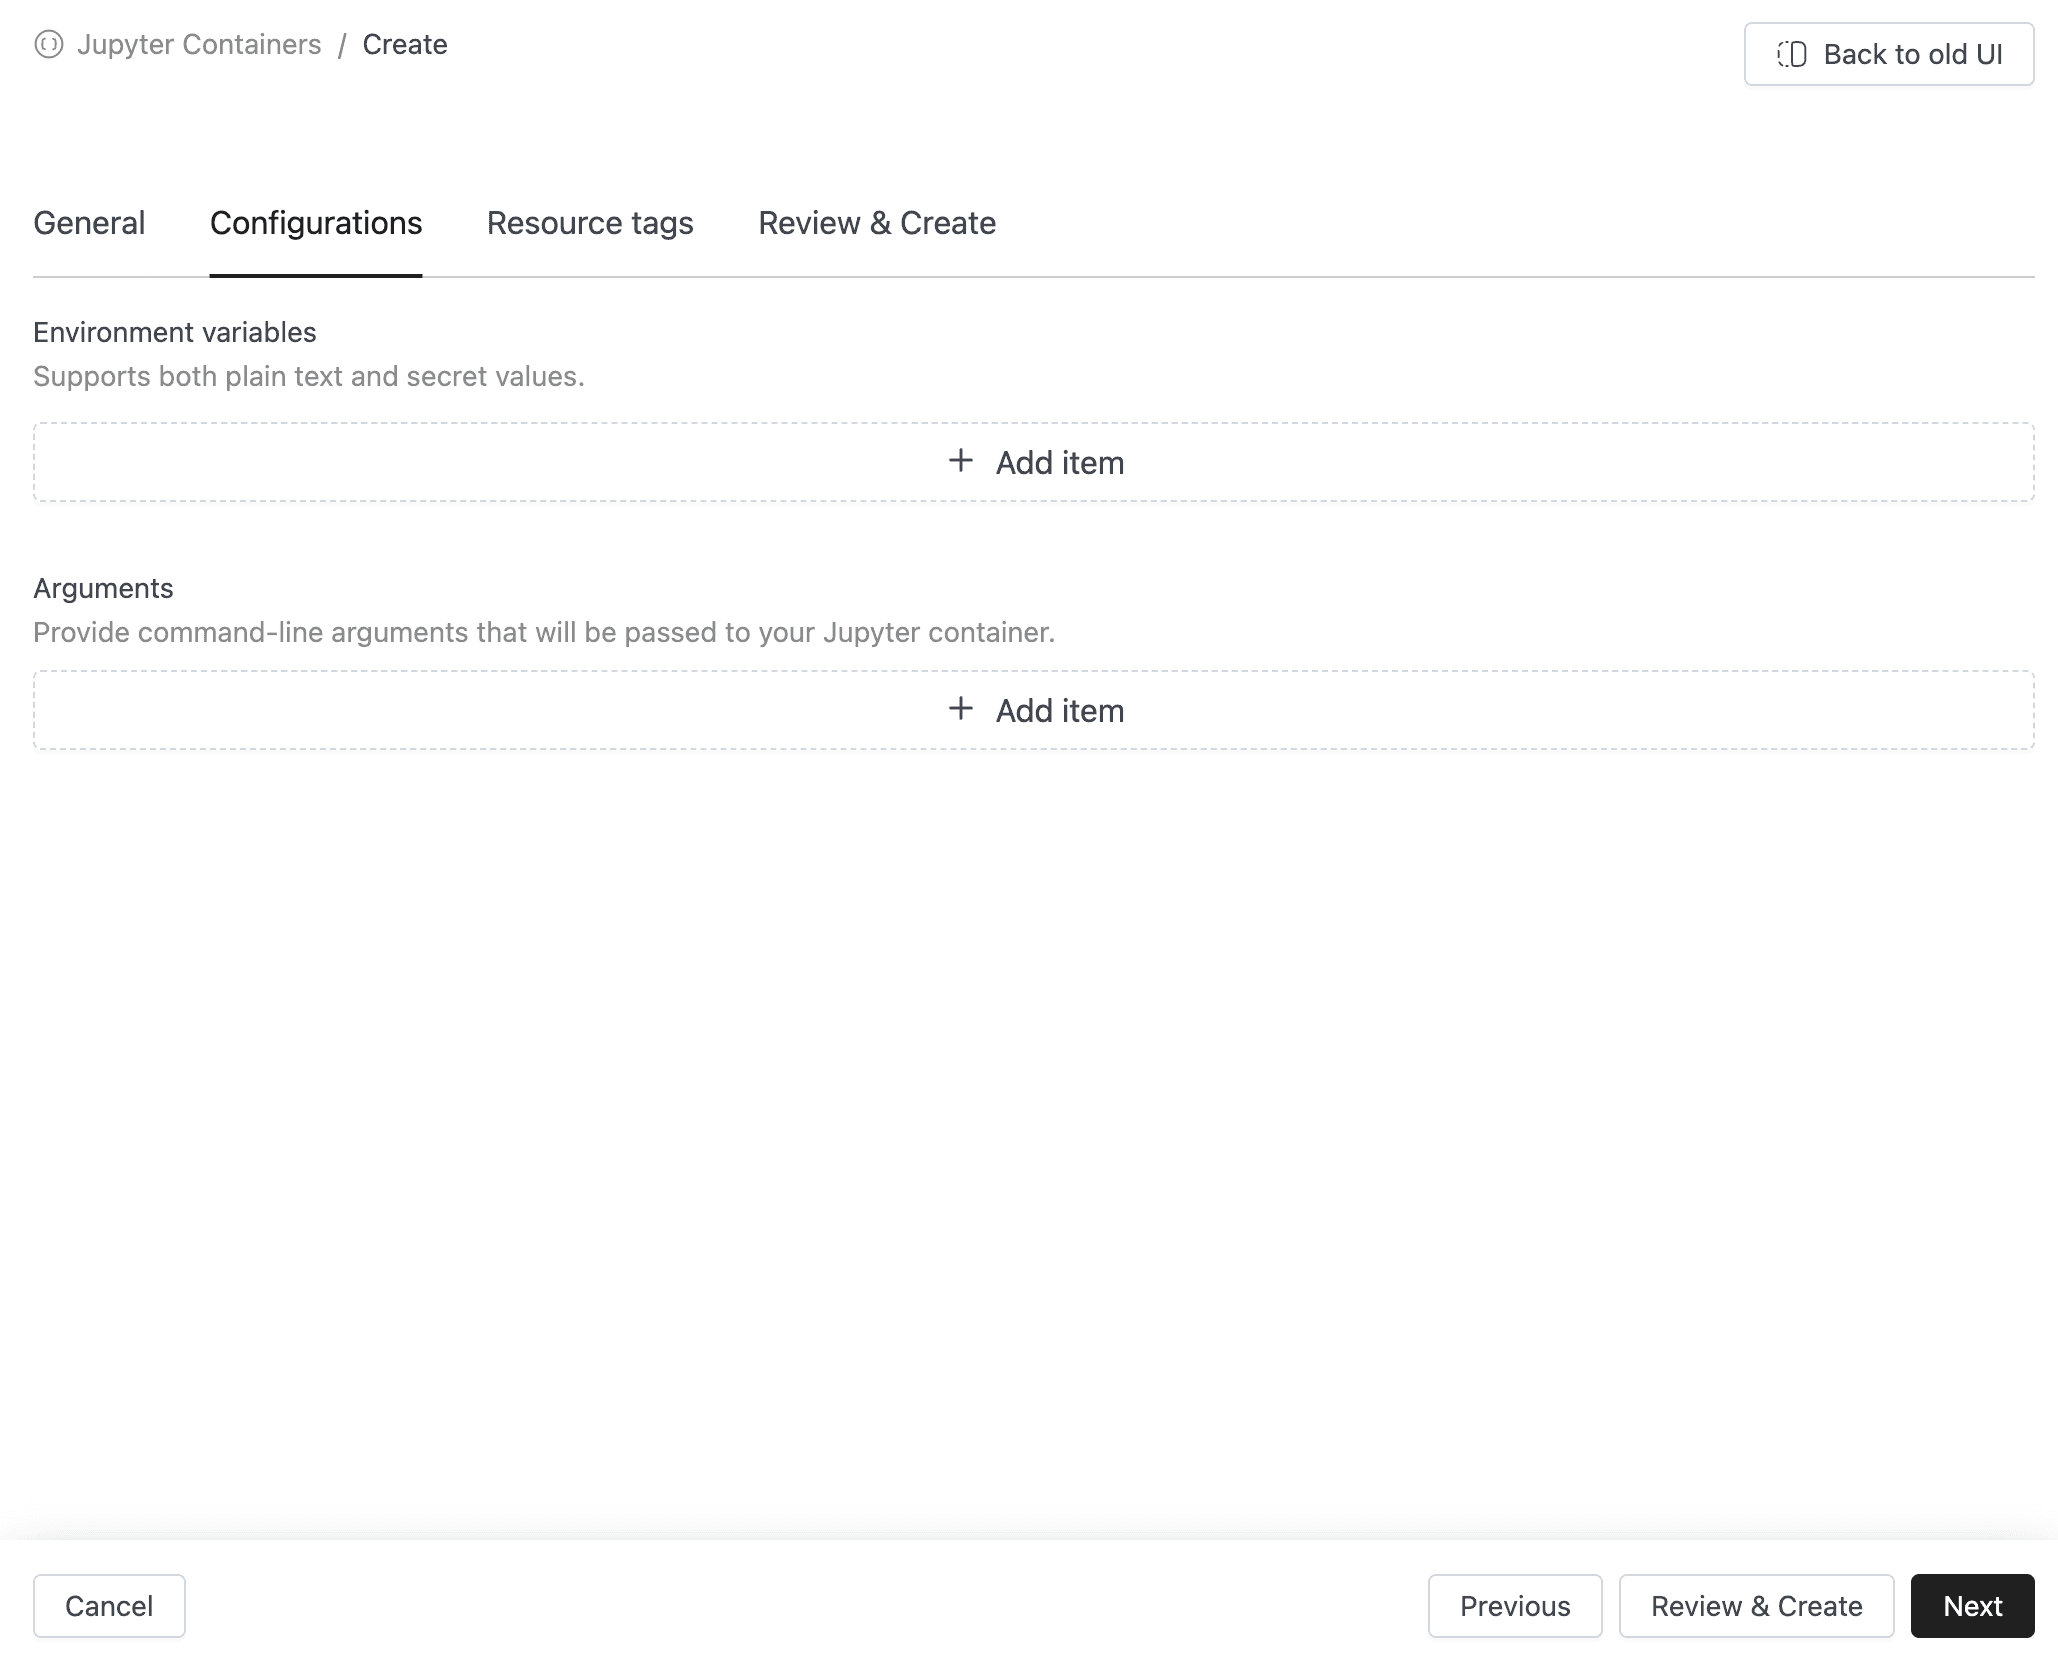
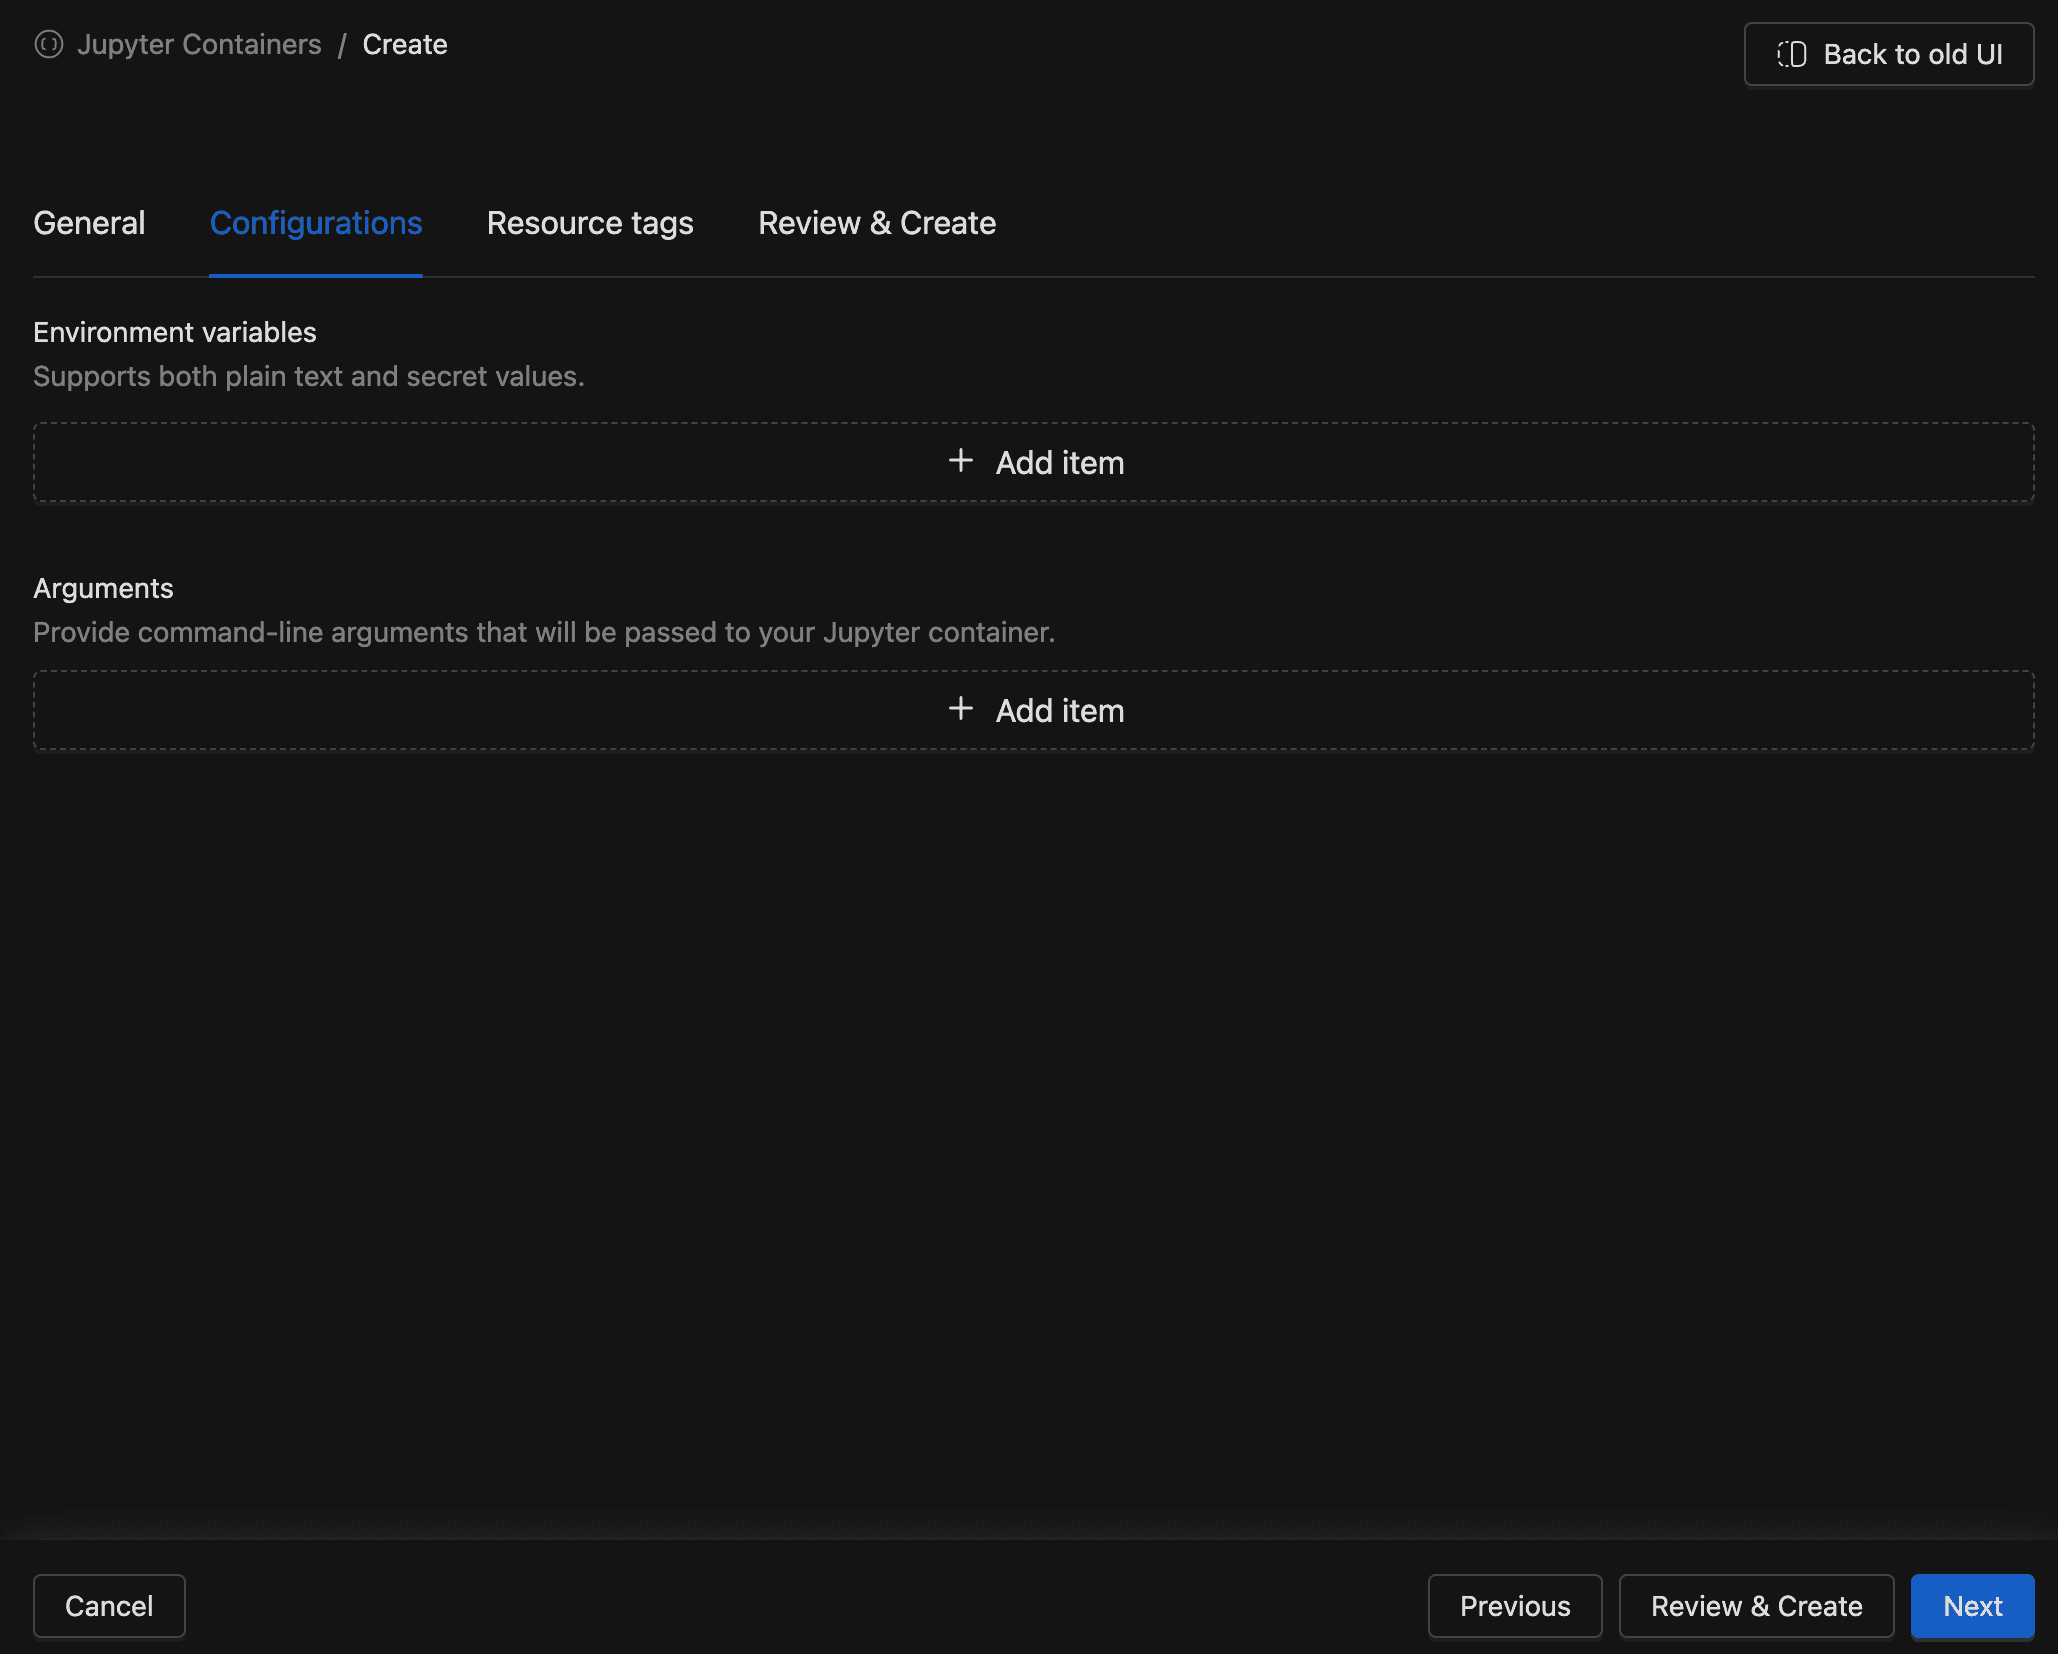
- Environment variables: Key-value pairs injected at runtime. Supports both plain text values and secret-backed references. Use secrets to avoid storing credentials in plain text. The platform also injects
JUPYTER_ENABLE_LAB=trueandRESTARTABLE=yesautomatically. - Arguments: Command-line arguments passed to the JupyterLab process. Use these for advanced JupyterLab server configuration. The platform already sets core arguments (
--ip,--port,--ServerApp.base_url,--ServerApp.allow_origin,--IdentityProvider.token), so you only need to add additional customizations.
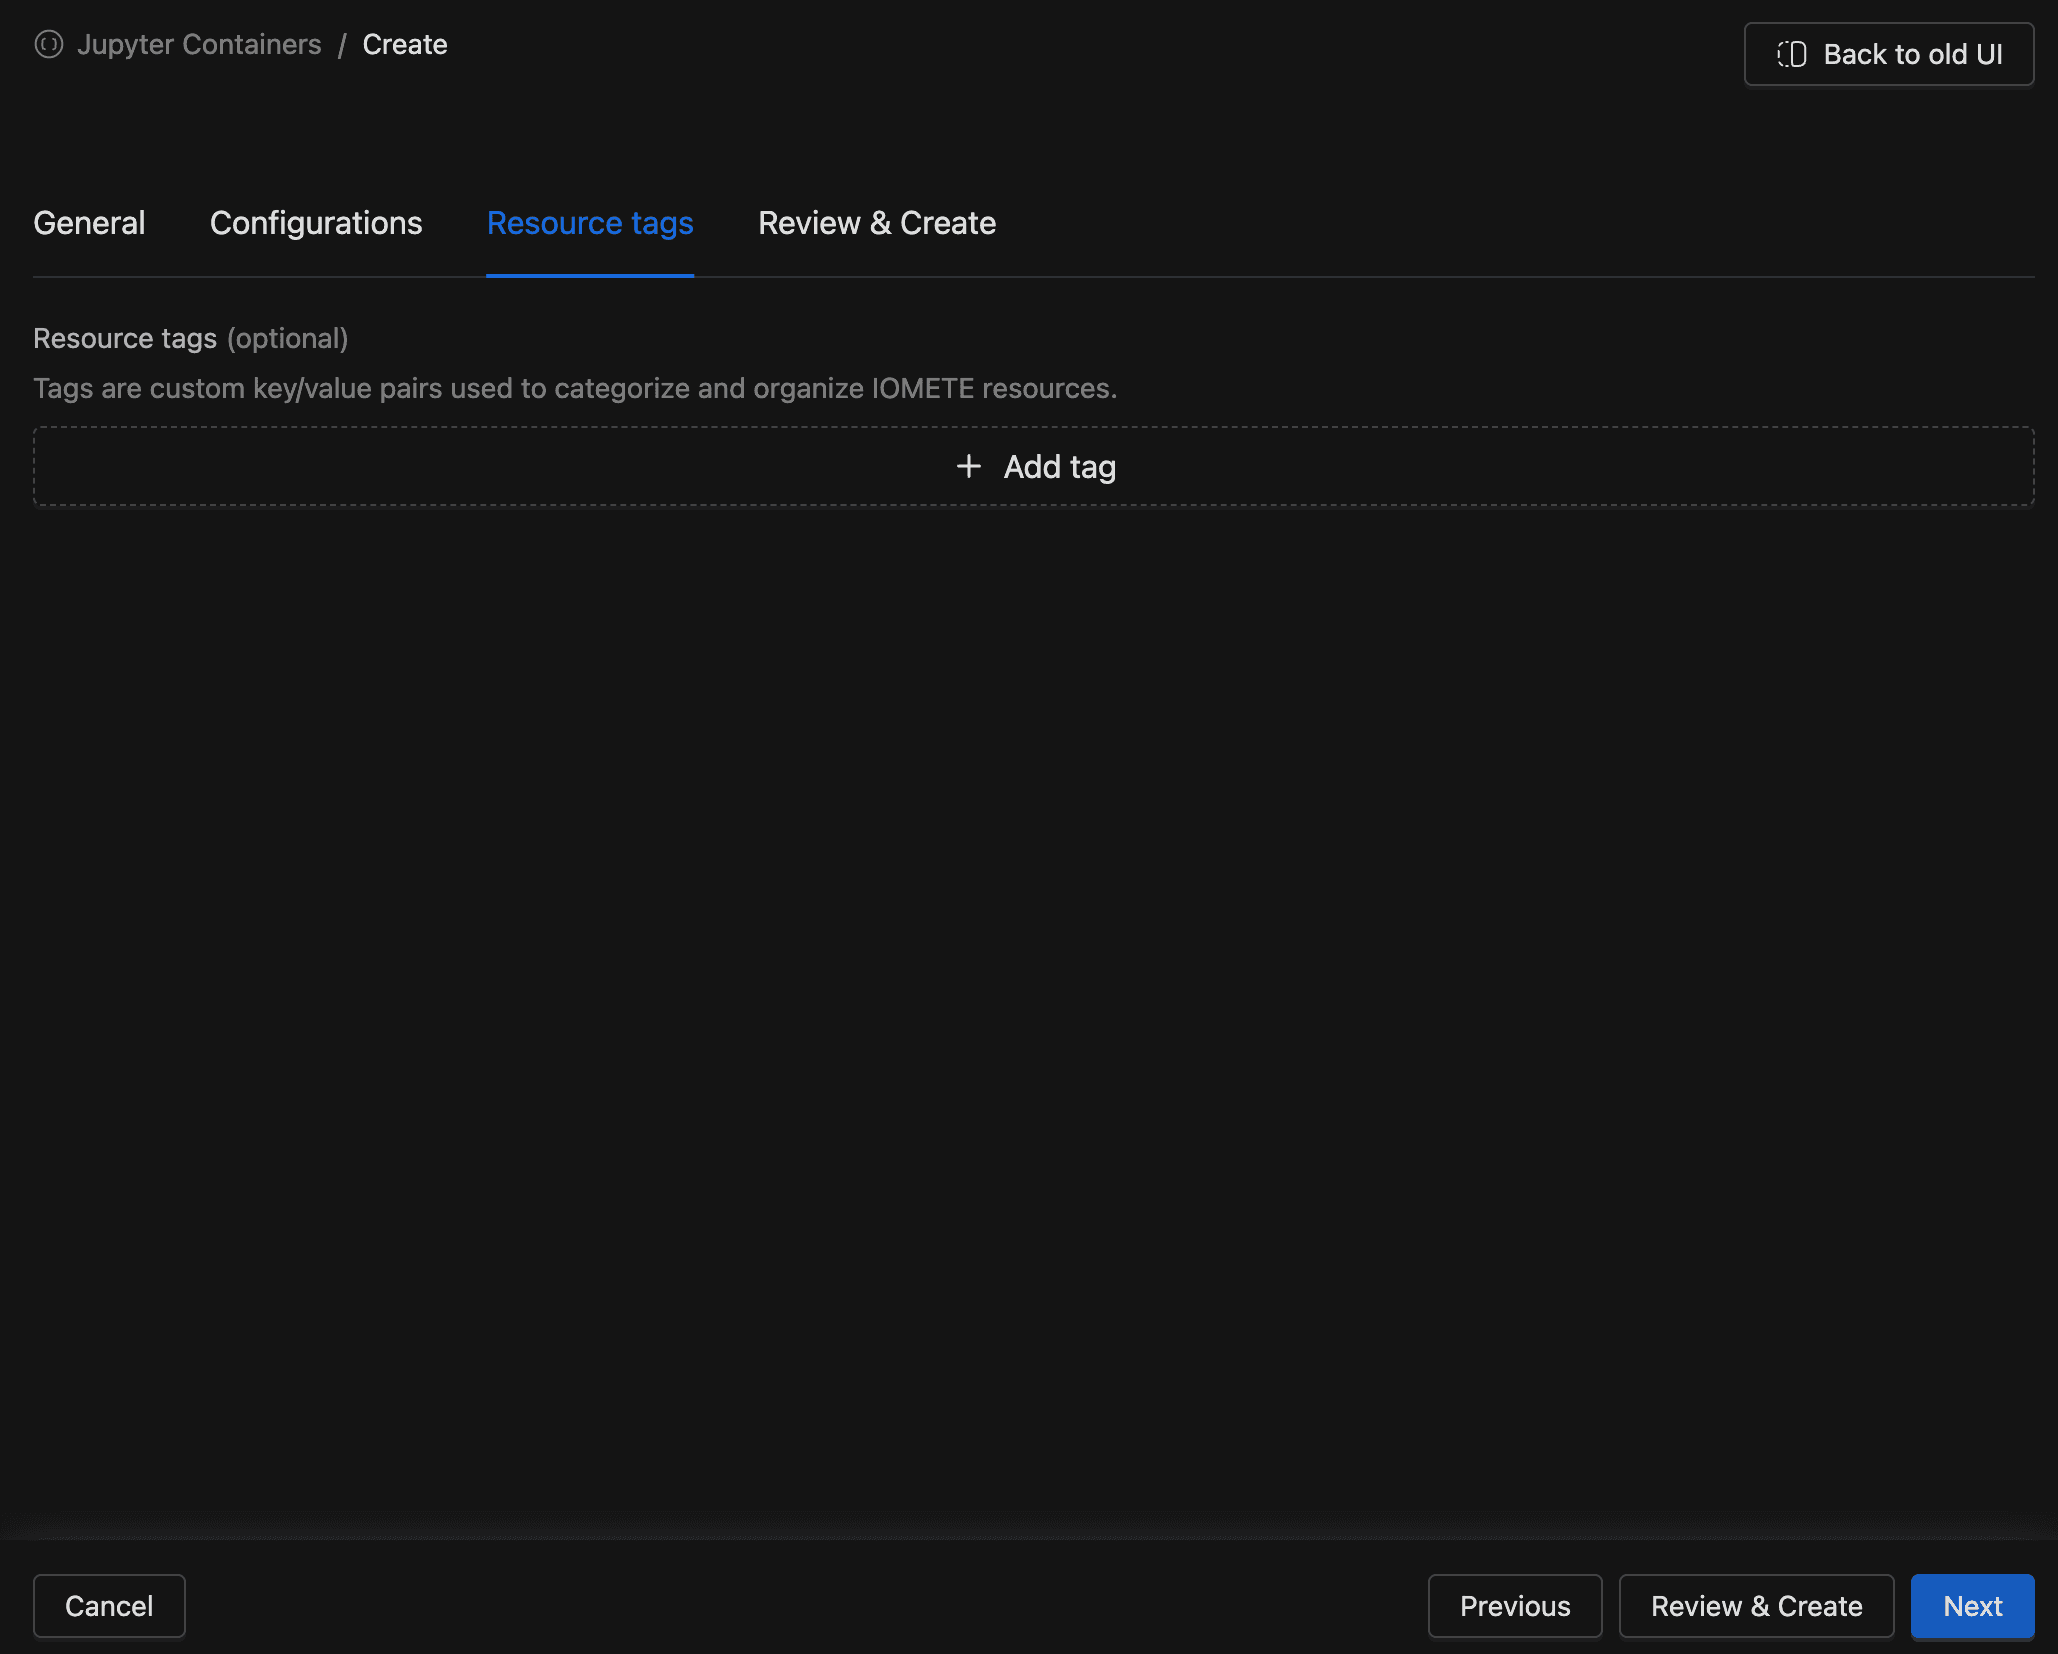
Tags Tab
The Tags tab lets you add key-value resource tags for organizing and categorizing your containers. Tags are optional metadata that help you manage containers at scale.

Review & Create Tab
The Review & Create tab displays a read-only summary of every setting before submission. It includes:
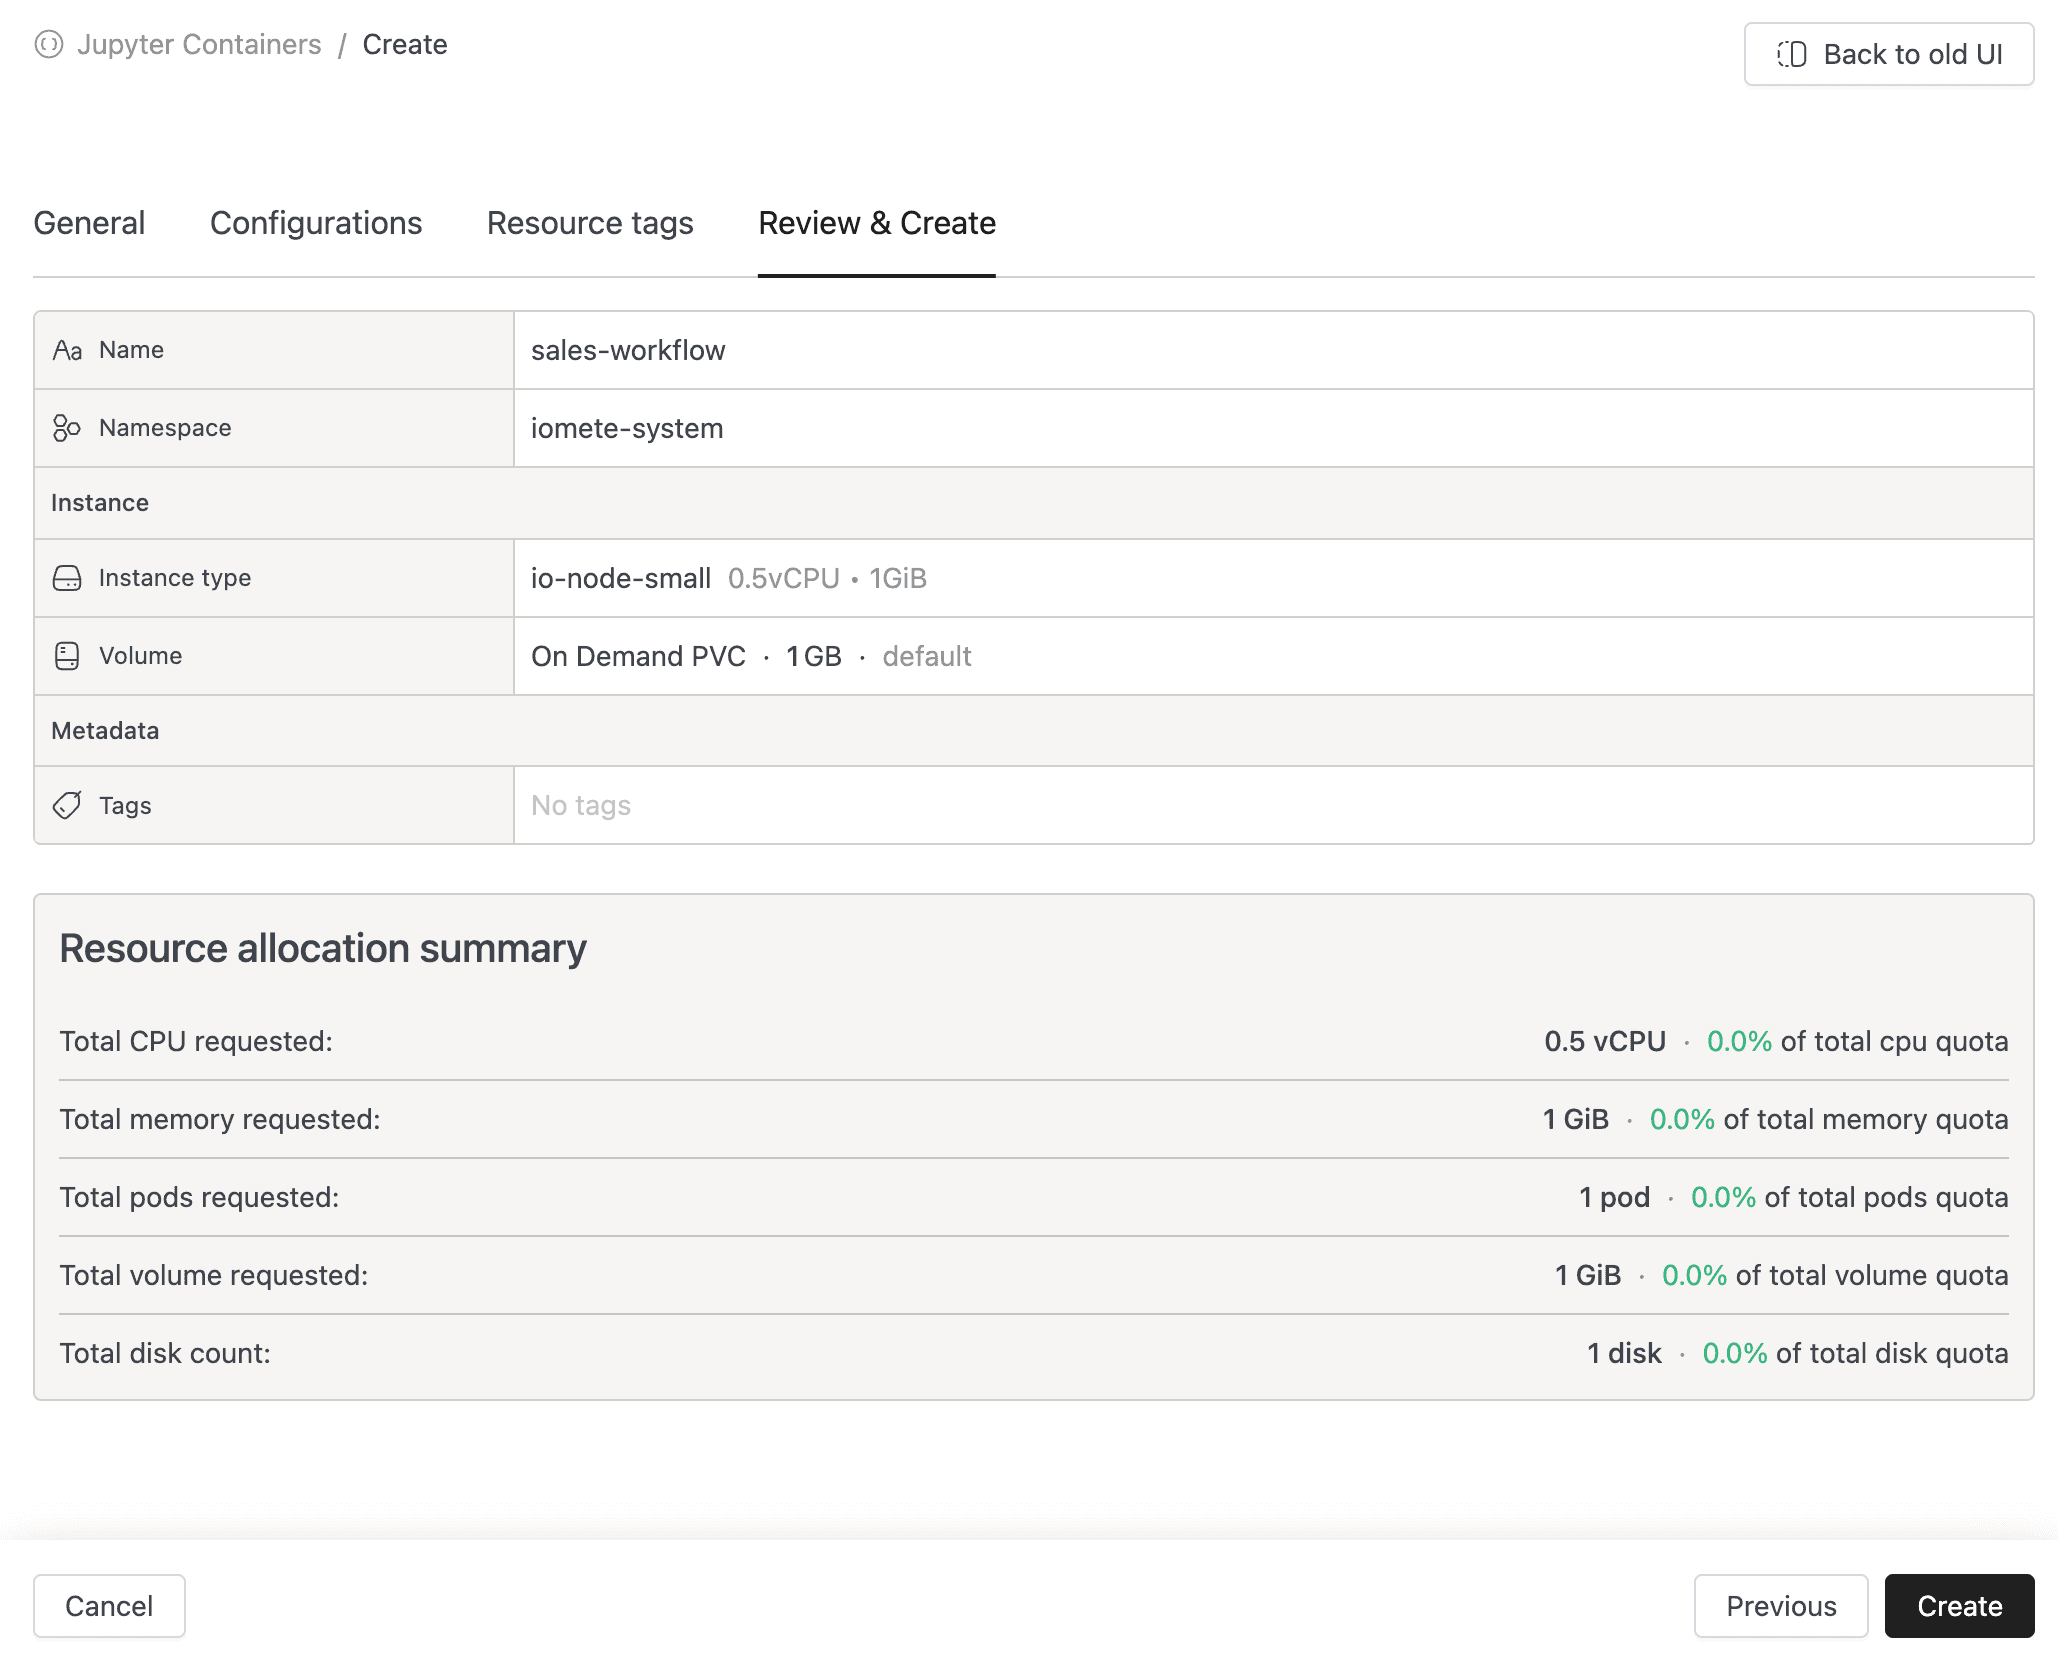
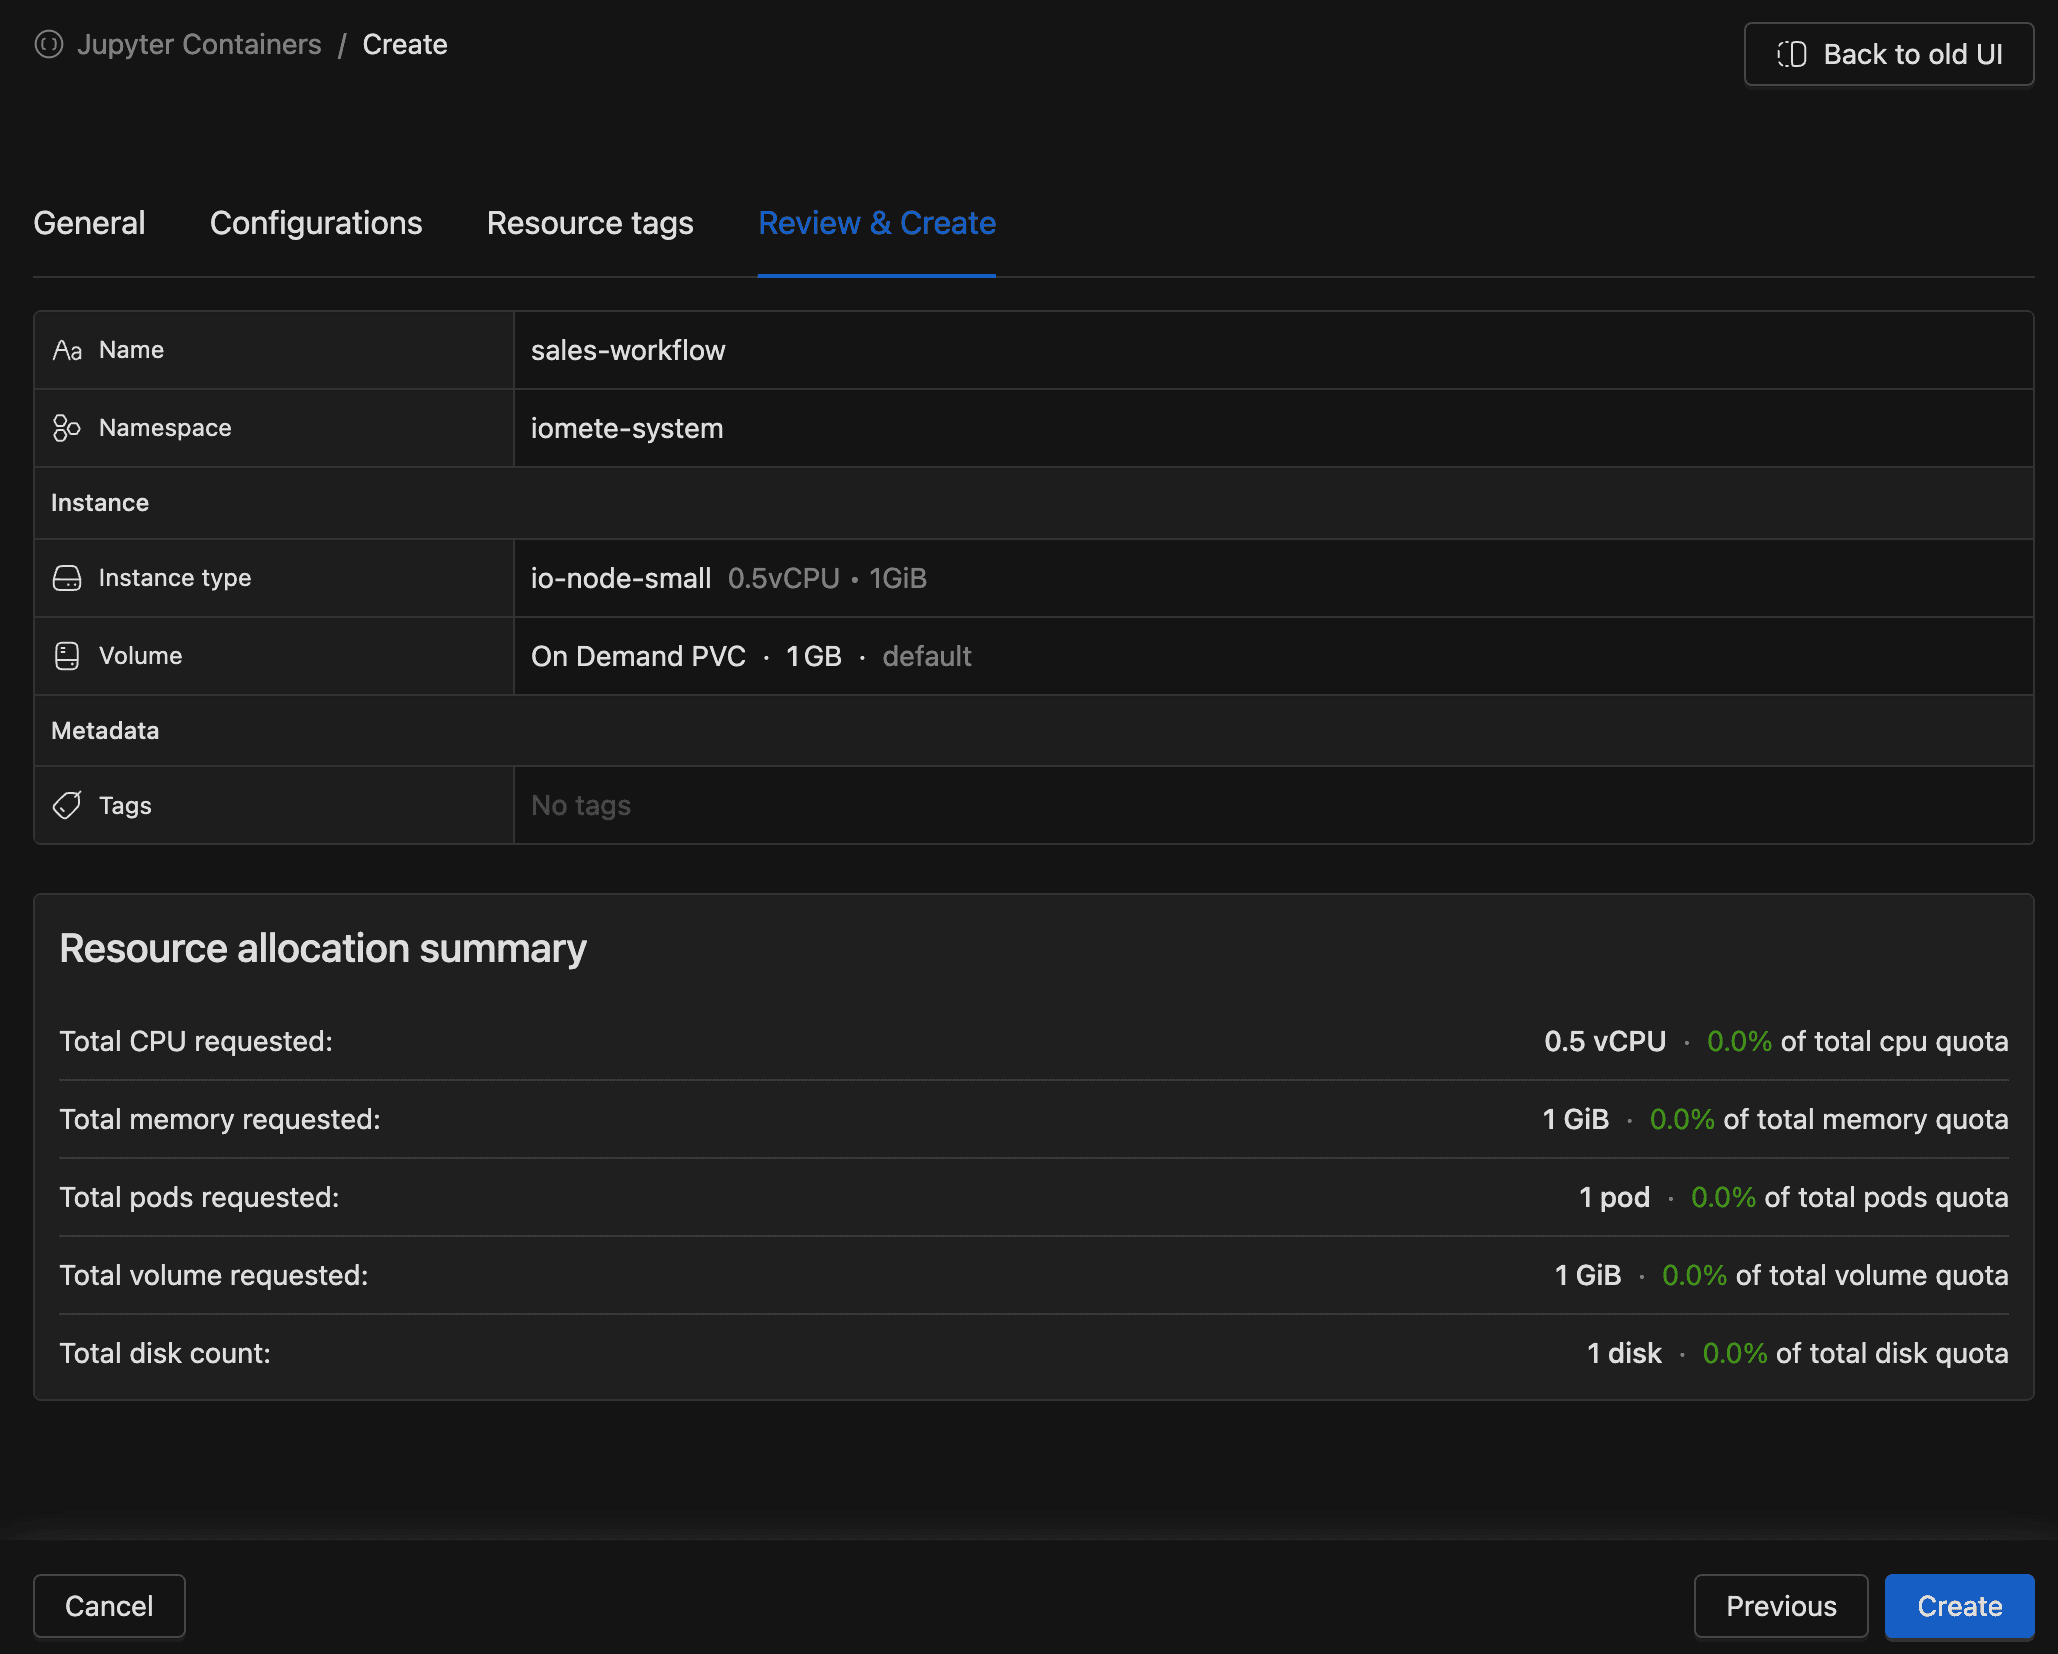
- Container name, bundle, and namespace
- Instance type and volume assignment
- Environment variables and arguments (if any)
- Resource tags (if any)
- Resource Summary: Shows the resource cost against your quota
Review the summary and click Create to provision the container. IOMETE deploys it immediately; the status begins as Starting and transitions to Active once the pod is ready.
Handling Creation Errors
- Duplicate name: If the name already exists in your domain, the form highlights the Name field with the message "The name already exists. Please enter a different name."
- Quota exceeded: If the requested resources exceed your quota, the Instance type and Volume fields are highlighted with quota error details.
- Invalid volume type: Only On Demand PVC and NFS volumes are allowed. Other volume types are rejected with an error.
Configuring a Jupyter Container
You can change a container's configuration after creation, but the container must be in the Stopped or Failed state. If the Configure button is disabled, you will see the tooltip "Stop the container before configuring."
- Navigate to the container's detail page (or select Configure from the row's context menu in the list view).
- Click Configure in the header.
- Update the desired settings across the General, Configurations, and Tags tabs.
- Open Review & Save, verify the changes, then click Save.
The Name and Resource bundle fields are read-only in edit mode. To change these values, delete the container and create a new one. In edit mode, the Delete button replaces Cancel in the form footer (if you have the DELETE permission).
Changing the Namespace
Changing the namespace in edit mode triggers a warning about potential data loss. If you attached an On Demand PVC volume, the old PVC is deleted and a new one is created in the new namespace. Notebooks saved to Git or external file systems are unaffected, but any unsaved data in the container is lost permanently.
Changing the Volume
Changing the volume in edit mode also triggers a data loss warning. For On Demand PVC volumes, the old PVC is deleted and a new one is created. Back up any important data before making this change.
Starting and Stopping Containers
You control when containers consume resources by starting and stopping them.
Starting a Container
You can start a container that is in the Stopped or Failed state.
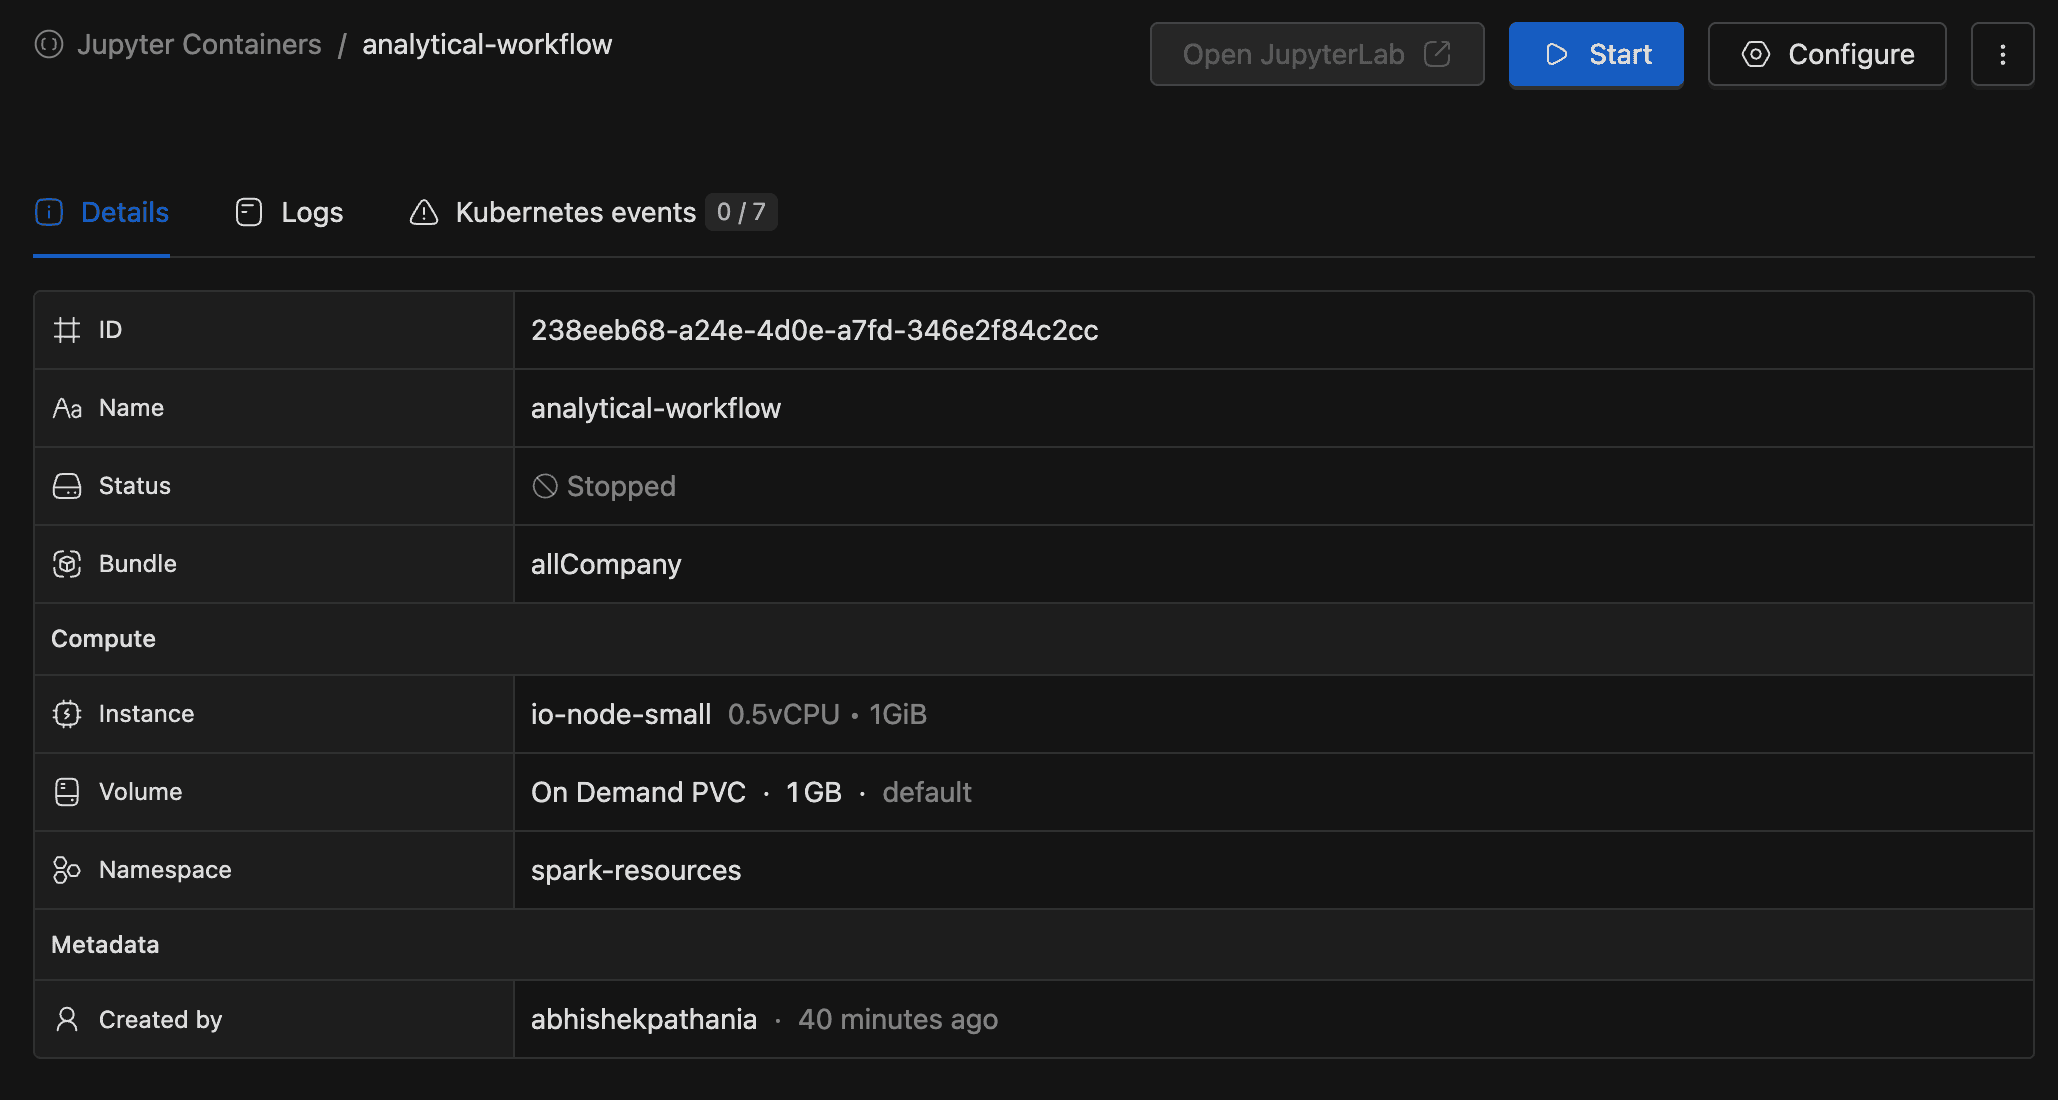
- Open the container's detail page (or find it in the list).
- Click the green Start button in the header, or select Start from the row's context menu.
The status changes to Starting while the Kubernetes pod initializes. Once the pod is ready, the status transitions to Active automatically. Status updates arrive in real time, so there is no need to refresh the page. Each time you start or save configuration changes, IOMETE pulls the latest container image version, ensuring your environment always uses the most recent base image.
Terminating a Container
You can terminate a container that is in the Active or Starting state.
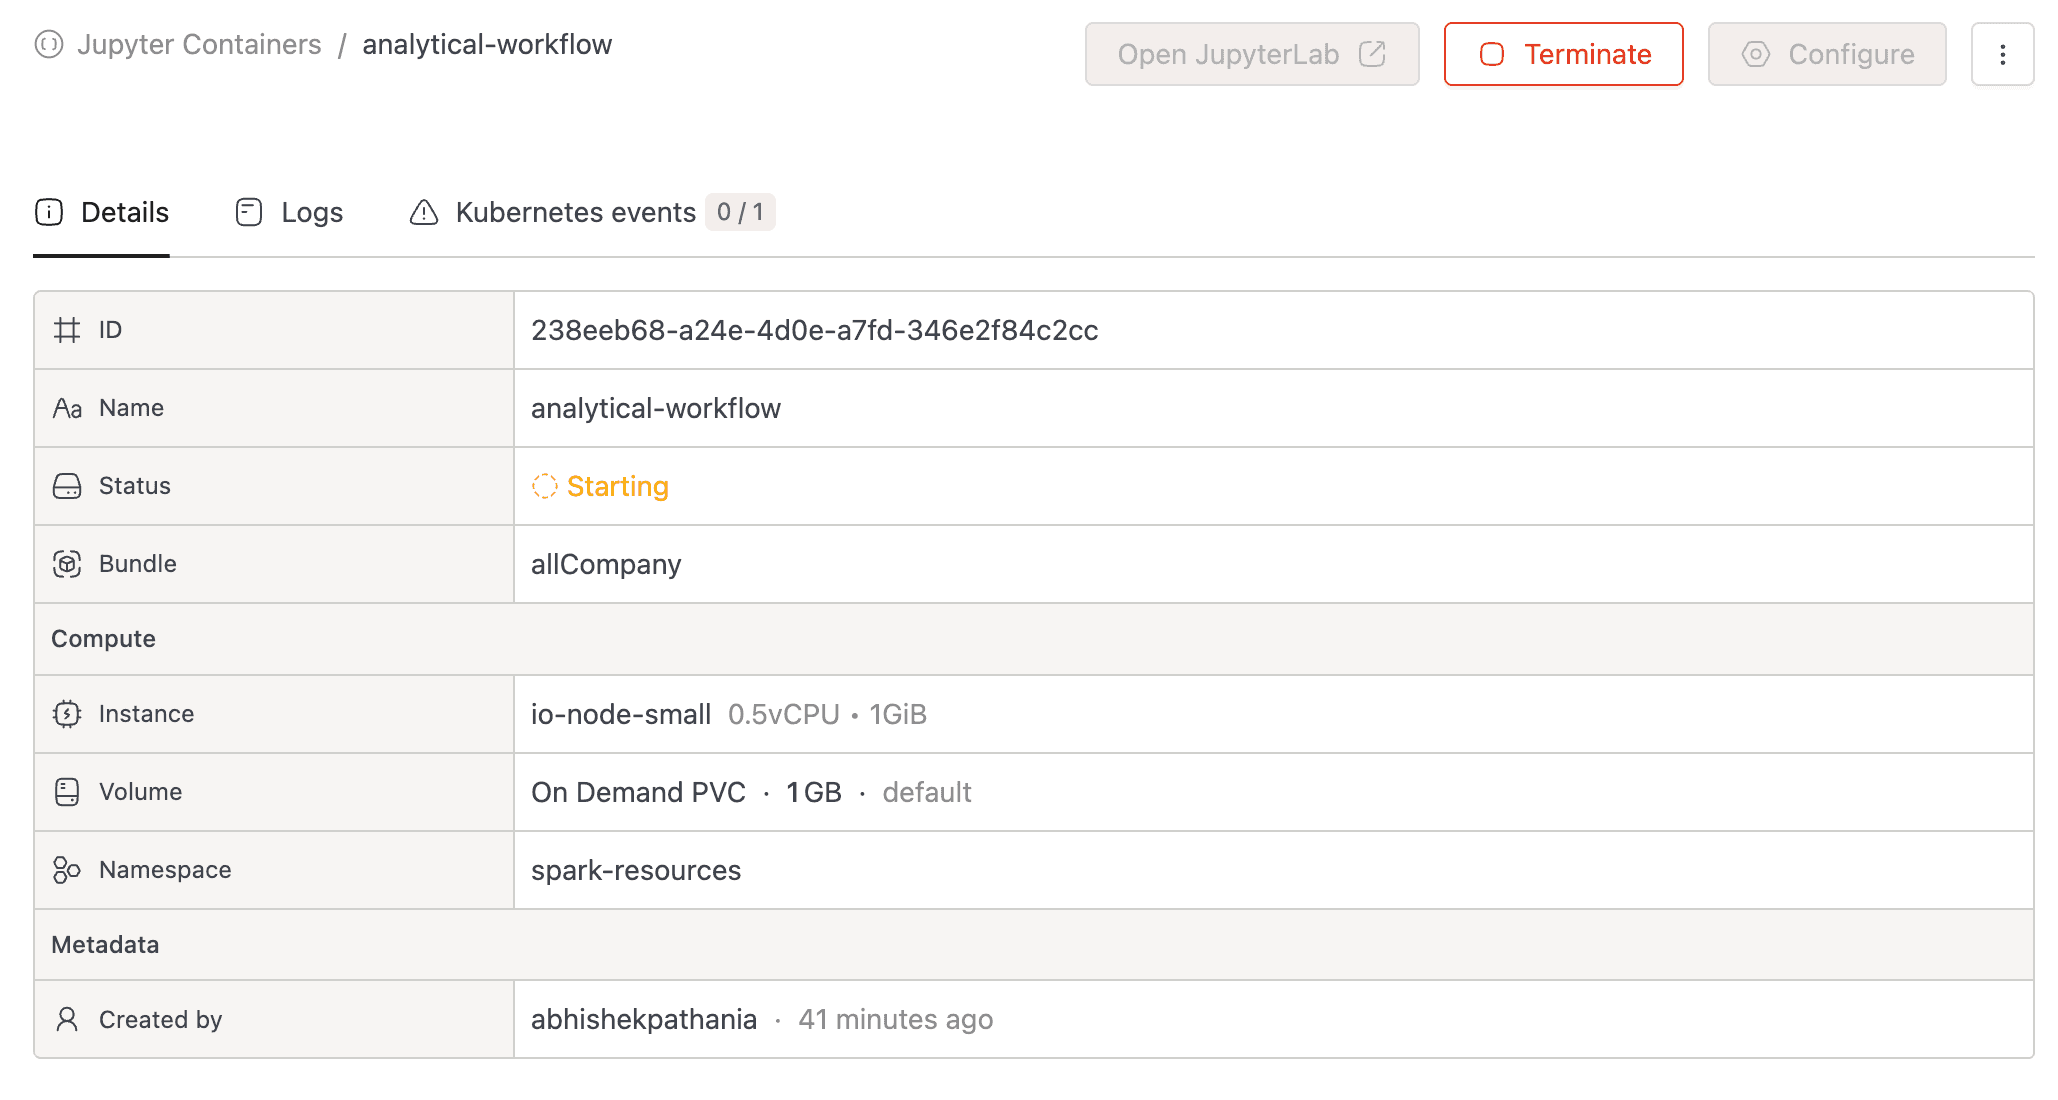
- Open the container's detail page (or find it in the list).
- Click the red Terminate button in the header, or select Terminate from the row's context menu.
- Confirm the action by clicking Yes, terminate it.
The underlying Kubernetes Deployment and Service are deleted, and the status transitions to Stopped.
If no persistent volume is attached, all unsaved work inside the container is lost when you terminate it.
Restarting a Container
To restart a running container, terminate it and then start it again. The container transitions through Stopped before returning to Starting. There is no dedicated restart button; the operation is a stop followed by a start.
Deleting a Jupyter Container
You can delete a container in any state. This action is permanent.
- Open the container's detail page.
- Click the More actions dropdown (or use the context menu in the list view).
- Select Delete.
- Confirm by clicking Yes, delete it.
IOMETE removes the Kubernetes resources, deletes any associated On Demand PVC, and removes the container from its resource bundle. The container name becomes available for reuse.


Deleting a container permanently destroys all data stored in its On Demand PVC volume. This action cannot be undone.
Viewing Container Details
The detail page provides full visibility into a container's configuration, logs, and Kubernetes events. Click a container name in the list to open it. The page includes a header with action buttons and three tabs.
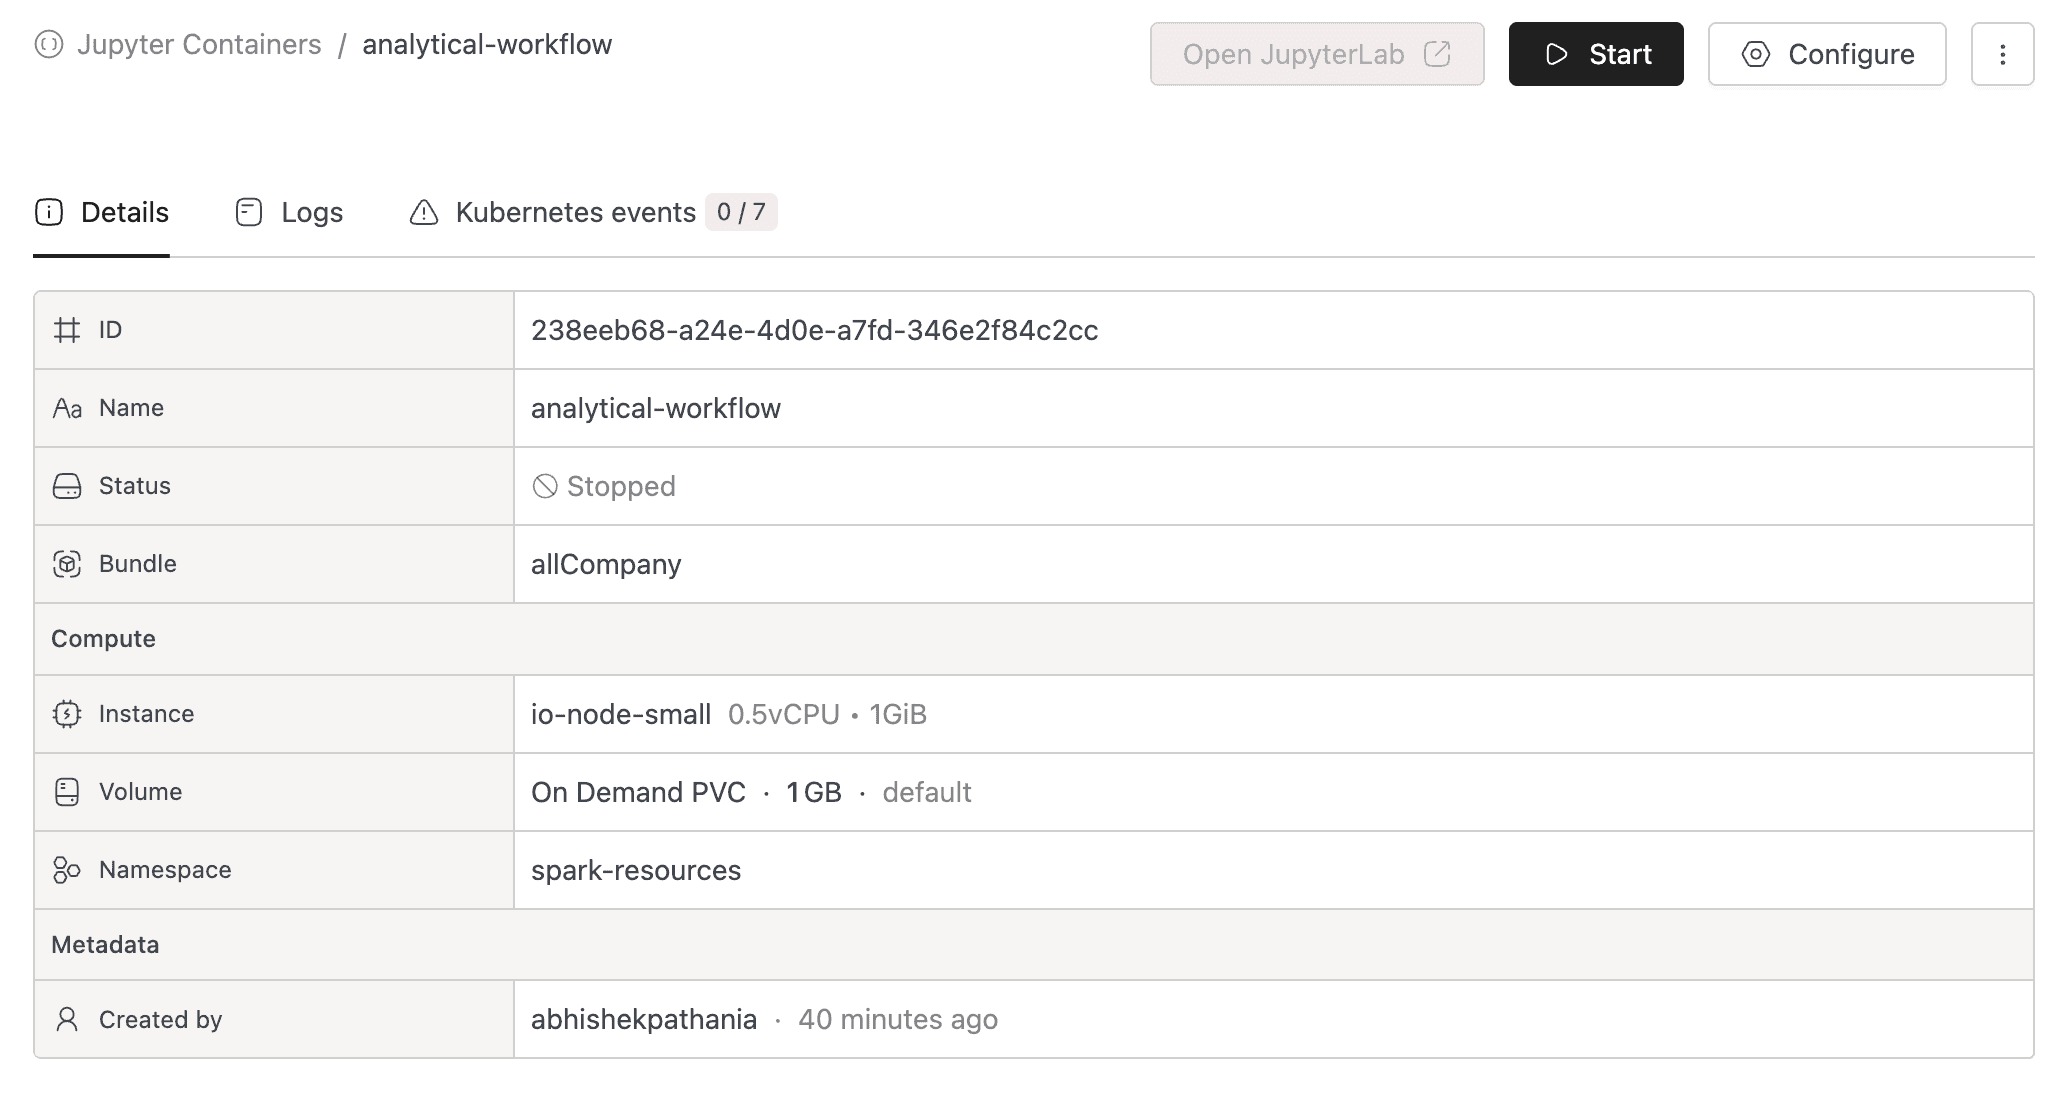
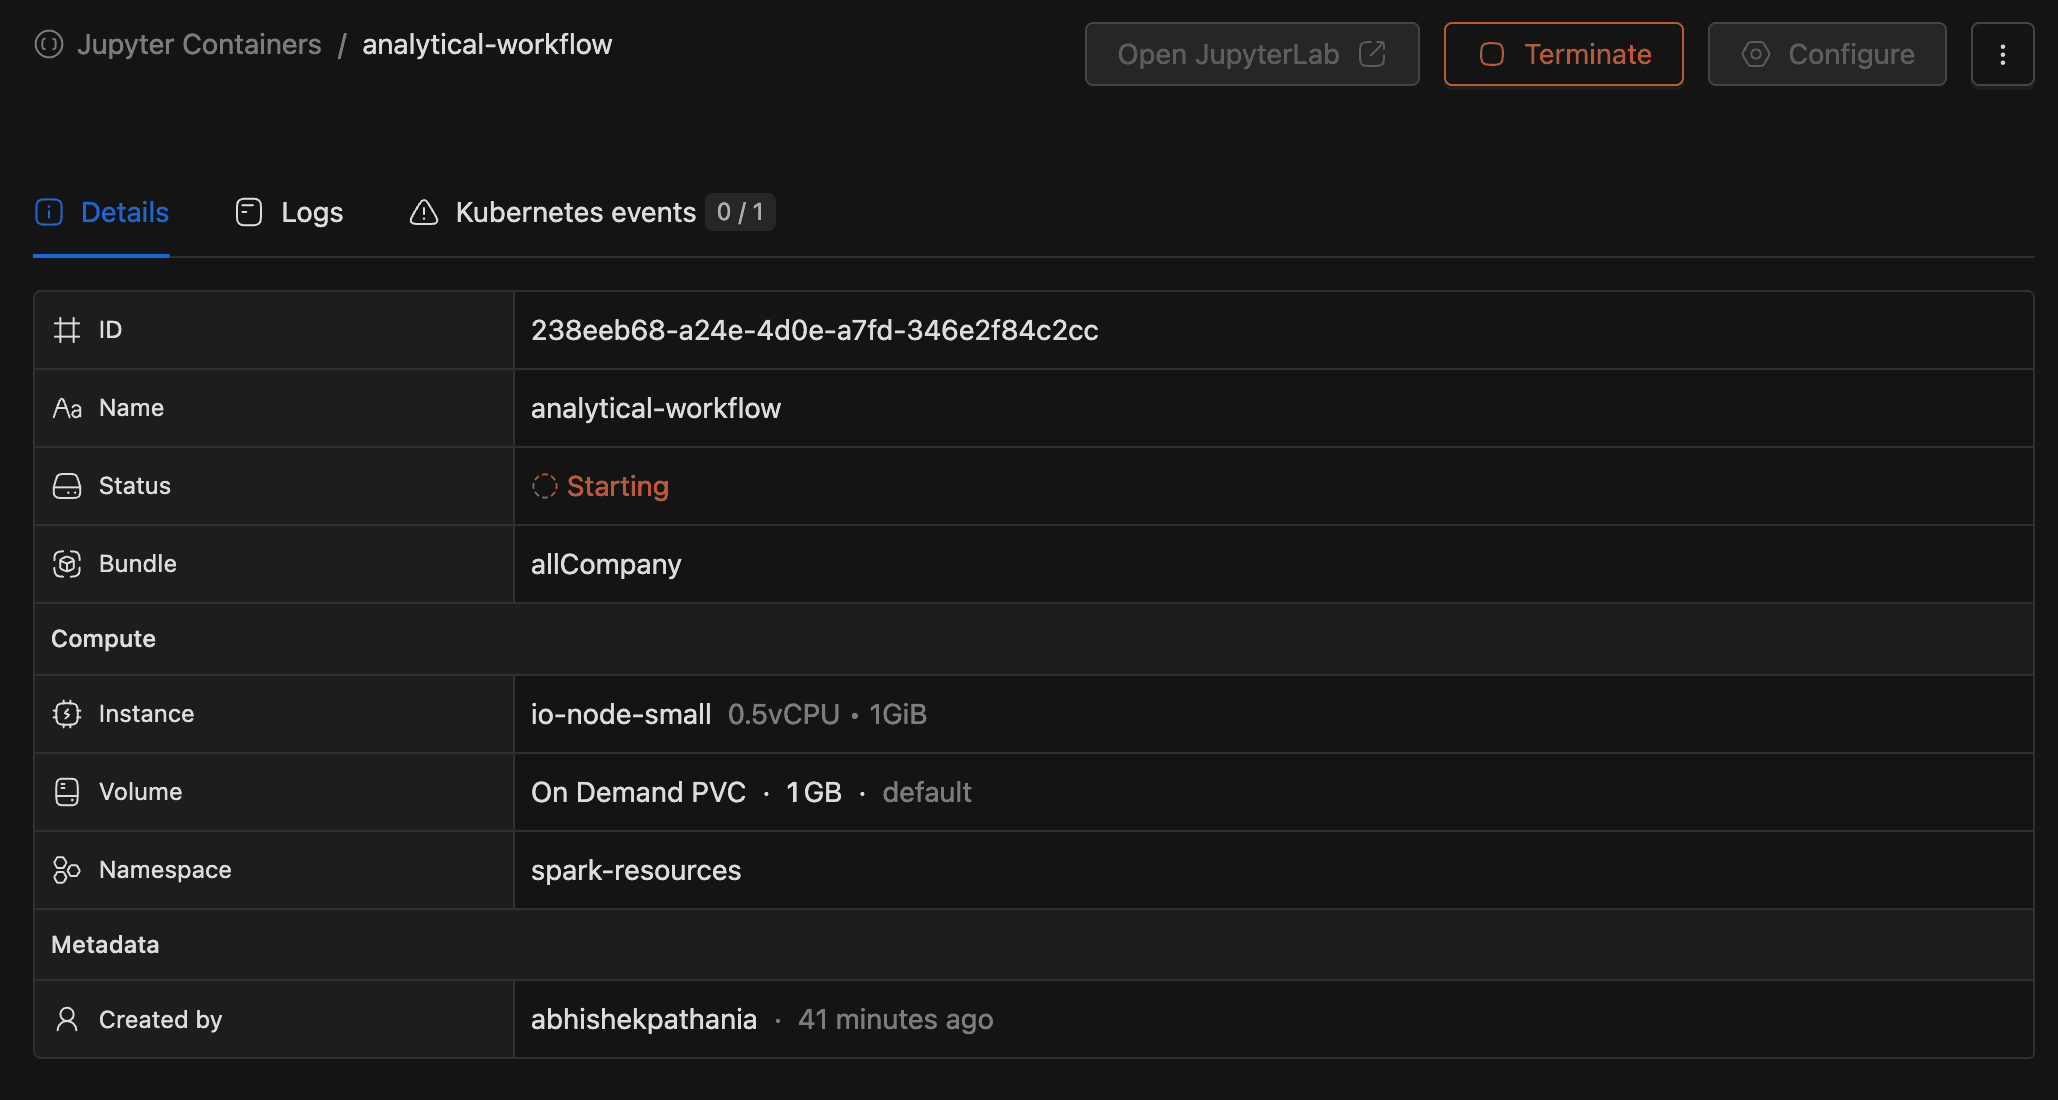
Details Tab
The Details tab shows the container's configuration:
| Field | Description |
|---|---|
| ID | The container's unique identifier (UUID). |
| Name | The container name. |
| Status | Current state with a color-coded badge. If Failed, the error message is shown below the badge. |
| Bundle | The associated resource bundle name. |
| Instance | The assigned node type (CPU and memory). |
| Volume | The attached volume, or "No volume" if none is configured. |
| Namespace | The Kubernetes namespace. |
| Created by | The user who created the container, with a relative timestamp. |
| Tags | Resource tags (shown only when tags exist). |
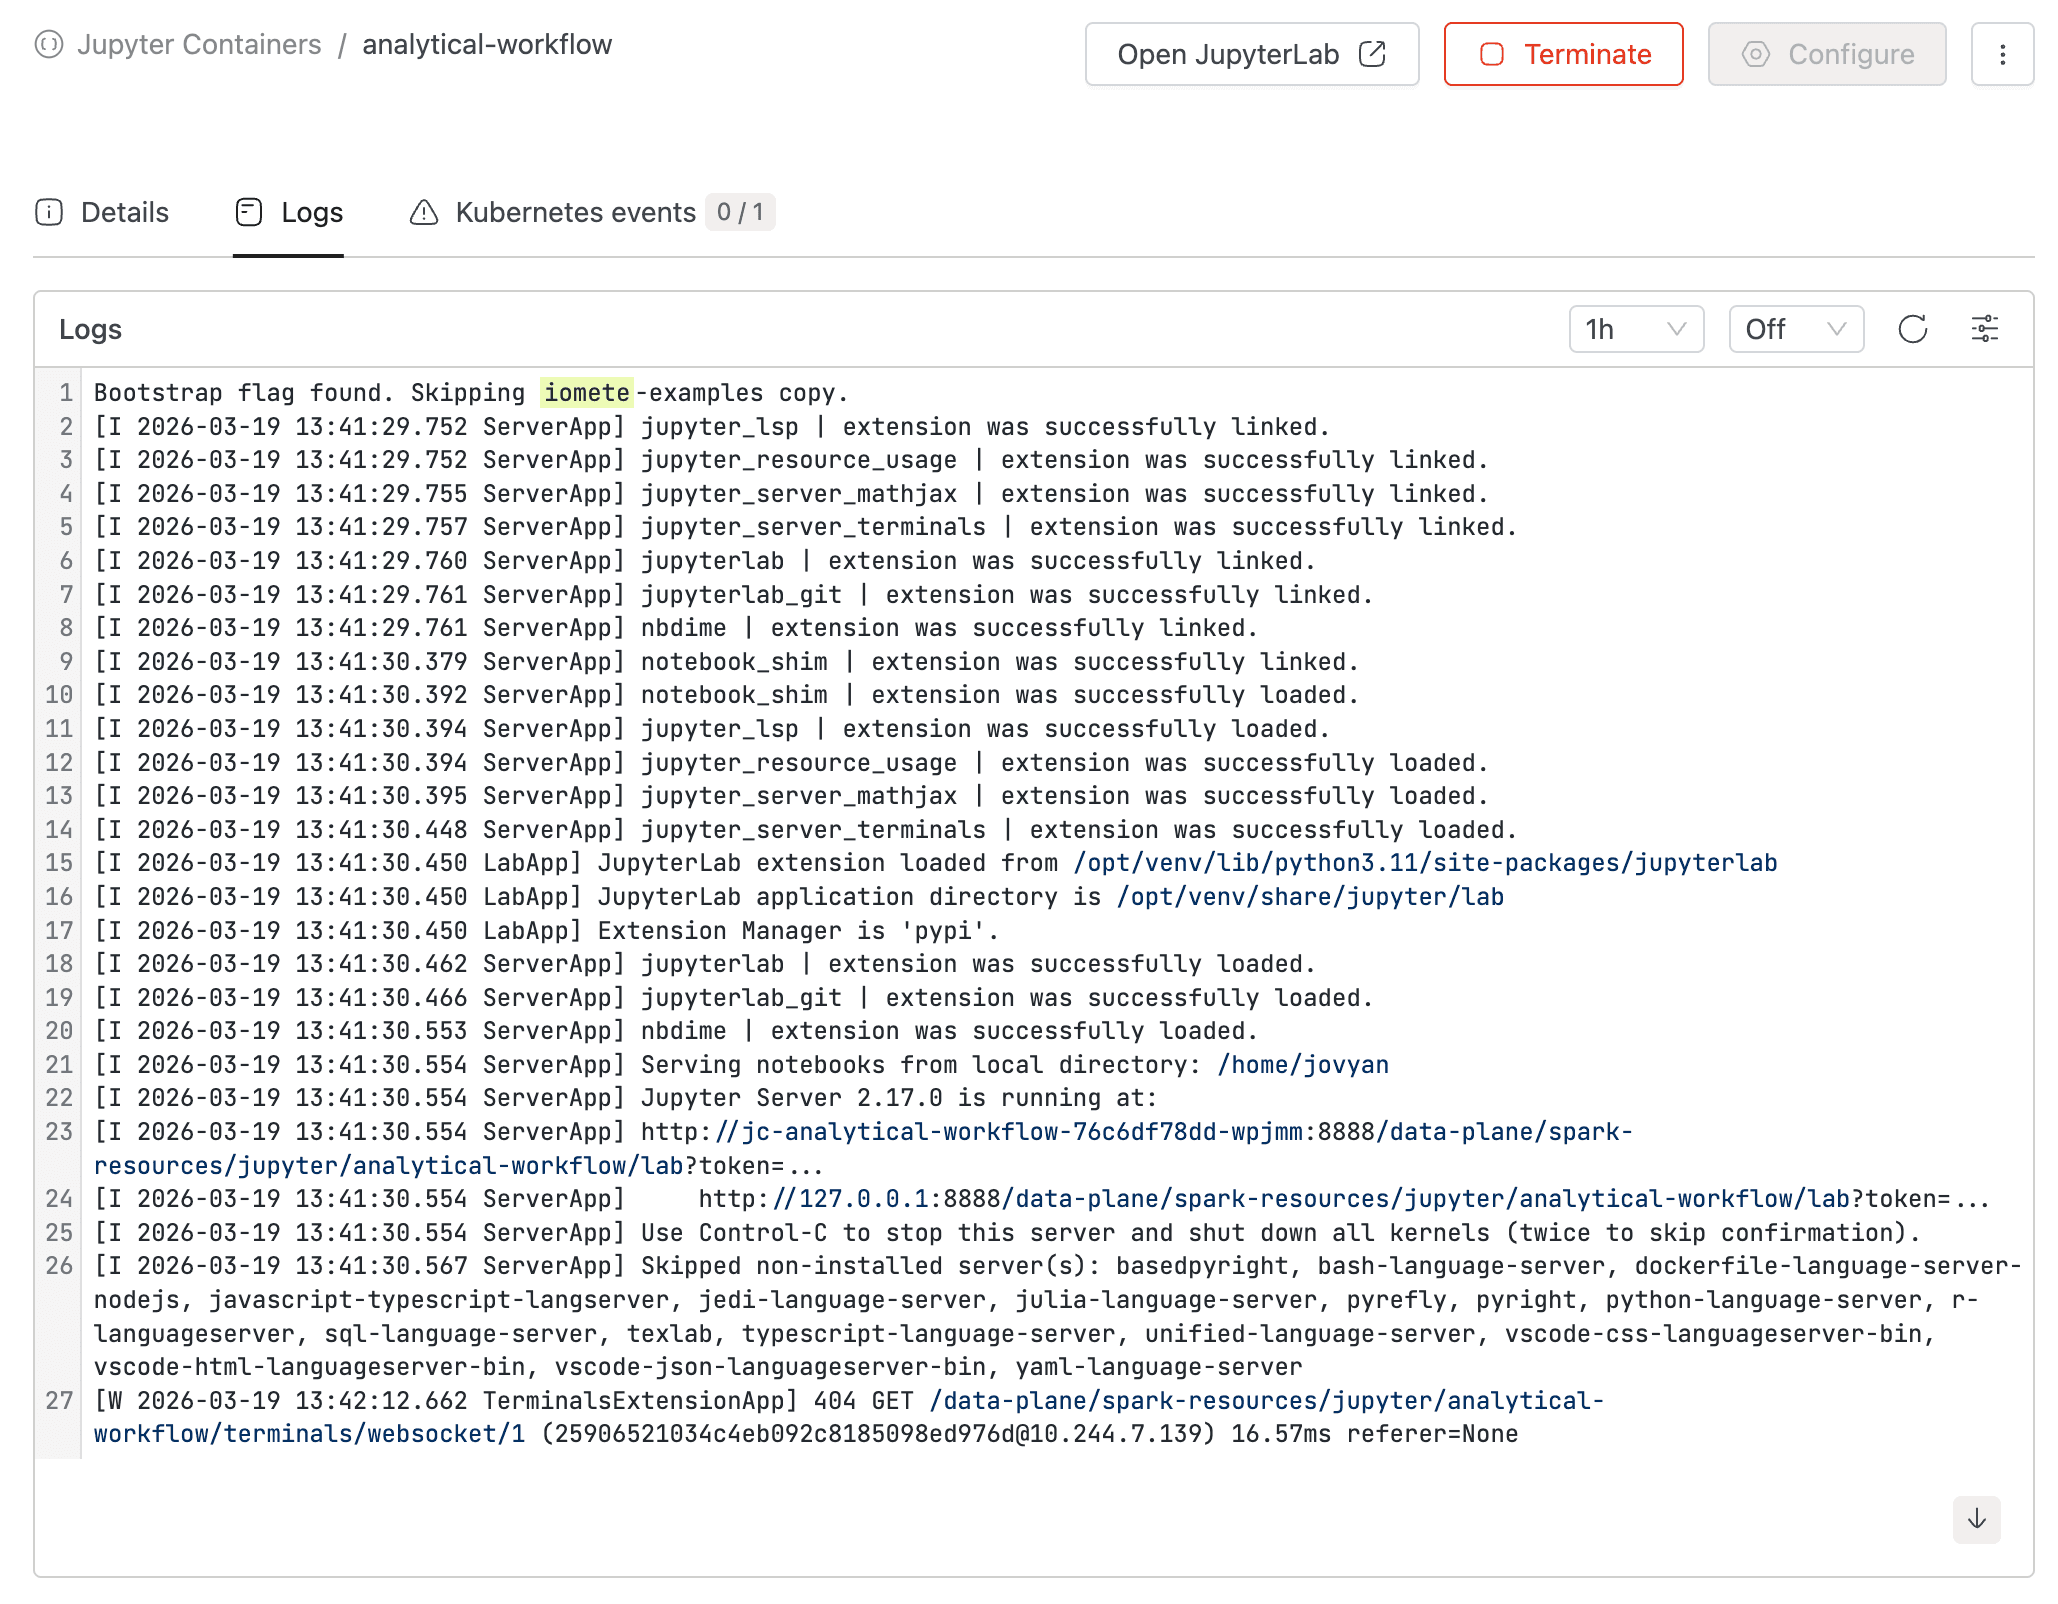
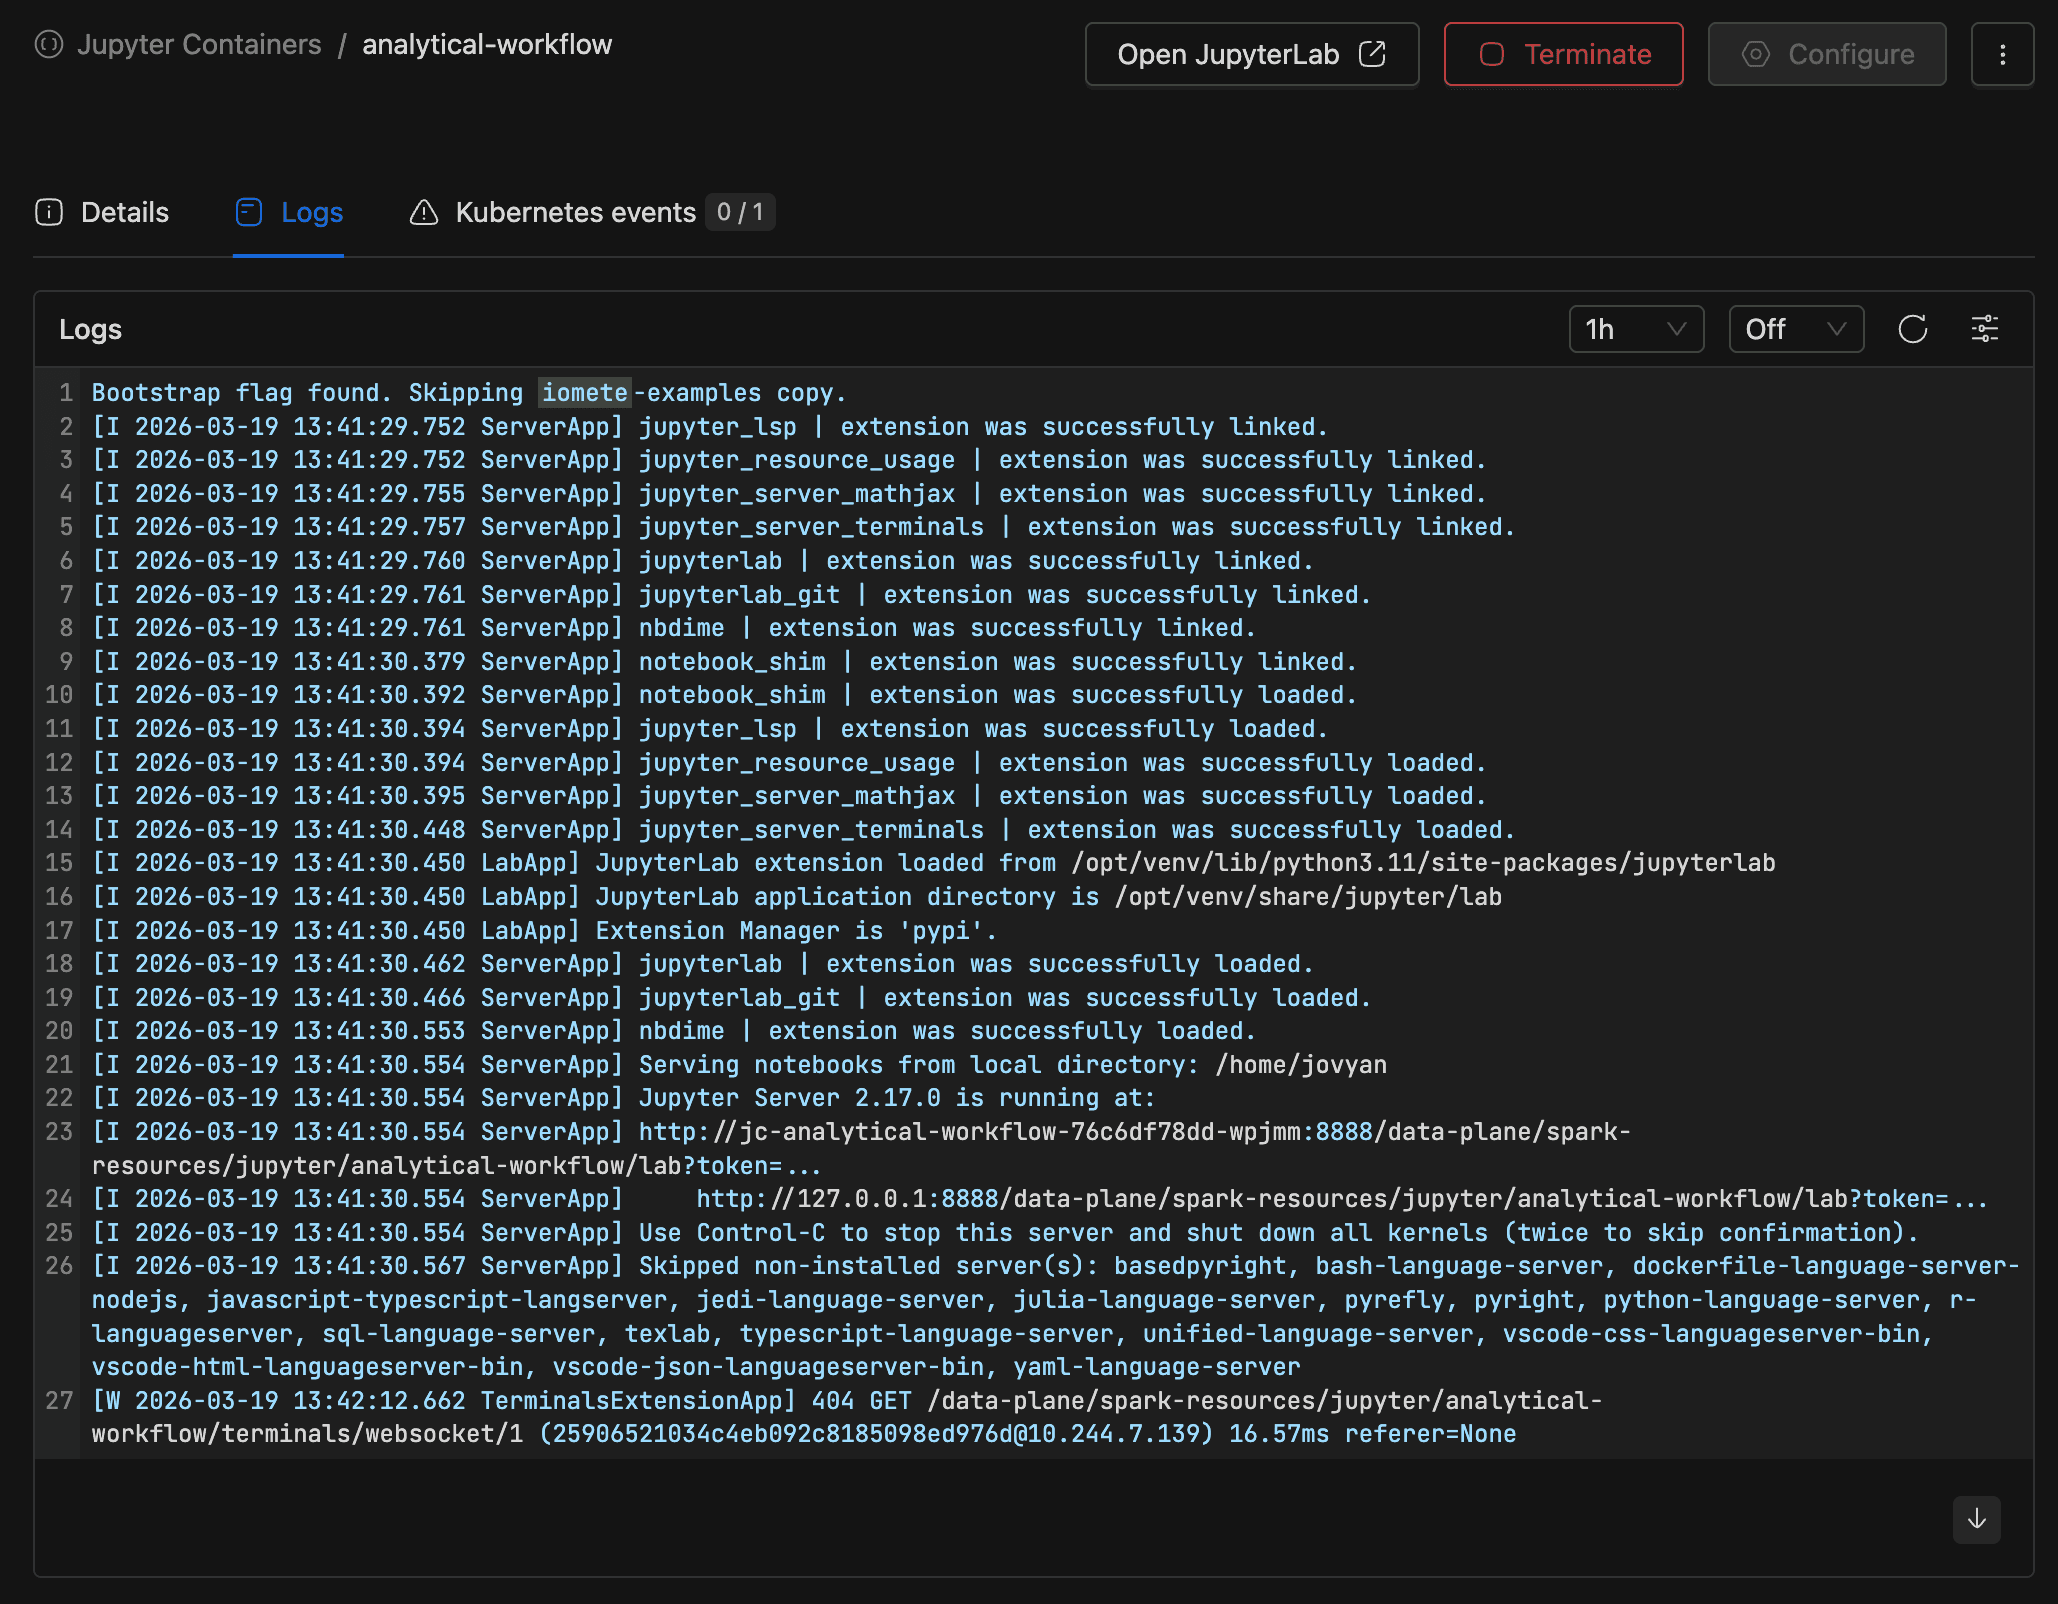
Logs Tab
The Logs tab streams Kubernetes container logs with time range filtering. Use the download button to export logs as a file.
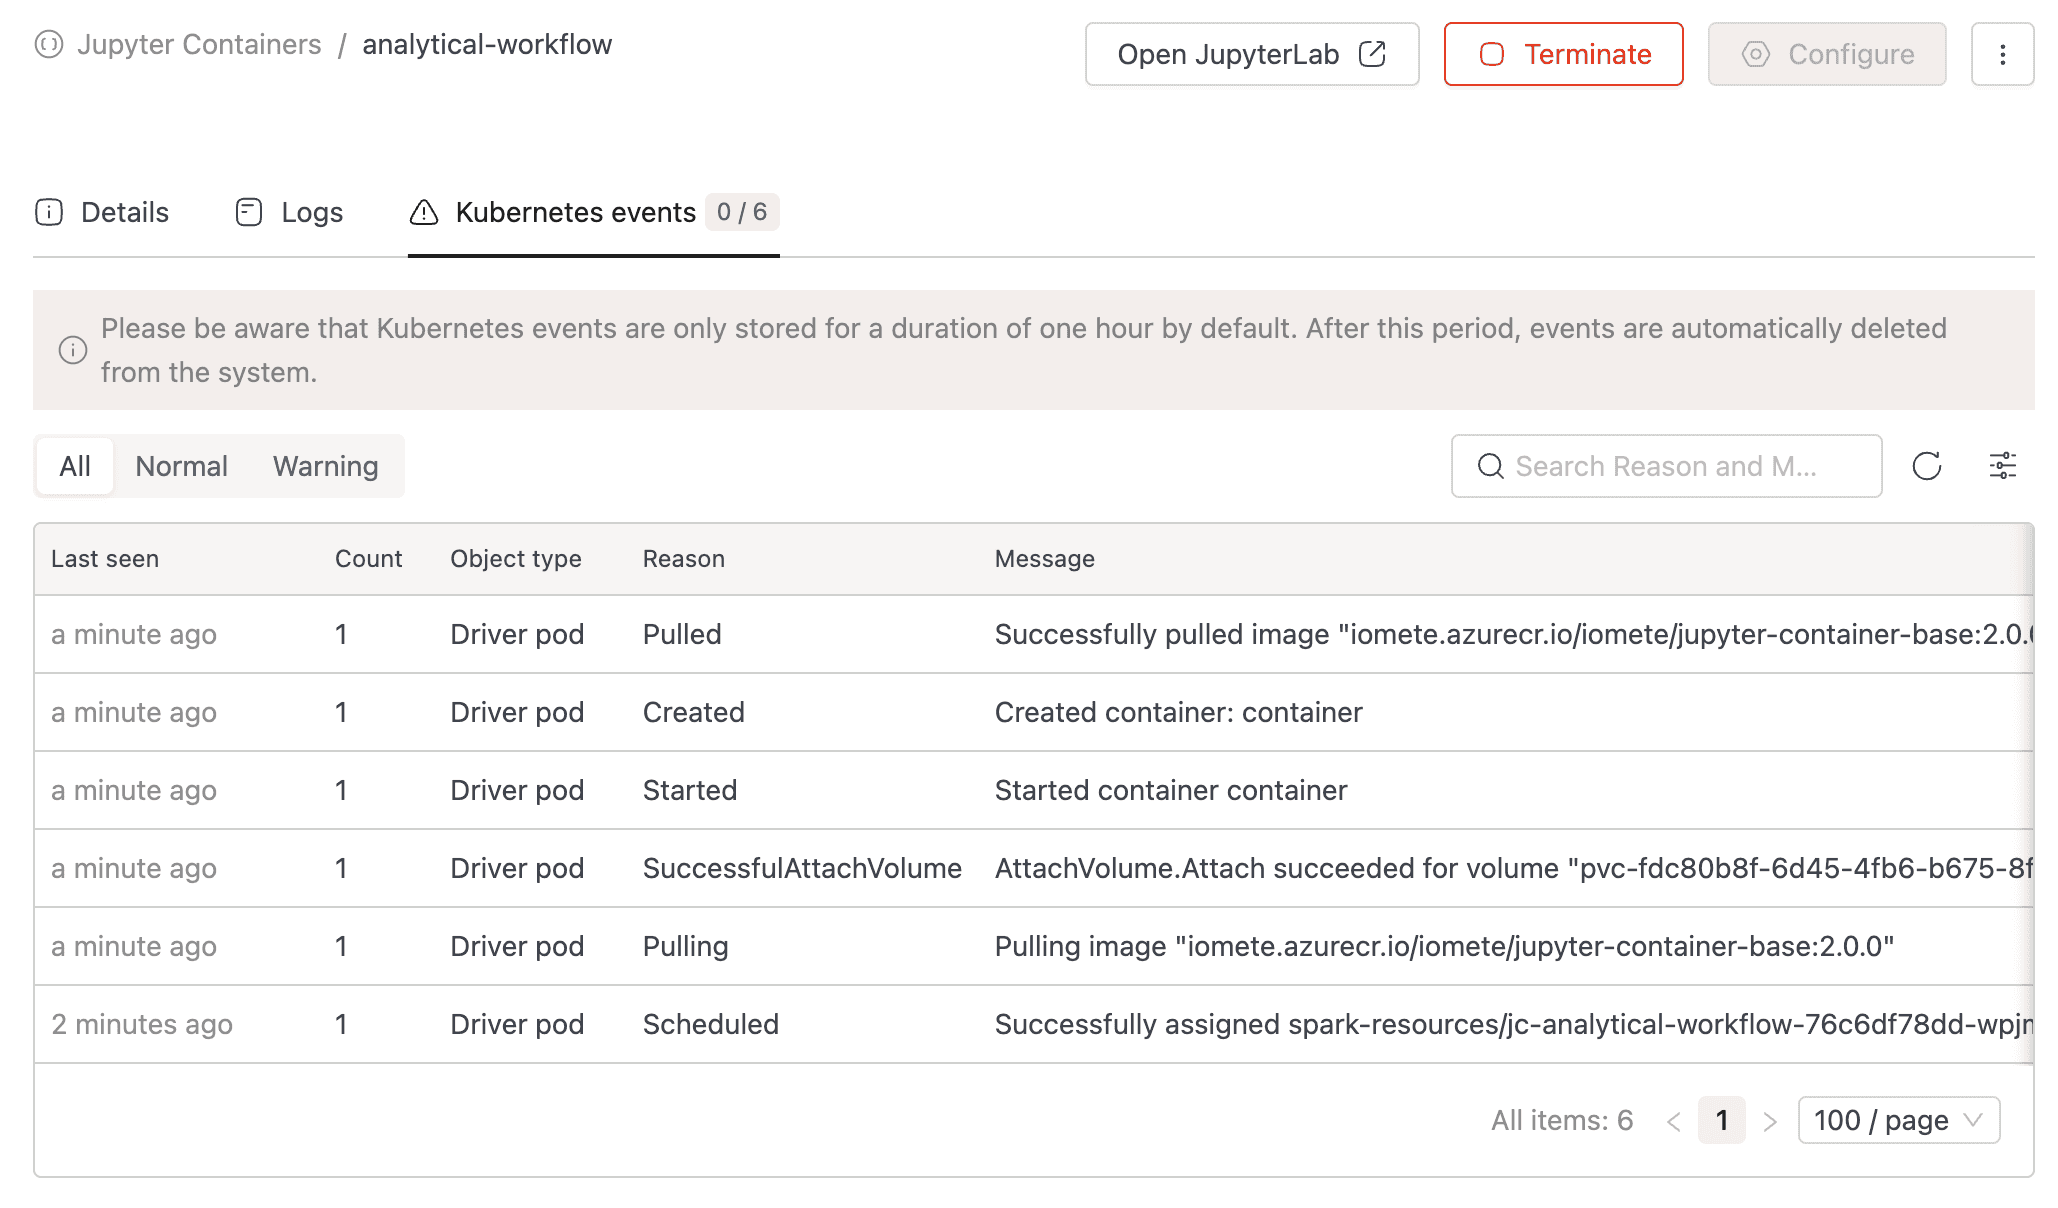
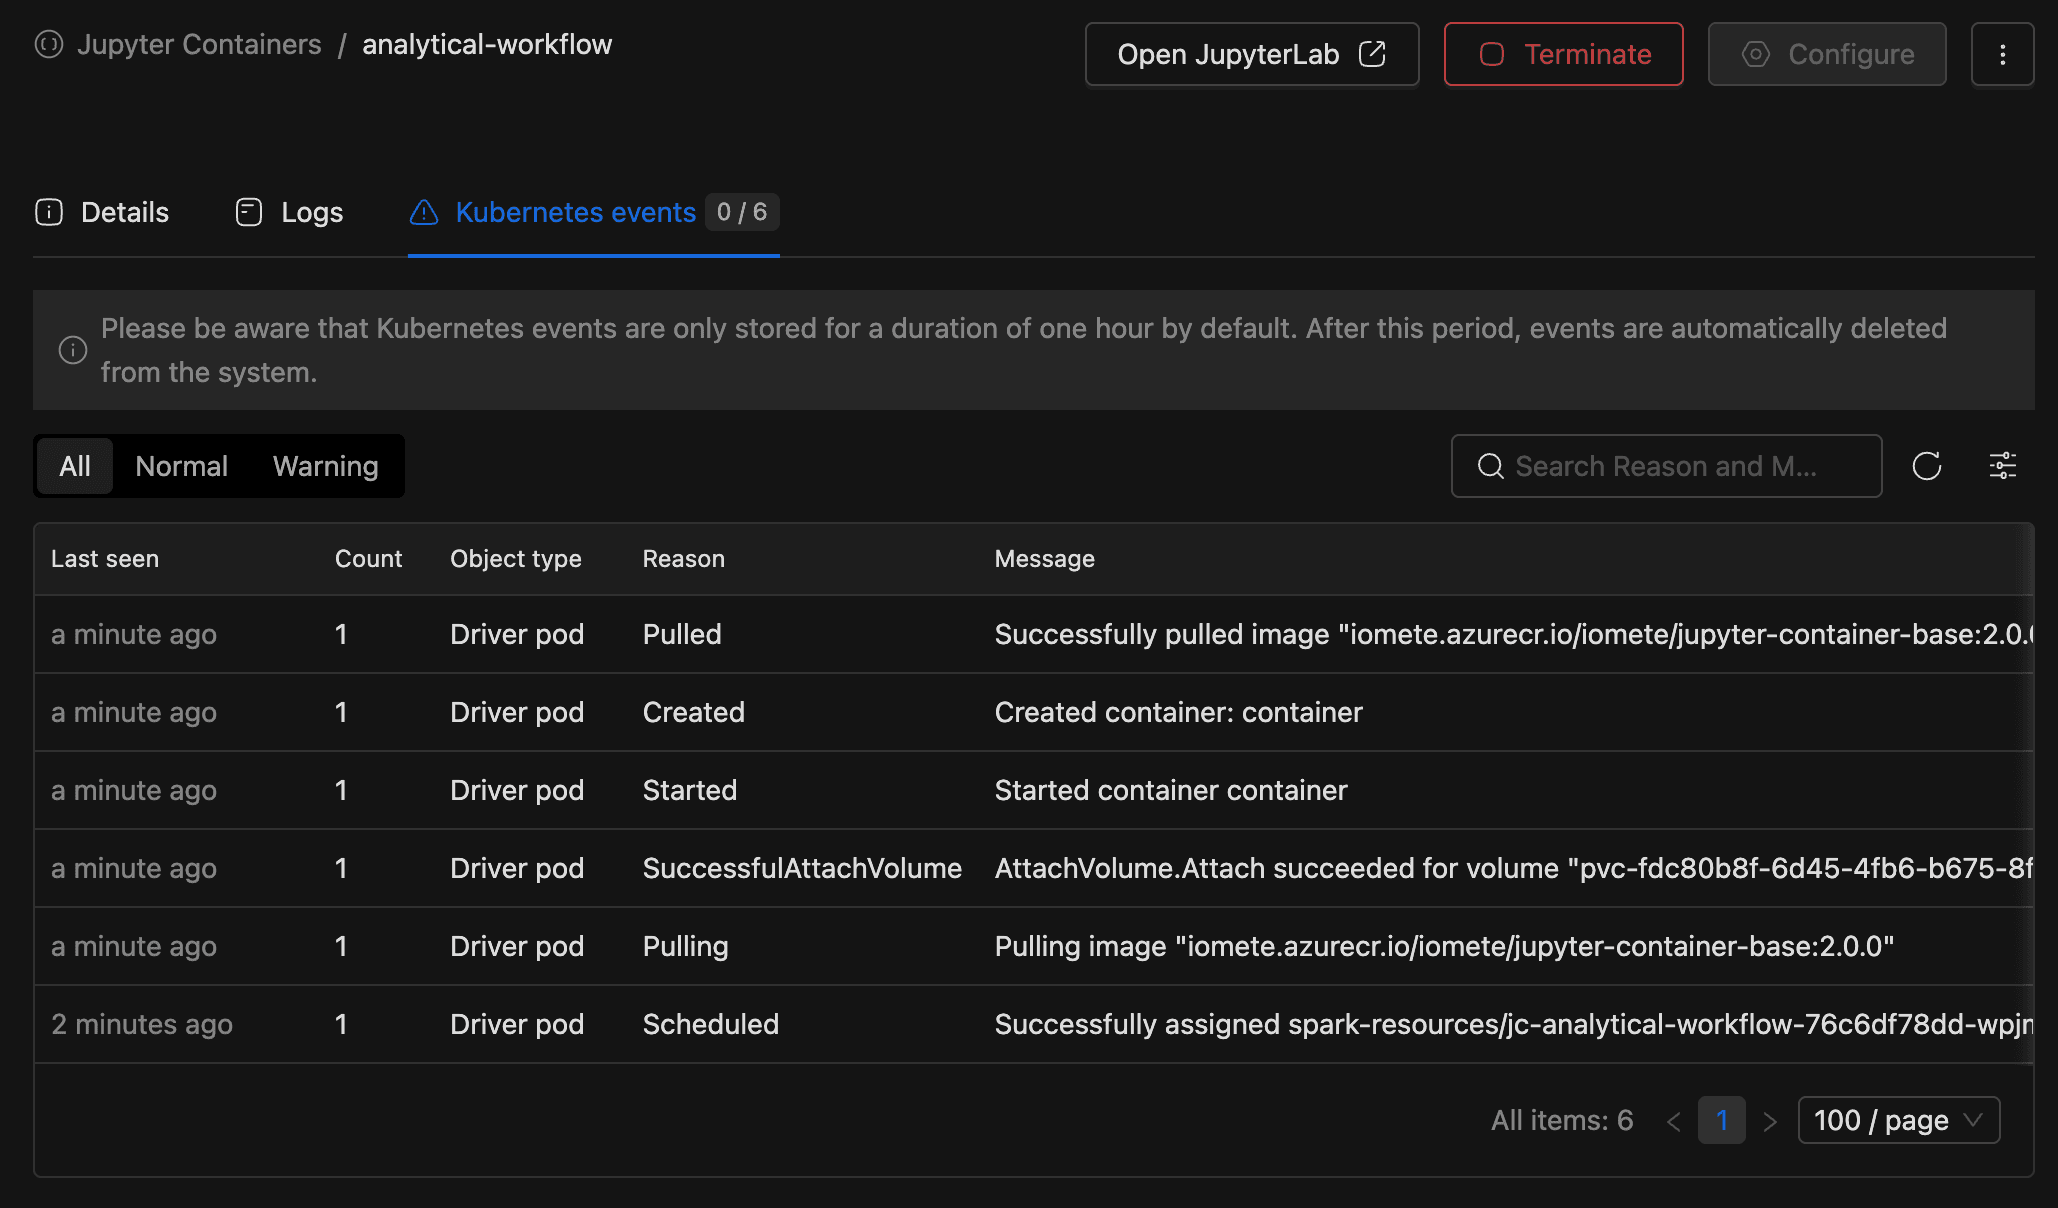
Kubernetes Events Tab
The Kubernetes events tab lists all events (Normal and Warning) for the container's pods. The tab label includes a badge showing the count of warning events relative to total events.
Persistent Storage
Jupyter Containers support optional persistent storage to preserve files across restarts and redeployments.
Supported Volume Types
Only two volume types are supported:
| Volume type | Description |
|---|---|
| On Demand PVC | A dynamically provisioned Persistent Volume Claim. Created automatically when the container is deployed. PVC size is determined by the volume's configured maximum size. |
| NFS | A Network File System volume. Shared storage that can be accessed by multiple containers. |
Other volume types (Host Path, tmpfs, Empty Dir) are not supported and are rejected with the error "Only On Demand PVC and NFS volumes are allowed in Jupyter Containers."
Mount Path
Volumes are mounted at /home/jovyan, which is the default JupyterLab working directory. All notebooks and files you save in JupyterLab are written to this path.
PVC Lifecycle
For On Demand PVC volumes:
- A PVC is created when the container is first deployed.
- The PVC persists across container starts and stops.
- Changing the volume or namespace in edit mode deletes the old PVC and creates a new one. Data on the old PVC is lost.
- Deleting the container permanently deletes the PVC.
Container States
Each Jupyter Container moves through a defined set of lifecycle states.
| State | Description |
|---|---|
| Starting | The container is being deployed. Kubernetes pods are initializing. |
| Active | The container is running and ready. You can open JupyterLab and run notebooks. |
| Stopped | The container has been terminated. Kubernetes resources are deleted, but the container configuration is preserved. |
| Failed | The container encountered an error, for example a crash loop or out-of-memory condition. Check the Logs and Kubernetes Events tabs for details. |
State transitions happen automatically based on Kubernetes pod events, except for user-initiated actions (Start, Terminate, Delete). The platform updates the status automatically, so you always see the current state without refreshing.
Lifecycle Summary
| From | To | Trigger |
|---|---|---|
| (new) | Starting | Container created |
| Starting | Active | Pod becomes ready |
| Starting | Failed | Pod fails to start |
| Active | Stopped | User clicks Terminate |
| Active | Failed | Pod crashes at runtime |
| Stopped | Starting | User clicks Start |
| Failed | Starting | User clicks Start |