Configure LDAP Authentication
Introduction
This guide provides a walkthrough on integrating LDAP authentication with the IOMETE Data Plane. Whether you're setting up an LDAP server for testing or integrating an existing directory, this documentation covers all the necessary steps.
LDAP Server (Optional)
If you don't have an LDAP server, you can use the below instructions to set up server for testing purposes. OpenLDAP is an open-source implementation of the Lightweight Directory Access Protocol (LDAP) and is widely used for testing and development.
Install OpenLDAP (Ubuntu)
sudo apt-get update
sudo apt-get install slapd ldap-utils
During the installation, you will be prompted to set a password for the administrative account of the LDAP directory. This account is known as the admin account, and its DN (Distinguished Name) is cn=admin,dc=ldap,dc=iomete,dc=com.
We will be using domain ldap.iomete.com for this example. Replace ldap.iomete.com with your domain name.
Configure OpenLDAP
1. Reconfigure slapd (Optional)
If you need to reconfigure your LDAP settings (e.g., domain, organization name, admin password), you can run:
sudo dpkg-reconfigure slapd
Enter the domain name (e.g., ldap.iomete.com), organization name (e.g., iomete), and admin password.
2. Create the Organizational Unit (OU)
Create a file named ldap-ou.ldif with the following content:
dn: ou=people,dc=ldap,dc=iomete,dc=com
objectClass: organizationalUnit
ou: people
Run the following command to add the OU:
ldapadd -x -D "cn=admin,dc=ldap,dc=iomete,dc=com" -W -f ldap-ou.ldif
3. Add Users to LDAP
Create an LDIF file for your users. LDIF (LDAP Data Interchange Format) is a standard plain text data format for representing LDAP directory entries and update requests.
Create a file named ldap-users.ldif with the following content, replacing dc=ldap,dc=iomete,dc=com with your actual domain components and filling in the user information accordingly
dn: uid=john.doe,ou=people,dc=ldap,dc=iomete,dc=com
objectClass: inetOrgPerson
objectClass: posixAccount
objectClass: shadowAccount
cn: John Doe
sn: Doe
userPassword: 123456
loginShell: /bin/bash
uidNumber: 10000
gidNumber: 10000
homeDirectory: /home/john.doe
mail: john.doe@iomete.com

dn: uid=jane.doe,ou=people,dc=ldap,dc=iomete,dc=com
objectClass: inetOrgPerson
objectClass: posixAccount
objectClass: shadowAccount
cn: Jane Doe
sn: Doe
userPassword: 123456
loginShell: /bin/bash
uidNumber: 10001
gidNumber: 10001
homeDirectory: /home/jane.doe
mail: jane.doe@iomete.com
Run the following command to add the users:
ldapadd -x -D "cn=admin,dc=ldap,dc=iomete,dc=com" -W -f ldap-users.ldif
Configure Keycloak with LDAP
Make sure that your ubuntu server is accessible from the IOMETE Data Plane and the LDAP ports are open. By default, LDAP uses port 389.
-
Log in to your Keycloak Admin Console. By default the admin console is available at
/auth/adminendpoint. Host will be the same as your IOMETE Console endpoint.
Depending on your Data Plane configuration Keycloak admin endpoint will look like this:http(s)://your_dns_or_ip/auth/admin.
Keycloak admin user and password are configured during installation in helm values file. You can find them in thevalues.yamlfile underkeycloaksection. -
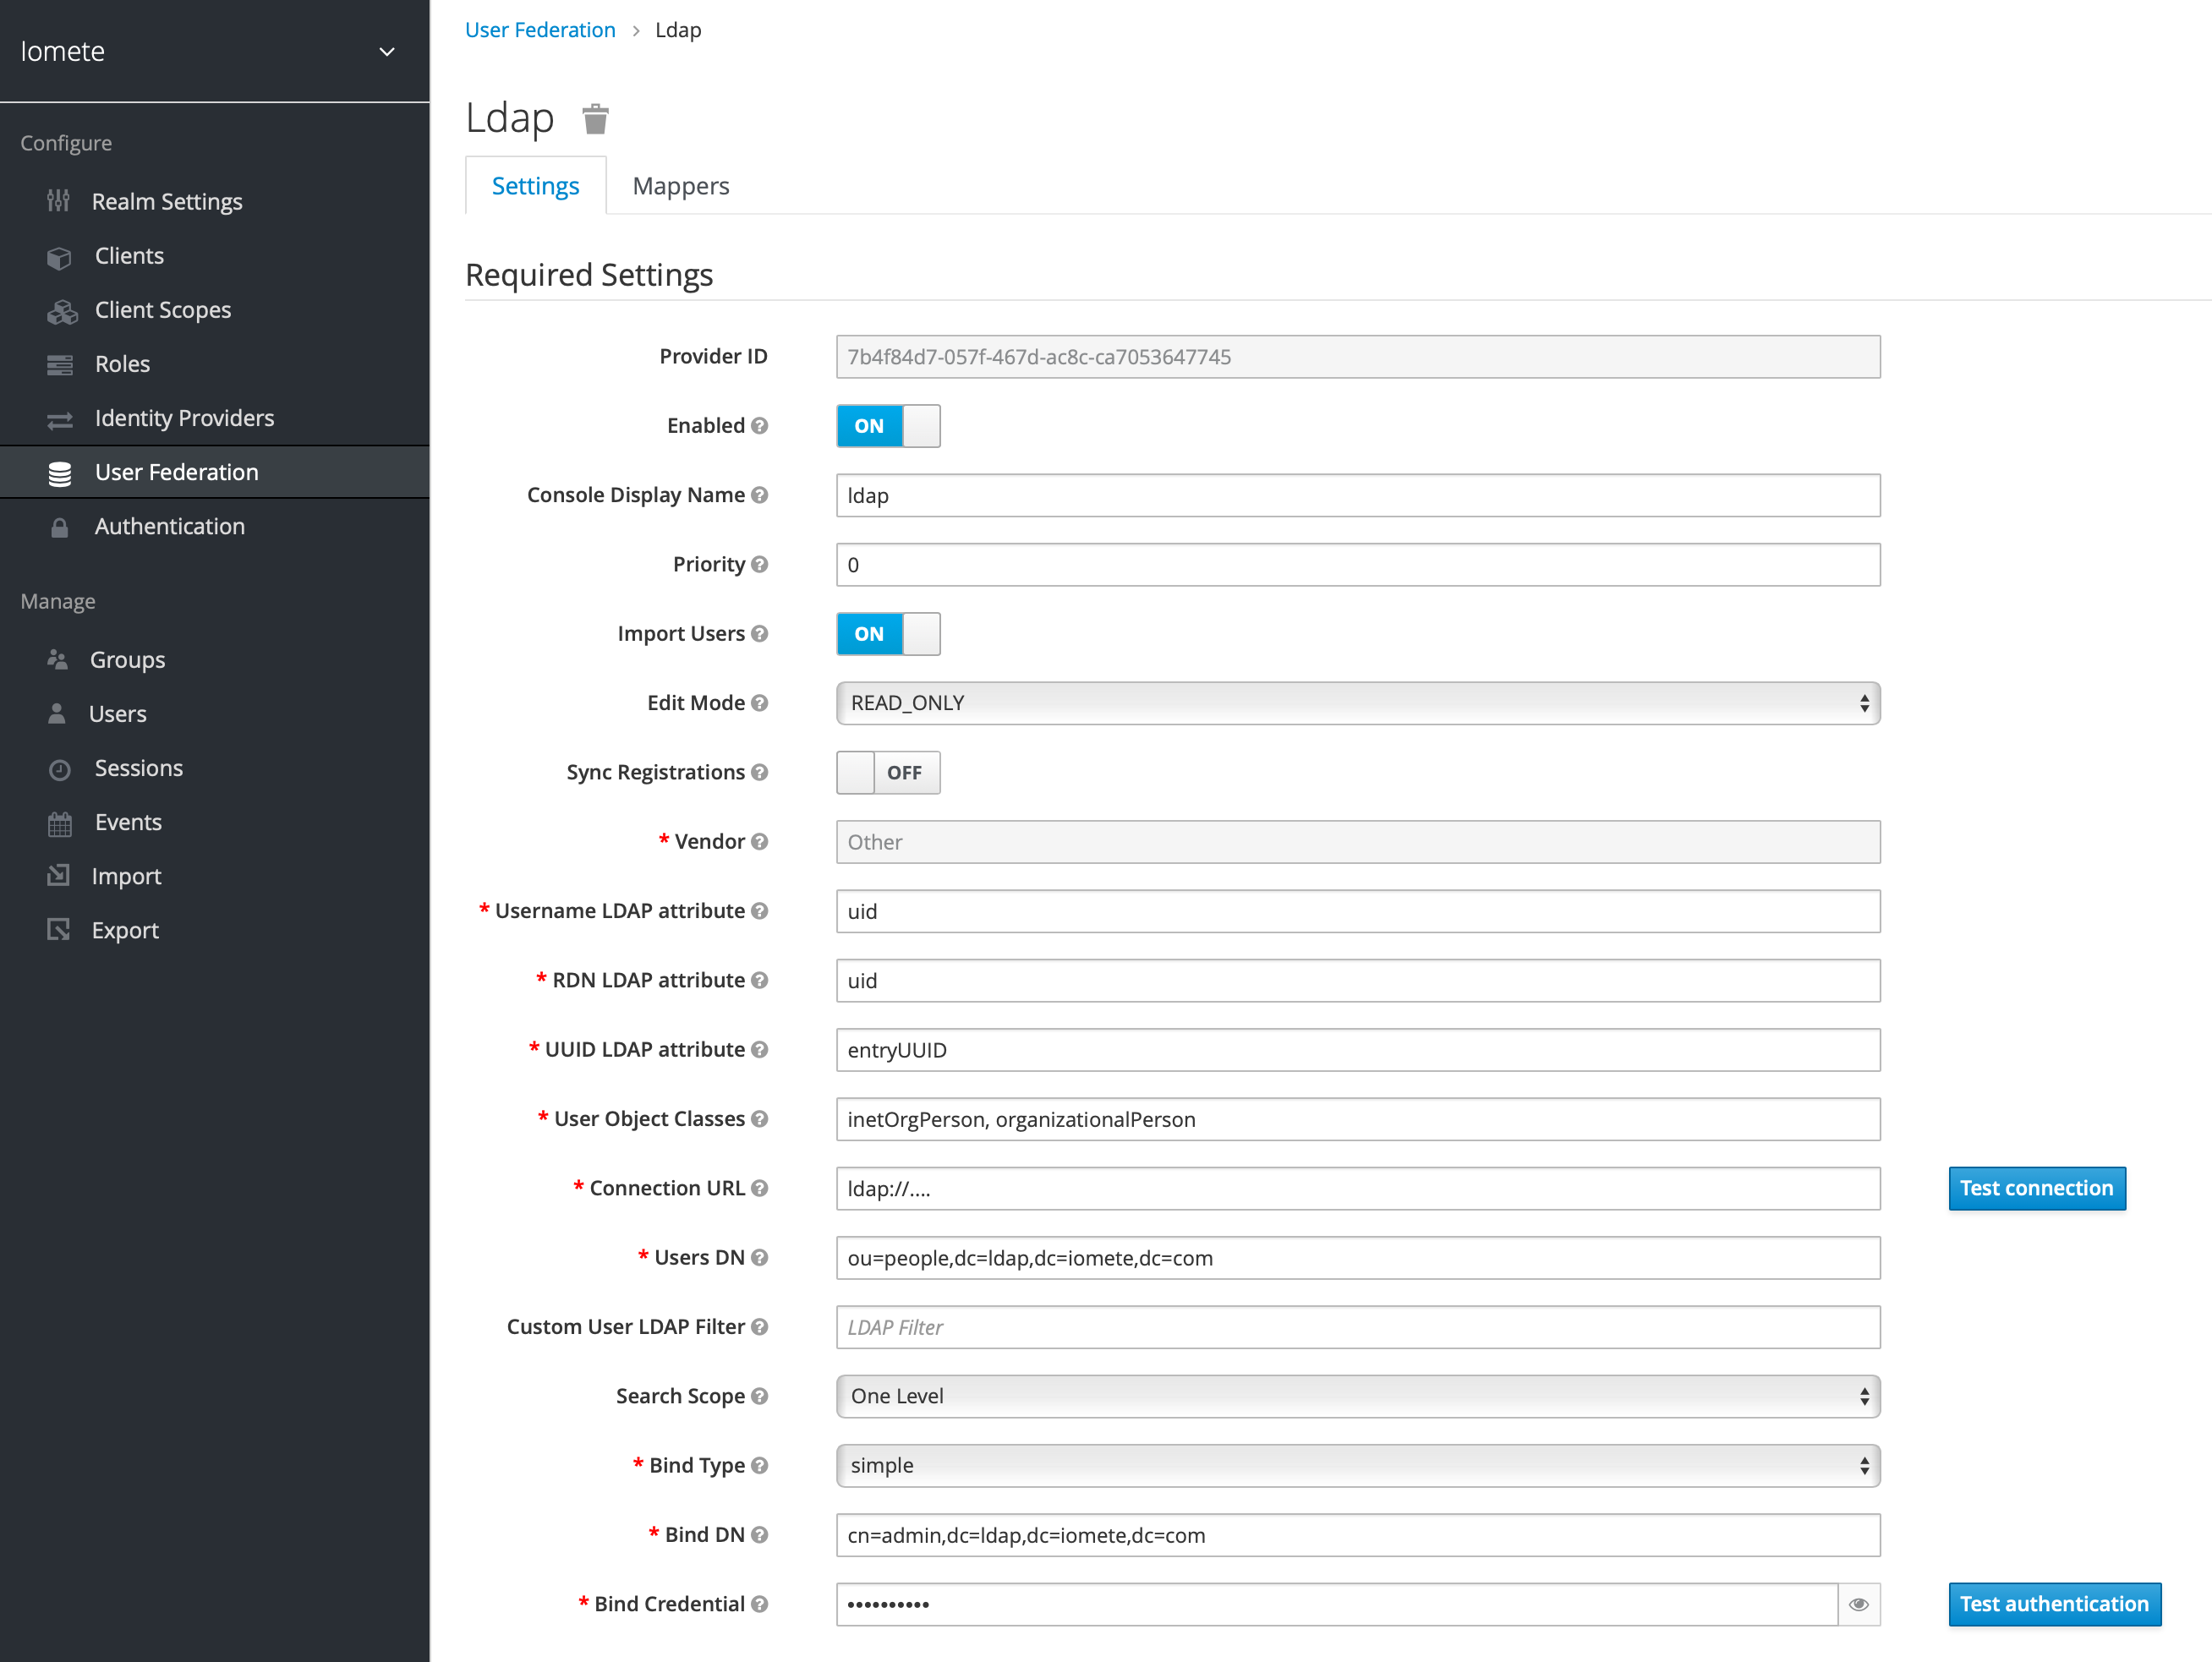
Navigate to User Federation in the menu. From the dropdown, select LDAP and fill in the form with your LDAP server details:
| Settings | Values | Note |
|---|---|---|
| Edit Mode | READ_ONLY or WRITEABLE | Depending on your use case |
| Sync Registrations | Yes | If you want new users in LDAP to be imported |
| Vendor | Other | |
| Connection URL | ldap://your_ldap_server | |
| Users DN | ou=people,dc=ldap,dc=iomete,dc=com | Replace this with your DN |
| Bind DN | cn=admin,dc=ldap,dc=iomete,dc=com | Replace this with your DN |
- Save and test the connection to ensure everything is set up correctly.
- Synchronize your users from LDAP to Keycloak if needed.
Now you have successfully configured LDAP with Keycloak. You can use your LDAP users to log in to the IOMETE Data Plane. For more details and advanced configurations, please refer to the Keycloak documentation.