K8S Gateway API -> iom-gateway

Overview
Kubernetes Gateway API is the next-generation standard for managing ingress traffic in Kubernetes clusters. It's designed to replace traditional Ingress resources with a more powerful, flexible, and vendor-neutral approach. In this documentation, we show how you can use K8S Gateway API as your gateway architecture and connect your system to IOMETE running on your own Kubernetes cluster.
Architecture
In order to setup K8S Gateway API, we need the following components:
- Gateway API CRDs: Gateway API resources are not included in Kubernetes by default. We will have to install them separately.
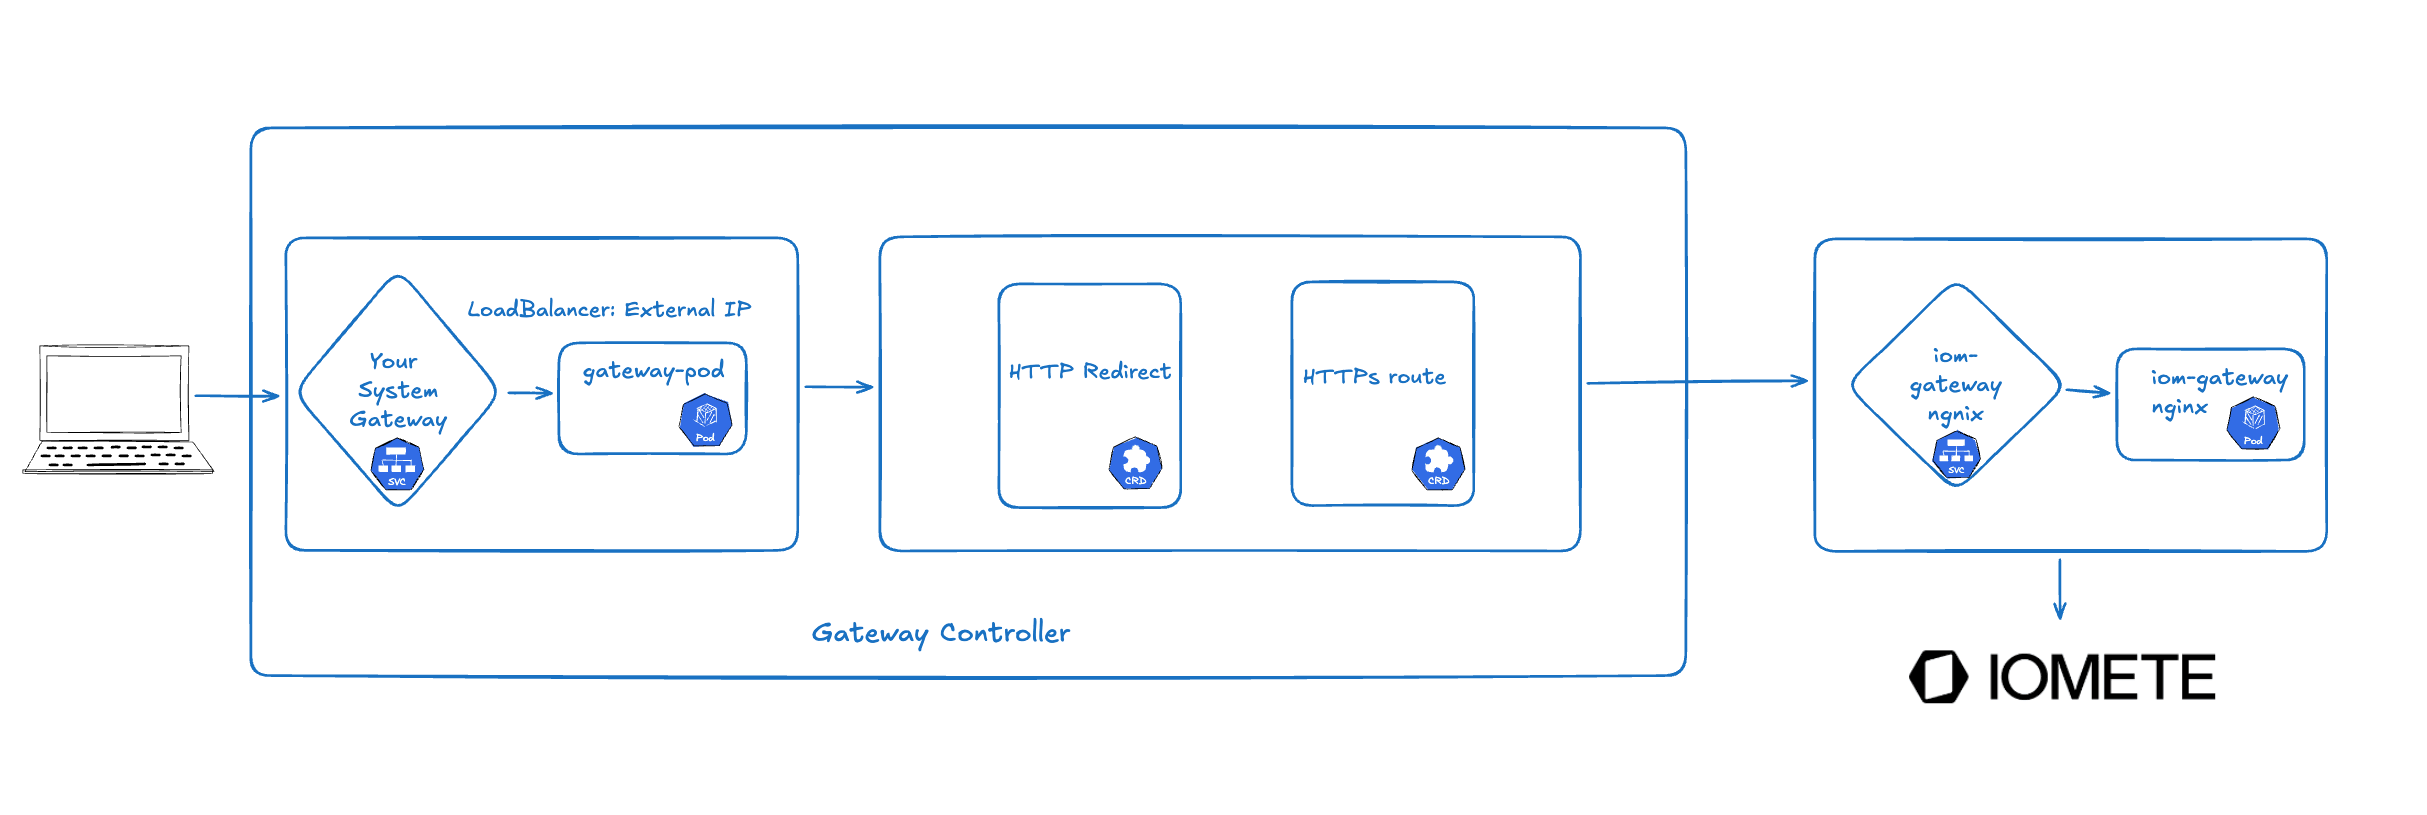
- Gateway Controller: Gateway API CRDs alone don't do anything, they are just blueprints. They need a controller that manages them. This is where Gateway Controller comes in. A Gateway Controller is the software that implements the Gateway API specification. It's the "brain" that reads your Gateway and HTTPRoute resources and configures the actual infrastructure (load balancers, routing rules, etc).
- GatewayClass - Defines which Gateway Controller handles the Gateway (e.g., Istio or Envoy)
- Gateway - Creates the actual load balancer (external IP) with listeners
- HTTPRoute - Defines HTTP routing rules from Gateway to Services
- ReferenceGrant - Allows cross-namespace resource access
Generic Traffic Flow
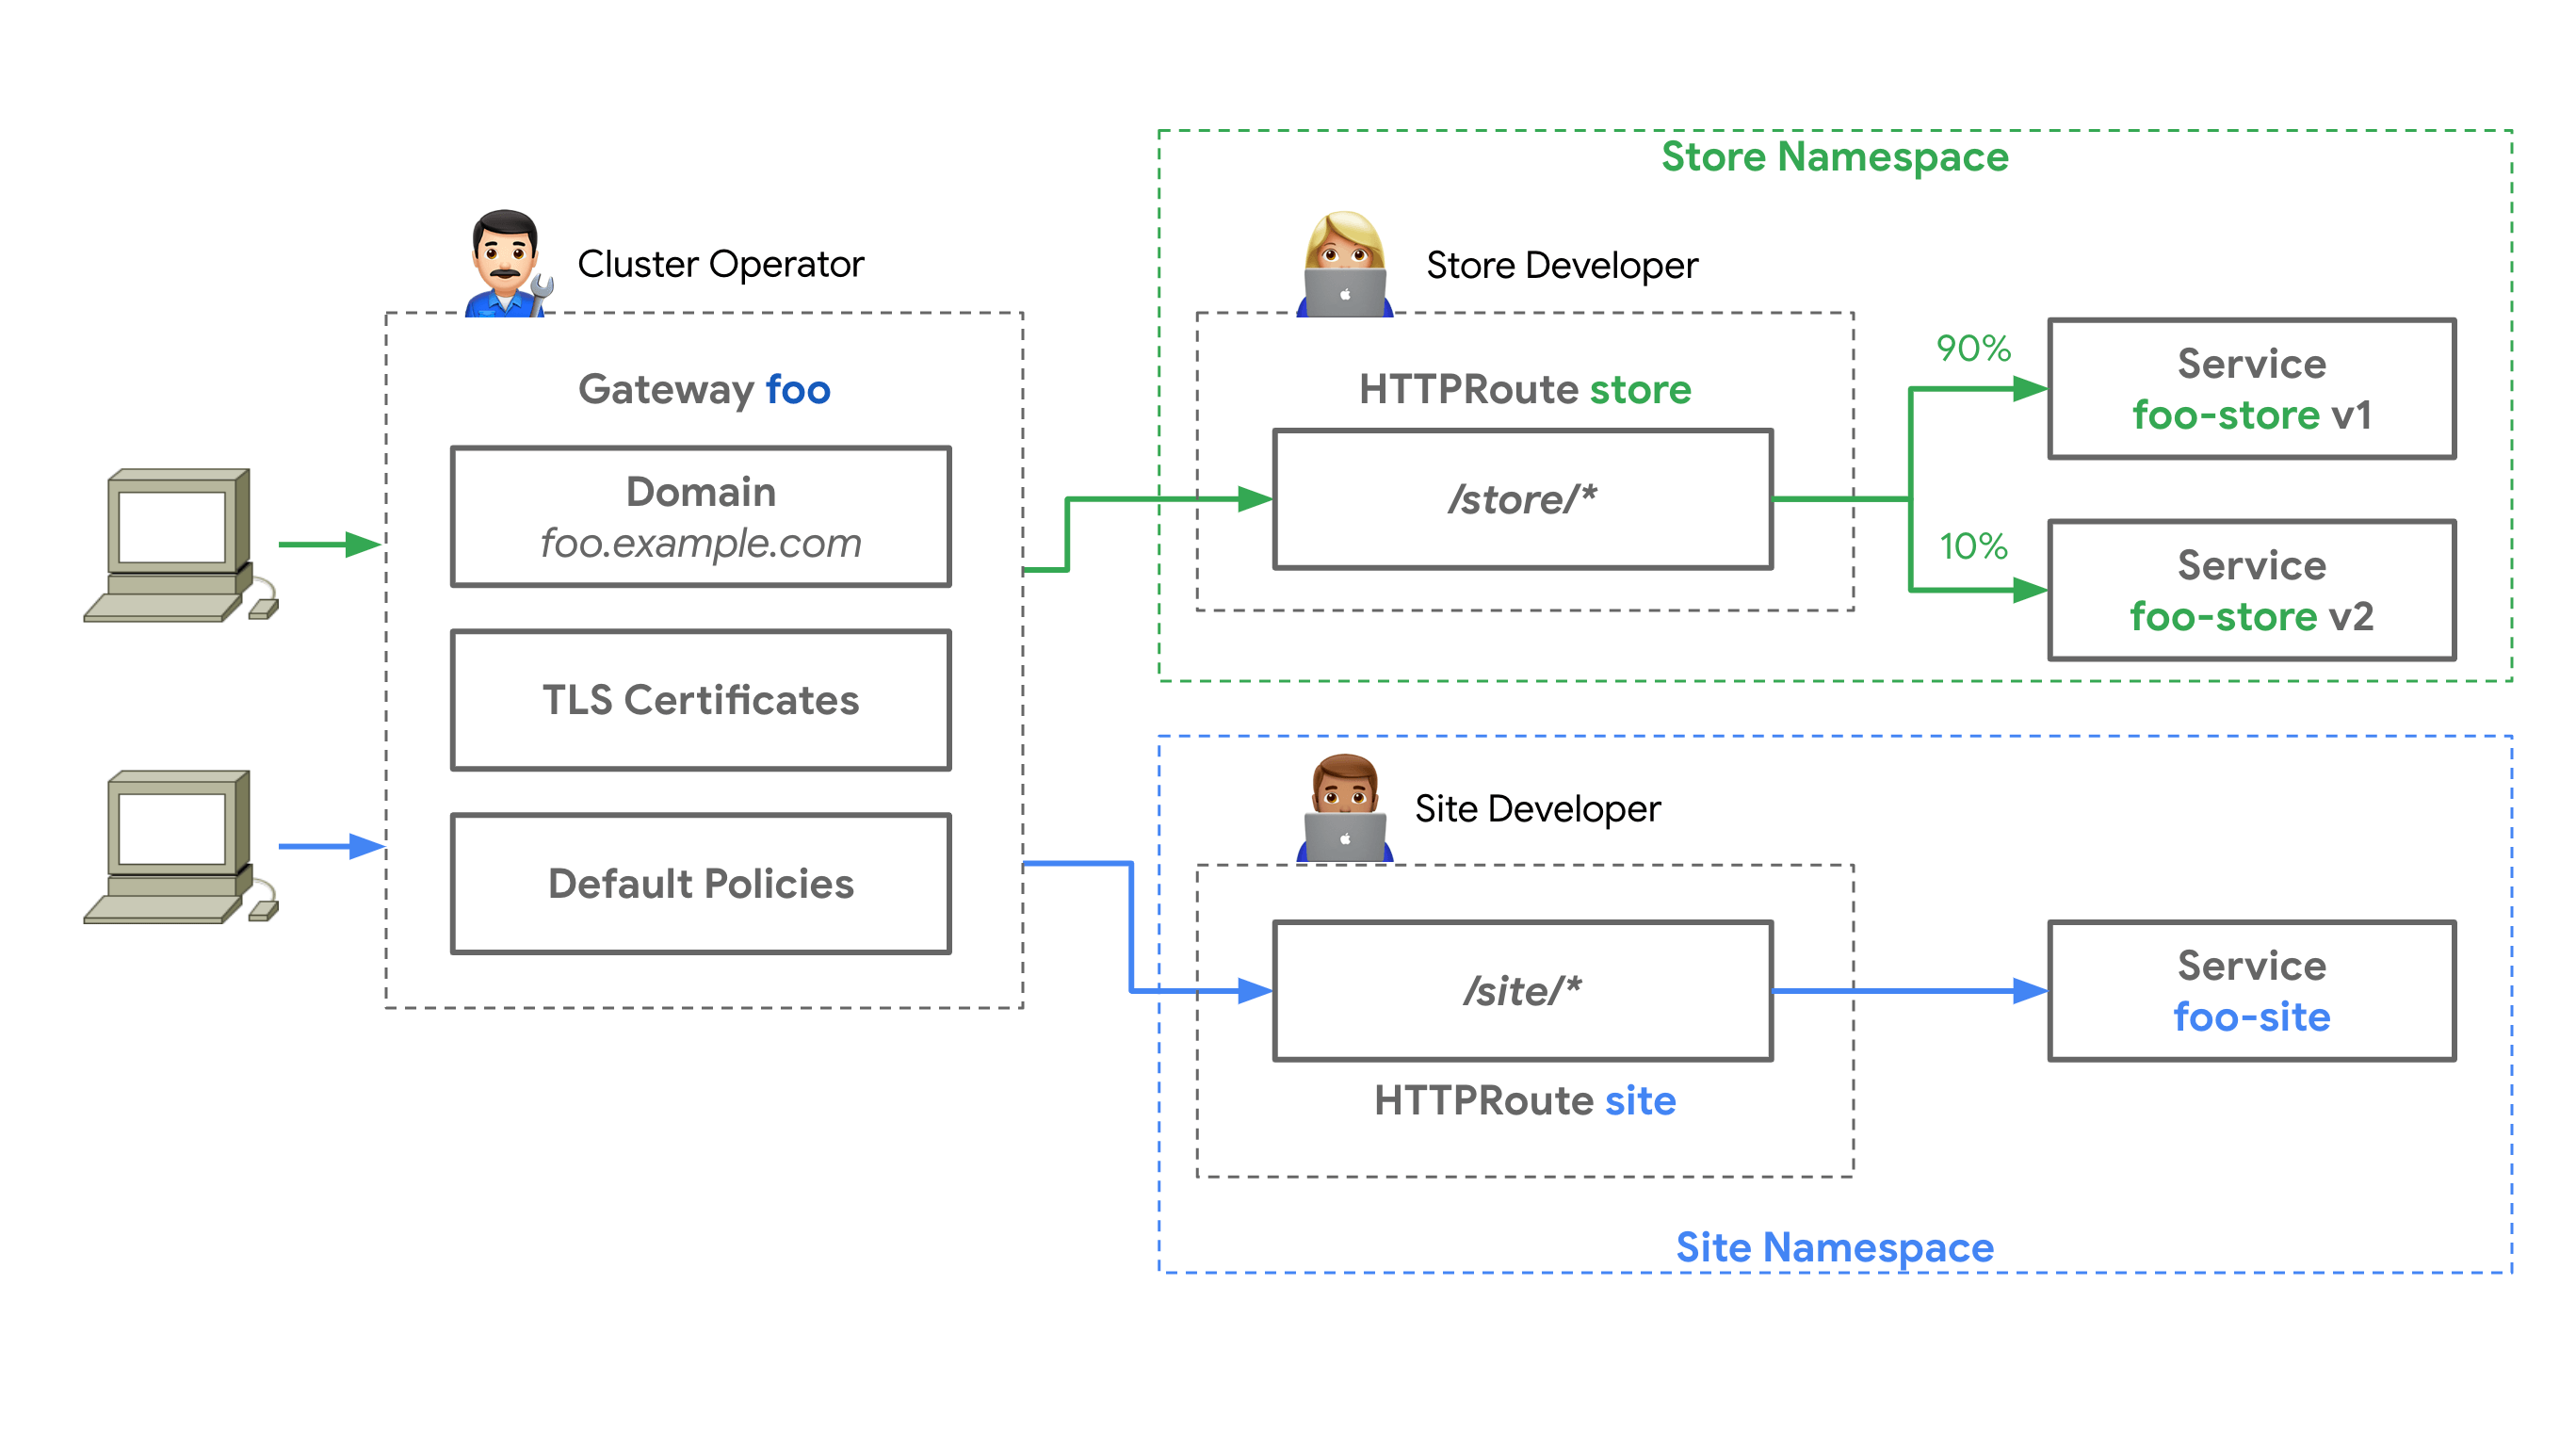
As shown in the illustration below, Kubernetes Gateway API is very flexible, and can direct traffic to various endpoints, do blue-green deployments, terminate TLS certificates and more.
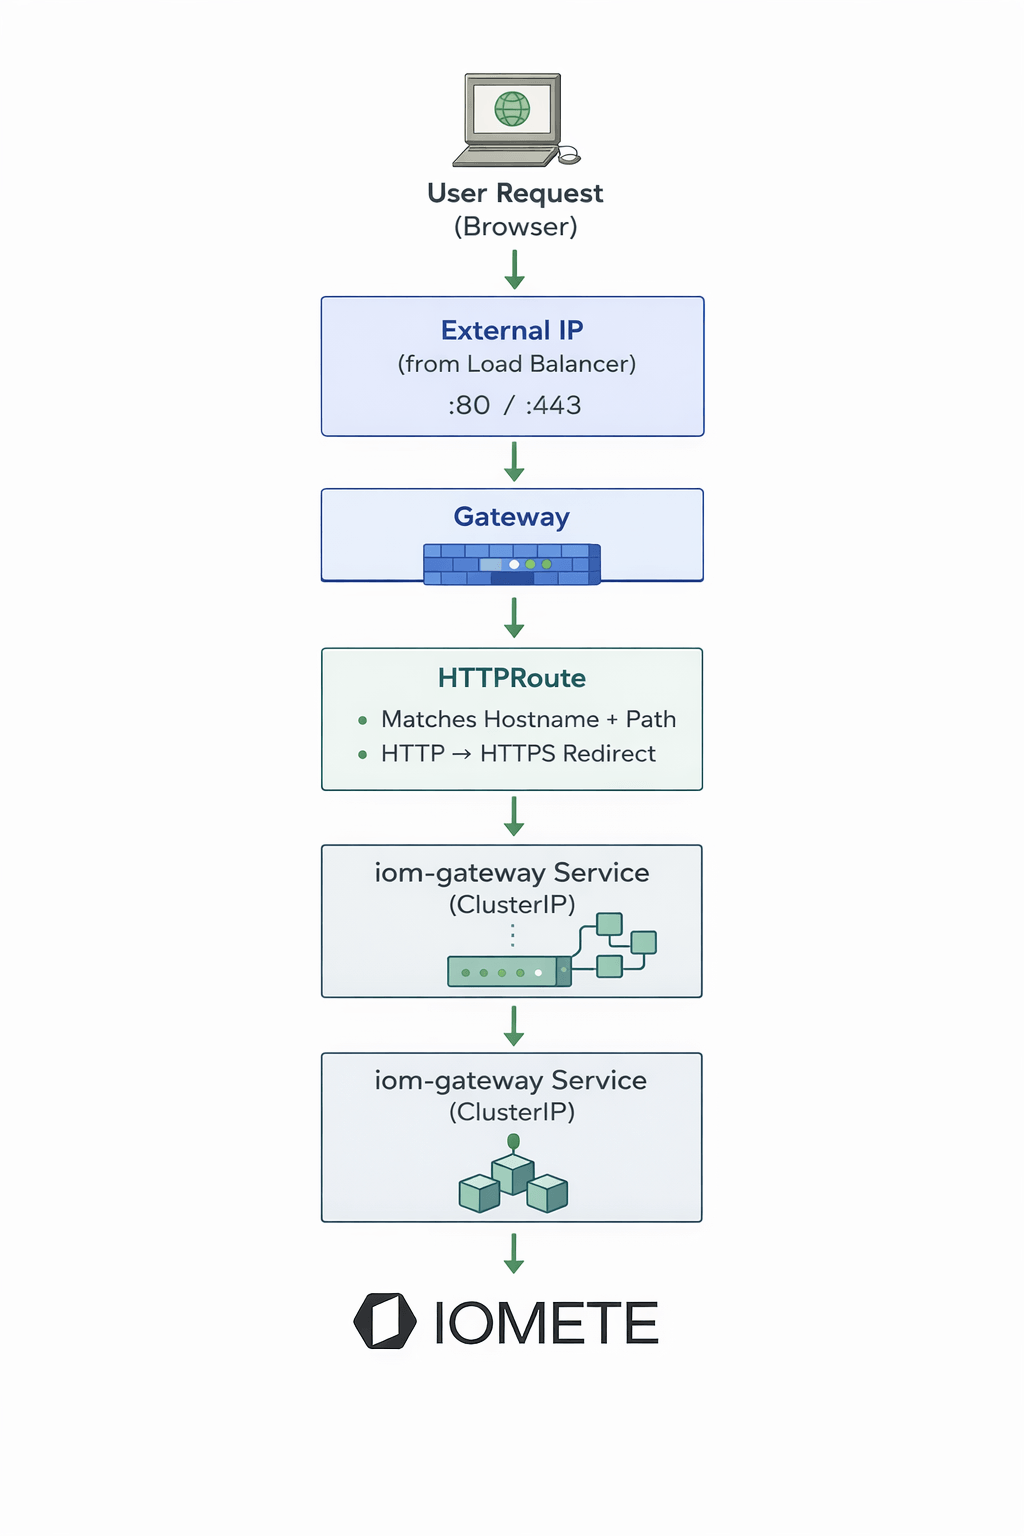
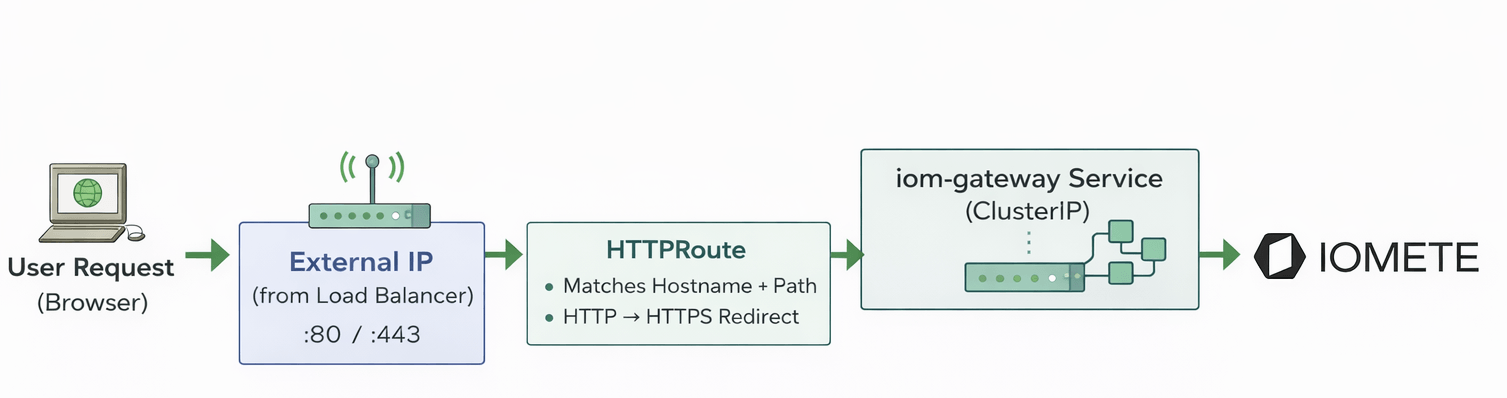
But in this document, we will show much simpler workflow/traffic that connects your system's main K8S Gateway to IOMETE's own nginx gateway.
Step-by-Step Implementation
Step 1: Install Gateway API CRDs
Gateway API resources are not included in Kubernetes by default. Install the Custom Resource Definitions first:
# Install standard Gateway API CRDs (v1.4.0)
kubectl apply -f https://github.com/kubernetes-sigs/gateway-api/releases/download/v1.4.0/standard-install.yaml
Verify installation:
kubectl get crd | grep gateway.networking.k8s.io
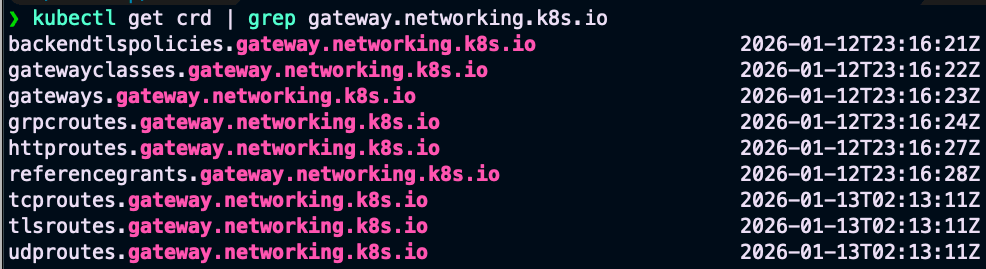
This only installs the API definitions. You still need a controller implementation.
Step 2: Install Gateway Controller
There are many options for gateway controllers such as Istio, Envoy Gateway, Cilium, etc. Choose any one of these controller for implementations, but we will show examples for two of them below:
Option A: Istio (Recommended for Service Mesh)
# Download Istio
curl -L https://istio.io/downloadIstio | sh -
cd istio-*/
export PATH=$PWD/bin:$PATH

# Install Istio with default profile
istioctl install --set profile=default -y
What gets installed:
- Istio control plane (
istiod) - Istio Ingress Gateway (creates LoadBalancer)
- GatewayClass resource automatically registered
Option B: Envoy Gateway (Lightweight)
helm install eg oci://docker.io/envoyproxy/gateway-helm \
  --version v1.6.2 \
  -n envoy-gateway-system \
  --create-namespace
Verify controller installation:
# Check GatewayClass exists
kubectl get gatewayclass

Verify istio or envoy components running:
kubectl get pods -n istio-system

kubectl get pods -n envoy-gateway-system

Step 3: Register GatewayClass (for Envoy Gateway)
GatewayClass is automatically created when you install Istio.
# View GatewayClass
kubectl get gatewayclass istio -o yaml
Key fields (omitting some metadata):
apiVersion: gateway.networking.k8s.io/v1
kind: GatewayClass
metadata:
  name: istio
  ...
spec:
  controllerName: istio.io/gateway-controller  # Controller identifier
  ...
status:
  conditions:
  - type: Accepted
    status: "True"  # Controller is ready
    ...
For ISTIO, you don't create GatewayClass manually - it's created by the istio controller installation. If you are using Envoy Gateway, you need to register it as GatewayClass.
apiVersion: gateway.networking.k8s.io/v1
kind: GatewayClass
metadata:
  name: eg # You can name this anything
spec:
  controllerName: gateway.envoyproxy.io/gatewayclass-controller
Step 4: Create ReferenceGrants (Cross-Namespace Access)
Kubernetes blocks cross-namespace references by default for security. ReferenceGrants explicitly allow them. If your Gateway, Services, or Secrets are in different namespaces, you need ReferenceGrants.
Example: Allow Gateway to Access Secret
apiVersion: gateway.networking.k8s.io/v1beta1
kind: ReferenceGrant
metadata:
  name: allow-access-to-tls-secret
  namespace: tls-namespace  # Where the Secret lives
spec:
  from:
  - group: gateway.networking.k8s.io
    kind: Gateway
    namespace: iomete-system  # Where Gateway is
  to:
  - group: ""  # Core Kubernetes API (empty = core)
    kind: Secret
    name: tls-secret # if omitted, access is granted to all secrets in tls-namespace
Example: Allow HTTPRoute to Access Service
apiVersion: gateway.networking.k8s.io/v1beta1
kind: ReferenceGrant
metadata:
  name: allow-httproute-to-ngnix-iom-gateway-service
  namespace: iomete-system  # Where the Service lives
spec:
  from:
  - group: gateway.networking.k8s.io
    kind: HTTPRoute
    namespace: iomete-system  # Where HTTPRoute is
  to:
  - group: ""
    kind: Service
    name: iom-gateway
Apply ReferenceGrants:
kubectl apply -f reference-grants.yaml
For example:
kubectl get referencegrants -n tls-namespace

Step 5: Deploy Gateway
The Gateway resource creates the actual load balancer and defines listeners (ports/protocols).
apiVersion: gateway.networking.k8s.io/v1
kind: Gateway
metadata:
  name: my-main-gateway
  namespace: iomete-system
spec:
  gatewayClassName: istio # you can choose eg for envoy
  listeners:
  - name: http
    port: 80
    protocol: HTTP
    hostname: my.custom.domain # use your company specific domain
    allowedRoutes:
      namespaces:
        from: All
  - name: https
    port: 443
    protocol: HTTPS
    hostname: my.custom.domain # use your company specific domain
    tls:
      mode: Terminate
      certificateRefs:
      - name: tls-secret
        kind: Secret
        namespace: tls-namespace # secret is in different namespace
    allowedRoutes:
      namespaces:
        from: All
Apply and verify:
kubectl apply -f gateway.yaml

# Check Gateway status
kubectl get gateway experimental-gateway -n iomete-system

# Expected output similar to below:
# NAME                   CLASS   ADDRESS          PROGRAMMED   AGE
# my-main-gateway        istio   .......          True         2m
Get External IP:
kubectl get gateway my-main-gateway -n iomete-system -o jsonpath='{.status.addresses[0].value}'
Step 6: Create HTTPRoutes
HTTPRoutes define routing rules from the Gateway to your backend services. If request comes as HTTP, you might want to redirect it to HTTPS like below:
apiVersion: gateway.networking.k8s.io/v1
kind: HTTPRoute
metadata:
  name: http-to-https-redirect
  namespace: iomete-system
spec:
  parentRefs:
  - name: my-main-gateway
    namespace: iomete-system
    sectionName: http
  hostnames:
  - my.custom.domain # use your company specific domain
  rules:
  - filters:
    - type: RequestRedirect
      requestRedirect:
        scheme: https
        statusCode: 301
For all HTTPS traffic, route them all to iom-gateway, IOMETE's nginx service:
HTTPS Traffic Routing
apiVersion: gateway.networking.k8s.io/v1
kind: HTTPRoute
metadata:
  name: https-routes
  namespace: iomete-system
spec:
  parentRefs:
  - name: my-main-gateway
    namespace: iomete-system
    sectionName: https
  hostnames:
  - my.company.domain
  rules:
  - matches:
    - path:
        type: PathPrefix
        value: /
    backendRefs:
    - name: iom-gateway
      port: 80
Apply routes:
kubectl apply -f httproutes.yaml

# Verify routes accepted
kubectl get httproute -n iomete-system

# Check detailed status
kubectl describe httproute https-routes -n iomete-system
Look for:
Type: Accepted
Status: True
...
Type: ResolvedRefs
Status: True
Step 7: Configure DNS
Point your domain to the Gateway's external IP in your DNS provider (e.g., Route 53).
# Get Gateway IP
GATEWAY_IP=$(kubectl get gateway my-main-gateway -n iomete-system -o jsonpath='{.status.addresses[0].value}')
echo $GATEWAY_IP
Create A record in your DNS manager:
| Record Name | Type | IP Route To |
|---|---|---|
| my.company.domain | A | <GATEWAY-IP> |
Verify DNS propagation:
nslookup my.company.domain
# or
dig my.company.domain
# Should resolve to Gateway IP
Step 8: Test the Setup
# Test HTTP (should redirect to HTTPS)
curl -v http://my.company.domain

# Expected
# ...
# < HTTP/1.1 301 Moved Permanently
# < location: https://my.company.domain/
# ...

# Test HTTPS (should reach your service)
curl -v https://my.company.domain

# Expected:
# < HTTP/2 200
# <response from your nginx service>
Troubleshooting
| Main Issue | Status Message | Solution |
|---|---|---|
| HTTPRoute: ResolvedRefs = False | backendRef not accessible (missing a ReferenceGrant?) | Create ReferenceGrant allowing HTTPRoute to access Service in different namespace. |
| HTTPRoute: ResolvedRefs = False | serviceName invalid; the name of the Service must be used, not the hostname | Use Kubernetes Service name, not DNS hostname. Wrong: backendRefs: - name: iom-gateway.iomete-system.svc.cluster.local. Correct: backendRefs: - name: iom-gateway / namespace: iomete-system |
| HTTPRoute: ResolvedRefs = False | sectionName "https" not found | Ensure sectionName in HTTPRoute matches listener name in Gateway exactly. Gateway listeners: - name: https must match HTTPRoute parentRefs: - sectionName: https |
Key Learnings
| Term | Learning |
|---|---|
| Gateway API is just definitions (CRDs) | You must install a controller (Istio, Envoy, or similar) to actually create infrastructure |
| GatewayClass connects everything | It tells Kubernetes which controller handles your Gateways |
| Cross-namespace requires ReferenceGrants | Security feature that must be explicitly configured |
| Gateway creates the load balancer | It gets an external IP automatically (on cloud providers) |
| HTTPRoute does the routing | It's the replacement for Istio VirtualService for example |